
:max_bytes(150000):strip_icc():format(webp)/hexadecimal-code-security-key-krzysztof-zmij-e-plus-getty-images-57c76b825f9b5829f4bd185e.jpg)
2024 Approved The FCP Factor 10 Successful Movies That Used Final Cut Pro
The FCP Factor: 10 Successful Movies That Used Final Cut Pro
Top 10 Famous Movies Made By Final Cut Pro

Benjamin Arango
Mar 27, 2024• Proven solutions
Developed as video editing software that has been developed by Apple, Final Cut Pro began life as software designed to made simple video editing accessible for video hobbyists and independent filmmakers. However, in recent years the capabilities of Final Cut Pro have evolved significantly and we are now seeing major Hollywood movies also being edited with this software.
Do you want to turn your own video into a Hollywood film-like video? Check this guide on How to make big-budget cinematic look video with Final Cut Pro.
You may also like: 8 Best Movie Trailer Template for After Effects
Top 10 Movies Made by Final Cut Pro
Let’s take a look at ten major movies that have been edited using Final Cut Pro.

1. The Social Network (2010)
Based on the rise of the phenomenon that we now know as Facebook, The Social Network starred Jesse Eisenberg, Andrew Garfield and Justin Timberlake. The movie performed well at the box office and was also positively received by movie critics.
The film won an Academy Award for Best Editing, collected by Kirk Baxter and Angus Wall. They used Final Cut Pro to edit the film, and one of the things they really like about the software is the ability to do multiple timelines. Final Cut Pro was also used in this movie to enable face replacement in a number of scenes. Two of the key characters in the movie are twins, and so the scenes were filmed with actors (who weren’t twins) and then the editing software was used to create the illusion that they were twins. Digital matte paintings was another feature of this movie that relied on the functionality of Final Cut Pro.

2. The Girl with the Dragon Tattoo (2011)
This was the US adaptation of the earlier Swedish film of the same name - based on the novel by Stieg Larsson. Starring Daniel Craig and Rooney Mara, the story is a crime thriller trying to uncover the secrets surrounding the disappearance of a young girl from a wealthy family.
One of the challenges with this movie was that there were a lot of invisible effects throughout the film. Final Cut Pro was used to achieve the shot stabilization and the visual enhancements - everything from matte painting to creating seasonal elements such as snow.

3. John Carter (2011)
A science fiction adventure, this film performed so badly at the box office that it caused major financial problems for its studio Disney.
The editing of the John Carter movie was a particular challenge as a lot of the action was shot twice during the troubled production. The editor Eric Zumbrunnen used Final Cut Pro to piece the various elements together. With a huge range of CGI and creature effects to deal with, the editing process on this movie was extremely complex. Final Cut Pro was used to create a lot of the background detail need to bring the green screen scenes to life.

4. 500 Days of Summer (2009)
This was a cute, quirky romantic comedy starring Joseph Gordon-Levitt and Zooey Deschanel.
Editing on the movie was by Alan Edward Bell in DVCPro HD format on Final Cut Pro. Because the storyline of the movie unfolds in a non-linear timeline, the workflow feature of Final Cut Pro made it easier to manage the sequencing of the different scenes. There were also 250 invisible effects which were created using Final Cut Pro’s editing features.

5. X-Men Origins: Wolverine (2009)
Continuing the X-Men franchise, this installment traces Wolverine’s childhood and the relationship with his brother. It didn’t really appeal to X-Men fans or movie critics.
Editing on the movie was by Nicolas De Toth and Megan Gill. There were a number of continuity glitches identified during the production of this movie but De Toth and Gill used Final Pro Cut to keep a consistent flow to the narrative. What is interesting about the editing on this movie is that all the cutting of the scenes required was done on Final Cut Pro 5, taking advantage of the software’s HD abilities and also the multi-clip features.

6. Burn After Reading (2008)
A black comedy from the talented brothers Joel and Ethan Coen, they wrote, produced, edited, and directed the movie.
The Coen brothers used Final Cut Pro on this movie because it was simple and easy to use - they were blocking together the rough cuts as the scenes were being shot, and Final Cut Pro gave them the flexibility that they needed to edit quickly. On this movie most of the action was shot using Sony cameras but there were several scenes on which a RED camera was added when an additional camera was needed. Even though there is a significantly different workflow between the two types of camera, the RED material was able to be integrated smoothly with the Sony footage.

7. No Country for Old Men (2007)
A neo-Western thriller from Coen brothers. They directed, wrote, and edited this production.
The movie was also nominated for an Academy Award for Best Editing for editor Roderick Jaynes (a pseudonym for Joel and Ethan Coen).
Directing and editing a movie brings the two processes a lot closer together for the Coen brothers. An easy to use product such as Final Cut Pro ensures that they can construct the movie’s narrative using the timeline features of the product. This movie marked a chance in approach for the Coen brothers, who took advantage of the better resolution DVCPRO HD for their cutting process compared to earlier films that were cut at DV resolution.

8. 300 (2007)
Based on a graphic novel by Frank Miller, this is the fictionalized retelling of the Battle Termopylae - part of the Persian Wars. Directed by Zack Snyder, the movie was filmed with a super-imposition chroma key technique to help replicate the imagery of the original comic book. Editing on the movie was by William Hoy.
To capture the graphic novel look and feel of the film’s images, editor Hoy used a number of the key Final Cut Pro features such as the adjustment layer and blending modes to create depth and mood. With the look and feel of this movie so dependent on the effects created, editor Hoy spent a lot of time debating what was being added visually to each shot and how this would impact the length and continuity of each scene.

9. Sky Captain and the World of Tomorrow (2004)
With big name stars (Gwyneth Paltrow and Jude Law), this was an unusual film that used digital artists to build multi-layered 2D and 3D backgrounds for live action footage, with hand-drawn storyboards recreated as computer-generated 3D animatics. Critically it was well received but didn’t set the box office alight.
Editing on the movie was by Sabrina Plisco.
Final Cut Pro was particularly critical to create a scene between two characters that was shot in a physical set (unlike the digital soundstage that was used for the rest of the movie). Final Cut Pro allowed the filmmakers to line up the animatics with the live onstage footage. One of the challenges with this movie is that the editors had to manually assign time-codes to each take - the clips were then rendered out and sorted so that they could be used on a Final Cut Pro SD workstation. This approach was also used to create the master off-line cut. Batch lists of the cuts were then imported into Final Cut Pro.

10. Cold Mountain (2003)
This is an epic Civil War drama based on the novel by Charles Frazier. Starring Jude Law, Nicole Kidman, and Renee Zellweger this was critically acclaimed and performed reasonably well at the box office.
The movie was also nominated for an Academy Award for Best Editing let by editor Walter Murch.
This was really seen as the breakthrough movie for the use of Final Cut Pro in Hollywood Movies. An entire book has been produced analysing how editor Murch used Final Cut Pro to edit the movie and analysis its impact on future cinema productions. Editor Murch believes that the use of Final Cut Pro on this movie indirected affected the ultimate creative outcome. In particular, the use of the DVD authoring capabilities on Final Cut Pro meant that the editing team was able to look at the material more often, sharing it with more people, and changing the way that they looked at certain scenes.
While Hollywood movies require editing tools of the highest order, the range of effects that you can achieve using Final Cut Pro is impressive - as well as the standard ripple, roll, slip, slide, scrub, razor blade and time remapping edit functions, Final Cut Pro also comes with a range of video transitions and a range of video and audio filters that will take your film project to the next level.
It is clear that Final Cut Pro is definitely now a star in the editing of Hollywood movies, it is time to make it a star in editing your movies as well.
Benjamin Arango
Benjamin Arango is a writer and a lover of all things video.
Follow @Benjamin Arango
Benjamin Arango
Mar 27, 2024• Proven solutions
Developed as video editing software that has been developed by Apple, Final Cut Pro began life as software designed to made simple video editing accessible for video hobbyists and independent filmmakers. However, in recent years the capabilities of Final Cut Pro have evolved significantly and we are now seeing major Hollywood movies also being edited with this software.
Do you want to turn your own video into a Hollywood film-like video? Check this guide on How to make big-budget cinematic look video with Final Cut Pro.
You may also like: 8 Best Movie Trailer Template for After Effects
Top 10 Movies Made by Final Cut Pro
Let’s take a look at ten major movies that have been edited using Final Cut Pro.
1. The Social Network (2010)
Based on the rise of the phenomenon that we now know as Facebook, The Social Network starred Jesse Eisenberg, Andrew Garfield and Justin Timberlake. The movie performed well at the box office and was also positively received by movie critics.
The film won an Academy Award for Best Editing, collected by Kirk Baxter and Angus Wall. They used Final Cut Pro to edit the film, and one of the things they really like about the software is the ability to do multiple timelines. Final Cut Pro was also used in this movie to enable face replacement in a number of scenes. Two of the key characters in the movie are twins, and so the scenes were filmed with actors (who weren’t twins) and then the editing software was used to create the illusion that they were twins. Digital matte paintings was another feature of this movie that relied on the functionality of Final Cut Pro.
2. The Girl with the Dragon Tattoo (2011)
This was the US adaptation of the earlier Swedish film of the same name - based on the novel by Stieg Larsson. Starring Daniel Craig and Rooney Mara, the story is a crime thriller trying to uncover the secrets surrounding the disappearance of a young girl from a wealthy family.
One of the challenges with this movie was that there were a lot of invisible effects throughout the film. Final Cut Pro was used to achieve the shot stabilization and the visual enhancements - everything from matte painting to creating seasonal elements such as snow.
3. John Carter (2011)
A science fiction adventure, this film performed so badly at the box office that it caused major financial problems for its studio Disney.
The editing of the John Carter movie was a particular challenge as a lot of the action was shot twice during the troubled production. The editor Eric Zumbrunnen used Final Cut Pro to piece the various elements together. With a huge range of CGI and creature effects to deal with, the editing process on this movie was extremely complex. Final Cut Pro was used to create a lot of the background detail need to bring the green screen scenes to life.
4. 500 Days of Summer (2009)
This was a cute, quirky romantic comedy starring Joseph Gordon-Levitt and Zooey Deschanel.
Editing on the movie was by Alan Edward Bell in DVCPro HD format on Final Cut Pro. Because the storyline of the movie unfolds in a non-linear timeline, the workflow feature of Final Cut Pro made it easier to manage the sequencing of the different scenes. There were also 250 invisible effects which were created using Final Cut Pro’s editing features.
5. X-Men Origins: Wolverine (2009)
Continuing the X-Men franchise, this installment traces Wolverine’s childhood and the relationship with his brother. It didn’t really appeal to X-Men fans or movie critics.
Editing on the movie was by Nicolas De Toth and Megan Gill. There were a number of continuity glitches identified during the production of this movie but De Toth and Gill used Final Pro Cut to keep a consistent flow to the narrative. What is interesting about the editing on this movie is that all the cutting of the scenes required was done on Final Cut Pro 5, taking advantage of the software’s HD abilities and also the multi-clip features.
6. Burn After Reading (2008)
A black comedy from the talented brothers Joel and Ethan Coen, they wrote, produced, edited, and directed the movie.
The Coen brothers used Final Cut Pro on this movie because it was simple and easy to use - they were blocking together the rough cuts as the scenes were being shot, and Final Cut Pro gave them the flexibility that they needed to edit quickly. On this movie most of the action was shot using Sony cameras but there were several scenes on which a RED camera was added when an additional camera was needed. Even though there is a significantly different workflow between the two types of camera, the RED material was able to be integrated smoothly with the Sony footage.
7. No Country for Old Men (2007)
A neo-Western thriller from Coen brothers. They directed, wrote, and edited this production.
The movie was also nominated for an Academy Award for Best Editing for editor Roderick Jaynes (a pseudonym for Joel and Ethan Coen).
Directing and editing a movie brings the two processes a lot closer together for the Coen brothers. An easy to use product such as Final Cut Pro ensures that they can construct the movie’s narrative using the timeline features of the product. This movie marked a chance in approach for the Coen brothers, who took advantage of the better resolution DVCPRO HD for their cutting process compared to earlier films that were cut at DV resolution.
8. 300 (2007)
Based on a graphic novel by Frank Miller, this is the fictionalized retelling of the Battle Termopylae - part of the Persian Wars. Directed by Zack Snyder, the movie was filmed with a super-imposition chroma key technique to help replicate the imagery of the original comic book. Editing on the movie was by William Hoy.
To capture the graphic novel look and feel of the film’s images, editor Hoy used a number of the key Final Cut Pro features such as the adjustment layer and blending modes to create depth and mood. With the look and feel of this movie so dependent on the effects created, editor Hoy spent a lot of time debating what was being added visually to each shot and how this would impact the length and continuity of each scene.
9. Sky Captain and the World of Tomorrow (2004)
With big name stars (Gwyneth Paltrow and Jude Law), this was an unusual film that used digital artists to build multi-layered 2D and 3D backgrounds for live action footage, with hand-drawn storyboards recreated as computer-generated 3D animatics. Critically it was well received but didn’t set the box office alight.
Editing on the movie was by Sabrina Plisco.
Final Cut Pro was particularly critical to create a scene between two characters that was shot in a physical set (unlike the digital soundstage that was used for the rest of the movie). Final Cut Pro allowed the filmmakers to line up the animatics with the live onstage footage. One of the challenges with this movie is that the editors had to manually assign time-codes to each take - the clips were then rendered out and sorted so that they could be used on a Final Cut Pro SD workstation. This approach was also used to create the master off-line cut. Batch lists of the cuts were then imported into Final Cut Pro.
10. Cold Mountain (2003)
This is an epic Civil War drama based on the novel by Charles Frazier. Starring Jude Law, Nicole Kidman, and Renee Zellweger this was critically acclaimed and performed reasonably well at the box office.
The movie was also nominated for an Academy Award for Best Editing let by editor Walter Murch.
This was really seen as the breakthrough movie for the use of Final Cut Pro in Hollywood Movies. An entire book has been produced analysing how editor Murch used Final Cut Pro to edit the movie and analysis its impact on future cinema productions. Editor Murch believes that the use of Final Cut Pro on this movie indirected affected the ultimate creative outcome. In particular, the use of the DVD authoring capabilities on Final Cut Pro meant that the editing team was able to look at the material more often, sharing it with more people, and changing the way that they looked at certain scenes.
While Hollywood movies require editing tools of the highest order, the range of effects that you can achieve using Final Cut Pro is impressive - as well as the standard ripple, roll, slip, slide, scrub, razor blade and time remapping edit functions, Final Cut Pro also comes with a range of video transitions and a range of video and audio filters that will take your film project to the next level.
It is clear that Final Cut Pro is definitely now a star in the editing of Hollywood movies, it is time to make it a star in editing your movies as well.
Benjamin Arango
Benjamin Arango is a writer and a lover of all things video.
Follow @Benjamin Arango
Top 10 Vegas Pro Alternatives for Mac (Free & Paid)
For creating high-grade dynamic videos, simply shooting or recording a clip is not enough. Finding the best Sony Ve gas alternatives for Mac is essential since the software mainly targets Windows users.
Thanks to developers, there are many free and paid options to start your video editing journey on a Mac. Let’s first have a look at alternative software you could consider.
- Lightworks
- Wondershare Filmora
- Adobe Premiere Pro
- HitFilm Express
- Kdenlive
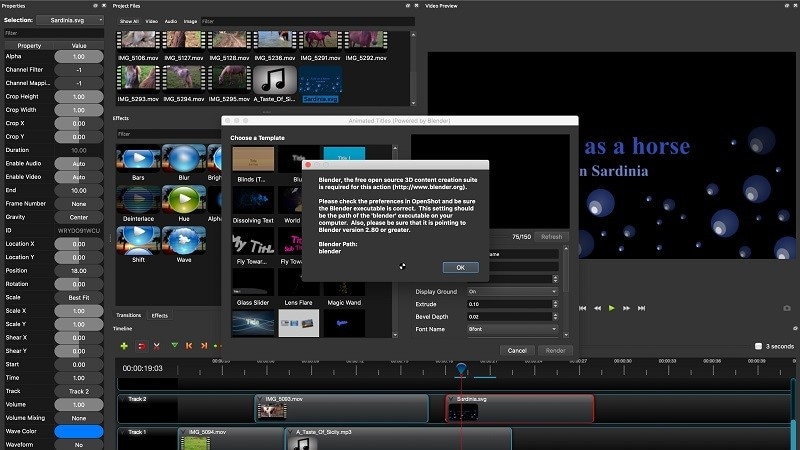
- OpenShot
- Blender
- Jahshaka
- Final Cut Pro
- Cyberlink PowerDirector 365
- What are the limitations when using Sony Vegas (Vegas Pro) on Mac?
- Hot FAQs about Vegas Pro Alternatives
Part 1: Sony Vegas Pro Alternatives & Competitors Overview
Here is a list of the top 10 tools we found after research. For an easier understanding, the following are the essential points of difference between alternative video editing software types for Sony Vegas Pro in a tabular form.
| Software | Supported OS | Price | Editor’s Verdict |
|---|---|---|---|
| Lightworks | Windows, Mac, Linux | Create-$9.99/month, Pro-$23.99/month | Medium-Difficult |
| Wondershare Filmora | Windows, Mac | Annual-$49.99, Perpetual-$79.99 | Easy |
| Adobe Premiere Pro | Windows, Mac | $20.99/month | Easy-Medium |
| HitFilm Express | Windows, Mac | Free | Easy |
| Kdenlive | Windows, Mac, Linux | Free | Medium-Difficult |
| OpenShot | Windows, Mac, Linux, OsX | Free | Medium-Difficult |
| Blender | Windows, Mac, Linux | Free | Easy |
| Jahshaka | Windows, Linux, OsX | Free | Easy-Medium |
| Final Cut Pro | Mac | Lifetime-$299.99 | Easy-Medium |
| Cyberlink PowerDirector 365 | Windows, Mac | Lifetime-$52.50 | Easy-Medium |
Part 2: Top 10 Sony Vegas (Vegas Pro) Alternatives & Competitors
Now that you know the primary differences between the Sony Vegas Pro alternatives. Are you find anything you like? Let’s move on to more details for your further consideration.
1. Lightworks
With Lightworks, using the independent timeline codec, format, and resolution alteration in videos is extremely simple. In addition, you can use the multi-cam editing feature for real-time, high-quality editing work. Moreover, drag and drop elements into videos for optimized video editing work, including pre-existing Storyboard points.
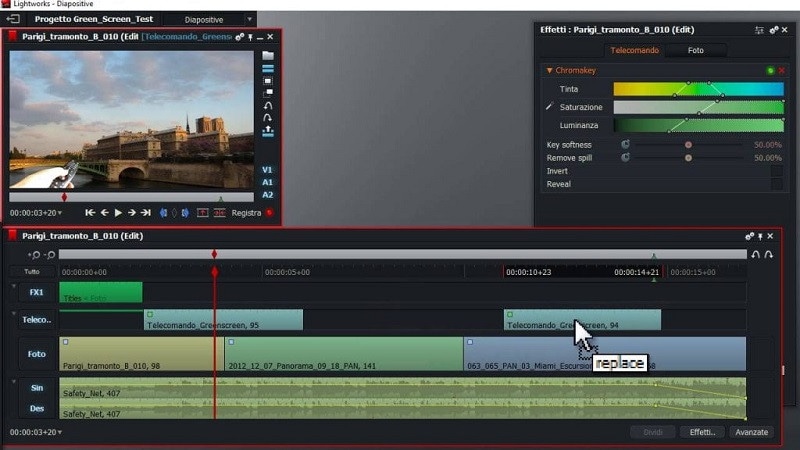
Main Features:
- Industry-grade features like QC, transcoding, and automated transfer are available.
- Edit files at different FPS limits and use three-point editing for recording/source files.
- Insert files and overwrite on a new project, replace, backfill, and fit to fill your video clips.
- Attach Storyboard tiles and match-frame clips/sub-clips easily.
Pros
- Flexible functionality and speedy transfers
- Edit files with professional movie-like quality
- Auto Sync feature for automatic timeline re-syncing is available
Cons
- Direct X is only available on the Windows version
- TotalFX plugin is not available for free- you have to upgrade to use them
OS Compatibility: Windows , Mac , Linux
Best For: Editing experts creating visually animated and professional-looking short videos can work with Lightworks.
What users say:
For professional-level video editing work, Lightworks brings a lot of resources and elements to users. According to reviews , people who have tried it have experienced better video editing functionality with these resources.
2. Wondershare Filmora
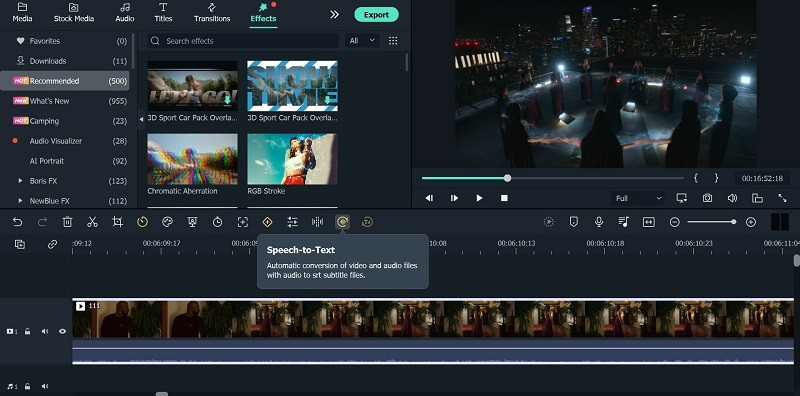
The top Vegas Pro alternative that both Windows and Mac users can opt for is Filmora. The software has advanced AI-incorporated editing functions for automated editing work, including preset effects from FX plugins. Besides that, you can easily add pre-set transitions, audio clips, text, images, and more.
Beginners find it simple to navigate through its interface and can opt for the Instant Mode function for automatic video edits .
Free Download For Win 7 or later(64-bit)
Free Download For macOS 10.14 or later

For a better idea of how this works, you should check out this tutorial video: https://filmora.wondershare.com/get-creative/make-a-video-quickly.html
Main Features:
- Instant Mode is available for automatic video/audio project editing out of 6 shorter clips.
- Support Advanced editing tools like Chroma Key and AI Portrait.
- Record voiceover, apply speech-to-text/text-to-speech functions, and more audio editing features.
- OpenFX plugins like BorisFX and NewBlue FX for a better list of pre-set effects.
Pros
- Simple to use and navigate on the editor timeline, especially with drag-and-drop support
- Output your editing files in different video/audio formats
- Quickly share the file on Vimeo or YouTube, besides downloading it on the local hard drive
Cons
- Free trial users cannot bring their Instant Mode-created videos into the editor timeline
- 4K support only with selected MKV, MOV, M4V (for Mac), and MP4 codecs
OS Compatibility: Windows , Mac
G2 Rating: 4.4 out of 5
Best For: All types of users like educators, students, homeowners, businesses, and video editors for comprehensive video editing tools and uses.
What users say:
Filmora is extremely simple to use, with advanced features available for top-level video editing work. Users mention in reviews how they have benefitted from the simple functionality and dynamic AI-based features available here for video editing.
3. Adobe Premiere Pro
If you are looking for high-quality programs like Sony Vegas, Adobe Premiere Pro is a reliable choice. This editing software allows you to easily create, delete, and move big video projects. Moreover, you can work on multiple files simultaneously and use shortcuts for faster editing work.
Preset filters and editing features are also available here, especially if they choose the Adobe Creative Cloud option.
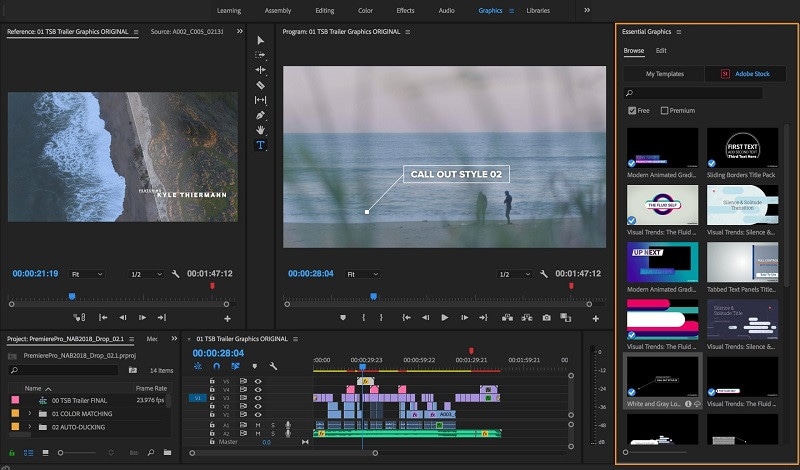
Main Features:
- Multiple pre-set transitions and effects are available for quick thematic changes.
- Add graphics, titles, and captions.
- Color grading and correction tools are available.
- It is possible to add keyframing and animation elements.
Pros
- Opting for group plans for video editing practice and learning using Adobe Premiere Pro is possible
- Aligns audio with videos instantly during editing
- Utilize Quick Export functionality for video files in some taps
Cons
- Windows High Contrast Mode is supported but to a limited extent, like with menus and title bars
- HDR workflows can only be handled on the Windows version with DisplayHDR 400 support
OS Compatibility: Windows , Mac
G2 Rating: 4.5 out of 5
Best For: Professional editors and trainers can use the various plans under Adobe Premiere Pro for video/audio editing.
What users say:
Advertisers and videographers enjoy high-grade video editing features and like the simple effects and interface quality. The motion graphics support in Adobe Premiere Pro is high-grade as well.
4. HitFilm Express
A capable Sony Vegas free alternative that you should check out is HitFilm Express. With this, you can expect many prepared designs for quick video edits. Additionally, you can manually customize the video files you are working on with high-grade personalization features available in the timeline.

Main Features:
- Pre-set customizable designs are available.
- Built-in sound effects and soundtracks are usable for free.
- Cache renders in timelines are optimized.
- The New Grade Clips feature allows users to apply varying effects to many video clips.
Pros
- Stable process of switching between timelines with an active orbit tool
- Easy to switch between 2D/3D timelines while using the text tool
- Simple to use for an unlimited period
Cons
- Does not work on older versions than Windows 10 and macOS 10.14
- Users cannot integrate this with Vegas Pro like before
OS Compatibility: Windows , Mac
TechRadar Rating: 4.5 out of 5
Best For: This software is a high-quality video editor for custom video editing work, fit for beginners and professionals alike.
What users say:
HitFilm Express is easy to use and efficient in the market for professional-level editing. The tutorial is available here for quick learning about the steps, and expandable features are well-admired by users.
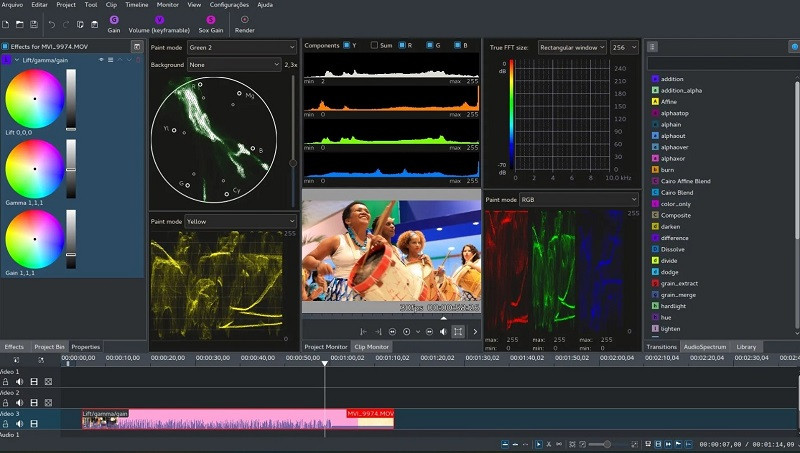
5. Kdenlive
A high-quality Sony Vegas open-source variety that you should seriously consider is Kdenlive. The video editor comes with MLT framework support and holds many tools for optimizing video editing.
To simplify, you can arrange and adjust various video/audio tracks and mute or lock specific ones as needed. Add everything from filters, texts, and transitions using this editor for high-grade video projects.
Main Features:
- Get an automatic backup of your video project while you are editing it.
- Use proxy editing to create low-resolution source clip copies and render them later on computers.
- Multiple video/audio scopes are available for monitoring projects like vectorscope, waveform, and RDB Parade.
- Many transition and effect choices to use.
Pros
- Flexibility with themes to add with multiple options
- Pre-render specific timeline parts for preview
- Effects are simple to use with keyframing quality
Cons
- Complex for completely non-technical users to adapt to
- Only supports 64-bit versions in regards to Windows-based compatibility
Trustpilot Rating: 3.7 out of 5
Best For: High-level editing experts who need strong video editing and monitoring features in an open-source platform.
What users say:
Kdenlive, as an open-source video editing software, assures quick and straightforward usability with projects. Per reviews , users like the ability to make simple video edits without bugs in this editor and quickly export finished projects.
6. OpenShot
OpenShot is a high-quality cross-platform video editor that you can use on different devices for quick but dynamic video project edits. Use keyframing ability here to adjust the animated elements you add to the file.
Moreover, cut the videos with simple steps and add many audio tracks/background videos/watermarks in layers. Also, get several video effects to optimize the video look easily.
Main Features:
- Adjust video speed in reverse motion, fast forward, and slow motion.
- Render effects and 3D animated elements into the video project.
- Get title templates and edit them as needed.
- Visualize the background audio beats with waveform support.
Pros
- Very user-friendly interface with a simple navigation guarantee
- Supports more than 70 languages that you can translate as well using LaunchPad
- Drag-and-drop functionality is supported for adding images, audio, and videos into the OpenShot editor timeline
Cons
- Some bug issues can occur
- Slightly complex learning curve
OS Compatibility: Windows , Linux , OsX
G2 Rating: 4.4 out of 5
Best For: Professional-level video editing experts can opt for this cross-platform free software for high-quality video creations.
What users say:
The OpenShot software is suitable for high-quality video editing across different devices and operating systems. Users like the lack of automated watermarks on all videos, its simple dashboard, and its multi-track editing ability, all available for free.
7. Blender
Blender is free video editing software like Sony Vegas that users can use for video editing, but it is also effective for game development with animations. Indeed, you can create and render dynamic-looking scenes with features like Cycles.
Furthermore, the software has a rich modelling toolset with solutions like curves and sculpting tools.

Main Features:
- Completely customization-friendly UI, shortcuts, and window layout here.
- Customization and scripting are possible to do with this software due to the Python API support.
- Supports access and integration of many pipeline tools for projects.
- Comes with advanced simulation-based features available in MantaFlow and Bullet libraries.
Pros
- Basic and advanced tools for quick video edits
- Strong composition and masking ability with object-based motion tracking benefits
- Easily create short animations with Blender
Cons
- Data under the standalone games created here fall under GPL conditions
- Strict licensing rules are applicable here
OS Compatibility: Windows , Mac , Linux
G2 Rating: 4.5 out of 5
Best For: Game developers and videographers for companies can use this open-source platform for creation and editing.
What users say:
Blender is a capable software for animation-based editing, with high-quality game-based features and interactive elements that make editing simple. As per reviews , users like the simple animation-based tools and fast rendering it offers.
8. Jahshaka
Users of Jahshaka can experience an inclusive, collaborative environment for metaverse-level editing work. This free editing software, like Sony Vegas, focuses mainly on VR-based editing functions and comes with powerful tools for project management and content creation.
Take the help of other team members to collaborate on dynamic virtual world building, editing, and publishing.
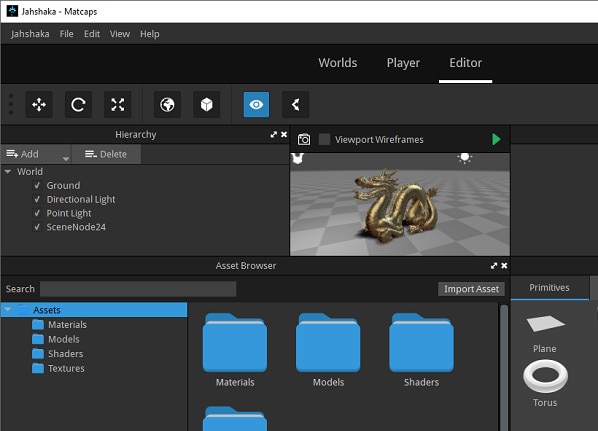
Main Features:
- Compatible player for different desktop and mobile devices.
- Create diversified worlds and scenes with one comprehensive platform.
- Immersive software 3D video development.
- Access to pre-built content and libraries of scenes and assets
Pros
- Easily share and distribute your virtual projects
- Deliver final projects offline and online
- An interactive multi-user engine is available
Cons
- Usable for a niche audience and does not include standard video editing tools
- Jahshaka V2 legacy support is no longer active
OS Compatibility: Windows , Linux , OsX
SourceForge Rating: 4.4 out of 5
Best For: Professional video editors who want a collaborative experience in VR-based development and publishing.
What users say:
Jahshaka is a suitable program for optimized VR-based editing with many preset features and themes to choose from. Most users enjoy the new features and worlds and can work with them efficiently.
9. Final Cut Pro
One of the top Sony Vegas alternatives Mac users can safely turn to is Final Cut Pro, which has powerful modern video editing features. With this software, you will access Cinematic Mode, which you can use to create stylish and thematic video scenes.
Similarly, the Object Tracker features utilize ML technology to automatically detect objects and faces in moving videos. It can align effects and titles accurately with the graphical elements in videos.

Main Features:
- Object Tracker feature for using color correction and adding texts into moving videos.
- Accelerated functional for motion tracking with Apple Neural Engine.
- Add high-quality effects and titles into videos with Cinematic Mode support.
- Preset audio tracks and royalty-free sound effects are available for editing.
Pros
- Handle color grading for optimized scene quality
- Adjust the field depth and focus depth in clips
- Share projects across iOS and macOS platforms
Cons
- Not valid for Windows users
- Relatively high cost to avail the paid version with all advanced features
OS Compatibility: Mac
TrustRadius Rating: 4.8 out of 5
Best For: Professional video editors, students, and filmmakers who want to create cinematic-quality video projects.
What users say:
Final Cut Pro is an efficient Mac-based video editing tool with easy sharing and editing capabilities, rich effects/transitions options, and fast rendering ability. Customers enjoy the intuitive non-linear editor, easy accessibility to social media platforms for file exporting, and live scrubbing, as noted in one review .
10. Cyberlink PowerDirector 365
Another Sony Vegas mac alternative for Windows you should give a try is PowerDirector 365 from Cyberlink. This software removes or compiles video clips and uses masking features like image/custom masks.
Preset special effects, blending modes, and sound effects are available here for quick editing. Additionally, the AI-powered Motion Tracking traces objects in clips and adds graphics, animations, and text quickly in line with it.

Main Features:
- You can create and remove videos with masking features.
- Drag and drop the pre-set effects and texts into videos.
- Adjust video clips with tools for border, gradation, and shadowing.
- Multiple animations, callouts, graphics, and stickers to add to videos.
Pros
- Use green screen functionality for quick background removal or editing
- Automatic audio mastering and mixing functionality are available
- Keyframing benefits for customized animations like scaling and positioning
Cons
- Dolby Digital-centric audio codec is not available for users
- Users can try features like Room Echo Removal and NVIDIA A/V Denoise only on Windows 11
OS Compatibility: Windows
TechRadar Rating: 4.5 out of 5
Best For: Professional videographers and regular users who want a Windows-based video editing software for standard video clip editing.
What users say:
Cyberlink PowerDirector is a powerful video editor with standard editing functions many users have tried and benefited from. According to customers , the program has high-quality video and audio editing benefits for presentations, with additional effects/splitting/cropping features.
Part 3: What are the limitations when using Sony Vegas (Vegas Pro) on Mac?
Yes, with the given Sony Vegas alternatives, Mac and Windows users can benefit heavily. But why is it important to try for a replacement when Sony Vegas Pro is relatively efficient software?
To know the answer, you should take the time to understand its limitations, which do exist.
It only works for Windows users
The Sony Vegas Pro software is not available for Mac or other operating systems besides Windows. In addition, it’ll be really complex and time-consuming, even if you opt for virtual machine software or handle dual booting techniques to configure the software on your Mac or Linux.
You need to invest in other hardware
Sony Vegas Pro does do not work within one comprehensive platform like other capable video editing software types, like Wondershare Filmora . You have to acquire a powerful PC and tools to operate it separately. The software works very slowly on older devices.
Not incredibly unique
The functions of Sony Vegas Pro match somewhat with other options in the market. So, users would not expect much value in purchasing this software’s plans that they want to upgrade from their previous system, but on the other hand, the available features are mostly standard-level in functionality as well.
Hot FAQs about Vegas Pro Alternatives
After knowing these details, many users still have specific common queries about opting for a Sony Vegas Pro alternatively. So these are some common FAQs about this- answered.
1. Can Sony Vegas be used on a Mac?
No, it is impossible to directly use Sony Vegas on macOS devices since it does not support it. Instead, you have to separately use a dual boot strategy or virtual machine software to activate the video editor on Mac devices, but the process for that is complex.
2. Is Wondershare Filmora or Vegas Pro better?
Wondershare Filmora and Vegas Pro are top-level options in video and audio editing projects with professional-level editing accuracy. However, Filmora has a cohesive ecosystem with rich AI and standard functions and comes with Mac/Windows support. So, in that sense, Filmora is comparatively a better choice.
Final Words
In place of Sony Vegas Pro, any of these options would also give you a great user experience. Out of them, Filmora is one that we will recommend due to its multi-faceted benefits and features for Mac and Windows users. Ultimately, make your decision based on your particular needs.
Free Download For Win 7 or later(64-bit)
Free Download For macOS 10.14 or later
Part 1: Sony Vegas Pro Alternatives & Competitors Overview
Here is a list of the top 10 tools we found after research. For an easier understanding, the following are the essential points of difference between alternative video editing software types for Sony Vegas Pro in a tabular form.
| Software | Supported OS | Price | Editor’s Verdict |
|---|---|---|---|
| Lightworks | Windows, Mac, Linux | Create-$9.99/month, Pro-$23.99/month | Medium-Difficult |
| Wondershare Filmora | Windows, Mac | Annual-$49.99, Perpetual-$79.99 | Easy |
| Adobe Premiere Pro | Windows, Mac | $20.99/month | Easy-Medium |
| HitFilm Express | Windows, Mac | Free | Easy |
| Kdenlive | Windows, Mac, Linux | Free | Medium-Difficult |
| OpenShot | Windows, Mac, Linux, OsX | Free | Medium-Difficult |
| Blender | Windows, Mac, Linux | Free | Easy |
| Jahshaka | Windows, Linux, OsX | Free | Easy-Medium |
| Final Cut Pro | Mac | Lifetime-$299.99 | Easy-Medium |
| Cyberlink PowerDirector 365 | Windows, Mac | Lifetime-$52.50 | Easy-Medium |
Part 2: Top 10 Sony Vegas (Vegas Pro) Alternatives & Competitors
Now that you know the primary differences between the Sony Vegas Pro alternatives. Are you find anything you like? Let’s move on to more details for your further consideration.
1. Lightworks
With Lightworks, using the independent timeline codec, format, and resolution alteration in videos is extremely simple. In addition, you can use the multi-cam editing feature for real-time, high-quality editing work. Moreover, drag and drop elements into videos for optimized video editing work, including pre-existing Storyboard points.
Main Features:
- Industry-grade features like QC, transcoding, and automated transfer are available.
- Edit files at different FPS limits and use three-point editing for recording/source files.
- Insert files and overwrite on a new project, replace, backfill, and fit to fill your video clips.
- Attach Storyboard tiles and match-frame clips/sub-clips easily.
Pros
- Flexible functionality and speedy transfers
- Edit files with professional movie-like quality
- Auto Sync feature for automatic timeline re-syncing is available
Cons
- Direct X is only available on the Windows version
- TotalFX plugin is not available for free- you have to upgrade to use them
OS Compatibility: Windows , Mac , Linux
Best For: Editing experts creating visually animated and professional-looking short videos can work with Lightworks.
What users say:
For professional-level video editing work, Lightworks brings a lot of resources and elements to users. According to reviews , people who have tried it have experienced better video editing functionality with these resources.
2. Wondershare Filmora
The top Vegas Pro alternative that both Windows and Mac users can opt for is Filmora. The software has advanced AI-incorporated editing functions for automated editing work, including preset effects from FX plugins. Besides that, you can easily add pre-set transitions, audio clips, text, images, and more.
Beginners find it simple to navigate through its interface and can opt for the Instant Mode function for automatic video edits .
Free Download For Win 7 or later(64-bit)
Free Download For macOS 10.14 or later
For a better idea of how this works, you should check out this tutorial video: https://filmora.wondershare.com/get-creative/make-a-video-quickly.html
Main Features:
- Instant Mode is available for automatic video/audio project editing out of 6 shorter clips.
- Support Advanced editing tools like Chroma Key and AI Portrait.
- Record voiceover, apply speech-to-text/text-to-speech functions, and more audio editing features.
- OpenFX plugins like BorisFX and NewBlue FX for a better list of pre-set effects.
Pros
- Simple to use and navigate on the editor timeline, especially with drag-and-drop support
- Output your editing files in different video/audio formats
- Quickly share the file on Vimeo or YouTube, besides downloading it on the local hard drive
Cons
- Free trial users cannot bring their Instant Mode-created videos into the editor timeline
- 4K support only with selected MKV, MOV, M4V (for Mac), and MP4 codecs
OS Compatibility: Windows , Mac
G2 Rating: 4.4 out of 5
Best For: All types of users like educators, students, homeowners, businesses, and video editors for comprehensive video editing tools and uses.
What users say:
Filmora is extremely simple to use, with advanced features available for top-level video editing work. Users mention in reviews how they have benefitted from the simple functionality and dynamic AI-based features available here for video editing.
3. Adobe Premiere Pro
If you are looking for high-quality programs like Sony Vegas, Adobe Premiere Pro is a reliable choice. This editing software allows you to easily create, delete, and move big video projects. Moreover, you can work on multiple files simultaneously and use shortcuts for faster editing work.
Preset filters and editing features are also available here, especially if they choose the Adobe Creative Cloud option.
Main Features:
- Multiple pre-set transitions and effects are available for quick thematic changes.
- Add graphics, titles, and captions.
- Color grading and correction tools are available.
- It is possible to add keyframing and animation elements.
Pros
- Opting for group plans for video editing practice and learning using Adobe Premiere Pro is possible
- Aligns audio with videos instantly during editing
- Utilize Quick Export functionality for video files in some taps
Cons
- Windows High Contrast Mode is supported but to a limited extent, like with menus and title bars
- HDR workflows can only be handled on the Windows version with DisplayHDR 400 support
OS Compatibility: Windows , Mac
G2 Rating: 4.5 out of 5
Best For: Professional editors and trainers can use the various plans under Adobe Premiere Pro for video/audio editing.
What users say:
Advertisers and videographers enjoy high-grade video editing features and like the simple effects and interface quality. The motion graphics support in Adobe Premiere Pro is high-grade as well.
4. HitFilm Express
A capable Sony Vegas free alternative that you should check out is HitFilm Express. With this, you can expect many prepared designs for quick video edits. Additionally, you can manually customize the video files you are working on with high-grade personalization features available in the timeline.
Main Features:
- Pre-set customizable designs are available.
- Built-in sound effects and soundtracks are usable for free.
- Cache renders in timelines are optimized.
- The New Grade Clips feature allows users to apply varying effects to many video clips.
Pros
- Stable process of switching between timelines with an active orbit tool
- Easy to switch between 2D/3D timelines while using the text tool
- Simple to use for an unlimited period
Cons
- Does not work on older versions than Windows 10 and macOS 10.14
- Users cannot integrate this with Vegas Pro like before
OS Compatibility: Windows , Mac
TechRadar Rating: 4.5 out of 5
Best For: This software is a high-quality video editor for custom video editing work, fit for beginners and professionals alike.
What users say:
HitFilm Express is easy to use and efficient in the market for professional-level editing. The tutorial is available here for quick learning about the steps, and expandable features are well-admired by users.
5. Kdenlive
A high-quality Sony Vegas open-source variety that you should seriously consider is Kdenlive. The video editor comes with MLT framework support and holds many tools for optimizing video editing.
To simplify, you can arrange and adjust various video/audio tracks and mute or lock specific ones as needed. Add everything from filters, texts, and transitions using this editor for high-grade video projects.
Main Features:
- Get an automatic backup of your video project while you are editing it.
- Use proxy editing to create low-resolution source clip copies and render them later on computers.
- Multiple video/audio scopes are available for monitoring projects like vectorscope, waveform, and RDB Parade.
- Many transition and effect choices to use.
Pros
- Flexibility with themes to add with multiple options
- Pre-render specific timeline parts for preview
- Effects are simple to use with keyframing quality
Cons
- Complex for completely non-technical users to adapt to
- Only supports 64-bit versions in regards to Windows-based compatibility
Trustpilot Rating: 3.7 out of 5
Best For: High-level editing experts who need strong video editing and monitoring features in an open-source platform.
What users say:
Kdenlive, as an open-source video editing software, assures quick and straightforward usability with projects. Per reviews , users like the ability to make simple video edits without bugs in this editor and quickly export finished projects.
6. OpenShot
OpenShot is a high-quality cross-platform video editor that you can use on different devices for quick but dynamic video project edits. Use keyframing ability here to adjust the animated elements you add to the file.
Moreover, cut the videos with simple steps and add many audio tracks/background videos/watermarks in layers. Also, get several video effects to optimize the video look easily.
Main Features:
- Adjust video speed in reverse motion, fast forward, and slow motion.
- Render effects and 3D animated elements into the video project.
- Get title templates and edit them as needed.
- Visualize the background audio beats with waveform support.
Pros
- Very user-friendly interface with a simple navigation guarantee
- Supports more than 70 languages that you can translate as well using LaunchPad
- Drag-and-drop functionality is supported for adding images, audio, and videos into the OpenShot editor timeline
Cons
- Some bug issues can occur
- Slightly complex learning curve
OS Compatibility: Windows , Linux , OsX
G2 Rating: 4.4 out of 5
Best For: Professional-level video editing experts can opt for this cross-platform free software for high-quality video creations.
What users say:
The OpenShot software is suitable for high-quality video editing across different devices and operating systems. Users like the lack of automated watermarks on all videos, its simple dashboard, and its multi-track editing ability, all available for free.
7. Blender
Blender is free video editing software like Sony Vegas that users can use for video editing, but it is also effective for game development with animations. Indeed, you can create and render dynamic-looking scenes with features like Cycles.
Furthermore, the software has a rich modelling toolset with solutions like curves and sculpting tools.
Main Features:
- Completely customization-friendly UI, shortcuts, and window layout here.
- Customization and scripting are possible to do with this software due to the Python API support.
- Supports access and integration of many pipeline tools for projects.
- Comes with advanced simulation-based features available in MantaFlow and Bullet libraries.
Pros
- Basic and advanced tools for quick video edits
- Strong composition and masking ability with object-based motion tracking benefits
- Easily create short animations with Blender
Cons
- Data under the standalone games created here fall under GPL conditions
- Strict licensing rules are applicable here
OS Compatibility: Windows , Mac , Linux
G2 Rating: 4.5 out of 5
Best For: Game developers and videographers for companies can use this open-source platform for creation and editing.
What users say:
Blender is a capable software for animation-based editing, with high-quality game-based features and interactive elements that make editing simple. As per reviews , users like the simple animation-based tools and fast rendering it offers.
8. Jahshaka
Users of Jahshaka can experience an inclusive, collaborative environment for metaverse-level editing work. This free editing software, like Sony Vegas, focuses mainly on VR-based editing functions and comes with powerful tools for project management and content creation.
Take the help of other team members to collaborate on dynamic virtual world building, editing, and publishing.
Main Features:
- Compatible player for different desktop and mobile devices.
- Create diversified worlds and scenes with one comprehensive platform.
- Immersive software 3D video development.
- Access to pre-built content and libraries of scenes and assets
Pros
- Easily share and distribute your virtual projects
- Deliver final projects offline and online
- An interactive multi-user engine is available
Cons
- Usable for a niche audience and does not include standard video editing tools
- Jahshaka V2 legacy support is no longer active
OS Compatibility: Windows , Linux , OsX
SourceForge Rating: 4.4 out of 5
Best For: Professional video editors who want a collaborative experience in VR-based development and publishing.
What users say:
Jahshaka is a suitable program for optimized VR-based editing with many preset features and themes to choose from. Most users enjoy the new features and worlds and can work with them efficiently.
9. Final Cut Pro
One of the top Sony Vegas alternatives Mac users can safely turn to is Final Cut Pro, which has powerful modern video editing features. With this software, you will access Cinematic Mode, which you can use to create stylish and thematic video scenes.
Similarly, the Object Tracker features utilize ML technology to automatically detect objects and faces in moving videos. It can align effects and titles accurately with the graphical elements in videos.
Main Features:
- Object Tracker feature for using color correction and adding texts into moving videos.
- Accelerated functional for motion tracking with Apple Neural Engine.
- Add high-quality effects and titles into videos with Cinematic Mode support.
- Preset audio tracks and royalty-free sound effects are available for editing.
Pros
- Handle color grading for optimized scene quality
- Adjust the field depth and focus depth in clips
- Share projects across iOS and macOS platforms
Cons
- Not valid for Windows users
- Relatively high cost to avail the paid version with all advanced features
OS Compatibility: Mac
TrustRadius Rating: 4.8 out of 5
Best For: Professional video editors, students, and filmmakers who want to create cinematic-quality video projects.
What users say:
Final Cut Pro is an efficient Mac-based video editing tool with easy sharing and editing capabilities, rich effects/transitions options, and fast rendering ability. Customers enjoy the intuitive non-linear editor, easy accessibility to social media platforms for file exporting, and live scrubbing, as noted in one review .
10. Cyberlink PowerDirector 365
Another Sony Vegas mac alternative for Windows you should give a try is PowerDirector 365 from Cyberlink. This software removes or compiles video clips and uses masking features like image/custom masks.
Preset special effects, blending modes, and sound effects are available here for quick editing. Additionally, the AI-powered Motion Tracking traces objects in clips and adds graphics, animations, and text quickly in line with it.
Main Features:
- You can create and remove videos with masking features.
- Drag and drop the pre-set effects and texts into videos.
- Adjust video clips with tools for border, gradation, and shadowing.
- Multiple animations, callouts, graphics, and stickers to add to videos.
Pros
- Use green screen functionality for quick background removal or editing
- Automatic audio mastering and mixing functionality are available
- Keyframing benefits for customized animations like scaling and positioning
Cons
- Dolby Digital-centric audio codec is not available for users
- Users can try features like Room Echo Removal and NVIDIA A/V Denoise only on Windows 11
OS Compatibility: Windows
TechRadar Rating: 4.5 out of 5
Best For: Professional videographers and regular users who want a Windows-based video editing software for standard video clip editing.
What users say:
Cyberlink PowerDirector is a powerful video editor with standard editing functions many users have tried and benefited from. According to customers , the program has high-quality video and audio editing benefits for presentations, with additional effects/splitting/cropping features.
Part 3: What are the limitations when using Sony Vegas (Vegas Pro) on Mac?
Yes, with the given Sony Vegas alternatives, Mac and Windows users can benefit heavily. But why is it important to try for a replacement when Sony Vegas Pro is relatively efficient software?
To know the answer, you should take the time to understand its limitations, which do exist.
It only works for Windows users
The Sony Vegas Pro software is not available for Mac or other operating systems besides Windows. In addition, it’ll be really complex and time-consuming, even if you opt for virtual machine software or handle dual booting techniques to configure the software on your Mac or Linux.
You need to invest in other hardware
Sony Vegas Pro does do not work within one comprehensive platform like other capable video editing software types, like Wondershare Filmora . You have to acquire a powerful PC and tools to operate it separately. The software works very slowly on older devices.
Not incredibly unique
The functions of Sony Vegas Pro match somewhat with other options in the market. So, users would not expect much value in purchasing this software’s plans that they want to upgrade from their previous system, but on the other hand, the available features are mostly standard-level in functionality as well.
Hot FAQs about Vegas Pro Alternatives
After knowing these details, many users still have specific common queries about opting for a Sony Vegas Pro alternatively. So these are some common FAQs about this- answered.
1. Can Sony Vegas be used on a Mac?
No, it is impossible to directly use Sony Vegas on macOS devices since it does not support it. Instead, you have to separately use a dual boot strategy or virtual machine software to activate the video editor on Mac devices, but the process for that is complex.
2. Is Wondershare Filmora or Vegas Pro better?
Wondershare Filmora and Vegas Pro are top-level options in video and audio editing projects with professional-level editing accuracy. However, Filmora has a cohesive ecosystem with rich AI and standard functions and comes with Mac/Windows support. So, in that sense, Filmora is comparatively a better choice.
Final Words
In place of Sony Vegas Pro, any of these options would also give you a great user experience. Out of them, Filmora is one that we will recommend due to its multi-faceted benefits and features for Mac and Windows users. Ultimately, make your decision based on your particular needs.
Free Download For Win 7 or later(64-bit)
Free Download For macOS 10.14 or later
Split Screen Video Editing Software: Free Online and Offline Solutions
Best Split Screen Video Editor [Online & Offline]

Ollie Mattison
Mar 27, 2024• Proven solutions
The effect that comes up after adding two or more screens in a single frame is called split screen, and the tool that enables the users to do this is a split screen video editor. These split screens have significant importance in post-production tasks. That said, the following sections discuss about the tools that enable you to create split screen videos, and explain the process of doing so.
As mentioned above, the split screen effect lets you add two or more screens in a single frame. When multiple activities occur at the same time but at different locations, they all can be shown on one screen by placing their corresponding footages side-by-side or in any other arrangement that the split screen video maker allows.
Best Split Screen Video Editing Software for Windows and Mac [Free & Paid]
After understanding what split screen is, it becomes both obvious and mandatory to know about some of the most used split screen video editor applications, and how they help you in adding the effect to your movies. Following is a list of a couple of such programs:
1. iMovie
A proprietary of Apple, iMovie is available for both iOS and macOS, and is absolutely free of cost. Even though the tool lacks some advanced options for fine editing, it still offers a good platform to those planning their career in post-production industry. With simple UI, it is easy to learn iMovie.
The step-by-step instructions given below explain how to use iMovie to add split screen effect to your videos:
Step 1: Add Footages to iMovie
After importing the footages to the Media Bin in iMovie, drag the first one to the Timeline, and then drag the second one above the first layer.
Step 2: Select the Split Screen Effect
Select the top video layer in the Timeline, and choose Split Screen from the screen type drop-down list at the top.
Step 3: Select Split Screen Preset
Choose a position for the selected layer from the Position drop-down list at the top, and use the Slide slider to adjust the speed of the appearance of the footage.
Pros
- iMovie is free to download and use
- The program is available for both macOS and iOS
Cons
- Allows only up to two videos to be used in split screen
You can get iMovie from here: https://www.apple.com/in/imovie/
2. Wondershare Filmora Editor


One of the most robust apps that is compared with post-production applications like Adobe Premiere Pro and Final Cut Pro X, Wondershare Filmora is also a video editor that helps split screen easily. The software is available for Windows and Mac computers, and provides prompt technical support to its consumers. Although Filmora that packed with more advanced tools is also available, most of the times Filmora serves the purpose pretty well.
You can learn how to add split screen effect in Wondershare Filmora by following the steps given below:
Step 1: Import Footages to Filmora
Launch Wondershare Filmora, click anywhere inside the Media window in the upper-left section, and import all the videos you want to use to create the split screen effect.
Step 2: Choose a Split Screen Preset
Click Split Screen from the standard toolbar at the top, click and drag your preferred preset to the Timeline, and then extend the duration of the effect in the Timeline by dragging its handle.
Step 3: Add Videos to Split Screen

Click ADVANCED from the bottom-right area of the Media pane, on the Advanced Split Screen Edit box, drag the first video from the left pane, and drop it on your preferred section in the right. Repeat the process to add all the other videos to their corresponding sections. Adjust their time of appearance by dragging their thumbnail in the Timeline of the box, and click OK.
Pros
- Wondershare Filmora is lightweight and is less resource intensive
- Allows as many as 6 videos to be added to create split screen effect
- Has 30+ split screen presets
Cons
- A couple of windows are required to be opened while working with split screen
3 . VSDC
VSDC is a free and efficient split screen video maker. In fact, the program is a full-fledged post-production application that can be used to edit the videos to prepare industry-standard clips for presentations, broadcasting, and commercial and private distribution. The best thing about VSDC is, it is absolutely free of cost, and doesn’t add any watermarks to the output files.
The instructions given below explain how to use the split screen feature in VSDC:
Step 1: Add Video Footages
Click Add object from the standard toolbar at the top, click Video, and select and add the first footage to the preview window. Repeat the process to add more video(s) as needed.
Step 2: Add Split Screen Effect
Grab any of the side handles of the video you added last, and drag it inward to reduce its size proportionally. Repeat the process to reduce the size of the other video(s) that is/are now revealed from beneath the one you just adjusted in order to create the split screen effect.
Pros
- Absolutely free to use
- Allows practically unlimited number of footages to be added to create the split screen videos
Cons
- No presets for automatic video positioning are available for split screen effect
You can get VSDC free video editor from here: http://www.videosoftdev.com/
4. Shotcut
A free and opensource editing tool, Shotcut can also be used as a split screen video maker to produce industry-standard movies and documentaries. Shotcut is available for FreeBSD, Windows, Linux, and macOS, and comes in both x64 and x86 variants. Being a free program, Shotcut doesn’t require any activation or registration.
The procedure that follows explains how to use Shortcut as a free split screen video editor:
Step 1: Add Clips to the Timeline
Import the footages to the Shotcut’s media bin, drag one of the clips from the bin to the Timeline at the bottom, and then press Ctrl + I on your keyboard to add more video tracks. You can press this shortcut key for another couple of times depending on the number films you want to use for the split screen effect. Next, drag each film from the bin to their corresponding tracks. Note: Make sure NOT to place all the clips on the same track, and that each of them is on a different, its own, video layer.
Step 2: Adjust the First Video
Select the last video you added to the Timeline (it should be the topmost track), click Filters from above the Timeline, click the + button from the upper-left corner, click Size and Position from the list that appears next, and select the clip’s position from the Preset drop-down list.
Step 3: Adjust Other Videos
Select the second video in the Timeline and repeat the process to set its position, and do the same for all other footages that you added in order to create the split screen effect.
Pros
- Available for FreeBSD, Windows, Linux, and macOS platforms
- If using presets, as many as 4 videos can be added for split screen effect
Cons
- Working with split screen manually may require practice and some calculations to position the clips on the screen correctly
You can get Shotcut from here: https://shotcut.org/
5. Lightworks
Used by the professionals to edit and prepare movies like Pulp Fiction, The Cure, L.A. Confidential, Bruce Almighty, The Wolf of Wall Street, etc., Lightworks is, in true means, a complete and full-fledged post-production application to create industry-standard outputs. The main reason for the app’s wide userbase is that it is a cross-platform software that is available for Linux, Mac, and Windows computers.
To use Lightworks as split screen video maker, you can follow the instructions given below:
Step 1: Add Tracks in Timeline
After importing the clips to Lightworks, leave them in the Media Bin for now, right-click anywhere in the Timeline at the bottom, go to Tracks, click Add multiple, and from the Number to add drop-down list, choose the number of tracks you want to add to the Timeline. Click Add to confirm the changes.
Step 2: Disable Auto Sync
Right-click anywhere in the Timeline, and click to deselect Auto track sync.
Step 3: Add Clips to Timeline
Drag the clips from the Media Bin to the Timeline. Make sure to place each footage on a different track, and that all the tracks are on top of each other. Optionally, right-click the audio that was added along with the clips, and click Remove from the context menu. Use this method to remove all the audios or leave the one you want to have. Note: Removing the audio tracks ensures that they do not overlap during the playback.
Step 4: Enable Split Screen
Click VFX from above the preview window, click the + (Add new effects) icon from the top of the left pane, select the DVE category from the upper-right corner of the left pane, scroll down the left pane to the Split-screen Presets section, and double-click your preferred split screen preset to add the effect to the participating clips.
Pros
- Even the free variant has split screen feature
- A complete post-production tool that doesn’t require any other program for finalizing the things
Cons
- Not many split screen presets are available
Download Lightworks free version from here: https://www.lwks.com/
6. Adobe Premiere Pro
One of the most appreciated and widely used post-production applications for Windows and Mac computers, Adobe Premiere Pro has been professionals’ first choice when it comes to video editing, irrespective of the fact that it has a steep learning curve, and is also a resource intensive software to work with.
The steps below explain how to use Adobe Premiere Pro as a split screen video maker:
Step 1: Add Videos to Timeline
After importing the clips to the Project window, drag each of them to the Timeline, and place them in their separate tracks one above the other.
Step 2: Position and Crop
Select the topmost video track in the Timeline, go to Effect Controls panel from the top of the upper-left pane, and use the Position slider to position the video to your preferred area of the screen. Repeat this process for all the clips in the Timeline you want to add to split screen.
Step 3: Crop the Clips
Search for the Crop effect in the Effects pane present at the lower-left corner, drag and drop the effect on each of the clips in the timeline, and use the Crop slider in the Effect Controls pane to crop the videos as needed. Optionally use the keyframes to add sliding animations to give more professional look to the split screen effect.
Pros
- Most robust and efficient video editing tool
- Allows practically unlimited number of videos to be used for split screen
Cons
- Requires subscription that needs to be renewed regularly
For more details about making split screen with Pr, check How to create a split screen in Premiere Pro
7. Final Cut Pro X
Available only for Mac computers at the time of this writing, Final Cut Pro X or FCPX gives tough competition to Adobe Premiere Pro. Since Apple devices are famous for their speedy processing, professionals any day prefer FCPX over Adobe Premiere Pro if they own a Mac PC running macOS.
You can use FCPX as split screen video maker by following the steps given below:
Step 1: Place Footages in the Timeline
As mentioned earlier, add the clips on top of each other on separate tracks in the Timeline of FCPX.
Step 2: Position and Crop
Select the first clip in the Timeline, from the Transform section of the Video Inspector pane in the right, use the Position slider to move the clip to your preferred side of the screen, and use the sliders from the Crop section to crop the footage to adjust the portion of interest. Repeat the process for the other video tracks as well to get your desired split screen effect in Final Cut Pro X.
Pros
- Offers quick and easy way to add split screen effect
- Allows practically unlimited number of videos to be used for split screen
Cons
- Doesn’t have any particular preset for split screen effect
You may also like: How to create a PIP video with Final Cut Pro X
Best Free Online Split Screen Video Editors
Apart from the desktop programs discussed above, there are a couple of web tools that can be used as split screen video maker online free. Two of the most used ones are introduced below:
1. Kapwing Collage Maker
Although Kapwing offers several other online tools like video resizer, meme generator, slideshow maker, etc., the solution that can be considered split screen video editor is Kapwing Collage Maker. This web app allows you to select a template to get started, and the rest of the process is simple.
The following steps explain how to create a split screen video with Kapwing:
Step 1: Add Clips to Preset
Go to the https://www.kapwing.com/collage link, click to select your preferred split screen preset, click REPLACE on one of the segments of the split screen on the next page, and select and upload the first video. Next, click REPLACE on the other segment(s), and select and upload the other videos as well.
Step 2: Reposition and Publish
Click and drag each of the added clips to reposition them on the screen, use the other tools to crop and adjust the videos as needed, and click Publish from the top-right corner. Note: Optionally you can click Timeline from the top of the preview window, adjust the timings and other settings as needed on the next page, and click Done. After this, you can go ahead and hit Publish to create the split screen effect out of the uploaded videos.
Pros
- Free to use
- Allows as many as 4 videos to create split screen effect
Cons
- Requires you to register and sign in to remove the watermark from the output file
2. WeVideo
Yet another split screen video maker online free solution, WeVideo offers almost desktop program-like experience while creating split screen effects. Even though all the subscription plans that the vendor offers are chargeable, the Education plan can be tried for 30 days for free, post which the teachers are required to pay to continue using the web tool.
The following steps explain how to get split screen effect with WeVideo:
Step 1: Import Videos
Visit https://www.wevideo.com and on the main window, click Video from under the Create a new section at the top, select a layout on the Let’s get started box, and click START EDITING from the bottom right corner. Next, click ADD in the My media window in the upper-left section, click BROWSE TO SELECT on the Import media box, and add the videos you want to use in the split screen effect.
Step 2: Add Clips to Timeline
As explained earlier, drag the videos from the My media pane and drop them in the Timeline. Make sure to place every video in its separate layer, and that all the layers are on top of each other.
Step 3: Create Split Screen Effect
Select any clip in the Timeline, and click the Open clip editor icon from the upper-left area of the track. On the next page, use the Scale slider to reduce the size of the selected clip, and from the preview window in the right, drag to reposition the video to your preferred location on the screen. Click SAVE CHANGES from the bottom of the left pane to confirm the settings. Repeat the process for the second clip in the Timeline to resize and reposition it on the screen. Click FINISH from the upper-right corner, on the next box, enter a name for the video in the available field, click SET, choose your preferred settings on the next page, and click EXPORT from the bottom-right corner to produce the split screen video.
Pros
- Free to use
- Allows multiple videos to be used for split screen
Cons
- Paid subscription is needed to remove watermark from the outputs
FAQs About Split Screen Video Editors
Why you should use split screen effect in video?
There are a couple of reasons you may want to use split screen effect in your video. Some of the most common uses include:
- Showing multiple actions by the same or different characters at the same time, without changing the screen
- Comparing multiple objects or picture quality. This can be done only when the entities in question are placed side-by-side
- Making your video look more professional
- Showing different effects on the same screen
Can I create a split screen video with Windows Movie Maker or Windows 10 Photos app?
No, you cannot. Although these tools enable you to resize the videos, since they don’t allow multi-tracked Timelines, no video clips can be placed one above the other which is an essential part for any split screen video maker to create the effect. However, as discussed above, there are several post-production tools, offline and online, that allow you to make split screen videos easily and without any cost.
Conclusion
Split screen video editor tools are both paid and free. Regardless of the program you use to create the effect, the output files always look more professional and informative. Furthermore, things become way simpler if the split screen video maker has simple UI, is less resource intensive, and is easy to use as it is the case with Wondershare Filmora.
Ollie Mattison
Ollie Mattison is a writer and a lover of all things video.
Follow @Ollie Mattison
Ollie Mattison
Mar 27, 2024• Proven solutions
The effect that comes up after adding two or more screens in a single frame is called split screen, and the tool that enables the users to do this is a split screen video editor. These split screens have significant importance in post-production tasks. That said, the following sections discuss about the tools that enable you to create split screen videos, and explain the process of doing so.
As mentioned above, the split screen effect lets you add two or more screens in a single frame. When multiple activities occur at the same time but at different locations, they all can be shown on one screen by placing their corresponding footages side-by-side or in any other arrangement that the split screen video maker allows.
Best Split Screen Video Editing Software for Windows and Mac [Free & Paid]
After understanding what split screen is, it becomes both obvious and mandatory to know about some of the most used split screen video editor applications, and how they help you in adding the effect to your movies. Following is a list of a couple of such programs:
1. iMovie
A proprietary of Apple, iMovie is available for both iOS and macOS, and is absolutely free of cost. Even though the tool lacks some advanced options for fine editing, it still offers a good platform to those planning their career in post-production industry. With simple UI, it is easy to learn iMovie.
The step-by-step instructions given below explain how to use iMovie to add split screen effect to your videos:
Step 1: Add Footages to iMovie
After importing the footages to the Media Bin in iMovie, drag the first one to the Timeline, and then drag the second one above the first layer.
Step 2: Select the Split Screen Effect
Select the top video layer in the Timeline, and choose Split Screen from the screen type drop-down list at the top.
Step 3: Select Split Screen Preset
Choose a position for the selected layer from the Position drop-down list at the top, and use the Slide slider to adjust the speed of the appearance of the footage.
Pros
- iMovie is free to download and use
- The program is available for both macOS and iOS
Cons
- Allows only up to two videos to be used in split screen
You can get iMovie from here: https://www.apple.com/in/imovie/
2. Wondershare Filmora Editor
One of the most robust apps that is compared with post-production applications like Adobe Premiere Pro and Final Cut Pro X, Wondershare Filmora is also a video editor that helps split screen easily. The software is available for Windows and Mac computers, and provides prompt technical support to its consumers. Although Filmora that packed with more advanced tools is also available, most of the times Filmora serves the purpose pretty well.
You can learn how to add split screen effect in Wondershare Filmora by following the steps given below:
Step 1: Import Footages to Filmora
Launch Wondershare Filmora, click anywhere inside the Media window in the upper-left section, and import all the videos you want to use to create the split screen effect.
Step 2: Choose a Split Screen Preset
Click Split Screen from the standard toolbar at the top, click and drag your preferred preset to the Timeline, and then extend the duration of the effect in the Timeline by dragging its handle.
Step 3: Add Videos to Split Screen
Click ADVANCED from the bottom-right area of the Media pane, on the Advanced Split Screen Edit box, drag the first video from the left pane, and drop it on your preferred section in the right. Repeat the process to add all the other videos to their corresponding sections. Adjust their time of appearance by dragging their thumbnail in the Timeline of the box, and click OK.
Pros
- Wondershare Filmora is lightweight and is less resource intensive
- Allows as many as 6 videos to be added to create split screen effect
- Has 30+ split screen presets
Cons
- A couple of windows are required to be opened while working with split screen
3 . VSDC
VSDC is a free and efficient split screen video maker. In fact, the program is a full-fledged post-production application that can be used to edit the videos to prepare industry-standard clips for presentations, broadcasting, and commercial and private distribution. The best thing about VSDC is, it is absolutely free of cost, and doesn’t add any watermarks to the output files.
The instructions given below explain how to use the split screen feature in VSDC:
Step 1: Add Video Footages
Click Add object from the standard toolbar at the top, click Video, and select and add the first footage to the preview window. Repeat the process to add more video(s) as needed.
Step 2: Add Split Screen Effect
Grab any of the side handles of the video you added last, and drag it inward to reduce its size proportionally. Repeat the process to reduce the size of the other video(s) that is/are now revealed from beneath the one you just adjusted in order to create the split screen effect.
Pros
- Absolutely free to use
- Allows practically unlimited number of footages to be added to create the split screen videos
Cons
- No presets for automatic video positioning are available for split screen effect
You can get VSDC free video editor from here: http://www.videosoftdev.com/
4. Shotcut
A free and opensource editing tool, Shotcut can also be used as a split screen video maker to produce industry-standard movies and documentaries. Shotcut is available for FreeBSD, Windows, Linux, and macOS, and comes in both x64 and x86 variants. Being a free program, Shotcut doesn’t require any activation or registration.
The procedure that follows explains how to use Shortcut as a free split screen video editor:
Step 1: Add Clips to the Timeline
Import the footages to the Shotcut’s media bin, drag one of the clips from the bin to the Timeline at the bottom, and then press Ctrl + I on your keyboard to add more video tracks. You can press this shortcut key for another couple of times depending on the number films you want to use for the split screen effect. Next, drag each film from the bin to their corresponding tracks. Note: Make sure NOT to place all the clips on the same track, and that each of them is on a different, its own, video layer.
Step 2: Adjust the First Video
Select the last video you added to the Timeline (it should be the topmost track), click Filters from above the Timeline, click the + button from the upper-left corner, click Size and Position from the list that appears next, and select the clip’s position from the Preset drop-down list.
Step 3: Adjust Other Videos
Select the second video in the Timeline and repeat the process to set its position, and do the same for all other footages that you added in order to create the split screen effect.
Pros
- Available for FreeBSD, Windows, Linux, and macOS platforms
- If using presets, as many as 4 videos can be added for split screen effect
Cons
- Working with split screen manually may require practice and some calculations to position the clips on the screen correctly
You can get Shotcut from here: https://shotcut.org/
5. Lightworks
Used by the professionals to edit and prepare movies like Pulp Fiction, The Cure, L.A. Confidential, Bruce Almighty, The Wolf of Wall Street, etc., Lightworks is, in true means, a complete and full-fledged post-production application to create industry-standard outputs. The main reason for the app’s wide userbase is that it is a cross-platform software that is available for Linux, Mac, and Windows computers.
To use Lightworks as split screen video maker, you can follow the instructions given below:
Step 1: Add Tracks in Timeline
After importing the clips to Lightworks, leave them in the Media Bin for now, right-click anywhere in the Timeline at the bottom, go to Tracks, click Add multiple, and from the Number to add drop-down list, choose the number of tracks you want to add to the Timeline. Click Add to confirm the changes.
Step 2: Disable Auto Sync
Right-click anywhere in the Timeline, and click to deselect Auto track sync.
Step 3: Add Clips to Timeline
Drag the clips from the Media Bin to the Timeline. Make sure to place each footage on a different track, and that all the tracks are on top of each other. Optionally, right-click the audio that was added along with the clips, and click Remove from the context menu. Use this method to remove all the audios or leave the one you want to have. Note: Removing the audio tracks ensures that they do not overlap during the playback.
Step 4: Enable Split Screen
Click VFX from above the preview window, click the + (Add new effects) icon from the top of the left pane, select the DVE category from the upper-right corner of the left pane, scroll down the left pane to the Split-screen Presets section, and double-click your preferred split screen preset to add the effect to the participating clips.
Pros
- Even the free variant has split screen feature
- A complete post-production tool that doesn’t require any other program for finalizing the things
Cons
- Not many split screen presets are available
Download Lightworks free version from here: https://www.lwks.com/
6. Adobe Premiere Pro
One of the most appreciated and widely used post-production applications for Windows and Mac computers, Adobe Premiere Pro has been professionals’ first choice when it comes to video editing, irrespective of the fact that it has a steep learning curve, and is also a resource intensive software to work with.
The steps below explain how to use Adobe Premiere Pro as a split screen video maker:
Step 1: Add Videos to Timeline
After importing the clips to the Project window, drag each of them to the Timeline, and place them in their separate tracks one above the other.
Step 2: Position and Crop
Select the topmost video track in the Timeline, go to Effect Controls panel from the top of the upper-left pane, and use the Position slider to position the video to your preferred area of the screen. Repeat this process for all the clips in the Timeline you want to add to split screen.
Step 3: Crop the Clips
Search for the Crop effect in the Effects pane present at the lower-left corner, drag and drop the effect on each of the clips in the timeline, and use the Crop slider in the Effect Controls pane to crop the videos as needed. Optionally use the keyframes to add sliding animations to give more professional look to the split screen effect.
Pros
- Most robust and efficient video editing tool
- Allows practically unlimited number of videos to be used for split screen
Cons
- Requires subscription that needs to be renewed regularly
For more details about making split screen with Pr, check How to create a split screen in Premiere Pro
7. Final Cut Pro X
Available only for Mac computers at the time of this writing, Final Cut Pro X or FCPX gives tough competition to Adobe Premiere Pro. Since Apple devices are famous for their speedy processing, professionals any day prefer FCPX over Adobe Premiere Pro if they own a Mac PC running macOS.
You can use FCPX as split screen video maker by following the steps given below:
Step 1: Place Footages in the Timeline
As mentioned earlier, add the clips on top of each other on separate tracks in the Timeline of FCPX.
Step 2: Position and Crop
Select the first clip in the Timeline, from the Transform section of the Video Inspector pane in the right, use the Position slider to move the clip to your preferred side of the screen, and use the sliders from the Crop section to crop the footage to adjust the portion of interest. Repeat the process for the other video tracks as well to get your desired split screen effect in Final Cut Pro X.
Pros
- Offers quick and easy way to add split screen effect
- Allows practically unlimited number of videos to be used for split screen
Cons
- Doesn’t have any particular preset for split screen effect
You may also like: How to create a PIP video with Final Cut Pro X
Best Free Online Split Screen Video Editors
Apart from the desktop programs discussed above, there are a couple of web tools that can be used as split screen video maker online free. Two of the most used ones are introduced below:
1. Kapwing Collage Maker
Although Kapwing offers several other online tools like video resizer, meme generator, slideshow maker, etc., the solution that can be considered split screen video editor is Kapwing Collage Maker. This web app allows you to select a template to get started, and the rest of the process is simple.
The following steps explain how to create a split screen video with Kapwing:
Step 1: Add Clips to Preset
Go to the https://www.kapwing.com/collage link, click to select your preferred split screen preset, click REPLACE on one of the segments of the split screen on the next page, and select and upload the first video. Next, click REPLACE on the other segment(s), and select and upload the other videos as well.
Step 2: Reposition and Publish
Click and drag each of the added clips to reposition them on the screen, use the other tools to crop and adjust the videos as needed, and click Publish from the top-right corner. Note: Optionally you can click Timeline from the top of the preview window, adjust the timings and other settings as needed on the next page, and click Done. After this, you can go ahead and hit Publish to create the split screen effect out of the uploaded videos.
Pros
- Free to use
- Allows as many as 4 videos to create split screen effect
Cons
- Requires you to register and sign in to remove the watermark from the output file
2. WeVideo
Yet another split screen video maker online free solution, WeVideo offers almost desktop program-like experience while creating split screen effects. Even though all the subscription plans that the vendor offers are chargeable, the Education plan can be tried for 30 days for free, post which the teachers are required to pay to continue using the web tool.
The following steps explain how to get split screen effect with WeVideo:
Step 1: Import Videos
Visit https://www.wevideo.com and on the main window, click Video from under the Create a new section at the top, select a layout on the Let’s get started box, and click START EDITING from the bottom right corner. Next, click ADD in the My media window in the upper-left section, click BROWSE TO SELECT on the Import media box, and add the videos you want to use in the split screen effect.
Step 2: Add Clips to Timeline
As explained earlier, drag the videos from the My media pane and drop them in the Timeline. Make sure to place every video in its separate layer, and that all the layers are on top of each other.
Step 3: Create Split Screen Effect
Select any clip in the Timeline, and click the Open clip editor icon from the upper-left area of the track. On the next page, use the Scale slider to reduce the size of the selected clip, and from the preview window in the right, drag to reposition the video to your preferred location on the screen. Click SAVE CHANGES from the bottom of the left pane to confirm the settings. Repeat the process for the second clip in the Timeline to resize and reposition it on the screen. Click FINISH from the upper-right corner, on the next box, enter a name for the video in the available field, click SET, choose your preferred settings on the next page, and click EXPORT from the bottom-right corner to produce the split screen video.
Pros
- Free to use
- Allows multiple videos to be used for split screen
Cons
- Paid subscription is needed to remove watermark from the outputs
FAQs About Split Screen Video Editors
Why you should use split screen effect in video?
There are a couple of reasons you may want to use split screen effect in your video. Some of the most common uses include:
- Showing multiple actions by the same or different characters at the same time, without changing the screen
- Comparing multiple objects or picture quality. This can be done only when the entities in question are placed side-by-side
- Making your video look more professional
- Showing different effects on the same screen
Can I create a split screen video with Windows Movie Maker or Windows 10 Photos app?
No, you cannot. Although these tools enable you to resize the videos, since they don’t allow multi-tracked Timelines, no video clips can be placed one above the other which is an essential part for any split screen video maker to create the effect. However, as discussed above, there are several post-production tools, offline and online, that allow you to make split screen videos easily and without any cost.
Conclusion
Split screen video editor tools are both paid and free. Regardless of the program you use to create the effect, the output files always look more professional and informative. Furthermore, things become way simpler if the split screen video maker has simple UI, is less resource intensive, and is easy to use as it is the case with Wondershare Filmora.
Ollie Mattison
Ollie Mattison is a writer and a lover of all things video.
Follow @Ollie Mattison
Download Windows Movie Maker for PC: A Detailed Tutorial
Microsoft produced the movie editing software known as Windows Movie Maker. You can download Movie Maker Windows 10 or even in previous versions. This application can combine video, sound, still photos, and transcripts to make a customized movie. Its functions are simple to use and enjoyable to explore with, and its XML code enables users to create new transitions and effects or change current ones. It’s also simple to upload finished Windows Movie Maker productions to video and social media platforms.
This guide explains everything you need to know about downloading windows movie maker. You can choose to use windows movie maker installation guide as well. With this Windows Movie Maker, you can choose from five different thumb sizes, which is probably plenty, and you can enlarge these clip representations using the zoom button at the bottom. Using the cursor insertion point and edit buttons, you can cut or divide clips. Once you’re used to the app’s distinct editing method, it becomes pretty simple.
Part 1. System Requirements for Windows Movie Maker
Beginners should use Windows Video Maker. Along with fundamental capabilities and workflow components seen in professional video editing systems, it is available for free on Windows PCs. Even inexperienced editors may understand it because to its simple chronology in the form of an understandable interface. Windows Movie Maker allows you to create your own movies. Create professional movies from your still and moving images. To aid in telling your tale, use transitions, sound, subtitles, and special effects.
| Requirements | Compatibility of Windows Movie Maker |
|---|---|
| Support System | Windows Vista, Windows 7, Windows 8, Windows 8.1, and Windows 10 are all versions of Microsoft Windows. |
| Processor | 1GHz Intel/AMD processor or above such as an Intel Pentium III, Advanced Micro Devices (AMD) Athlon, or equivalent processor |
| For Audio | An audio capture device to capture audio from external sources |
| Hardware Memory | 300MB space for installation |
| Graphics Card | Super VGA (800x600) resolution graphics card with at least a 16-bit graphics card |
| Other Requirements | 256MB RAM (512MB or above recommended) |
Part 2. Download and install Windows Movie Maker Windows 10
Anyone who wants to easily modify movies should use Movie Maker. The program offers every fundamental feature you need to create edited videos. Effects, transitions, titles and credits, audio track, timeline narration, and Auto Movie are just a few of the features available in Windows Movie Maker. XML code may be used to create new effects and transitions as well as modify already existing ones. An easy-to-use tool for altering audio tracks is Windows Movie Maker. To audio tracks, Windows Movie Maker can add simple effects like fade-in and fade-out.
Steps to Download and Install Windows Movie Maker on Win 10
Step1 Download the File
You may download Windows Movie Maker to produce videos from photographs. Transitions, a soundtrack, title and credit text, among other things, are simple to add to your video. Complete the necessary file downloads by clicking on the download button(s) below. Depending on your download speed, this might take anything from a few minutes to many hours.
Step2 Run the Downloaded program File
The installation launch screen is given in the following image. To install the program, run “setup.exe” by double-clicking the downloaded setup file that you previously downloaded.

Step3 Set Personalized Installation
Follow the instructions to install Windows Movie Maker. .Net framework is a required for Windows Movie Maker. Launch the Windows Movie Maker Installer program to install Windows Movie Maker on Windows 10.

Step4 Hit Install Button
Press the “Install” button after selecting Messenger, Photo Gallery, and Movie Maker as the apps to be installed. You can now access Windows Movie Maker.

Naturally, Microsoft also offered new video editing tools for Windows users once they ceased upgrading Windows Movie Maker. The complete version of Windows Movie Maker 2022 is now installed on your Windows 10 OS computer without any restrictions.
Part 3. Download and Install Windows Movie Maker Windows 7/8
Windows Movie Maker is a user-friendly and effective movie creation and editing software program created for the most recent versions of Windows 11 and Windows 7/8/10. Windows XP and Vista are compatible with the previous version. Only the Essentials package, a free collection of lifestyle and utility software for Windows 7 and Windows 8, which also contains Windows Photo Gallery, allows you to install Movie Maker. The single installer for all the Essentials applications gives you the choice to install all of them at once or just some of them.
Steps to Download and Install Windows Movie Maker on Win 7/8
Step1 Download the Installer
Start downloading Windows Live Essentials Movie Maker 12 by clicking on one of the links below. Windows Live Essentials Movie Maker has a standalone, complete offline installation available here. Windows XP, Vista, 7, 8, 8.1, and 64-bit versions of Windows are all supported by this offline installation solution for Windows Movie Maker.
Download Installer
Step2 Open and Customize the File
Access the “Patch” folder. Apply the fix by running “windows.movie.maker-patch.exe”. Although Windows Essentials installation is requested by the Windows Movie Maker installer, it is not required. You may click “Choose the programs you wish to install” instead to bypass it. You may now view your selections. We just need the picture gallery and the movie creator, so uncheck the boxes next to Writer, Messenger, and Mail. Click the “Choose the apps you wish to install” button after that.
Step3 Hit Install Button
Following this, the installation of Windows Movie Maker will begin when you click the install button. The installation is finished in a short while. After a successful installation, Windows Movie Maker can be added to your taskbar and a desktop shortcut can be made.

Step4 Launch the Editor
Free video editing software with a simple UI is called Windows Movie Maker. Click the provided download button to start the Windows movie maker download. The Windows Movie Maker utility download is completely secure and virus-free.

Part 4. Best Windows Movie Maker Alternative to Use
While there are now several excellent video editors available on the market, we will here suggest Filmora by Wondershare as the best replacement for Windows Movie Maker. Filmora is an extremely user-friendly video editor in terms of UI. It offers a simple user interface that even beginners may quickly grasp. By holding the mouse over any clip in the Media view, you can navigate through it thanks to a handy UX touch.
You may download Filmora for free on your computer running Windows 10 or Windows 11 and it is a very user-friendly movie editor. For novices who want to create explainer videos, training videos, demo videos, and more rapidly, Filmora is a simple yet advanced feature-packed tool. The great video templates make screen recording more alluring. You can make use of annotation tools like callouts, arrows, and drawing gestures to attract attention to essential information. Its structure is quite straightforward and easy to understand since it utilizes the timeline as the editing UI.
How to Edit Videos with Filmora:
Free Download For Win 7 or later(64-bit)
Free Download For macOS 10.14 or later
Step1 Install Filmora on your Windows PC
You must to download and install Wondershare Filmora on your computer before using it. This TV recorder on the fly may be used for your requirements. You can find every version of the Filmora software, including Windows and Mac versions, as well as the most current version.
You can now install it on your computer once you’ve done downloading it before you can use it with your laptop. It will bring you to the user-friendly UI of Filmora, where you may use the documentation function right away, as illustrated in the following figure:

Step2 Import the Content
A significant component of managing your raw footages is the Media library. All of the imported material, including the images, audio files, and movies, are now kept in Import Window. The media files are also included in the Music, Pictures, and Videos sections. This top free video editing program has new built-in sound tracks to simplify your job. As the video backdrop music, you can either choose the built-in music or local audio files.

Step3 Create the Movies
Finally, you may edit your audio recordings using tools that are completely customizable. Use the editor in Filmora to edit your recorded audio files, using simple to advanced editing techniques. Your recorded video can be improved using Filmora’s Editor by adding animated titles, spectacular effects, audio enhancements, and more.

Step4 Add Special Effects to Your Video
Wondershare Filmora was created primarily to give your films a polished appearance. You may utilize a variety of its eye-catching and adjustable effects to make your video productions stand out from the competition. In this area, we’ve covered some of the best effects for bringing life to your dull, unprofessional films.

Step5 Save or Share the Videos
Finally, you can use the complete Filmora editor as previously mentioned when you’ve done editing the recorded video. When you want to submit your creative work right away to YouTube or another well-known website, click the Export option and choose the platform where you want to share your video clip. If you like, you may even make changes to the video before uploading it.
The Bottom Line
Looking to create captivating movies from video clips? The best tool for the purpose can be Windows Movie Maker. While Windows Movie Maker allows for basic track editing, such as the addition of fade-in and fade-out effects for audio tracks, yet, using Filmora program gives you a variety of tools to create professional-looking films, including timeline narration, transition overlays, animations, and audio choices. This way, you might use the suggested movie maker to make movies with a professional tool and sharing it with others.
Part 2. Download and install Windows Movie Maker Windows 10
Anyone who wants to easily modify movies should use Movie Maker. The program offers every fundamental feature you need to create edited videos. Effects, transitions, titles and credits, audio track, timeline narration, and Auto Movie are just a few of the features available in Windows Movie Maker. XML code may be used to create new effects and transitions as well as modify already existing ones. An easy-to-use tool for altering audio tracks is Windows Movie Maker. To audio tracks, Windows Movie Maker can add simple effects like fade-in and fade-out.
Steps to Download and Install Windows Movie Maker on Win 10
Step1 Download the File
You may download Windows Movie Maker to produce videos from photographs. Transitions, a soundtrack, title and credit text, among other things, are simple to add to your video. Complete the necessary file downloads by clicking on the download button(s) below. Depending on your download speed, this might take anything from a few minutes to many hours.
Step2 Run the Downloaded program File
The installation launch screen is given in the following image. To install the program, run “setup.exe” by double-clicking the downloaded setup file that you previously downloaded.
Step3 Set Personalized Installation
Follow the instructions to install Windows Movie Maker. .Net framework is a required for Windows Movie Maker. Launch the Windows Movie Maker Installer program to install Windows Movie Maker on Windows 10.
Step4 Hit Install Button
Press the “Install” button after selecting Messenger, Photo Gallery, and Movie Maker as the apps to be installed. You can now access Windows Movie Maker.
Naturally, Microsoft also offered new video editing tools for Windows users once they ceased upgrading Windows Movie Maker. The complete version of Windows Movie Maker 2022 is now installed on your Windows 10 OS computer without any restrictions.
Part 3. Download and Install Windows Movie Maker Windows 7/8
Windows Movie Maker is a user-friendly and effective movie creation and editing software program created for the most recent versions of Windows 11 and Windows 7/8/10. Windows XP and Vista are compatible with the previous version. Only the Essentials package, a free collection of lifestyle and utility software for Windows 7 and Windows 8, which also contains Windows Photo Gallery, allows you to install Movie Maker. The single installer for all the Essentials applications gives you the choice to install all of them at once or just some of them.
Steps to Download and Install Windows Movie Maker on Win 7/8
Step1 Download the Installer
Start downloading Windows Live Essentials Movie Maker 12 by clicking on one of the links below. Windows Live Essentials Movie Maker has a standalone, complete offline installation available here. Windows XP, Vista, 7, 8, 8.1, and 64-bit versions of Windows are all supported by this offline installation solution for Windows Movie Maker.
Download Installer
Step2 Open and Customize the File
Access the “Patch” folder. Apply the fix by running “windows.movie.maker-patch.exe”. Although Windows Essentials installation is requested by the Windows Movie Maker installer, it is not required. You may click “Choose the programs you wish to install” instead to bypass it. You may now view your selections. We just need the picture gallery and the movie creator, so uncheck the boxes next to Writer, Messenger, and Mail. Click the “Choose the apps you wish to install” button after that.
Step3 Hit Install Button
Following this, the installation of Windows Movie Maker will begin when you click the install button. The installation is finished in a short while. After a successful installation, Windows Movie Maker can be added to your taskbar and a desktop shortcut can be made.
Step4 Launch the Editor
Free video editing software with a simple UI is called Windows Movie Maker. Click the provided download button to start the Windows movie maker download. The Windows Movie Maker utility download is completely secure and virus-free.
Part 4. Best Windows Movie Maker Alternative to Use
While there are now several excellent video editors available on the market, we will here suggest Filmora by Wondershare as the best replacement for Windows Movie Maker. Filmora is an extremely user-friendly video editor in terms of UI. It offers a simple user interface that even beginners may quickly grasp. By holding the mouse over any clip in the Media view, you can navigate through it thanks to a handy UX touch.
You may download Filmora for free on your computer running Windows 10 or Windows 11 and it is a very user-friendly movie editor. For novices who want to create explainer videos, training videos, demo videos, and more rapidly, Filmora is a simple yet advanced feature-packed tool. The great video templates make screen recording more alluring. You can make use of annotation tools like callouts, arrows, and drawing gestures to attract attention to essential information. Its structure is quite straightforward and easy to understand since it utilizes the timeline as the editing UI.
How to Edit Videos with Filmora:
Free Download For Win 7 or later(64-bit)
Free Download For macOS 10.14 or later
Step1 Install Filmora on your Windows PC
You must to download and install Wondershare Filmora on your computer before using it. This TV recorder on the fly may be used for your requirements. You can find every version of the Filmora software, including Windows and Mac versions, as well as the most current version.
You can now install it on your computer once you’ve done downloading it before you can use it with your laptop. It will bring you to the user-friendly UI of Filmora, where you may use the documentation function right away, as illustrated in the following figure:
Step2 Import the Content
A significant component of managing your raw footages is the Media library. All of the imported material, including the images, audio files, and movies, are now kept in Import Window. The media files are also included in the Music, Pictures, and Videos sections. This top free video editing program has new built-in sound tracks to simplify your job. As the video backdrop music, you can either choose the built-in music or local audio files.
Step3 Create the Movies
Finally, you may edit your audio recordings using tools that are completely customizable. Use the editor in Filmora to edit your recorded audio files, using simple to advanced editing techniques. Your recorded video can be improved using Filmora’s Editor by adding animated titles, spectacular effects, audio enhancements, and more.
Step4 Add Special Effects to Your Video
Wondershare Filmora was created primarily to give your films a polished appearance. You may utilize a variety of its eye-catching and adjustable effects to make your video productions stand out from the competition. In this area, we’ve covered some of the best effects for bringing life to your dull, unprofessional films.
Step5 Save or Share the Videos
Finally, you can use the complete Filmora editor as previously mentioned when you’ve done editing the recorded video. When you want to submit your creative work right away to YouTube or another well-known website, click the Export option and choose the platform where you want to share your video clip. If you like, you may even make changes to the video before uploading it.
The Bottom Line
Looking to create captivating movies from video clips? The best tool for the purpose can be Windows Movie Maker. While Windows Movie Maker allows for basic track editing, such as the addition of fade-in and fade-out effects for audio tracks, yet, using Filmora program gives you a variety of tools to create professional-looking films, including timeline narration, transition overlays, animations, and audio choices. This way, you might use the suggested movie maker to make movies with a professional tool and sharing it with others.
Also read:
- Updated In 2024, Work Smarter, Not Harder 20 Adobe Premiere Shortcuts for Editors
- In 2024, Picture-in-Picture Made Easy A Beginners Guide to FCP Video Editing
- Updated In 2024, Start Here User-Friendly Video Editing Tools
- New In 2024, Video Stabilization Made Easy Top Apps
- New In 2024, The Power of Slow Motion Edit Your Videos for Free with Filmoras Pro Tools
- New 2024 Approved Create Unforgettable Intros 7 Leading Movie Intro Software
- New VSDC Video Editor Mac Alternatives Free and Paid Options for 2024
- Updated Elevate Your Facebook Presence Optimizing Video Cover Size and Quality for 2024
- New 2024 Approved Make Your WhatsApp Status Stand Out Essential Apps
- New In 2024, Elevate Your Videos Top-Rated Free 4K Video Editing Solutions
- Updated 2024 Approved Unlock Free Video Blurring Tools Your Go-To Resource
- New Top 10 Animated Text Tools You Need to Try This Year for 2024
- Updated Minitool Movie Maker Vs. Alternatives Which Video Editor Reigns Supreme?
- Updated 2024 Approved The Ultimate Guide to iPhone Apps Must-Haves and Hidden Gems
- Updated In 2024, Smooth Operator Free Android Apps for Video Stabilization
- Updated 2024 Approved Unleash Your Creativity Top Apple Video Editing Tools
- New In 2024, Uncover the Secrets to Choosing the Right YouTube to Audio Converter
- In 2024, Top-Rated Free Video Editing Tools for MP4 Files
- New In 2024, GoPro Quik for PC and Alternatives
- Updated 2024 Approved Adobe Premiere Pro for Mac The Video Editor for Professionals
- In 2024, OS X Mavericks Video Editing Tutorial From Basics to Advanced
- Make an Impact 10 Best Free Invitation Video Creators Online for 2024
- Updated Video Pace Control A Beginners Guide to Camtasia Speed Adjustment
- New Optimizing Mobile Video A Guide to Vertical Aspect Ratio for 2024
- Updated 2024 Approved Unmissable 4K Footage The Best of the Best
- Updated In 2024, The Best of the Best Top 10 Free and Paid Android Video Editing Apps
- Updated 2024 Approved 10 Essential Animation Programs for Interactive Learning
- Updated In This Article, Youll Learn the 10 Best Free and Paid Online Animation Makers. Some of Them You May Have Heard, but the Others May Not. Free to Check It Now for 2024
- Updated 2024 Approved Reverse Your Videos Online The Best Tools
- Updated 2024 Approved Mac Subtitle Editor Showdown Top Alternatives to Subtitle Edit
- 2024 Approved Movie Mastery for Kids Learn the Art of Filmmaking
- A Step-by-Step Guide on Using ADB and Fastboot to Remove FRP Lock on your Tecno Pova 5 Pro
- In 2024, How To Do Sony Xperia 10 V Screen Sharing | Dr.fone
- Read This Guide to Find a Reliable Alternative to Fake GPS On Poco C50 | Dr.fone
- In 2024, How to Change GPS Location on Lava Blaze Pro 5G Easily & Safely | Dr.fone
- In 2024, Full Guide on Mirroring Your Lava Blaze Pro 5G to Your PC/Mac | Dr.fone
- How to Change/Fake Your Realme GT 5 Location on Viber | Dr.fone
- 9 Best Free Android Monitoring Apps to Monitor Phone Remotely For your Infinix Hot 30i | Dr.fone
- In 2024, What Does Jailbreaking Apple iPhone 14 Pro i Do? Get Answers here
- Guide on How To Remove Apple ID From Apple iPhone 11 Pro
- Unlock Apple iPhone 12 Pro Max With Forgotten Passcode Different Methods You Can Try
- In 2024, How to Cast Sony Xperia 1 V Screen to PC Using WiFi | Dr.fone
- Is GSM Flasher ADB Legit? Full Review To Bypass Your OnePlus Ace 3FRP Lock
- 10 Fake GPS Location Apps on Android Of your Vivo Y77t | Dr.fone
- 2 Ways to Transfer Text Messages from Vivo S17t to iPhone 15/14/13/12/11/X/8/ | Dr.fone
- In 2024, 5 Easy Ways to Copy Contacts from Huawei Nova Y71 to iPhone 14 and 15 | Dr.fone
- In 2024, Top Apps and Online Tools To Track Nubia Red Magic 8S Pro Phone With/Without IMEI Number
- Title: 2024 Approved The FCP Factor 10 Successful Movies That Used Final Cut Pro
- Author: Isabella
- Created at : 2024-05-19 13:03:21
- Updated at : 2024-05-20 13:03:21
- Link: https://video-creation-software.techidaily.com/2024-approved-the-fcp-factor-10-successful-movies-that-used-final-cut-pro/
- License: This work is licensed under CC BY-NC-SA 4.0.
