
:max_bytes(150000):strip_icc():format(webp)/title-b16094ee6f3340328084b9e5cc01426f.jpg)
New 2024 Approved Cartoonify Your Content The Latest Techniques for Video Conversion (2023
Cartoonify Your Content: The Latest Techniques for Video Conversion (2023
How to Convert Digital Videos into Cartoons?

Liza Brown
Mar 27, 2024• Proven solutions
Besides enhancing the photos you take with your Smartphone or your DSLR camera, you can use photo editing software to produce images that don’t look realistic. Cartooning a photo is one out of many options nearly all desktop-based photo editors offer, although in most cases you will have to combine several effects in order to cartoon your pictures.
However, photo to cartoon software products require some previous photo editing experience since you will have to do much more than apply an effect to a photo in order to make a photo look like a cartoon. We’ve selected some of the best photo to cartoon software products that can help you create stunning cartoons from your photos.
If you need to cartoon your video, you can try Filmora video editor . The newly released Filmora professional video editing software can allow you to turn videos into cartoons with ease. The processing of converting videos into cartoon style is easy, just import the videos into Filmora, and then add the Cartoon effect under Stylize. Adjust the cartoon settings and do some basic color corrections to perfect the cartoon result.
![]()
A cross-platform for making videos anywhere for all creators

Why your video editing isn’t good enough? How about some creative inspo?
- 100 Million+ Users
- 150+ Countries and Regions
- 4 Million+ Social Media Followers
- 5 Million+ Stock Media for Use
* Secure Download

Top 10 Photo to Cartoon Software Products for Windows & Mac
Even though you can cartoon photos with each photo to cartoon software we included in this article, which effects you will have to use depends on the software and the style of the cartoon you’re trying to create. So, let’s take a look at what these photo to cartoon software products have to offer.
For Win 7 or later (64-bit)
 Secure Download
For macOS 10.14 or later
Secure Download
Click here to get Filmora for PC by email
or Try Filmora App for mobile >>>
download filmora app for ios ](https://app.adjust.com/b0k9hf2%5F4bsu85t ) download filmora app for android ](https://app.adjust.com/b0k9hf2%5F4bsu85t )
1. Adobe Photoshop
Price: $20.99 per month as a single app
Compatibility: macOS, Windows
Adobe Photoshop is one of the best photo editing software ever created, which is why it is hardly surprising that it can help you to cartoon a photo. Photoshop’s rich selection of effects includes a number of effects you can use to turn a photo into a cartoon.
However, you will also have to create several layers, change blend modes, and create masks. Effects such as Sketch, Ink Outlines, or Cutout can all be used during this process, and you can also combine several effects while turning a photo into a cartoon. Needless to say, inexperienced photo editors can find this task overwhelming, because it requires a lot of patience and excellent knowledge of the software’s features.
2. Paint.net
Price: Free
Compatibility: Windows
PC owners in need of a simple photo editing software that can help them turn a photo into a cartoon are going to love using Paint.net. This is a simple photo editor that has more to offer than Microsoft Paint, and it is as easy to use.
In order to cartoon a photo with Paint.net, you just have to import it into the editor and then head over to the Effects menu. After you locate the Artistic sub-menu, you should pick the Ink Sketch option and then adjust the Coloring and Ink Outline options. Optionally, you can also add Noise to the photo you’re cartooning if it fits the style you’re trying to achieve. However, picking the right picture can turn out to be vital for the success of the cartoon process in Paint.net.
3. iToon
Price: 14-day free trial, $29.95
Compatibility: Windows, iOS
iToon makes turning photos into cartoons look easy because everyone can cartoon their photos with this photo to cartoon software. Once you’ve installed iToon on your PC, you just have to launch it and import the photo you want to cartoon and then choose the effect you want to apply.
There are more than 50 cartoon effects to choose from and you just have to click on the one you like to apply it. Each effect can be edited so that it fits your image better, and if you don’t like how the effect matches your photo you can always hit the undo button and try another one. Click on the Apply icon to confirm the changes you’ve made and proceed to save the cartoon you created to your hard drive.
4. XnSketch
Price: Free
Compatibility: macOS, Windows, Linux
This is a simple software that doesn’t offer much more than visual effects you can use to cartoon a photo. In addition, you won’t need too much time to get used to XnSketch because its software is intuitive and easy to use. Moreover, the software supports a broad range of image files, which enables you to edit your photos regardless of the format in which they are saved.
So, once you open a photo you want to edit in XnSketch you should either click on Cartoon 1 or Cartoon 2 options and then proceed to adjust Hue, Saturation, Brightness, and Contrast. When done you can easily save your creations and share them on social networks, but you cannot upload photos to an account on social media directly from XnSketch.
5. FotoSketcher
Price: Free
Compatibility: Windows, macOS
Applying or combining two or more effects with FotoSkecther is a simple and fun process that takes just a few clicks. Unsurprisingly, there is more than just one way of turning a photo into a cartoon with FotoSketcher.
Cartoon 1 and Cartoon 2 effects can be accessed by clicking on the Drawing parameter menu and then choosing the Stylized Effects sub-menu. You can then pick one of the available Cartoon effects and customize the color blending, edge intensity, and other settings. FotoSkecther allows you to see the original photo throughout the cartoon process and enables you to undo all mistakes you make. Keep in mind that you can only save images in JPEG, PNG, or BMP file formats.
6. Gimp
Price: Free
Compatibility: macOS, Windows, Linux
Gimp is an iconic open-source photo editor that offers a broad spectrum of photo editing options. Its extensive collection of photo effects also contains the Cartoon effect, so all you need to do to cartoon a photo in Gimp is go to the Filters effect, expand the Artistic sub-menu and pick the Cartoon option.
You can then adjust the Mask Radius and Percent Black settings and customize it in accordance with your needs. Gimp also grants you access to other effects such as Photocopy, Cubism, or Clothify that can be used to cartoon a photo. This photo editor supports almost all common photo formats and it lets you save cartoon images in a variety of file formats so that you can choose the one that best fits your needs.
7. Sketch Me!
Price: Free
Compatibility: Windows
PC owners that have Windows 10 installed on their computers can turn their photos into cartoons for free with Microsoft’s Sketch Me software. This photo to cartoon software is equipped with all tools you are going to need to create visually impressive cartoons from your photos.
There are just two effects labeled Cartoon in Sketch Me, although the software features other effects like Comic, Dull Pastel, or Neon that can also help you create a cartoon from a photo. You can adjust the intensity of both Cartoon effects or play around with Contrast and Brightness settings in order to achieve the best visual results. Keep in mind that you can only edit or save JPEG photos with Sketch Me.
8. Image Cartoonizer
Price: $19.95
Compatibility: Windows
As its name indicates, this software product was designed to help PC users to cartoon their images with ease. There are more than a hundred effects to choose from which leaves you quite a bit of space to experiment with different combinations of effects.
What’s more, Image Cartoonizer lets you customize each effect, so that all pictures you edit with this photo to cartoon software can look unique. The results of the changes you make are visible instantaneously which means that you don’t have to wait to see how your photo is going to look after you convert it into a cartoon. What’s more Image Cartoonizer features the Red Eye removal tool that can assist you in correcting this common mistake.
9. Pixelmator Pro
Price: $39.99
Compatibility: macOS
There is no quick or simple way to cartoon a photo with Pixelmator Pro since this image editor doesn’t offer any cartoon effects that can be easily applied to a photo. So, in order to cartoon a photo with Pixelmator Pro you’ll have to place the photo you’re turning into a cartoon onto a blank layer and then outline the figure in the photo.
This process can be very slow, especially if the person you are outlining has long hair or wears a sweater that has a wrinkled sleeve. Once you are done with this step you can proceed to paint the figure using the Color Fill tool. It is important to be patient and go through this stage of the process slowly in order to avoid making mistakes.
10. Adobe 2D Animation Software
Price: Free trial, $20.99 as a single app
Compatibility: macOS, Windows
Even though Adobe 2D Animation Software has an intuitive interface that doesn’t take much time to get used to, creating cartoons from photos with Adobe’s highly praise animation app can be an overwhelming task if you don’t have previous experience.
What’s more, you’ll have to convert your photos into vector drawings before you can import them into Adobe 2D Animation Software and use them to make a cartoon. Once you arrange all the images in the exact same order in which you want them to appear in the final video, you can proceed to use the lip-sync features, synchronize the sounds with the movements of your characters or utilize the Bone tool to make the movements more fluid. All animations you create can be exported and used in HTML5, Canvas, or WebGL while you can also export them as GIFs or MOV files.
Frequently Asked Questions About Photo to Cartoon Software
1. How to Cartoonize a Photo?
There is more than just one way to cartoon a photo, but most photo editing software products feature effects you can apply to a photo to make it look like a cartoon. The exact steps you need to take to cartoon a photo depending on the software you are using.
2. Are there any apps that turn photos into caricatures?
Yes, there are hundreds of apps that enable you to make caricatures from your photos. You can either use them from your Smartphone or install them on your Mac or PC.
3. What is the photo to cartoon software?
A photo to cartoon software can be any image editor that offers the tools users need to make a photo look like a cartoon. Some photo editing software products offer effects that cartoon a picture instantly while others offer only drawing and painting tools and you must complete this process manually.
For Win 7 or later (64-bit)
Secure Download
For macOS 10.14 or later
Secure Download
Click here to get Filmora for PC by email
or Try Filmora App for mobile >>>
download filmora app for ios ](https://app.adjust.com/b0k9hf2%5F4bsu85t ) download filmora app for android ](https://app.adjust.com/b0k9hf2%5F4bsu85t )
Conclusion
Turning a photo into a cartoon on a Mac or PC doesn’t have to be a slow process, because most of the photo to cartoon software products offer a variety of effects that enable you to cartoon a photo with a single click.
However professional photo editing and animation software can be a bit more difficult to use, and you may need some practice before you can start using it to cartoon your photos. Which of the best photo to cartoon software products are you going to choose? Leave a comment and let us know.
Liza Brown
Liza Brown is a writer and a lover of all things video.
Follow @Liza Brown
Liza Brown
Mar 27, 2024• Proven solutions
Besides enhancing the photos you take with your Smartphone or your DSLR camera, you can use photo editing software to produce images that don’t look realistic. Cartooning a photo is one out of many options nearly all desktop-based photo editors offer, although in most cases you will have to combine several effects in order to cartoon your pictures.
However, photo to cartoon software products require some previous photo editing experience since you will have to do much more than apply an effect to a photo in order to make a photo look like a cartoon. We’ve selected some of the best photo to cartoon software products that can help you create stunning cartoons from your photos.
If you need to cartoon your video, you can try Filmora video editor . The newly released Filmora professional video editing software can allow you to turn videos into cartoons with ease. The processing of converting videos into cartoon style is easy, just import the videos into Filmora, and then add the Cartoon effect under Stylize. Adjust the cartoon settings and do some basic color corrections to perfect the cartoon result.
![]()
A cross-platform for making videos anywhere for all creators
Why your video editing isn’t good enough? How about some creative inspo?
- 100 Million+ Users
- 150+ Countries and Regions
- 4 Million+ Social Media Followers
- 5 Million+ Stock Media for Use
* Secure Download
Top 10 Photo to Cartoon Software Products for Windows & Mac
Even though you can cartoon photos with each photo to cartoon software we included in this article, which effects you will have to use depends on the software and the style of the cartoon you’re trying to create. So, let’s take a look at what these photo to cartoon software products have to offer.
For Win 7 or later (64-bit)
Secure Download
For macOS 10.14 or later
Secure Download
Click here to get Filmora for PC by email
or Try Filmora App for mobile >>>
download filmora app for ios ](https://app.adjust.com/b0k9hf2%5F4bsu85t ) download filmora app for android ](https://app.adjust.com/b0k9hf2%5F4bsu85t )
1. Adobe Photoshop
Price: $20.99 per month as a single app
Compatibility: macOS, Windows
Adobe Photoshop is one of the best photo editing software ever created, which is why it is hardly surprising that it can help you to cartoon a photo. Photoshop’s rich selection of effects includes a number of effects you can use to turn a photo into a cartoon.
However, you will also have to create several layers, change blend modes, and create masks. Effects such as Sketch, Ink Outlines, or Cutout can all be used during this process, and you can also combine several effects while turning a photo into a cartoon. Needless to say, inexperienced photo editors can find this task overwhelming, because it requires a lot of patience and excellent knowledge of the software’s features.
2. Paint.net
Price: Free
Compatibility: Windows
PC owners in need of a simple photo editing software that can help them turn a photo into a cartoon are going to love using Paint.net. This is a simple photo editor that has more to offer than Microsoft Paint, and it is as easy to use.
In order to cartoon a photo with Paint.net, you just have to import it into the editor and then head over to the Effects menu. After you locate the Artistic sub-menu, you should pick the Ink Sketch option and then adjust the Coloring and Ink Outline options. Optionally, you can also add Noise to the photo you’re cartooning if it fits the style you’re trying to achieve. However, picking the right picture can turn out to be vital for the success of the cartoon process in Paint.net.
3. iToon
Price: 14-day free trial, $29.95
Compatibility: Windows, iOS
iToon makes turning photos into cartoons look easy because everyone can cartoon their photos with this photo to cartoon software. Once you’ve installed iToon on your PC, you just have to launch it and import the photo you want to cartoon and then choose the effect you want to apply.
There are more than 50 cartoon effects to choose from and you just have to click on the one you like to apply it. Each effect can be edited so that it fits your image better, and if you don’t like how the effect matches your photo you can always hit the undo button and try another one. Click on the Apply icon to confirm the changes you’ve made and proceed to save the cartoon you created to your hard drive.
4. XnSketch
Price: Free
Compatibility: macOS, Windows, Linux
This is a simple software that doesn’t offer much more than visual effects you can use to cartoon a photo. In addition, you won’t need too much time to get used to XnSketch because its software is intuitive and easy to use. Moreover, the software supports a broad range of image files, which enables you to edit your photos regardless of the format in which they are saved.
So, once you open a photo you want to edit in XnSketch you should either click on Cartoon 1 or Cartoon 2 options and then proceed to adjust Hue, Saturation, Brightness, and Contrast. When done you can easily save your creations and share them on social networks, but you cannot upload photos to an account on social media directly from XnSketch.
5. FotoSketcher
Price: Free
Compatibility: Windows, macOS
Applying or combining two or more effects with FotoSkecther is a simple and fun process that takes just a few clicks. Unsurprisingly, there is more than just one way of turning a photo into a cartoon with FotoSketcher.
Cartoon 1 and Cartoon 2 effects can be accessed by clicking on the Drawing parameter menu and then choosing the Stylized Effects sub-menu. You can then pick one of the available Cartoon effects and customize the color blending, edge intensity, and other settings. FotoSkecther allows you to see the original photo throughout the cartoon process and enables you to undo all mistakes you make. Keep in mind that you can only save images in JPEG, PNG, or BMP file formats.
6. Gimp
Price: Free
Compatibility: macOS, Windows, Linux
Gimp is an iconic open-source photo editor that offers a broad spectrum of photo editing options. Its extensive collection of photo effects also contains the Cartoon effect, so all you need to do to cartoon a photo in Gimp is go to the Filters effect, expand the Artistic sub-menu and pick the Cartoon option.
You can then adjust the Mask Radius and Percent Black settings and customize it in accordance with your needs. Gimp also grants you access to other effects such as Photocopy, Cubism, or Clothify that can be used to cartoon a photo. This photo editor supports almost all common photo formats and it lets you save cartoon images in a variety of file formats so that you can choose the one that best fits your needs.
7. Sketch Me!
Price: Free
Compatibility: Windows
PC owners that have Windows 10 installed on their computers can turn their photos into cartoons for free with Microsoft’s Sketch Me software. This photo to cartoon software is equipped with all tools you are going to need to create visually impressive cartoons from your photos.
There are just two effects labeled Cartoon in Sketch Me, although the software features other effects like Comic, Dull Pastel, or Neon that can also help you create a cartoon from a photo. You can adjust the intensity of both Cartoon effects or play around with Contrast and Brightness settings in order to achieve the best visual results. Keep in mind that you can only edit or save JPEG photos with Sketch Me.
8. Image Cartoonizer
Price: $19.95
Compatibility: Windows
As its name indicates, this software product was designed to help PC users to cartoon their images with ease. There are more than a hundred effects to choose from which leaves you quite a bit of space to experiment with different combinations of effects.
What’s more, Image Cartoonizer lets you customize each effect, so that all pictures you edit with this photo to cartoon software can look unique. The results of the changes you make are visible instantaneously which means that you don’t have to wait to see how your photo is going to look after you convert it into a cartoon. What’s more Image Cartoonizer features the Red Eye removal tool that can assist you in correcting this common mistake.
9. Pixelmator Pro
Price: $39.99
Compatibility: macOS
There is no quick or simple way to cartoon a photo with Pixelmator Pro since this image editor doesn’t offer any cartoon effects that can be easily applied to a photo. So, in order to cartoon a photo with Pixelmator Pro you’ll have to place the photo you’re turning into a cartoon onto a blank layer and then outline the figure in the photo.
This process can be very slow, especially if the person you are outlining has long hair or wears a sweater that has a wrinkled sleeve. Once you are done with this step you can proceed to paint the figure using the Color Fill tool. It is important to be patient and go through this stage of the process slowly in order to avoid making mistakes.
10. Adobe 2D Animation Software
Price: Free trial, $20.99 as a single app
Compatibility: macOS, Windows
Even though Adobe 2D Animation Software has an intuitive interface that doesn’t take much time to get used to, creating cartoons from photos with Adobe’s highly praise animation app can be an overwhelming task if you don’t have previous experience.
What’s more, you’ll have to convert your photos into vector drawings before you can import them into Adobe 2D Animation Software and use them to make a cartoon. Once you arrange all the images in the exact same order in which you want them to appear in the final video, you can proceed to use the lip-sync features, synchronize the sounds with the movements of your characters or utilize the Bone tool to make the movements more fluid. All animations you create can be exported and used in HTML5, Canvas, or WebGL while you can also export them as GIFs or MOV files.
Frequently Asked Questions About Photo to Cartoon Software
1. How to Cartoonize a Photo?
There is more than just one way to cartoon a photo, but most photo editing software products feature effects you can apply to a photo to make it look like a cartoon. The exact steps you need to take to cartoon a photo depending on the software you are using.
2. Are there any apps that turn photos into caricatures?
Yes, there are hundreds of apps that enable you to make caricatures from your photos. You can either use them from your Smartphone or install them on your Mac or PC.
3. What is the photo to cartoon software?
A photo to cartoon software can be any image editor that offers the tools users need to make a photo look like a cartoon. Some photo editing software products offer effects that cartoon a picture instantly while others offer only drawing and painting tools and you must complete this process manually.
For Win 7 or later (64-bit)
Secure Download
For macOS 10.14 or later
Secure Download
Click here to get Filmora for PC by email
or Try Filmora App for mobile >>>
download filmora app for ios ](https://app.adjust.com/b0k9hf2%5F4bsu85t ) download filmora app for android ](https://app.adjust.com/b0k9hf2%5F4bsu85t )
Conclusion
Turning a photo into a cartoon on a Mac or PC doesn’t have to be a slow process, because most of the photo to cartoon software products offer a variety of effects that enable you to cartoon a photo with a single click.
However professional photo editing and animation software can be a bit more difficult to use, and you may need some practice before you can start using it to cartoon your photos. Which of the best photo to cartoon software products are you going to choose? Leave a comment and let us know.
Liza Brown
Liza Brown is a writer and a lover of all things video.
Follow @Liza Brown
Aspect Ratio Made Simple: Top 5 Online Calculators
Best 5 Aspect Ratio Calculators Online
An easy yet powerful editor
Numerous effects to choose from
Detailed tutorials provided by the official channel
Have you noticed how certain old movies play with black padding on either side of the screen while watching the television?

With this guide of the best five aspect ratio calculators online we’ve put together for you, you cannot go wrong!
In this article
01 [Typical Aspect Ratios and Sizes of Screens and Videos](#Part 1)
02 [How Do I Know the Aspect Ratio of My Video?](#Part 2)
03 [How Can I Change the Aspect Ratio of an Image Online?](#Part 3)
04 [How to Change the Aspect Ratio in Filmora/Filmora Pro?](#Part 4)
Part 1 Part 1: Typical Aspect Ratios and Sizes of Screens and Videos
An aspect ratio is a measurement representing the ratio between the width and height of a screen or a video. It determines the length of your video or screen. Not only screens and videos, but you can use the concept also in images.
And, it is written as ‘x:y’ where ‘x’ is the width and ‘y’ is the height.
There isn’t any one-size-fits-all when we need to use the video aspect ratios. Aspect ratios are generally selected based on where the video will post, how it will be visible, and what aim it usually serves.
Videos utilized for social media will vary from trailers shows or movies shown in theaters. There are common aspect ratios for modern televisions, but broadcasters can consider using the aspect ratio that operates great with their audience and content.
Since most videos showcase through standard online video platforms, custom aspect ratios are not commonly used.
Here are a few standard aspect ratios that you can use for live streaming and other video creation:

16:9
A 16:9 aspect ratio represents a wide rectangle. It is also called “1.71:1,” the most accessible form of the ratio, mathematically speaking.
This ratio is mainly used in video creation and streaming and is considered the international standard format for cinema and television.
Many also tend to use this highly famous aspect ratio on their sites.
It is also more cost-effective to use screens compatible with this ratio instead of their predecessors. The standardization of computer monitors and televisions saved producers both the money and time spent in the research field.
One of the ideal resolutions you can use with a 16:9 aspect ratio is 4Kor 3840 pixels by 2160 pixels.
1:1
The 1:1 video aspect ratio is one of the ideal squares used with square television sets.
It is much less in demand but usually visible on social media platforms like Facebook or Instagram.
Many cameras still have a square setting even though it’s not the most commonly used aspect ratio.
4:3
The 4:3 aspect ratio was the general screen size for computer monitors and televisions before 16:9 and 16:10. The reason for the switch was the HDTV birth. It’s because the 16:9 and 16:10 aspect ratios allow for better resolutions than 4:3 do.
This aspect ratio was still considered for Apple iPads until they released the 2018 iPad Pro.
3:2
The 3:2 aspect ratio was primarily seen in classic 35 mm still photography still used on tablets, laptops, and various game consoles in the handheld form.
Many micro- to medium-sized cameras still use the 3:2 aspect ratio settings, but broadcasters rarely use it today.
21:9
The 21:9 aspect ratios have a pretty specific purpose. It is often called cinematic widescreen or ultra-widescreen.
It is also helpful for films with an anamorphic format. Anamorphic format videos create an optical illusion that offers a 360-degree view.
You are likely to look for the videos with this aspect ratio in notable museums, theme parks, theaters, and the like.
9:16
A 9:16 aspect ratio is for tall videos. This aspect ratio became famous after the launch of smartphones with video capabilities.
For instance, the optimal measure for an Instagram story is 1080 px by 1920 px, and thus its ratio comes out as 9:16. The same goes for other famous apps with “story” features, including Snapchat and Facebook.
This makes sense because the iPhone camera’s video setting can record footage in both 16:9 and 9:16.
Part 2 How Do I Know the Aspect Ratio of My Video?

Most cameras with video capabilities are available with various aspect ratio settings. This helps you decide which aspect ratio you’d like your video to have before recording it.
If you are looking to determine the aspect ratio of a video already shot, you can easily access additional information for the file.
The information button is a small “i” in a circle on Mac. Move on to right-click a file and select “Properties“ on your PC.
It may give you the actual width and height of the video, but you can divide the two to find the aspect ratio.
However, you don’t need to hassle as we’ll enlist the best five aspect ratio calculators online below.
01Calculate Aspect Ratio

Our first pick-in aspect ratio calculator online is used simply by entering Common Presets. Then, there are tabs where you can enter Ratio Width, Ratio Height, Pixels Width, and Pixels Height.
It can help determine the aspect ratio of both the images and the videos.
Pros
Good user interface
Simple tabs for inputs
Fast loading speed
Cons
Pretty confusing for beginners to know which inputs to enter
02Digital Rebellion Aspect Ratio Calculator

Again, here’s an aspect ratio calculator online that is pretty straightforward than the one on the previous list. It helps you identify both the pixel dimensions and aspect ratios of the images and videos.
You’re only required to enter your inputs in Calculate and Preset tab to get Resolution as outcomes.
Pros
It can also be used to calculate pixel dimensions
Interactive user interface
No ads
Cons
Pretty confusing when it comes to entering Preset
03Toolstud Aspect Ratio Calculator

This aspect ratio calculator online is the simplest on our list as you’re only required to enter the Width-Height of an image or screen whose aspect ratio needs to be calculated.
Plus, the best part is that it gives you the detailed analysis of Calculation in terms of Size, Aspect Ratio, Angle of Diagonal, and Length of Diagonal etc.
Pros
Detailed calculation
Only needs to enter width and height
Simple user interface
Cons
A bit slow in processing
04Aspect Ratio Calculator

Again, this is the most straightforward aspect ratio calculator online with fewer complexities than others on the list. You must enter your desired width for an image or a video to get the outcome as an idea; height is a must to maintain that height.
Or, you can enter both the width and height to know the aspect ratio, dimensions, and mode.
Pros
Detailed calculation
Easy to calculate
A guide on how to use it
Cons
Slow user interface
05Calculator Online

You need to enter width and height within this tool and select among the common ratios to know the aspect ratio. However, it’s pretty unknown and confusing whether it’s applicable on both the images and videos or not.
Pros
Interactive user interface
With a guide on how to use
Various options
Cons
Display ads
Part 3 How Can I Change the Aspect Ratio of an Image Online?
You need to select among the aspect ratio calculator mentioned above online or go for the particular one for images.
Here, we’ll use Kapwing to resize the image dimensions within its editor.
Step 1: Visit Kapwing official website as follows
Go to https://www.kapwing.com/tools/resize-image

Step 2: Enter its editor
Now, you’re within its editor. Upload your image, which needs to change in terms of aspect ratio.

Step 3: Select output
Now, you need to choose the output. Make sure you haven’t selected the image to do this. There’s an output size on the left panel, which you can choose among 1:1, 9:16, 16:9, 5:4, and 4:5, and custom size.

Part 4 How to Change the Aspect Ratio in Filmora/Filmora Pro?

Wondershare Filmora - Best Video Editor for Mac/Windows
5,481,435 people have downloaded it.
Build unique custom animations without breaking a sweat.
Focus on creating epic stories and leave the details to Filmora’s auto features.
Start a creative adventure with drag & drop effects and endless possibilities.
Filmora simplifies advanced features to save you time and effort.
Filmora cuts out repetition so you can move on to your next creative breakthrough.
To permanently change the aspect ratio, you need a video editor or converter as one of the best aspect ratio calculators online.
Here, we’d like to recommend a significant aspect ratio changer - Wondershare Filmora Video Editor , which allows you to create both the 4:3, 9:16, 16:9, and 1:1 aspect ratio videos quite simply. You can conveniently share the created videos on YouTube, Apple TV, Vimeo, and mobile devices.
The Filmora also assists you in changing the project aspect ratio after launching the video editor program. Hit the drop-down tab and go through the 16:9, 1:1, 9:16, 4:3, and 21:9 aspect ratios to select among.

Key Takeaways from This Episode
● A complete overview of aspect ratio calculators.
● Understanding 5 best aspect ratio calculators.
● An ideal aspect ratio calculator to permanently change the video’s aspect ratio.
Have you noticed how certain old movies play with black padding on either side of the screen while watching the television?
With this guide of the best five aspect ratio calculators online we’ve put together for you, you cannot go wrong!
In this article
01 [Typical Aspect Ratios and Sizes of Screens and Videos](#Part 1)
02 [How Do I Know the Aspect Ratio of My Video?](#Part 2)
03 [How Can I Change the Aspect Ratio of an Image Online?](#Part 3)
04 [How to Change the Aspect Ratio in Filmora/Filmora Pro?](#Part 4)
Part 1 Part 1: Typical Aspect Ratios and Sizes of Screens and Videos
An aspect ratio is a measurement representing the ratio between the width and height of a screen or a video. It determines the length of your video or screen. Not only screens and videos, but you can use the concept also in images.
And, it is written as ‘x:y’ where ‘x’ is the width and ‘y’ is the height.
There isn’t any one-size-fits-all when we need to use the video aspect ratios. Aspect ratios are generally selected based on where the video will post, how it will be visible, and what aim it usually serves.
Videos utilized for social media will vary from trailers shows or movies shown in theaters. There are common aspect ratios for modern televisions, but broadcasters can consider using the aspect ratio that operates great with their audience and content.
Since most videos showcase through standard online video platforms, custom aspect ratios are not commonly used.
Here are a few standard aspect ratios that you can use for live streaming and other video creation:
16:9
A 16:9 aspect ratio represents a wide rectangle. It is also called “1.71:1,” the most accessible form of the ratio, mathematically speaking.
This ratio is mainly used in video creation and streaming and is considered the international standard format for cinema and television.
Many also tend to use this highly famous aspect ratio on their sites.
It is also more cost-effective to use screens compatible with this ratio instead of their predecessors. The standardization of computer monitors and televisions saved producers both the money and time spent in the research field.
One of the ideal resolutions you can use with a 16:9 aspect ratio is 4Kor 3840 pixels by 2160 pixels.
1:1
The 1:1 video aspect ratio is one of the ideal squares used with square television sets.
It is much less in demand but usually visible on social media platforms like Facebook or Instagram.
Many cameras still have a square setting even though it’s not the most commonly used aspect ratio.
4:3
The 4:3 aspect ratio was the general screen size for computer monitors and televisions before 16:9 and 16:10. The reason for the switch was the HDTV birth. It’s because the 16:9 and 16:10 aspect ratios allow for better resolutions than 4:3 do.
This aspect ratio was still considered for Apple iPads until they released the 2018 iPad Pro.
3:2
The 3:2 aspect ratio was primarily seen in classic 35 mm still photography still used on tablets, laptops, and various game consoles in the handheld form.
Many micro- to medium-sized cameras still use the 3:2 aspect ratio settings, but broadcasters rarely use it today.
21:9
The 21:9 aspect ratios have a pretty specific purpose. It is often called cinematic widescreen or ultra-widescreen.
It is also helpful for films with an anamorphic format. Anamorphic format videos create an optical illusion that offers a 360-degree view.
You are likely to look for the videos with this aspect ratio in notable museums, theme parks, theaters, and the like.
9:16
A 9:16 aspect ratio is for tall videos. This aspect ratio became famous after the launch of smartphones with video capabilities.
For instance, the optimal measure for an Instagram story is 1080 px by 1920 px, and thus its ratio comes out as 9:16. The same goes for other famous apps with “story” features, including Snapchat and Facebook.
This makes sense because the iPhone camera’s video setting can record footage in both 16:9 and 9:16.
Part 2 How Do I Know the Aspect Ratio of My Video?
Most cameras with video capabilities are available with various aspect ratio settings. This helps you decide which aspect ratio you’d like your video to have before recording it.
If you are looking to determine the aspect ratio of a video already shot, you can easily access additional information for the file.
The information button is a small “i” in a circle on Mac. Move on to right-click a file and select “Properties“ on your PC.
It may give you the actual width and height of the video, but you can divide the two to find the aspect ratio.
However, you don’t need to hassle as we’ll enlist the best five aspect ratio calculators online below.
01Calculate Aspect Ratio
Our first pick-in aspect ratio calculator online is used simply by entering Common Presets. Then, there are tabs where you can enter Ratio Width, Ratio Height, Pixels Width, and Pixels Height.
It can help determine the aspect ratio of both the images and the videos.
Pros
Good user interface
Simple tabs for inputs
Fast loading speed
Cons
Pretty confusing for beginners to know which inputs to enter
02Digital Rebellion Aspect Ratio Calculator
Again, here’s an aspect ratio calculator online that is pretty straightforward than the one on the previous list. It helps you identify both the pixel dimensions and aspect ratios of the images and videos.
You’re only required to enter your inputs in Calculate and Preset tab to get Resolution as outcomes.
Pros
It can also be used to calculate pixel dimensions
Interactive user interface
No ads
Cons
Pretty confusing when it comes to entering Preset
03Toolstud Aspect Ratio Calculator
This aspect ratio calculator online is the simplest on our list as you’re only required to enter the Width-Height of an image or screen whose aspect ratio needs to be calculated.
Plus, the best part is that it gives you the detailed analysis of Calculation in terms of Size, Aspect Ratio, Angle of Diagonal, and Length of Diagonal etc.
Pros
Detailed calculation
Only needs to enter width and height
Simple user interface
Cons
A bit slow in processing
04Aspect Ratio Calculator
Again, this is the most straightforward aspect ratio calculator online with fewer complexities than others on the list. You must enter your desired width for an image or a video to get the outcome as an idea; height is a must to maintain that height.
Or, you can enter both the width and height to know the aspect ratio, dimensions, and mode.
Pros
Detailed calculation
Easy to calculate
A guide on how to use it
Cons
Slow user interface
05Calculator Online
You need to enter width and height within this tool and select among the common ratios to know the aspect ratio. However, it’s pretty unknown and confusing whether it’s applicable on both the images and videos or not.
Pros
Interactive user interface
With a guide on how to use
Various options
Cons
Display ads
Part 3 How Can I Change the Aspect Ratio of an Image Online?
You need to select among the aspect ratio calculator mentioned above online or go for the particular one for images.
Here, we’ll use Kapwing to resize the image dimensions within its editor.
Step 1: Visit Kapwing official website as follows
Go to https://www.kapwing.com/tools/resize-image
Step 2: Enter its editor
Now, you’re within its editor. Upload your image, which needs to change in terms of aspect ratio.
Step 3: Select output
Now, you need to choose the output. Make sure you haven’t selected the image to do this. There’s an output size on the left panel, which you can choose among 1:1, 9:16, 16:9, 5:4, and 4:5, and custom size.
Part 4 How to Change the Aspect Ratio in Filmora/Filmora Pro?
Wondershare Filmora - Best Video Editor for Mac/Windows
5,481,435 people have downloaded it.
Build unique custom animations without breaking a sweat.
Focus on creating epic stories and leave the details to Filmora’s auto features.
Start a creative adventure with drag & drop effects and endless possibilities.
Filmora simplifies advanced features to save you time and effort.
Filmora cuts out repetition so you can move on to your next creative breakthrough.
To permanently change the aspect ratio, you need a video editor or converter as one of the best aspect ratio calculators online.
Here, we’d like to recommend a significant aspect ratio changer - Wondershare Filmora Video Editor , which allows you to create both the 4:3, 9:16, 16:9, and 1:1 aspect ratio videos quite simply. You can conveniently share the created videos on YouTube, Apple TV, Vimeo, and mobile devices.
The Filmora also assists you in changing the project aspect ratio after launching the video editor program. Hit the drop-down tab and go through the 16:9, 1:1, 9:16, 4:3, and 21:9 aspect ratios to select among.
Key Takeaways from This Episode
● A complete overview of aspect ratio calculators.
● Understanding 5 best aspect ratio calculators.
● An ideal aspect ratio calculator to permanently change the video’s aspect ratio.
Top 15 Free Video Editing Software for Beginners [Easy to Use]
Top 15 Free Video Editing Software for Beginners [Very Easy to Use]

Ollie Mattison
Mar 27, 2024• Proven solutions
If you are not a video-making expert, own a video studio, or have a video specialist to trim and shoot video features, then don’t worry!
We are here to take you on the tour of the easiest video editing software that would promise a professional-looking end-product despite being absolutely inexperienced!
In my opinion, an ideal video editing software should be easy for everyone to get started. It could be simple video editing software, but it at least contains all the basic features you want. My recommendation is Wondershare Filmora, which compromises usability and capability to the best. It not only comes with all common video editing tools at your fingertips but also features you may need to bring your videos to the next level.
- 15 Best Easy Video Editing Software
- Basic Features You Need in an Easy Video Editing Software
- Why Video Editing Matters Nowadays?
- Basic Video Editing Terms You Should Know
Watch Video to Take a Quick View of the 18 Best Video Editors
Filmora Video Editor is an expert in creating and editing videos with outstanding functions and features. The easy-to-use interface will help you much! It offers versions for Windows, Mac, Android and iOS! Worth to have a try!
Try Free Video Editor Try Free Video Editor Try Free Video Editor Learn More >
15 Best Easy Video Editing Software
Below are the brief detail of easy video editors for PC, giving you more editing scalability than mobile-based editing apps. So if you are seeking easy video editing software for YouTube or website then look no further!
1. Wondershare Filmora - Easy Video Editing Software, Unlimited Video Sharing
Compatibility: Windows, Mac, Android, iPhone and iPad.
Wondershare Filmora paves the way to share videos instantly with family and friends, whatever it’s on YouTube, computer, mobile devices, or TV, you’ll choose your way.
For Win 7 or later (64-bit)
Secure Download
For macOS 10.14 or later
Secure Download
You can directly upload the video to YouTube, as well as an optional message sending to Facebook and Twitter.
Preset profiles are included in output videos for playing on mobile devices like iPhone, iPad, iPod, PSP, etc. No further conversion required. A build-in DVD tool allows you to burn video to a high-quality DVD for watching on TV with your home DVD player.
Filmstock Stock Media Library ](https://filmstock.wondershare.com/creative-theme-tutorial?spm=rs.filmora%5Fweb&source%5Fchannel=seo%5Farticle )
Download the free trial version of Wondershare Filmora for your Mac/Windows version below, start to make your stunning home movies today!
2. Blender
Compatibility: Windows, Mac, and Linux.
This is free and open-source software, originally designed as a 3D animation suite but also has a use video editor. This editor lets you carry out basic actions like video cutting and video splicing. Hence, it is an easy video cutter and easy video joiner. It can also perform more advanced tasks such as video masking.
3. Lightworks
Compatibility: Windows, Mac, and Linux.
Lightworks is a free easy to use video editing software that comes with High precision video trimming, 720p video export for YouTube, Multicam support, and support of a large range of video formats. Its free version has ample features enough for most of the users. Although the paid pro version costs $25 a month.
4. Shotcut
Compatibility: Windows, Mac, and Linux.
Shotcut is a free, open-source video editing software, packed with ample features with wide range video formats support, timeline editing, 4K HD resolution support, and have several tutorials video.

Wondershare Filmora Video Editor
Filmora - No Watermark Video Editing Software
• Easily edit and export video files without watermark
• offers popular effects and filters for making your video professional
• Cross-platform supported - (Windows, Mac, iOS, Android)
Try Video Editor without Watermark Try Video Editor without Watermark Try Video Editor without Watermark Learn More >
5. VSDC
Compatibility: Windows
VSDC, an easy video editing software for windows, is a free video editing software, having an easy-to-learn powerful suite of features including audio editing and color correction. Although a paid version, pro, costs $19.99, having visual waveform, image stabilization and voice over support.
6. Machete Lite
Compatibility: Windows
Machete Lite is a free yet the simplest video editing software perfect for simple editing tasks. Only AVI and WMV files are supported in its free version. Its full version costs $19.95 having audio editing and more file type support, unlike the free version.
7. Avidemux
Compatibility: Windows, Mac, and Linux
Avoided is the simplest video editing software, perfect for beginners. It allows performing simple editing features like Encoding, simple cutting, and filtering with an easy-to-use interface.
8. Hitfilm Express
Compatibility: Windows and Mac
HitFilm Express is a free video editing software with features ranging from basic editing features like trimming, audio editing, and slicing to advance tools and features. Its free version supports over 180 special effects. There’s a built-in YouTube uploading.
Finding a Way to Edit Video for Free? Try This Out!
Filmora Video Editor brings you all the convenience of editing videos with handy functions. You can make your creative ideas into realize! More importantly, your edited video can export without a watermark!
Try It Free Try It Free Try It Free Learn More >
9. iMovie
Compatibility: Mac
If you are a beginner and searching for a good video editing software to get your hands clean on editing then iMovie editor is perfect for you. It is an easy video editing software for mac having an easy drag and drop interface. Features like Video trimming, split-screen, audio editing, pre-made transitions library, and 4K resolution support.
10. Openshot
Compatibility: Windows, Mac, and Linux
It is a free open source video editing software with an easy-to-use interface. Features like unlimited layers and tracks, time-mapping, real-time previews, trimming, snapping, clip resizing, curve-based keyframe animations etc. It offers more than enough features for free software.
11. Movie Maker
Compatibility: Windows
It is an easy video maker and editing software for beginners which can be downloaded from any third-party and use it to make and share high-quality movies.
12. Lumen5
Compatibility: Windows and Mac
It’s a perfect web-based video editing tool, best for Social Media promotion Campaigns with an easy drag-and-drop interface.
![]()
A cross-platform for making videos anywhere for all creators
Why your video editing isn’t good enough? How about some creative inspo?
- 100 Million+ Users
- 150+ Countries and Regions
- 4 Million+ Social Media Followers
- 5 Million+ Stock Media for Use
* Secure Download
13. Adobe Spark
Compatibility: Windows and Mac
Adobe Sparks is also a web-based easy video editor, similar to Lumen5. It offers an easy user interface but is a little restricted when it comes to offering a bank of images and footage to use.
14. Videopad
Compatibility: Windows
VideoPad is a simple video editing software for beginners, maybe not suitable for professional use. It has features like 3D Video Editing, Sound Effects and pre-made transitions Library, Reduce Camera Shakes and Multiple Resolutions export support.
15. Freemake
Compatibility: Windows
Freemake is a free video converter that is used to convert and alter videos that can modify and convert videos, embed videos to websites, and extract audio from video clips simply and fast. It supports above 500 video file formats and is compatible with multiple audio and image file formats for slideshows and video clip creation.
Basic Features You Need in an Easy Video Editing Software
A software having:
- Easy montage maker
- Easy video cutter
- Easy video joiner
- Compositing multiple elements together
- Color grading
- Motion tracking
- Stabilization
- Titles
- Background replacement
- Basic color correction
- Cross dissolves and fade-to-black transitions
- Audio crossfades
- Audio level adjustment using keyframes
- Auto synchronization of additional audio tracks
- Image position adjustment using keyframes
- Footage speed adjustments
- Basic color correction
- Footage bins for roughly organizing imported footage
Why Video Editing Matters Nowadays?
If videos aren’t a primary focus of your content marketing plan, the probability is it’s soon going to be certain! Every next production is turning into video-based content, be it content marketers or SEOs.
Around 50% of the content marketers are using Facebook and YouTube channels for the sake of video distribution since online activity spent on watching videos is 50%.
Moreover, by 2021, video is going to be projected to account for more than 80% out of all internet traffic.
Therefore, it has become a need to focus on video content if you are looking to grow the organic traffic of your publications.

Filmora Free Video Editor
Create AI-Generated Video with Filmora
Filmora Free video editor offers a ChatGPT plug-in and AI tools to enhance your creative vision. Make your idea into reality.
Try It Free Try It Free Try It Free Learn More >
Basic Video Editing Terms You Should Know
Below are some of the important yet basic terms that you should know related to videography in general and video editing in specific as well, whether you are a beginner or professional.
Aspect ratio:
The aspect ratio is the ratio of width and height of a video. Examples of the most used aspect ratios are: 4:3, 16:9, 1.85:1.
Refer to the image given below for a better understanding.

B-roll:
B-roll facilities one with the flexibility, when editing, to the video editing rules as it is an add-on picture that makes a previously incoherent scene seamless.
As shown in the image below, B-roll is used to insert which can make the transition easy to look on the eyes.
Bit rate:
Bit rate, also known as data rate, refers to the amount of data used for every second within the video. It is most commonly expressed in kilobits per second (kbps).
Close up:
Close-up refers to the shots that frame to subject tightly.
For instance, if it is a person, then the close-up covers solely his face.
Color temperature:
Color temperature refers to the light visibility in a shot. Color temperature is expressed in Kelvin. The scale of color temperature ranges from cool to warm.
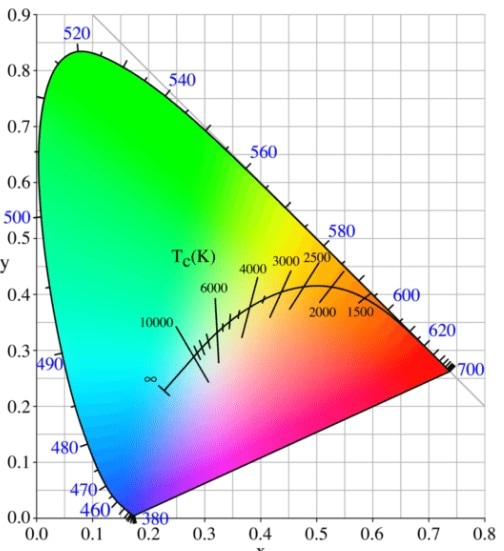
Composition:
Composition entails the process of combining multiple footages using video editing software.
Compression:
Compression is the process of minimizing the quantity of data utilized in a video file. It helps make in the process of uploading and downloading quite faster. This also leaves you with ample space for more of your publications.
Crop factor:
Crop factor refers to a number that expresses the ratio of the imaging area of a sensor to a full-frame sensor. It typically ranges from 1.3 to 2.0.
Cut-in
Cut-in refers to showing a specific part of a subject in order to emphasize a certain aspect or emotion. For instance, hand gestures may show nervousness, enthusiasm, agitation, etc.
Foley:
Often times the original sound of the scene captured in the video is not captured as naturally as they were supposed to sound like in reality. Hence, Foley is when you reproduce those sounds for that video.
Frame rate:
Frame rate refers to the video capturing by a shutter in a second or shutter cycling rate through opening and closing. Some of the common frame rates are 24, 25, 29.97, 30, etc. The frame rate is expressed in frames per second (fps).
High definition media interface:
HDMI is the connectors that digitally transfer audio and HD video to a television. This is helpful if you intend to work on a bigger screen or wish to share some of your productions.
Resolution:
Resolution refers to the horizontal and vertical pixels of your video. For instance 640×480 for SD and 1280×720 for HD. Sometimes resolution refers only to the number of pixels that paper vertically. For example 480p, 720p, and 1080p respectively.
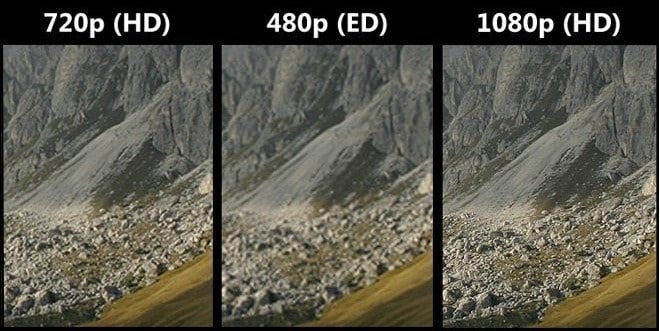
J-Cut:
J-cut refers to the editing technique in which the audio from a next scene is overlapped with the image from the previous scene, such that the audio segment of the next scene begins playing prior to its picture.
Jumpcut:
Jumpcut editing techniques refer to an abrupt transition between the two consecutive frames. The entity in the video containing jump cuts appears to jump along with the scene from one place to another. This looks disruptive to the audience.
L-Cut:
L-cut is exactly opposite to J-cut where the audio from the next scene overlays the image from the next scene to play the audio after an image has been displayed in the video.
Lower third:
As the name suggests, the lower third is derived from the rule of third which refers to the type of title, mostly used by vloggers, broadcasters, interviewers, and you tubers.
Memory bank:
You can understand the term by thinking of a memory box where we keep certain things as a memory of the events in someone’s life. Memory bank serves the same purpose through the use of video. It often uses natural sounds, document travel or merely store moments in routine life.
Press kit:
Press kit is used to provide information regarding your productions to the press for promotional purposes. Such information is often background including synopsis, crew, cast’s bios Q&A with the director, production stills and its reviews.
Shot list:
The shot list refers to the checklist related to the shots that a videographer plans to include in his/her content. This may help you save time and gear with efficient planning and handling. This gives a sense of direction to your production.
Storyboard:
A storyboard is a drawing to illustrate the scenes in the video. This gives a direct and organized way to visualize the needs for the shots or animation.
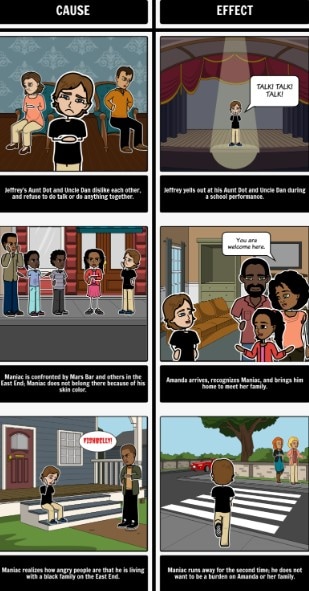
Sync:
Synchronization, aka sync, refers to the alignment of audio with video imaging.
Rule of thirds:
The rule of third is a grid that helps you to compose interesting and balanced shots to make your productions aesthetically pleasing. The grid is similar to a tic-tac-toe board since it segregates the picture into 9 segments. It helps bring points of interest to be aligned with the lines or intersection given in the grid.
Three-point lighting:
This helps one to diminish the shadows for image balancing and provides an appealing contrast. These three lights are commonly known as fill, key, and backlight.

Tilts:
Tilts refer to the vertical transitions that your camera. This is the opposite of pans.

Pans:
Pans refer to the horizontal movements of your camera. This is exactly contrary to tilts.
White balance:
White balance refers to the process where the unrealistic color casts are removed in order to render a white object to be actually white in your photo, and not have other tints.
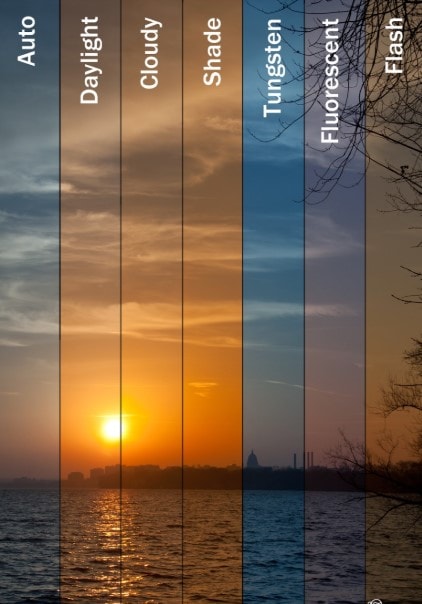
Wide-angle:
A wide-angel lens refers to a short focal length of a lens. This brings more of a subject rather than a subject being captured by a normal lens at equal distances.
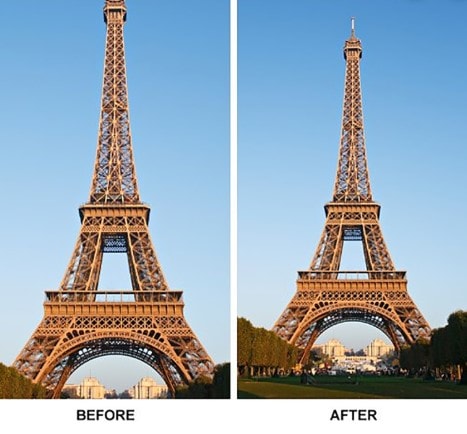
Non-linear editing:
NLEs is a non-destructive editing technique that allows one to access any frame in a video clip regardless of the sequence in the clip. It gives you the freedom to easily include effects, transitions, fades, etc. which cannot be achieved with linear editing
Pixel aspect ratio:
Pixels are several tiny squares that build up an image in a video. Whereas, aspect ratio refers to the ratio of width to height of a video. Hence, the pixel aspect ratio (PAR) is the ratio of width to height of the pixels.
Conclusion
Be it Instagram stories, YouTube product testimonials, or Facebook ads, using these easy-to-use video editing software will elevate your content into a professional and slick look.
So, I hope you are now ready to get started.
Lights, camera, action!
For Win 7 or later (64-bit)
Secure Download
For macOS 10.14 or later
Secure Download
Click here to get Filmora for PC by email
or Try Filmora App for mobile >>>
download filmora app for ios ](https://app.adjust.com/b0k9hf2%5F4bsu85t ) download filmora app for android ](https://app.adjust.com/b0k9hf2%5F4bsu85t )
Ollie Mattison
Ollie Mattison is a writer and a lover of all things video.
Follow @Ollie Mattison
Ollie Mattison
Mar 27, 2024• Proven solutions
If you are not a video-making expert, own a video studio, or have a video specialist to trim and shoot video features, then don’t worry!
We are here to take you on the tour of the easiest video editing software that would promise a professional-looking end-product despite being absolutely inexperienced!
In my opinion, an ideal video editing software should be easy for everyone to get started. It could be simple video editing software, but it at least contains all the basic features you want. My recommendation is Wondershare Filmora, which compromises usability and capability to the best. It not only comes with all common video editing tools at your fingertips but also features you may need to bring your videos to the next level.
- 15 Best Easy Video Editing Software
- Basic Features You Need in an Easy Video Editing Software
- Why Video Editing Matters Nowadays?
- Basic Video Editing Terms You Should Know
Watch Video to Take a Quick View of the 18 Best Video Editors
Filmora Video Editor is an expert in creating and editing videos with outstanding functions and features. The easy-to-use interface will help you much! It offers versions for Windows, Mac, Android and iOS! Worth to have a try!
Try Free Video Editor Try Free Video Editor Try Free Video Editor Learn More >
15 Best Easy Video Editing Software
Below are the brief detail of easy video editors for PC, giving you more editing scalability than mobile-based editing apps. So if you are seeking easy video editing software for YouTube or website then look no further!
1. Wondershare Filmora - Easy Video Editing Software, Unlimited Video Sharing
Compatibility: Windows, Mac, Android, iPhone and iPad.
Wondershare Filmora paves the way to share videos instantly with family and friends, whatever it’s on YouTube, computer, mobile devices, or TV, you’ll choose your way.
For Win 7 or later (64-bit)
Secure Download
For macOS 10.14 or later
Secure Download
You can directly upload the video to YouTube, as well as an optional message sending to Facebook and Twitter.
Preset profiles are included in output videos for playing on mobile devices like iPhone, iPad, iPod, PSP, etc. No further conversion required. A build-in DVD tool allows you to burn video to a high-quality DVD for watching on TV with your home DVD player.
Filmstock Stock Media Library ](https://filmstock.wondershare.com/creative-theme-tutorial?spm=rs.filmora%5Fweb&source%5Fchannel=seo%5Farticle )
Download the free trial version of Wondershare Filmora for your Mac/Windows version below, start to make your stunning home movies today!
2. Blender
Compatibility: Windows, Mac, and Linux.
This is free and open-source software, originally designed as a 3D animation suite but also has a use video editor. This editor lets you carry out basic actions like video cutting and video splicing. Hence, it is an easy video cutter and easy video joiner. It can also perform more advanced tasks such as video masking.
3. Lightworks
Compatibility: Windows, Mac, and Linux.
Lightworks is a free easy to use video editing software that comes with High precision video trimming, 720p video export for YouTube, Multicam support, and support of a large range of video formats. Its free version has ample features enough for most of the users. Although the paid pro version costs $25 a month.
4. Shotcut
Compatibility: Windows, Mac, and Linux.
Shotcut is a free, open-source video editing software, packed with ample features with wide range video formats support, timeline editing, 4K HD resolution support, and have several tutorials video.
Wondershare Filmora Video Editor
Filmora - No Watermark Video Editing Software
• Easily edit and export video files without watermark
• offers popular effects and filters for making your video professional
• Cross-platform supported - (Windows, Mac, iOS, Android)
Try Video Editor without Watermark Try Video Editor without Watermark Try Video Editor without Watermark Learn More >
5. VSDC
Compatibility: Windows
VSDC, an easy video editing software for windows, is a free video editing software, having an easy-to-learn powerful suite of features including audio editing and color correction. Although a paid version, pro, costs $19.99, having visual waveform, image stabilization and voice over support.
6. Machete Lite
Compatibility: Windows
Machete Lite is a free yet the simplest video editing software perfect for simple editing tasks. Only AVI and WMV files are supported in its free version. Its full version costs $19.95 having audio editing and more file type support, unlike the free version.
7. Avidemux
Compatibility: Windows, Mac, and Linux
Avoided is the simplest video editing software, perfect for beginners. It allows performing simple editing features like Encoding, simple cutting, and filtering with an easy-to-use interface.
8. Hitfilm Express
Compatibility: Windows and Mac
HitFilm Express is a free video editing software with features ranging from basic editing features like trimming, audio editing, and slicing to advance tools and features. Its free version supports over 180 special effects. There’s a built-in YouTube uploading.
Finding a Way to Edit Video for Free? Try This Out!
Filmora Video Editor brings you all the convenience of editing videos with handy functions. You can make your creative ideas into realize! More importantly, your edited video can export without a watermark!
Try It Free Try It Free Try It Free Learn More >
9. iMovie
Compatibility: Mac
If you are a beginner and searching for a good video editing software to get your hands clean on editing then iMovie editor is perfect for you. It is an easy video editing software for mac having an easy drag and drop interface. Features like Video trimming, split-screen, audio editing, pre-made transitions library, and 4K resolution support.
10. Openshot
Compatibility: Windows, Mac, and Linux
It is a free open source video editing software with an easy-to-use interface. Features like unlimited layers and tracks, time-mapping, real-time previews, trimming, snapping, clip resizing, curve-based keyframe animations etc. It offers more than enough features for free software.
11. Movie Maker
Compatibility: Windows
It is an easy video maker and editing software for beginners which can be downloaded from any third-party and use it to make and share high-quality movies.
12. Lumen5
Compatibility: Windows and Mac
It’s a perfect web-based video editing tool, best for Social Media promotion Campaigns with an easy drag-and-drop interface.
![]()
A cross-platform for making videos anywhere for all creators
Why your video editing isn’t good enough? How about some creative inspo?
- 100 Million+ Users
- 150+ Countries and Regions
- 4 Million+ Social Media Followers
- 5 Million+ Stock Media for Use
* Secure Download
13. Adobe Spark
Compatibility: Windows and Mac
Adobe Sparks is also a web-based easy video editor, similar to Lumen5. It offers an easy user interface but is a little restricted when it comes to offering a bank of images and footage to use.
14. Videopad
Compatibility: Windows
VideoPad is a simple video editing software for beginners, maybe not suitable for professional use. It has features like 3D Video Editing, Sound Effects and pre-made transitions Library, Reduce Camera Shakes and Multiple Resolutions export support.
15. Freemake
Compatibility: Windows
Freemake is a free video converter that is used to convert and alter videos that can modify and convert videos, embed videos to websites, and extract audio from video clips simply and fast. It supports above 500 video file formats and is compatible with multiple audio and image file formats for slideshows and video clip creation.
Basic Features You Need in an Easy Video Editing Software
A software having:
- Easy montage maker
- Easy video cutter
- Easy video joiner
- Compositing multiple elements together
- Color grading
- Motion tracking
- Stabilization
- Titles
- Background replacement
- Basic color correction
- Cross dissolves and fade-to-black transitions
- Audio crossfades
- Audio level adjustment using keyframes
- Auto synchronization of additional audio tracks
- Image position adjustment using keyframes
- Footage speed adjustments
- Basic color correction
- Footage bins for roughly organizing imported footage
Why Video Editing Matters Nowadays?
If videos aren’t a primary focus of your content marketing plan, the probability is it’s soon going to be certain! Every next production is turning into video-based content, be it content marketers or SEOs.
Around 50% of the content marketers are using Facebook and YouTube channels for the sake of video distribution since online activity spent on watching videos is 50%.
Moreover, by 2021, video is going to be projected to account for more than 80% out of all internet traffic.
Therefore, it has become a need to focus on video content if you are looking to grow the organic traffic of your publications.
Filmora Free Video Editor
Create AI-Generated Video with Filmora
Filmora Free video editor offers a ChatGPT plug-in and AI tools to enhance your creative vision. Make your idea into reality.
Try It Free Try It Free Try It Free Learn More >
Basic Video Editing Terms You Should Know
Below are some of the important yet basic terms that you should know related to videography in general and video editing in specific as well, whether you are a beginner or professional.
Aspect ratio:
The aspect ratio is the ratio of width and height of a video. Examples of the most used aspect ratios are: 4:3, 16:9, 1.85:1.
Refer to the image given below for a better understanding.
B-roll:
B-roll facilities one with the flexibility, when editing, to the video editing rules as it is an add-on picture that makes a previously incoherent scene seamless.
As shown in the image below, B-roll is used to insert which can make the transition easy to look on the eyes.
Bit rate:
Bit rate, also known as data rate, refers to the amount of data used for every second within the video. It is most commonly expressed in kilobits per second (kbps).
Close up:
Close-up refers to the shots that frame to subject tightly.
For instance, if it is a person, then the close-up covers solely his face.
Color temperature:
Color temperature refers to the light visibility in a shot. Color temperature is expressed in Kelvin. The scale of color temperature ranges from cool to warm.
Composition:
Composition entails the process of combining multiple footages using video editing software.
Compression:
Compression is the process of minimizing the quantity of data utilized in a video file. It helps make in the process of uploading and downloading quite faster. This also leaves you with ample space for more of your publications.
Crop factor:
Crop factor refers to a number that expresses the ratio of the imaging area of a sensor to a full-frame sensor. It typically ranges from 1.3 to 2.0.
Cut-in
Cut-in refers to showing a specific part of a subject in order to emphasize a certain aspect or emotion. For instance, hand gestures may show nervousness, enthusiasm, agitation, etc.
Foley:
Often times the original sound of the scene captured in the video is not captured as naturally as they were supposed to sound like in reality. Hence, Foley is when you reproduce those sounds for that video.
Frame rate:
Frame rate refers to the video capturing by a shutter in a second or shutter cycling rate through opening and closing. Some of the common frame rates are 24, 25, 29.97, 30, etc. The frame rate is expressed in frames per second (fps).
High definition media interface:
HDMI is the connectors that digitally transfer audio and HD video to a television. This is helpful if you intend to work on a bigger screen or wish to share some of your productions.
Resolution:
Resolution refers to the horizontal and vertical pixels of your video. For instance 640×480 for SD and 1280×720 for HD. Sometimes resolution refers only to the number of pixels that paper vertically. For example 480p, 720p, and 1080p respectively.
J-Cut:
J-cut refers to the editing technique in which the audio from a next scene is overlapped with the image from the previous scene, such that the audio segment of the next scene begins playing prior to its picture.
Jumpcut:
Jumpcut editing techniques refer to an abrupt transition between the two consecutive frames. The entity in the video containing jump cuts appears to jump along with the scene from one place to another. This looks disruptive to the audience.
L-Cut:
L-cut is exactly opposite to J-cut where the audio from the next scene overlays the image from the next scene to play the audio after an image has been displayed in the video.
Lower third:
As the name suggests, the lower third is derived from the rule of third which refers to the type of title, mostly used by vloggers, broadcasters, interviewers, and you tubers.
Memory bank:
You can understand the term by thinking of a memory box where we keep certain things as a memory of the events in someone’s life. Memory bank serves the same purpose through the use of video. It often uses natural sounds, document travel or merely store moments in routine life.
Press kit:
Press kit is used to provide information regarding your productions to the press for promotional purposes. Such information is often background including synopsis, crew, cast’s bios Q&A with the director, production stills and its reviews.
Shot list:
The shot list refers to the checklist related to the shots that a videographer plans to include in his/her content. This may help you save time and gear with efficient planning and handling. This gives a sense of direction to your production.
Storyboard:
A storyboard is a drawing to illustrate the scenes in the video. This gives a direct and organized way to visualize the needs for the shots or animation.
Sync:
Synchronization, aka sync, refers to the alignment of audio with video imaging.
Rule of thirds:
The rule of third is a grid that helps you to compose interesting and balanced shots to make your productions aesthetically pleasing. The grid is similar to a tic-tac-toe board since it segregates the picture into 9 segments. It helps bring points of interest to be aligned with the lines or intersection given in the grid.
Three-point lighting:
This helps one to diminish the shadows for image balancing and provides an appealing contrast. These three lights are commonly known as fill, key, and backlight.
Tilts:
Tilts refer to the vertical transitions that your camera. This is the opposite of pans.
Pans:
Pans refer to the horizontal movements of your camera. This is exactly contrary to tilts.
White balance:
White balance refers to the process where the unrealistic color casts are removed in order to render a white object to be actually white in your photo, and not have other tints.
Wide-angle:
A wide-angel lens refers to a short focal length of a lens. This brings more of a subject rather than a subject being captured by a normal lens at equal distances.
Non-linear editing:
NLEs is a non-destructive editing technique that allows one to access any frame in a video clip regardless of the sequence in the clip. It gives you the freedom to easily include effects, transitions, fades, etc. which cannot be achieved with linear editing
Pixel aspect ratio:
Pixels are several tiny squares that build up an image in a video. Whereas, aspect ratio refers to the ratio of width to height of a video. Hence, the pixel aspect ratio (PAR) is the ratio of width to height of the pixels.
Conclusion
Be it Instagram stories, YouTube product testimonials, or Facebook ads, using these easy-to-use video editing software will elevate your content into a professional and slick look.
So, I hope you are now ready to get started.
Lights, camera, action!
For Win 7 or later (64-bit)
Secure Download
For macOS 10.14 or later
Secure Download
Click here to get Filmora for PC by email
or Try Filmora App for mobile >>>
download filmora app for ios ](https://app.adjust.com/b0k9hf2%5F4bsu85t ) download filmora app for android ](https://app.adjust.com/b0k9hf2%5F4bsu85t )
Ollie Mattison
Ollie Mattison is a writer and a lover of all things video.
Follow @Ollie Mattison
Top 10 Free Online Subtitle Generators for Videos
When you watch a video online, it’s usually has a title and description. But what if the viewer doesn’t speak the same language as the speaker? Thankfully, there are subtitle maker online that you can use to create subtitles for any video.
Subtitles are excellent for those who want to learn a new language. It is also suitable for those who have trouble hearing. These subtitles can be added to the video by using subtitle maker online. Many subtitle makers are available, but we will discuss the top 10 subtitle creator online.
Best Free Subtitle Makers to Add Subtitles to Video Online
1. Adobe Creative Cloud Express
Creative Cloud Express is re-branded from Adobe Spark, a web and mobile app for creating multimeadia content. With Creative Cloud Express, you can add subtitles or captions to videos online without downloading any software on your computer. It also provides lots of editing tools such as convert video to GIF, reverse videos, merge videos, resize videos for different social , and change video speed.
You can use Creative Cloud Express for free, which includes most core features, but if you want to upgrade to use all features and assets, you may need to pay $9.99/month for the premium plan.
To add subtitles to video with Creative Cloud Express, follow the steps below:
- Visit https://www.adobe.com/express/feature/video/add-subtitle and click Add subtitles to your videos now to get started. Follow the instruction to sign up and sign in your account.
- Adobe will ask you to pick a story template, but you can always start from scratch. Here I will choose a template.
- Now import video or picture material from your computer, and adjust its position in the timeline.
- Pick from a variety of subtitle layout alternatives and change the text size as necessary.
- After adding titles and subtitles to your video, click the Download button to save your video to local computer.

If you prefer to add subtitles to video on Windows or Mac computer, you can try Filmora video editor . Compared with those online tools, Filmora video editor is undoubtedly a great choice for those who need more customized and stylish subtitles.

For Win 7 or later (64-bit)
Secure Download
For macOS 10.12 or later
Secure Download
Whether you want to edit home movies to send to family and friends or upload to YouTube and Vimeo for sharing, this video editor from Wondershare Filmora can help take your videos to a higher level effortlessly. Here, let’s take a look at the main features of this video editing software.
Filmora is compatible with the Filmstock effects store, an online stock media including video effects, va library for your video projects,video footage, music, sound effects, and stock images as well.
2. Kapwing
As one of the best online video editors , Kapwing allows you to add subtitles to the video easily. It gives three options for adding subtitles: upload an SRT file, manually add them, or have them auto-generated . It opens the video in the online video editor in either situation.
You can place subtitles anywhere on the screen, and you can relocate them at any time. Apart from that, you can customize the text’s appearance with formatting options, text color, and background color. However, you can export videos up to 30 minutes long for free, and to export longer video, you need to pay $16 per month. And in order to download the edited video without a watermark, you must create an account.
To use Kapwing subtitle creator online, follow these steps:
- Go to https://www.kapwing.com/subtitles , and upload your video file.
- On the Add Subtitles screen, choose the method for adding subtitles: add subtitles manually, or use auto-generated, or upload .SRT file. Here I will try add subtitles manually.
- When adding subtitles, make sure the timestamps are correct on the video. (If required) Set the time for precise sync (if desired).
- Click the “Done” button to return to the main editor. Click Export Video and then download it with embedded subtitles.

3. Clideo
Clideo is a video creation app that lets users add subtitles to their own videos. You can add subtitles in any language from an official list of languages available on the website. After adding the subtitle, you can re-position it anywhere on the screen with a few clicks. For free users, Claudio only allows HD exports, and they cannot download the video without a watermark.
To use this subtitle maker online tool, follow these steps:
- Visit https://clideo.com/add-subtitles-to-video and click Add subtitles to your videos now to get started after you register yourself on Clideo with your email id and password.
- Upload the video file from local storage, Google Drive or Dropbox, and then pick an option for adding captions: manually or using a subtitle file. Select the first instance, click “Add subtitle,” type your text, and set the timings.
You can also add a title, leader lines, and subheadings to your presentation. The font, color, background, size, and slide alignment are adjustable.
4. Veed.io
Veed.io is another easy-to-use web video editing tool with several subtitle options for adding subtitles. You can add subtitles quickly and easily, type them manually or upload them in SRT file format.
Veed is an automated subtitling platform that helps people add subtitles online to their YouTube videos without using off-the-shelf subtitle processing software. It is suitable for individuals who have no time or patience to type out long sentence structures one letter at a time. You can start without an account.
You can choose the color of the text, the background of subtitles, and more, to make your film look more attractive. It allows you to share your movies with friends via social media networks like Twitter and Facebook.
To use Veed subtitle creator online, follow these steps:
- Go to https://www.veed.io/tools/auto-subtitle-generator and click on “Get Started.” You can select a blank project or a template.
- Go to the Project Settings section on the left. Choose any one of them depending on your requirements and click Next.
- While using automated transcription, you have to upload.SRT subtitle file or enter the transcript manually.
- You can also personalize the text, color, size, font, alignment, and anything else you want.Make changes to the timeline and then sync the subtitles.
- After that, go to the Export and save the video.
5. Flixier
Flixier is one of the most accessible tools to add subtitles online. Flixier is an efficient auto subtitle generation and syncing platform. You can add any video file type with auto subtitles in Flixier. You can add auto subtitles to MPEG, MP4, MOV, AVI, or any other file on your system. There is no need to convert the video or do extra work. This automatic subtitle maker takes care of everything.
Flixier allows you to make a video subtitle automatically and manually create one or add a subtitle from your computer. You may submit any type of subtitle file (SRT, VTT, ASS, SSA, TXT).
To use Flixier subtitle maker online, follow these steps:
- Go to https://flixier.com/tools/auto-subtitle-generator and click on “Get Started.”
- You must first upload your videos to the Flixier library to create subtitles automatically.
- You may do so by uploading from your computer, importing from cloud storage services, or straight from YouTube, Zoom, or Twitch.
- After importing them, you may drag and drop your movie clips on the Flixier timeline.
- In the pop-up window that appears, click on one, and a button saying “Generate Auto Subtitle” will appear on the right. After you’ve finished your work, click start to have your subtitling generated and added onto the timeline where you can continue making changes.
- Finally, Flixier’s cloud rendering engine lets you export your film in minutes.
- Now, you may save the video to your computer or send it straight to social media.
6. Subtitle Horse
Subtitle Horse is a browser-based subtitler for online video captioning. There are many features, such as real-time validation, an interactive timeline, and shortcuts. Subtitle horse is highly configurable: Subtitles may be made by both amateurs and experts. Users must create an account to upload videos.
With the free version of subtitle horse, you may add subtitles and captions to your video. You may export your subtitles in the necessary formats (SRT, TimedText, WebVTT, etc.). The video can be accessed online, on a platform like YouTube, Dropbox, or others.
To use Subtitle-Horse subtitle creator online, follow these steps:
- Go to https://subtitle-horse.com/ and click on “Create subtitles with the free version.”
- Upload your video or add a URL by clicking the “Add Project” button
- Click “Next” and select “Frame Rate” and “Waveform.”
- Click “Start Subtitling”
- After adding subtitles, you can download them for free or buy HD-quality MP4 videos.
7. Subtitle Bee
SubtitleBee understands and automatically translates more than 120 languages across the world. Before uploading your video, simply choose your language and let SubtitleBee handle the rest by adding subtitles in your desired language.
The algorithm is about 95% accurate in detecting your voice and adding automated captions based on most languages. AI subtitle translation allows you to translate subtitles into other languages. You can use it for free with limited features and watermarked files. There is a time limit on free trial accounts, so you can add videos shorter than 10 minutes in length.
To use Subtitle-Bee subtitle maker online, follow these steps:
- Go to https://subtitlebee.com/ and click on “Add subtitles now”
- Then select the language of the current media voices.
- Now, Upload your video or paste a URL from Youtube, Vimeo, or self-hosted.
- Make any modifications as needed by editing the subtitles to meet your demands.
- Simply add the text you want and customize it to your own needs.
- Choose the social networking site that you wish to publish on.
- Download and encode your video with the subtitles included.
8. Fastreel

Fastreel allows you to create a video with subs and change the text settings: font, size, color, style, and position. A free membership will allow you to produce and share videos in the format of your choice, as well as access stock media. The cost of a paid subscription is $5.95 per video.
Furthermore, there are several colorful templates for various events — explainer videos, wedding films, YouTube intros, customer testimonials, and so forth. To personalize each template, you may use your own photos, films, music, and text. Plus, every template has its own title and transition style. Fastreel is not made for professional users; it’s a tool for novices and those searching for fast answers.
To use Fastreel subtitle creator online, follow these steps:
- Go to https://www.fastreel.com/add-subtitles-to-video.html and click on “Add subtitles now”
- Click the Add Your File button to upload any MOV, MKV, AVI, WMV, or MP4 content less than 500 MB in size. You can add subtitles only to the first hour of a film; therefore, it’s best to pick one with fewer subtitles.
- To add an SRT file to a video, select Upload SRT. You can modify each caption and its timing.
- You can also alter the text’s font, size, color, style, and position. The button labeled “Download SRT” allows you to save the subtitles file for later use.
- Then, scroll down to the bottom of the page and click Continue.
- After finishing, click the Export button. Choose a name and destination for your video, then choose a format. You’ll see the export window where you can select a save option that is appropriate for you. Subtitles will be permanently added to the video.
9. EZGIF

EZGIF is a well-known website for animated GIFs. EZGIF has several tools for GIFs, Photos, and Videos. It offers an online tool to add subtitles to videos that you may use. It’s pretty simple to utilize and provides two methods for adding subtitles. You can upload a maximum of 100 MB on EZGIF. If your video is larger than 100 MB, you may compress it using EZGIF.
To add subtitles to a video on EZGIF, follow these steps:
- Go to https://ezgif.com/video-subtitles .
- Upload a video file or copy and paste the URL of a video available on the internet.
- To add subtitles, click the “Upload” button. To enter them manually, scroll to the bottom of the screen.
- Simply type the subtitle in the box, then set the time duration for when it should appear in the video. To cover the whole video, you may add more subtitles as well.
- After that, click “Add Subtitles” and then save the output.
10. PROMO

Promo is a website that makes promotion easier. This online tool lets users add basic subtitles to videos with ease as a video creation software. This site is free of charge and does not require registration to use the subtitle function, but it does give you an ad at the beginning of your finished video.
Using Promo, you may add video captions or subtitles from your browser anytime, anytime, anyplace. There’s no need to download anything; it’s as simple as clicking a link. The free version comes with a watermark. For the ad-free version, there is a $99/month fee.
To add subtitles with Promo subtitle maker online, follow the steps below:
- Go to https://promo.com/tools/add-subtitles-to-video .
- Upload the video you wish to caption or subtitle.
- You can use one of the platform’s professionally designed video templates or premium clips to construct a new film from the ground up.
- To add a caption to your video, after uploading it in Promo’s video editor, click the circular pink plus sign to the left of the timeline. Choose “Add Caption” from the dropdown menu.
- After you’ve added and positioned, and designed your subtitles with beautiful text and colors, click Save & Preview to view your creation and publish or download it.
Conclusion
If you need subtitles for your videos, it is important to find the best subtitle maker online that will suit all of your needs. Whether you are looking for a free option or want something with more customization, there are plenty of options available online. Check out our list, and make sure to choose one that suits what you need!
Creative Cloud Express is re-branded from Adobe Spark, a web and mobile app for creating multimeadia content. With Creative Cloud Express, you can add subtitles or captions to videos online without downloading any software on your computer. It also provides lots of editing tools such as convert video to GIF, reverse videos, merge videos, resize videos for different social , and change video speed.
You can use Creative Cloud Express for free, which includes most core features, but if you want to upgrade to use all features and assets, you may need to pay $9.99/month for the premium plan.
To add subtitles to video with Creative Cloud Express, follow the steps below:
- Visit https://www.adobe.com/express/feature/video/add-subtitle and click Add subtitles to your videos now to get started. Follow the instruction to sign up and sign in your account.
- Adobe will ask you to pick a story template, but you can always start from scratch. Here I will choose a template.
- Now import video or picture material from your computer, and adjust its position in the timeline.
- Pick from a variety of subtitle layout alternatives and change the text size as necessary.
- After adding titles and subtitles to your video, click the Download button to save your video to local computer.
If you prefer to add subtitles to video on Windows or Mac computer, you can try Filmora video editor . Compared with those online tools, Filmora video editor is undoubtedly a great choice for those who need more customized and stylish subtitles.
For Win 7 or later (64-bit)
Secure Download
For macOS 10.12 or later
Secure Download
Whether you want to edit home movies to send to family and friends or upload to YouTube and Vimeo for sharing, this video editor from Wondershare Filmora can help take your videos to a higher level effortlessly. Here, let’s take a look at the main features of this video editing software.
Filmora is compatible with the Filmstock effects store, an online stock media including video effects, va library for your video projects,video footage, music, sound effects, and stock images as well.
2. Kapwing
As one of the best online video editors , Kapwing allows you to add subtitles to the video easily. It gives three options for adding subtitles: upload an SRT file, manually add them, or have them auto-generated . It opens the video in the online video editor in either situation.
You can place subtitles anywhere on the screen, and you can relocate them at any time. Apart from that, you can customize the text’s appearance with formatting options, text color, and background color. However, you can export videos up to 30 minutes long for free, and to export longer video, you need to pay $16 per month. And in order to download the edited video without a watermark, you must create an account.
To use Kapwing subtitle creator online, follow these steps:
- Go to https://www.kapwing.com/subtitles , and upload your video file.
- On the Add Subtitles screen, choose the method for adding subtitles: add subtitles manually, or use auto-generated, or upload .SRT file. Here I will try add subtitles manually.
- When adding subtitles, make sure the timestamps are correct on the video. (If required) Set the time for precise sync (if desired).
- Click the “Done” button to return to the main editor. Click Export Video and then download it with embedded subtitles.
3. Clideo
Clideo is a video creation app that lets users add subtitles to their own videos. You can add subtitles in any language from an official list of languages available on the website. After adding the subtitle, you can re-position it anywhere on the screen with a few clicks. For free users, Claudio only allows HD exports, and they cannot download the video without a watermark.
To use this subtitle maker online tool, follow these steps:
- Visit https://clideo.com/add-subtitles-to-video and click Add subtitles to your videos now to get started after you register yourself on Clideo with your email id and password.
- Upload the video file from local storage, Google Drive or Dropbox, and then pick an option for adding captions: manually or using a subtitle file. Select the first instance, click “Add subtitle,” type your text, and set the timings.
You can also add a title, leader lines, and subheadings to your presentation. The font, color, background, size, and slide alignment are adjustable.
4. Veed.io
Veed.io is another easy-to-use web video editing tool with several subtitle options for adding subtitles. You can add subtitles quickly and easily, type them manually or upload them in SRT file format.
Veed is an automated subtitling platform that helps people add subtitles online to their YouTube videos without using off-the-shelf subtitle processing software. It is suitable for individuals who have no time or patience to type out long sentence structures one letter at a time. You can start without an account.
You can choose the color of the text, the background of subtitles, and more, to make your film look more attractive. It allows you to share your movies with friends via social media networks like Twitter and Facebook.
To use Veed subtitle creator online, follow these steps:
- Go to https://www.veed.io/tools/auto-subtitle-generator and click on “Get Started.” You can select a blank project or a template.
- Go to the Project Settings section on the left. Choose any one of them depending on your requirements and click Next.
- While using automated transcription, you have to upload.SRT subtitle file or enter the transcript manually.
- You can also personalize the text, color, size, font, alignment, and anything else you want.Make changes to the timeline and then sync the subtitles.
- After that, go to the Export and save the video.
5. Flixier
Flixier is one of the most accessible tools to add subtitles online. Flixier is an efficient auto subtitle generation and syncing platform. You can add any video file type with auto subtitles in Flixier. You can add auto subtitles to MPEG, MP4, MOV, AVI, or any other file on your system. There is no need to convert the video or do extra work. This automatic subtitle maker takes care of everything.
Flixier allows you to make a video subtitle automatically and manually create one or add a subtitle from your computer. You may submit any type of subtitle file (SRT, VTT, ASS, SSA, TXT).
To use Flixier subtitle maker online, follow these steps:
- Go to https://flixier.com/tools/auto-subtitle-generator and click on “Get Started.”
- You must first upload your videos to the Flixier library to create subtitles automatically.
- You may do so by uploading from your computer, importing from cloud storage services, or straight from YouTube, Zoom, or Twitch.
- After importing them, you may drag and drop your movie clips on the Flixier timeline.
- In the pop-up window that appears, click on one, and a button saying “Generate Auto Subtitle” will appear on the right. After you’ve finished your work, click start to have your subtitling generated and added onto the timeline where you can continue making changes.
- Finally, Flixier’s cloud rendering engine lets you export your film in minutes.
- Now, you may save the video to your computer or send it straight to social media.
6. Subtitle Horse
Subtitle Horse is a browser-based subtitler for online video captioning. There are many features, such as real-time validation, an interactive timeline, and shortcuts. Subtitle horse is highly configurable: Subtitles may be made by both amateurs and experts. Users must create an account to upload videos.
With the free version of subtitle horse, you may add subtitles and captions to your video. You may export your subtitles in the necessary formats (SRT, TimedText, WebVTT, etc.). The video can be accessed online, on a platform like YouTube, Dropbox, or others.
To use Subtitle-Horse subtitle creator online, follow these steps:
- Go to https://subtitle-horse.com/ and click on “Create subtitles with the free version.”
- Upload your video or add a URL by clicking the “Add Project” button
- Click “Next” and select “Frame Rate” and “Waveform.”
- Click “Start Subtitling”
- After adding subtitles, you can download them for free or buy HD-quality MP4 videos.
7. Subtitle Bee
SubtitleBee understands and automatically translates more than 120 languages across the world. Before uploading your video, simply choose your language and let SubtitleBee handle the rest by adding subtitles in your desired language.
The algorithm is about 95% accurate in detecting your voice and adding automated captions based on most languages. AI subtitle translation allows you to translate subtitles into other languages. You can use it for free with limited features and watermarked files. There is a time limit on free trial accounts, so you can add videos shorter than 10 minutes in length.
To use Subtitle-Bee subtitle maker online, follow these steps:
- Go to https://subtitlebee.com/ and click on “Add subtitles now”
- Then select the language of the current media voices.
- Now, Upload your video or paste a URL from Youtube, Vimeo, or self-hosted.
- Make any modifications as needed by editing the subtitles to meet your demands.
- Simply add the text you want and customize it to your own needs.
- Choose the social networking site that you wish to publish on.
- Download and encode your video with the subtitles included.
8. Fastreel
Fastreel allows you to create a video with subs and change the text settings: font, size, color, style, and position. A free membership will allow you to produce and share videos in the format of your choice, as well as access stock media. The cost of a paid subscription is $5.95 per video.
Furthermore, there are several colorful templates for various events — explainer videos, wedding films, YouTube intros, customer testimonials, and so forth. To personalize each template, you may use your own photos, films, music, and text. Plus, every template has its own title and transition style. Fastreel is not made for professional users; it’s a tool for novices and those searching for fast answers.
To use Fastreel subtitle creator online, follow these steps:
- Go to https://www.fastreel.com/add-subtitles-to-video.html and click on “Add subtitles now”
- Click the Add Your File button to upload any MOV, MKV, AVI, WMV, or MP4 content less than 500 MB in size. You can add subtitles only to the first hour of a film; therefore, it’s best to pick one with fewer subtitles.
- To add an SRT file to a video, select Upload SRT. You can modify each caption and its timing.
- You can also alter the text’s font, size, color, style, and position. The button labeled “Download SRT” allows you to save the subtitles file for later use.
- Then, scroll down to the bottom of the page and click Continue.
- After finishing, click the Export button. Choose a name and destination for your video, then choose a format. You’ll see the export window where you can select a save option that is appropriate for you. Subtitles will be permanently added to the video.
9. EZGIF
EZGIF is a well-known website for animated GIFs. EZGIF has several tools for GIFs, Photos, and Videos. It offers an online tool to add subtitles to videos that you may use. It’s pretty simple to utilize and provides two methods for adding subtitles. You can upload a maximum of 100 MB on EZGIF. If your video is larger than 100 MB, you may compress it using EZGIF.
To add subtitles to a video on EZGIF, follow these steps:
- Go to https://ezgif.com/video-subtitles .
- Upload a video file or copy and paste the URL of a video available on the internet.
- To add subtitles, click the “Upload” button. To enter them manually, scroll to the bottom of the screen.
- Simply type the subtitle in the box, then set the time duration for when it should appear in the video. To cover the whole video, you may add more subtitles as well.
- After that, click “Add Subtitles” and then save the output.
10. PROMO
Promo is a website that makes promotion easier. This online tool lets users add basic subtitles to videos with ease as a video creation software. This site is free of charge and does not require registration to use the subtitle function, but it does give you an ad at the beginning of your finished video.
Using Promo, you may add video captions or subtitles from your browser anytime, anytime, anyplace. There’s no need to download anything; it’s as simple as clicking a link. The free version comes with a watermark. For the ad-free version, there is a $99/month fee.
To add subtitles with Promo subtitle maker online, follow the steps below:
- Go to https://promo.com/tools/add-subtitles-to-video .
- Upload the video you wish to caption or subtitle.
- You can use one of the platform’s professionally designed video templates or premium clips to construct a new film from the ground up.
- To add a caption to your video, after uploading it in Promo’s video editor, click the circular pink plus sign to the left of the timeline. Choose “Add Caption” from the dropdown menu.
- After you’ve added and positioned, and designed your subtitles with beautiful text and colors, click Save & Preview to view your creation and publish or download it.
Conclusion
If you need subtitles for your videos, it is important to find the best subtitle maker online that will suit all of your needs. Whether you are looking for a free option or want something with more customization, there are plenty of options available online. Check out our list, and make sure to choose one that suits what you need!
Also read:
- Updated 2024 Approved Convert WebM to MP3 Best Tools for the Job
- New In 2024, Smooth Operator 3 Techniques to Steady Unstable Footage in AE
- Updated Unlock the Secrets of YouTube MP3 Converters Top Reviews for 2024
- Updated 10+ Best Easy Video Joiner Alternatives for 2024
- 2024 Approved Make Your WhatsApp Status Stand Out with These Essential Apps
- Updated Beginners Guide to Easy Video Editing Programs for 2024
- In 2024, Unleash Your Creativity Top 10 Free and Paid Android Video Editors
- New 2024 Approved Split, Trim, and Merge AVI Videos Top Video Cutting Tools Reviewed
- Updated Unlock Slow Motion on VLC A Beginners Guide to Video Playback Tricks
- Updated Discover the Latest Movies with These Top 10 Trailer Apps for iOS for 2024
- New In 2024, Pro-Level Jump Cuts in Final Cut Pro X Tips and Tricks
- Updated The Ultimate List 10 Vegas Pro Alternatives for Mac That Wont Break the Bank for 2024
- Updated 2024 Approved Low-Cost Filmmaking Essentials 7 Must-Know Software 2023 Update
- Updated The Best of the Best Top Timecode Calculators for iPhone, Android, and Web for 2024
- New S Top Picks Free Open-Source Video Editing Tools for 2024
- Updated In 2024, Top Online Resources to Blur Image Backgrounds for Free
- Updated 2024 Approved Mobile Video Editing Mastery Top 10 Vlog Apps
- Updated The Countdown Begins A Step-by-Step Guide to Adding Timers in FCPX for 2024
- Updated In 2024, Web-Based Video Editing Platforms for Vertical Content Creators
- New Top-Rated Online Platforms for Making Professional Gaming Intros
- New In 2024, Mastering GoPro Video Editing on Mac A 2023 Guide
- Updated Pro Audio Editing Essentials Top 8 Software for Industry Experts for 2024
- 2024 Approved Your Go-To Guide The 12 Best Audio Converters for Easy Conversion
- New In 2024, 10 Exceptional Linux Video Editors That Rival Adobe Premiere
- New From Facebook to Instagram A Complete Guide to Social Media Aspect Ratios for 2024
- New Say Goodbye to iMovie The Top 10 Android Video Editing Apps for 2024
- Updated Budget Video Editing Options Top Picks for 2024
- Take Your Videos to the Next Level Top Adobe Premiere Plugins for 2024
- 2024 Approved Retrograde Your Footage Easy VHS Effects in Final Cut Pro
- New 2024 Approved No-Cost Split Screen Video Editors Online and Offline Options Reviewed
- New Open-Source Video Editing Excellenc for 2024
- 2024 Approved OS X Mavericks Video Editing 101 From Beginner to Pro
- New In 2024, Video Editing Hack How to Reverse a Clip in Final Cut Pro
- Updated In 2024, Get Creative with Instagram Stop Motion A Comprehensive Tutorial
- The Ultimate Guide to MTS Video Editing 5 Best Tools for 2024
- New 2024 Approved Invitation Video Creation Made Easy 10 Free Online Tools
- Updated Top Video Editing Software for PC GoPro Quik and More
- Updated Mobile Video Editing Made Easy PowerDirector Alternatives You Need to Know for 2024
- New 2024 Approved Alternatives to Popular Video Joining Tools Top Picks
- Updated Make a Movie Online for Free Top 9 Options
- Updated 2024 Approved Learn the Best Green Screen Video Editors for Mac Users, Including Green Screen Final Cut Pro
- In 2024, Online Image Size Converter Get the Right Fit
- New Top 10 Best Free Video Editors for Ubuntu for 2024
- Updated Best Vegas Pro Replacements for Mac Users Free and Premium Options for 2024
- New In 2024, Free Video Rotation Software Top 10 Picks for Flipping Footage
- Sign .dot file Documents Online for Free
- Some MP4 won't play on my Samsung Galaxy S21 FE 5G (2023)
- In 2024, What Is a SIM Network Unlock PIN? Get Your Nokia C02 Phone Network-Ready
- Hassle-Free Ways to Remove FRP Lock on Itel A70with/without a PC
- How does the stardust trade cost In pokemon go On Vivo S17e? | Dr.fone
- How to install and update hardware device drivers manually on Windows 11 & 10
- 2024 Approved The Top Reasons to Read This Article About Mp3 Converter Windows Right Now
- 2024 Approved Troubleshoot Avidemux Audio Problems Step-by-Step Guide 2023
- In 2024, 3 Ways for Android Pokemon Go Spoofing On Nokia 130 Music | Dr.fone
- How to Unlock Realme 12 Pro+ 5G Phone without PIN
- Latest way to get Shiny Meltan Box in Pokémon Go Mystery Box On OnePlus Nord N30 SE | Dr.fone
- In 2024, How to Send and Fake Live Location on Facebook Messenger Of your Poco M6 Pro 5G | Dr.fone
- Learn How To Lock Stolen Your iPhone 12 Properly
- In 2024, Best 4 Morgan Freeman Voice Generator Tools for Voice Cloning
- In 2024, Ultimate Guide from iPhone 13 mini iCloud Activation Lock Bypass
- 7 Fixes for Unfortunately, Phone Has Stopped on Samsung Galaxy S24 | Dr.fone
- Top Apps and Online Tools To Track Motorola Moto G34 5G Phone With/Without IMEI Number
- Updated In 2024, Blur Face or Background in Videos Top iPhone and Android Apps
- In 2024, The Magnificent Art of Pokemon Go Streaming On Motorola G24 Power? | Dr.fone
- AddROM Bypass An Android Tool to Unlock FRP Lock Screen For your Xiaomi Redmi Note 12 4G
- 10 Fake GPS Location Apps on Android Of your Lava Agni 2 5G | Dr.fone
- The Best Android Unlock Software For Lava Yuva 3 Device Top 5 Picks to Remove Android Locks
- In 2024, How to Fix Pokemon Go Route Not Working On Vivo T2 Pro 5G? | Dr.fone
- How Do You Get Sun Stone Evolutions in Pokémon For OnePlus Ace 2 Pro? | Dr.fone
- Updated Filmora Promo Codes 2024 Your Complete Resource for Discounts
- Solutions to restore deleted files from Vivo Y100A
- In 2024, How Can I Catch the Regional Pokémon without Traveling On Apple iPhone SE (2022) | Dr.fone
- How to Easily Hard reset my OnePlus Nord N30 SE | Dr.fone
- Updated Basic Introduction for LumaFusion Color Grading for 2024
- In 2024, How Do You Unlock your iPhone 7? Learn All 4 Methods
- Spotify Keeps Crashing A Complete List of Fixes You Can Use on Vivo Y28 5G | Dr.fone
- Bricked Your Motorola Moto G04? Heres A Full Solution | Dr.fone
- Updated How to Make a Time-Lapse Video Online for 2024
- In 2024, How to Reset a Locked Poco X6 Pro Phone
- Apple ID is Greyed Out On Apple iPhone 8 Plus How to Bypass?
- In 2024, Revolutionize Your Video Content How to Convert Videos Into Cartoons in Minutes
- A Step-by-Step Guide on Using ADB and Fastboot to Remove FRP Lock from your Infinix Zero 30 5G
- New 2024 Approved Video Brightness Boosting Solutions
- How to Lava Storm 5G Get Deleted photos Back with Ease and Safety?
- Title: New 2024 Approved Cartoonify Your Content The Latest Techniques for Video Conversion (2023
- Author: Isabella
- Created at : 2024-05-19 13:04:14
- Updated at : 2024-05-20 13:04:14
- Link: https://video-creation-software.techidaily.com/new-2024-approved-cartoonify-your-content-the-latest-techniques-for-video-conversion-2023/
- License: This work is licensed under CC BY-NC-SA 4.0.
