
:max_bytes(150000):strip_icc():format(webp)/GettyImages-585151372-a659baf0c7b441b9b7e7896716b12784.jpg)
New 2024 Approved The Art of Visual Storytelling Ken Burns Effect in Final Cut Pro Explained
The Art of Visual Storytelling: Ken Burns Effect in Final Cut Pro Explained
How to Use Ken Burns Effect in Final Cut Pro with Detailed Steps

Benjamin Arango
Mar 27, 2024• Proven solutions
Those new to the Final Cut Pro or Pro X programs will be finding it a little challenging to add effects or edit videos. It’s a complex film editing software that takes a while to use. With our help, however, we can have you mastering the Ken Burns effect in Final Cut Pro. Do you want to know how to make ken burns effect in final cut pro? Listen closely.
- Part 1: How to Make Ken Burns Effect Final Cut Pro
- Part 2: How to Zoom in Final Cut Pro Using Keyframing
Part 1: How to Make Ken Burns Effect Final Cut Pro
To make a Ken Burns Effect, Final Cut Pro X (or a Ken Burns Effect on Final Cut, since they are both extensions of one another) simply follow our guide.
First, let’s talk about what Ken Burns is and why he has an effect named after him in Final Cut programs!
What is the Ken Burns Effect
Ken Burns is a world-famous American documentary filmmaker. He is well known for producing documentaries that take a candid if somewhat old-world-feeling look into different worlds. He has covered Baseball, the Civil War, and other fascinating times and places. Arguably, he is best known for using archival footage as film footage. How does he do this? By using the Ken Burns Effect, of course.
The Ken Burns Effect in Final Cut Pro X allows the editor to zoom in and out, slow pan, and scroll across archive photography and still film. This will enable you to substitute whole parts of the program you are making with photographs if you haven’t taken enough footage. It is commonly used in editing, particularly when making things like wedding videos , which often feature lots of photos of the happy couple.
Anyway, let’s look at how you implement the Ken Burns Effect in Final Cut Pro.
Steps to Making the Ken Burns Effect Final Cut Pro
Now that we know what is Ken Burns Effect. Let’s go over the steps to making the Ken Burns Effect in Final Cut Pro.
Step 1 – Import your video. From your timeline workspace, select the clip, or highlight the section of the clip, that you want to apply the Ken Burns Effect to.

Step 2 – Enter into the viewer mode to do this. From here, select the pop-up menu from the list of options at the bottom of the screen.
Step 3 – Hold down both the shift key and the letter C. This is the fast way to cut out what you need. You can always stick to the right-click to cut a clip if you are more comfortable with this.
Step 4 – scroll down until you find the Ken Burns Effect option in the control panel. The effect should now appear on your page, in the area you selected.
Ken Burns Customization
You can also customize the ken burns effects in Final Cut.
Step 1 – To transform from the Ken Burns Effect into customization mode, drag the green box in the viewer.
Step 2 – Adjust the green box’s size, shape, and height until you are happy with where it is placed.

Step 3 – Checking what you have already put in place using the preview option is a good idea at this stage. You can edit mistakes out later, but when you are trying to edit for speed, it is best to get it right the first time around!
Step 4 – Adjust the viewer to accommodate any changes you need to make – don’t click the done button until you are sure. That being said, you can always back-step should you mis-click. You can also just start over with the effect customization if you messed up.
Part 2: How to Zoom in Final Cut Pro Using Keyframing
Now that we know how to open and apply the Ken Burns Effect in Final Cut Pro. Let’s examine how we zoom in Final Cut Pro using keyframing. Keyframing, of course, involves basic animation that allows movement to be added to a still frame. So how do you use the Ken Burns Effect in Final Cut Pro X in conjunction with keyframing? Let’s talk you through it.
You can use keyframing to zoom and pan. We will talk you through how you use it to zoom in, and you should be able to work out the rest from there.
Step 1 – Set the playhead at the start of the chosen clip. This is where you want the zoom effect to start from.
Step 2 – Click to select the effects menu. It should be at the bottom of the screen.
Step 3 – Seek out the scale and position tools. You can use these to size your animation, decide how much of a zoom you like, and how fast it will go.

Step 4 – Follow keyframe > size > position and ensure your clip is covered as you need it. You can always come back to this step a few times if you don’t get it immediately right.
Step 5 – Set the playhead where you want the clip and animation to end. Remember – if you zoom or pan too fast, you might glitch in your footage. Do it on time for the best results.
As a Pro Tip: you will be baled to view all keyframes on your clip if you select show video animation from your timeline.
The Ken Burns Conclusion
The Ken Burns Effect is famous for a reason. It allows you to fill up space if you don’t have footage for certain things. It can be used to depict ancient battles without the use of CGI.
The Ken Burns Effect, Final Cut Pro (X) technique lets filmmakers go to places that they wouldn’t otherwise get to. It is excellent for both glimpsing into the past, and for flashing forward into imagined futures. Best of all, it lets you go there when you aren’t a big-budget Hollywood film producer. We love anything that saves a buck or two while we edit.
Benjamin Arango
Benjamin Arango is a writer and a lover of all things video.
Follow @Benjamin Arango
Benjamin Arango
Mar 27, 2024• Proven solutions
Those new to the Final Cut Pro or Pro X programs will be finding it a little challenging to add effects or edit videos. It’s a complex film editing software that takes a while to use. With our help, however, we can have you mastering the Ken Burns effect in Final Cut Pro. Do you want to know how to make ken burns effect in final cut pro? Listen closely.
- Part 1: How to Make Ken Burns Effect Final Cut Pro
- Part 2: How to Zoom in Final Cut Pro Using Keyframing
Part 1: How to Make Ken Burns Effect Final Cut Pro
To make a Ken Burns Effect, Final Cut Pro X (or a Ken Burns Effect on Final Cut, since they are both extensions of one another) simply follow our guide.
First, let’s talk about what Ken Burns is and why he has an effect named after him in Final Cut programs!
What is the Ken Burns Effect
Ken Burns is a world-famous American documentary filmmaker. He is well known for producing documentaries that take a candid if somewhat old-world-feeling look into different worlds. He has covered Baseball, the Civil War, and other fascinating times and places. Arguably, he is best known for using archival footage as film footage. How does he do this? By using the Ken Burns Effect, of course.
The Ken Burns Effect in Final Cut Pro X allows the editor to zoom in and out, slow pan, and scroll across archive photography and still film. This will enable you to substitute whole parts of the program you are making with photographs if you haven’t taken enough footage. It is commonly used in editing, particularly when making things like wedding videos , which often feature lots of photos of the happy couple.
Anyway, let’s look at how you implement the Ken Burns Effect in Final Cut Pro.
Steps to Making the Ken Burns Effect Final Cut Pro
Now that we know what is Ken Burns Effect. Let’s go over the steps to making the Ken Burns Effect in Final Cut Pro.
Step 1 – Import your video. From your timeline workspace, select the clip, or highlight the section of the clip, that you want to apply the Ken Burns Effect to.
Step 2 – Enter into the viewer mode to do this. From here, select the pop-up menu from the list of options at the bottom of the screen.
Step 3 – Hold down both the shift key and the letter C. This is the fast way to cut out what you need. You can always stick to the right-click to cut a clip if you are more comfortable with this.
Step 4 – scroll down until you find the Ken Burns Effect option in the control panel. The effect should now appear on your page, in the area you selected.
Ken Burns Customization
You can also customize the ken burns effects in Final Cut.
Step 1 – To transform from the Ken Burns Effect into customization mode, drag the green box in the viewer.
Step 2 – Adjust the green box’s size, shape, and height until you are happy with where it is placed.
Step 3 – Checking what you have already put in place using the preview option is a good idea at this stage. You can edit mistakes out later, but when you are trying to edit for speed, it is best to get it right the first time around!
Step 4 – Adjust the viewer to accommodate any changes you need to make – don’t click the done button until you are sure. That being said, you can always back-step should you mis-click. You can also just start over with the effect customization if you messed up.
Part 2: How to Zoom in Final Cut Pro Using Keyframing
Now that we know how to open and apply the Ken Burns Effect in Final Cut Pro. Let’s examine how we zoom in Final Cut Pro using keyframing. Keyframing, of course, involves basic animation that allows movement to be added to a still frame. So how do you use the Ken Burns Effect in Final Cut Pro X in conjunction with keyframing? Let’s talk you through it.
You can use keyframing to zoom and pan. We will talk you through how you use it to zoom in, and you should be able to work out the rest from there.
Step 1 – Set the playhead at the start of the chosen clip. This is where you want the zoom effect to start from.
Step 2 – Click to select the effects menu. It should be at the bottom of the screen.
Step 3 – Seek out the scale and position tools. You can use these to size your animation, decide how much of a zoom you like, and how fast it will go.
Step 4 – Follow keyframe > size > position and ensure your clip is covered as you need it. You can always come back to this step a few times if you don’t get it immediately right.
Step 5 – Set the playhead where you want the clip and animation to end. Remember – if you zoom or pan too fast, you might glitch in your footage. Do it on time for the best results.
As a Pro Tip: you will be baled to view all keyframes on your clip if you select show video animation from your timeline.
The Ken Burns Conclusion
The Ken Burns Effect is famous for a reason. It allows you to fill up space if you don’t have footage for certain things. It can be used to depict ancient battles without the use of CGI.
The Ken Burns Effect, Final Cut Pro (X) technique lets filmmakers go to places that they wouldn’t otherwise get to. It is excellent for both glimpsing into the past, and for flashing forward into imagined futures. Best of all, it lets you go there when you aren’t a big-budget Hollywood film producer. We love anything that saves a buck or two while we edit.
Benjamin Arango
Benjamin Arango is a writer and a lover of all things video.
Follow @Benjamin Arango
Download Windows Movie Maker for Free: A Complete Walkthrough
Microsoft produced the movie editing software known as Windows Movie Maker. You can download Movie Maker Windows 10 or even in previous versions. This application can combine video, sound, still photos, and transcripts to make a customized movie. Its functions are simple to use and enjoyable to explore with, and its XML code enables users to create new transitions and effects or change current ones. It’s also simple to upload finished Windows Movie Maker productions to video and social media platforms.
This guide explains everything you need to know about downloading windows movie maker. You can choose to use windows movie maker installation guide as well. With this Windows Movie Maker, you can choose from five different thumb sizes, which is probably plenty, and you can enlarge these clip representations using the zoom button at the bottom. Using the cursor insertion point and edit buttons, you can cut or divide clips. Once you’re used to the app’s distinct editing method, it becomes pretty simple.
Part 1. System Requirements for Windows Movie Maker
Beginners should use Windows Video Maker. Along with fundamental capabilities and workflow components seen in professional video editing systems, it is available for free on Windows PCs. Even inexperienced editors may understand it because to its simple chronology in the form of an understandable interface. Windows Movie Maker allows you to create your own movies. Create professional movies from your still and moving images. To aid in telling your tale, use transitions, sound, subtitles, and special effects.
| Requirements | Compatibility of Windows Movie Maker |
|---|---|
| Support System | Windows Vista, Windows 7, Windows 8, Windows 8.1, and Windows 10 are all versions of Microsoft Windows. |
| Processor | 1GHz Intel/AMD processor or above such as an Intel Pentium III, Advanced Micro Devices (AMD) Athlon, or equivalent processor |
| For Audio | An audio capture device to capture audio from external sources |
| Hardware Memory | 300MB space for installation |
| Graphics Card | Super VGA (800x600) resolution graphics card with at least a 16-bit graphics card |
| Other Requirements | 256MB RAM (512MB or above recommended) |
Part 2. Download and install Windows Movie Maker Windows 10
Anyone who wants to easily modify movies should use Movie Maker. The program offers every fundamental feature you need to create edited videos. Effects, transitions, titles and credits, audio track, timeline narration, and Auto Movie are just a few of the features available in Windows Movie Maker. XML code may be used to create new effects and transitions as well as modify already existing ones. An easy-to-use tool for altering audio tracks is Windows Movie Maker. To audio tracks, Windows Movie Maker can add simple effects like fade-in and fade-out.
Steps to Download and Install Windows Movie Maker on Win 10
Step1 Download the File
You may download Windows Movie Maker to produce videos from photographs. Transitions, a soundtrack, title and credit text, among other things, are simple to add to your video. Complete the necessary file downloads by clicking on the download button(s) below. Depending on your download speed, this might take anything from a few minutes to many hours.
Step2 Run the Downloaded program File
The installation launch screen is given in the following image. To install the program, run “setup.exe” by double-clicking the downloaded setup file that you previously downloaded.

Step3 Set Personalized Installation
Follow the instructions to install Windows Movie Maker. .Net framework is a required for Windows Movie Maker. Launch the Windows Movie Maker Installer program to install Windows Movie Maker on Windows 10.

Step4 Hit Install Button
Press the “Install” button after selecting Messenger, Photo Gallery, and Movie Maker as the apps to be installed. You can now access Windows Movie Maker.

Naturally, Microsoft also offered new video editing tools for Windows users once they ceased upgrading Windows Movie Maker. The complete version of Windows Movie Maker 2022 is now installed on your Windows 10 OS computer without any restrictions.
Part 3. Download and Install Windows Movie Maker Windows 7/8
Windows Movie Maker is a user-friendly and effective movie creation and editing software program created for the most recent versions of Windows 11 and Windows 7/8/10. Windows XP and Vista are compatible with the previous version. Only the Essentials package, a free collection of lifestyle and utility software for Windows 7 and Windows 8, which also contains Windows Photo Gallery, allows you to install Movie Maker. The single installer for all the Essentials applications gives you the choice to install all of them at once or just some of them.
Steps to Download and Install Windows Movie Maker on Win 7/8
Step1 Download the Installer
Start downloading Windows Live Essentials Movie Maker 12 by clicking on one of the links below. Windows Live Essentials Movie Maker has a standalone, complete offline installation available here. Windows XP, Vista, 7, 8, 8.1, and 64-bit versions of Windows are all supported by this offline installation solution for Windows Movie Maker.
Download Installer
Step2 Open and Customize the File
Access the “Patch” folder. Apply the fix by running “windows.movie.maker-patch.exe”. Although Windows Essentials installation is requested by the Windows Movie Maker installer, it is not required. You may click “Choose the programs you wish to install” instead to bypass it. You may now view your selections. We just need the picture gallery and the movie creator, so uncheck the boxes next to Writer, Messenger, and Mail. Click the “Choose the apps you wish to install” button after that.
Step3 Hit Install Button
Following this, the installation of Windows Movie Maker will begin when you click the install button. The installation is finished in a short while. After a successful installation, Windows Movie Maker can be added to your taskbar and a desktop shortcut can be made.

Step4 Launch the Editor
Free video editing software with a simple UI is called Windows Movie Maker. Click the provided download button to start the Windows movie maker download. The Windows Movie Maker utility download is completely secure and virus-free.

Part 4. Best Windows Movie Maker Alternative to Use
While there are now several excellent video editors available on the market, we will here suggest Filmora by Wondershare as the best replacement for Windows Movie Maker. Filmora is an extremely user-friendly video editor in terms of UI. It offers a simple user interface that even beginners may quickly grasp. By holding the mouse over any clip in the Media view, you can navigate through it thanks to a handy UX touch.
You may download Filmora for free on your computer running Windows 10 or Windows 11 and it is a very user-friendly movie editor. For novices who want to create explainer videos, training videos, demo videos, and more rapidly, Filmora is a simple yet advanced feature-packed tool. The great video templates make screen recording more alluring. You can make use of annotation tools like callouts, arrows, and drawing gestures to attract attention to essential information. Its structure is quite straightforward and easy to understand since it utilizes the timeline as the editing UI.
How to Edit Videos with Filmora:
Free Download For Win 7 or later(64-bit)
Free Download For macOS 10.14 or later
Step1 Install Filmora on your Windows PC
You must to download and install Wondershare Filmora on your computer before using it. This TV recorder on the fly may be used for your requirements. You can find every version of the Filmora software, including Windows and Mac versions, as well as the most current version.
You can now install it on your computer once you’ve done downloading it before you can use it with your laptop. It will bring you to the user-friendly UI of Filmora, where you may use the documentation function right away, as illustrated in the following figure:

Step2 Import the Content
A significant component of managing your raw footages is the Media library. All of the imported material, including the images, audio files, and movies, are now kept in Import Window. The media files are also included in the Music, Pictures, and Videos sections. This top free video editing program has new built-in sound tracks to simplify your job. As the video backdrop music, you can either choose the built-in music or local audio files.

Step3 Create the Movies
Finally, you may edit your audio recordings using tools that are completely customizable. Use the editor in Filmora to edit your recorded audio files, using simple to advanced editing techniques. Your recorded video can be improved using Filmora’s Editor by adding animated titles, spectacular effects, audio enhancements, and more.

Step4 Add Special Effects to Your Video
Wondershare Filmora was created primarily to give your films a polished appearance. You may utilize a variety of its eye-catching and adjustable effects to make your video productions stand out from the competition. In this area, we’ve covered some of the best effects for bringing life to your dull, unprofessional films.

Step5 Save or Share the Videos
Finally, you can use the complete Filmora editor as previously mentioned when you’ve done editing the recorded video. When you want to submit your creative work right away to YouTube or another well-known website, click the Export option and choose the platform where you want to share your video clip. If you like, you may even make changes to the video before uploading it.
The Bottom Line
Looking to create captivating movies from video clips? The best tool for the purpose can be Windows Movie Maker. While Windows Movie Maker allows for basic track editing, such as the addition of fade-in and fade-out effects for audio tracks, yet, using Filmora program gives you a variety of tools to create professional-looking films, including timeline narration, transition overlays, animations, and audio choices. This way, you might use the suggested movie maker to make movies with a professional tool and sharing it with others.
Part 2. Download and install Windows Movie Maker Windows 10
Anyone who wants to easily modify movies should use Movie Maker. The program offers every fundamental feature you need to create edited videos. Effects, transitions, titles and credits, audio track, timeline narration, and Auto Movie are just a few of the features available in Windows Movie Maker. XML code may be used to create new effects and transitions as well as modify already existing ones. An easy-to-use tool for altering audio tracks is Windows Movie Maker. To audio tracks, Windows Movie Maker can add simple effects like fade-in and fade-out.
Steps to Download and Install Windows Movie Maker on Win 10
Step1 Download the File
You may download Windows Movie Maker to produce videos from photographs. Transitions, a soundtrack, title and credit text, among other things, are simple to add to your video. Complete the necessary file downloads by clicking on the download button(s) below. Depending on your download speed, this might take anything from a few minutes to many hours.
Step2 Run the Downloaded program File
The installation launch screen is given in the following image. To install the program, run “setup.exe” by double-clicking the downloaded setup file that you previously downloaded.
Step3 Set Personalized Installation
Follow the instructions to install Windows Movie Maker. .Net framework is a required for Windows Movie Maker. Launch the Windows Movie Maker Installer program to install Windows Movie Maker on Windows 10.
Step4 Hit Install Button
Press the “Install” button after selecting Messenger, Photo Gallery, and Movie Maker as the apps to be installed. You can now access Windows Movie Maker.
Naturally, Microsoft also offered new video editing tools for Windows users once they ceased upgrading Windows Movie Maker. The complete version of Windows Movie Maker 2022 is now installed on your Windows 10 OS computer without any restrictions.
Part 3. Download and Install Windows Movie Maker Windows 7/8
Windows Movie Maker is a user-friendly and effective movie creation and editing software program created for the most recent versions of Windows 11 and Windows 7/8/10. Windows XP and Vista are compatible with the previous version. Only the Essentials package, a free collection of lifestyle and utility software for Windows 7 and Windows 8, which also contains Windows Photo Gallery, allows you to install Movie Maker. The single installer for all the Essentials applications gives you the choice to install all of them at once or just some of them.
Steps to Download and Install Windows Movie Maker on Win 7/8
Step1 Download the Installer
Start downloading Windows Live Essentials Movie Maker 12 by clicking on one of the links below. Windows Live Essentials Movie Maker has a standalone, complete offline installation available here. Windows XP, Vista, 7, 8, 8.1, and 64-bit versions of Windows are all supported by this offline installation solution for Windows Movie Maker.
Download Installer
Step2 Open and Customize the File
Access the “Patch” folder. Apply the fix by running “windows.movie.maker-patch.exe”. Although Windows Essentials installation is requested by the Windows Movie Maker installer, it is not required. You may click “Choose the programs you wish to install” instead to bypass it. You may now view your selections. We just need the picture gallery and the movie creator, so uncheck the boxes next to Writer, Messenger, and Mail. Click the “Choose the apps you wish to install” button after that.
Step3 Hit Install Button
Following this, the installation of Windows Movie Maker will begin when you click the install button. The installation is finished in a short while. After a successful installation, Windows Movie Maker can be added to your taskbar and a desktop shortcut can be made.
Step4 Launch the Editor
Free video editing software with a simple UI is called Windows Movie Maker. Click the provided download button to start the Windows movie maker download. The Windows Movie Maker utility download is completely secure and virus-free.
Part 4. Best Windows Movie Maker Alternative to Use
While there are now several excellent video editors available on the market, we will here suggest Filmora by Wondershare as the best replacement for Windows Movie Maker. Filmora is an extremely user-friendly video editor in terms of UI. It offers a simple user interface that even beginners may quickly grasp. By holding the mouse over any clip in the Media view, you can navigate through it thanks to a handy UX touch.
You may download Filmora for free on your computer running Windows 10 or Windows 11 and it is a very user-friendly movie editor. For novices who want to create explainer videos, training videos, demo videos, and more rapidly, Filmora is a simple yet advanced feature-packed tool. The great video templates make screen recording more alluring. You can make use of annotation tools like callouts, arrows, and drawing gestures to attract attention to essential information. Its structure is quite straightforward and easy to understand since it utilizes the timeline as the editing UI.
How to Edit Videos with Filmora:
Free Download For Win 7 or later(64-bit)
Free Download For macOS 10.14 or later
Step1 Install Filmora on your Windows PC
You must to download and install Wondershare Filmora on your computer before using it. This TV recorder on the fly may be used for your requirements. You can find every version of the Filmora software, including Windows and Mac versions, as well as the most current version.
You can now install it on your computer once you’ve done downloading it before you can use it with your laptop. It will bring you to the user-friendly UI of Filmora, where you may use the documentation function right away, as illustrated in the following figure:
Step2 Import the Content
A significant component of managing your raw footages is the Media library. All of the imported material, including the images, audio files, and movies, are now kept in Import Window. The media files are also included in the Music, Pictures, and Videos sections. This top free video editing program has new built-in sound tracks to simplify your job. As the video backdrop music, you can either choose the built-in music or local audio files.
Step3 Create the Movies
Finally, you may edit your audio recordings using tools that are completely customizable. Use the editor in Filmora to edit your recorded audio files, using simple to advanced editing techniques. Your recorded video can be improved using Filmora’s Editor by adding animated titles, spectacular effects, audio enhancements, and more.
Step4 Add Special Effects to Your Video
Wondershare Filmora was created primarily to give your films a polished appearance. You may utilize a variety of its eye-catching and adjustable effects to make your video productions stand out from the competition. In this area, we’ve covered some of the best effects for bringing life to your dull, unprofessional films.
Step5 Save or Share the Videos
Finally, you can use the complete Filmora editor as previously mentioned when you’ve done editing the recorded video. When you want to submit your creative work right away to YouTube or another well-known website, click the Export option and choose the platform where you want to share your video clip. If you like, you may even make changes to the video before uploading it.
The Bottom Line
Looking to create captivating movies from video clips? The best tool for the purpose can be Windows Movie Maker. While Windows Movie Maker allows for basic track editing, such as the addition of fade-in and fade-out effects for audio tracks, yet, using Filmora program gives you a variety of tools to create professional-looking films, including timeline narration, transition overlays, animations, and audio choices. This way, you might use the suggested movie maker to make movies with a professional tool and sharing it with others.
Best Mac MP3 Conversion Tools: A Comprehensive Guide
What is the Best MP3 Converter Mac Software?
An easy yet powerful editor
Numerous effects to choose from
Detailed tutorials provided by the official channel
Mp3 Converter Mac allows the user to obtain the audio file from your favorite video and save it on your device for having better listening experience.
This article will discuss how to convert MP3 on Mac with high quality and enlist some of the leading and popular converter tools available both online and offline.
In this article
01 [5 Ways to Convert MP3 on Mac with High Quality](#Part 1)
02 [What Is The Best MP3 Converter Software for Mac?](#Part 2)
03 [The Runner-Up MP3 Converter Software List](#Part 3)
Part 1 5 Ways to Convert MP3 on Mac with High Quality
01Way 1: Best Way to Convert MP4 to MP3 with Highest Quality and Fastest Speed
If you want to convert MP3 on Mac with high quality, the best possible method is to download the Vidmore video converter. This software is consistent with both Windows and Mac devices. It comes with a multi-core processor and hardware acceleration, which facilitate you to convert MP4 to MP3 at a 50x faster conversion speed. It also comprises the built-in video clipper, which helps you shorten the MP4 video without losing its quality.
Step 1: You have to download and install the Vidmore converter on your device. Now, drag and drop the video file you want to convert to audio file format.

Step 2: In this step, you have to unfold the “Profile list to avail all the profiles and set MP3 format as a destination from the “General Audio “option. You can even select the portable device you use to convert videos to MP3 format.

Step 3: Now click the “Clip” option to access the video splitter and drag the clipper to set the start/ finish time to trim the available video. The preview window will represent all the modifications instantly. Lastly, click again on the “Clip” option to confirm and receive a new segment.

Step 4: Now, select the “Settings” option to adjust audio settings if required and further click “Convert” to start the conversion process with high quality.

02Way 2: How to Convert MP4 to MP3 for Free Online
As we have already discussed Vidmore software, you can also convert MP3 on Mac online using the same software. All you have to do is to observe the simple steps listed below.
Step 1: You have to type https://www.vidmore.com/free-online-video-converter/ on the browser to run the converter online. Select “Add files to convert,” which help you to navigate to its launcher
Step 2: Now select the “Add File “option to import the video files. You need to discover and click the” Audio” icon and choose “MP3” as the output audio format for each video.

Step 3: If you want to adjust the sample rate, channel, audio encoder, and bit-rate, you have to select the “Setting “option and proceed to the next step by clicking the “Ok” option.

Step 4: Now click the “Convert “option to define the output folder. Successfully, you can convert MP4 to MP3 free of cost.

03Way 3: How to Convert MP4 to MP3 with VLC Media Player
If you want to convert favorite videos into MP3 format using the VLC Media player, follow some of the steps which make your conversion process look easier.
Step 1: Firstly, you have to Run VLC Media Player. Select “Convert/Save” from the “Media” drop-down menu.
Step 2: You need to select the “Add” button to browse and open the MP4 video file. Now, you are required to click the “Convert/ save” option to proceed.
Step 3: Select “Audio – MP3“ from the “Profile” list available under “Settings”.
Step 4: Now, all you have to do is click “Start” to convert MP4 to MP3 with VLC Media Player.

04Way 4: How to Convert MP4 to MP3 Using Windows Media Player
If you have Windows Media Player installed, you will convert the MP4 format to MP3 format. You have to follow the below steps to convert file format without losing its quality.
Step 1: First, open the Window Media player on your computer and select the “Open” option from the “File” list.
Step 2: Now, find the MP4 videos and click “Open” further.
Step 3: Select “Menu” and return to the home screen of Windows Media Player.
Step 4: Now select “Organize” and click on “Options”.
Step 5: In the “Rip Music” section, you have to click the “Change…” option to choose a new destination folder.
Step 6: Now, choose “MP3” as the converted audio format under “Format”.
Step 7: Click “OK” to start the converting process.

05Way 5: How to Convert MP4 to MP3 via Video to MP3 Converter
If you want to convert MP4 files to MP3, you need to download Video to MP3 Converter Apk available for Android users. By using this Apk, you will be able to extract the high quality from the video, which later be saved as an MP3 file by default. It is beneficial if you want to set a ringtone for your phone.
Part 2 What Is The Best MP3 Converter Software for Mac?
01Handbrake
It is recognized as one of the best MP3 converter software compatible with Mac and supports various formats. This tool is also available for Linux and Windows.

Features:
The software has a different feature that facilitates easy conversion of MP3 audios. It works with standard formats and tools like x265 and Libav. According to the user reviews, Handbrake is the right choice if you want to convert videos to MP3 format.
Pros:
● It is an open-source tool and free audio converter Mac.
● Advanced control option with customization settings.
Cons:
● Intimidating interfaces make navigation complex, especially for the beginner.
● Not user-friendly
Rating – 4star/ 5star
02Leawo Video converter
It is a multifunctional converter that facilitates Mac users to convert the MP3 to the most audio format supported. The software is compatible with both Windows and Mac devices.

Features:
It is a YouTube MP3 converter compatible with most audio and video formats and can convert the media files in any combination as per the requirement. It also facilitates the user to optimize the video for playback on particular devices, including iPods, iPads and gaming consoles, etc.
Pros:
● Ease of accessibility
● Facilitate users to customize the conversion settings.
Cons:
● The conversion speed is low
● Not available free of cost
● Low performance in comparison to other converters listed.
Rating – 4.2 star/ 5star
03FFmpeg
It is a cross-platform solution available to convert videos to audio format. The user is forced to enter the instruction from the terminal. Nevertheless, it is available free of cost for Mac users.

Features: This software uses the free FFmpeg encoder and also supports various audio and video formats, including MPEG4, ASF, MOV, AVI, and more. The considerable salient feature of the tool refers to the fact that it supports batch conversion.
Pros:
● Support various audio/ video formats
● Support vast range of filters and codec’s
Cons:
● The official documentation is complex
● Not ideal for beginner
Rating – 4.5 star/ 5star
04Xilisoft Audio Converter
This converter is compatible with both Windows and Mac platforms and holds a reputed position in the marketplace.

Features: This tool accepts the standard audio and video formats and converts them to FLAC, OCG, MP3, etc. It also includes the capability to deliver lossless output post-conversion.
Pros:
● You can extract the output file directly to the designation device.
● Lossless output post-conversion
Cons:
● A limited number of output formats.
Rating – 3.9star/ 5star
05Movavi Video Converter
It is another option available if you are looking to convert MP3 on MAC as it supports almost all ranges of formats and seems to be compatible with both Windows and Mac platforms.

Features:
This converter includes a user-friendly interface that improves navigation and usability and converts most of the standard audio and video formats. It has a predefined setting for different media players like iTunes and Window Media Player.
Pros:
● Sustains a wide range of audio/video formats
● User-friendly interface
● Facilitate users to convert YouTube videos into audio format.
Cons:
● Slow conversion speed
● Not available free of cost( only limited trial version)
Rating – 4.7 star/ 5star
06Switch Audio File Converter
This FLAC to mp3 Mac is developed by one of the reputed vendors, i.e., NCH Software. This tool can run on a 64-bit operating system and provide comparatively better performance than another converter available.

Features: The tool will facilitate the users to obtain the song information from the online database and facilitate a batch conversion. It can be used as a CLI plug-in concerning automated conversion.
Pros:
● Fast conversion speed.
● Carry out the automatic normalization.
Cons:
● Advanced features are only accessible to Pro members.
● Not ideal for beginner
Rating – 4.3 star/ 5star
07Aiseesoft Audio Converter
It is one efficient tool compatible with both Windows and Mac platforms. It is available for a free trial to check the feature before investing in the converter tool.

Features: It allows the user to trim the audio and video clip before choosing the output preference. This tool supports almost all file formats, and also according to a user review, it allows conversion at a reasonable speed.
Pros:
● Support batch conversion
● Support almost all major formats of audio/video
Cons:
● Not available free of cost
Rating – 4.1star/ 5star
08Stellar Audio/ video converter
You can even choose a stellar audio/ video converter to convert videos file into supported audio formats. The tool is compatible with both Windows and Mac platforms.

Features:
This tool supports the standard audio/video format for conversion and lets you save the converted audio format on your device. You can use the converted format for setting ringtones for your phone device.
Pros:
● Compatible with both Windows and Mac platforms
● User-friendly interface
Cons:
● Limited formats supported
Rating – 3.8 star/ 5star
Part 3 The Runner-Up MP3 Converter Software List
Some alternative MP4 to MP3 Converters are available for Mac, making the conversion process more accessible and practical without losing quality.
● Filmora for Mac is recognized as one of the leading and influential video editing software through which you can easily access advanced features such as keyframing and motion tracking. You can easily download the tool by visiting the official website of Wondershare and avail a hassle-free video editing and conversion experience.
● VLC is another option available to you, and the process to convert video to audio is already discussed in the article.
● Convertio is an online tool available free of cost and works as MP4 to MP3 Converter browser support. This tool allows the vast range of conversion and facilitate user to convert archives, audio, videos, eBooks, and presentation.
● QuickTime Player and iTunes is another option available to you offline and available free of cost. The tool is highly compatible with the Mac platform and almost supports all major types of formats.
● Online UniConvert allows the user to convert the videos to audio format online. It is identified as a popular online conversion program that supports a variety of audio and videos format, including iTunes to MP3.
Key Takeaways from This Episode
● An MP4 to MP3 converter Mac computers support will facilitate the user to convert the video format to audio file format.
● Various methods and tools are available to make your conversion process more straightforward.
● The best tool you can use is Filmora from Wondershare due to its salient features.
● It provides you with the best experience as it features complete video conversion and editing features.
● If you have distrust or suggestions about the reading, do let us know by dropping a comment in the box below.
● Some alternative MP4 to MP3 Converters are available for Mac, making the conversion process more accessible and practical without losing quality.
Mp3 Converter Mac allows the user to obtain the audio file from your favorite video and save it on your device for having better listening experience.
This article will discuss how to convert MP3 on Mac with high quality and enlist some of the leading and popular converter tools available both online and offline.
In this article
01 [5 Ways to Convert MP3 on Mac with High Quality](#Part 1)
02 [What Is The Best MP3 Converter Software for Mac?](#Part 2)
03 [The Runner-Up MP3 Converter Software List](#Part 3)
Part 1 5 Ways to Convert MP3 on Mac with High Quality
01Way 1: Best Way to Convert MP4 to MP3 with Highest Quality and Fastest Speed
If you want to convert MP3 on Mac with high quality, the best possible method is to download the Vidmore video converter. This software is consistent with both Windows and Mac devices. It comes with a multi-core processor and hardware acceleration, which facilitate you to convert MP4 to MP3 at a 50x faster conversion speed. It also comprises the built-in video clipper, which helps you shorten the MP4 video without losing its quality.
Step 1: You have to download and install the Vidmore converter on your device. Now, drag and drop the video file you want to convert to audio file format.
Step 2: In this step, you have to unfold the “Profile list to avail all the profiles and set MP3 format as a destination from the “General Audio “option. You can even select the portable device you use to convert videos to MP3 format.
Step 3: Now click the “Clip” option to access the video splitter and drag the clipper to set the start/ finish time to trim the available video. The preview window will represent all the modifications instantly. Lastly, click again on the “Clip” option to confirm and receive a new segment.
Step 4: Now, select the “Settings” option to adjust audio settings if required and further click “Convert” to start the conversion process with high quality.
02Way 2: How to Convert MP4 to MP3 for Free Online
As we have already discussed Vidmore software, you can also convert MP3 on Mac online using the same software. All you have to do is to observe the simple steps listed below.
Step 1: You have to type https://www.vidmore.com/free-online-video-converter/ on the browser to run the converter online. Select “Add files to convert,” which help you to navigate to its launcher
Step 2: Now select the “Add File “option to import the video files. You need to discover and click the” Audio” icon and choose “MP3” as the output audio format for each video.
Step 3: If you want to adjust the sample rate, channel, audio encoder, and bit-rate, you have to select the “Setting “option and proceed to the next step by clicking the “Ok” option.
Step 4: Now click the “Convert “option to define the output folder. Successfully, you can convert MP4 to MP3 free of cost.
03Way 3: How to Convert MP4 to MP3 with VLC Media Player
If you want to convert favorite videos into MP3 format using the VLC Media player, follow some of the steps which make your conversion process look easier.
Step 1: Firstly, you have to Run VLC Media Player. Select “Convert/Save” from the “Media” drop-down menu.
Step 2: You need to select the “Add” button to browse and open the MP4 video file. Now, you are required to click the “Convert/ save” option to proceed.
Step 3: Select “Audio – MP3“ from the “Profile” list available under “Settings”.
Step 4: Now, all you have to do is click “Start” to convert MP4 to MP3 with VLC Media Player.
04Way 4: How to Convert MP4 to MP3 Using Windows Media Player
If you have Windows Media Player installed, you will convert the MP4 format to MP3 format. You have to follow the below steps to convert file format without losing its quality.
Step 1: First, open the Window Media player on your computer and select the “Open” option from the “File” list.
Step 2: Now, find the MP4 videos and click “Open” further.
Step 3: Select “Menu” and return to the home screen of Windows Media Player.
Step 4: Now select “Organize” and click on “Options”.
Step 5: In the “Rip Music” section, you have to click the “Change…” option to choose a new destination folder.
Step 6: Now, choose “MP3” as the converted audio format under “Format”.
Step 7: Click “OK” to start the converting process.
05Way 5: How to Convert MP4 to MP3 via Video to MP3 Converter
If you want to convert MP4 files to MP3, you need to download Video to MP3 Converter Apk available for Android users. By using this Apk, you will be able to extract the high quality from the video, which later be saved as an MP3 file by default. It is beneficial if you want to set a ringtone for your phone.
Part 2 What Is The Best MP3 Converter Software for Mac?
01Handbrake
It is recognized as one of the best MP3 converter software compatible with Mac and supports various formats. This tool is also available for Linux and Windows.
Features:
The software has a different feature that facilitates easy conversion of MP3 audios. It works with standard formats and tools like x265 and Libav. According to the user reviews, Handbrake is the right choice if you want to convert videos to MP3 format.
Pros:
● It is an open-source tool and free audio converter Mac.
● Advanced control option with customization settings.
Cons:
● Intimidating interfaces make navigation complex, especially for the beginner.
● Not user-friendly
Rating – 4star/ 5star
02Leawo Video converter
It is a multifunctional converter that facilitates Mac users to convert the MP3 to the most audio format supported. The software is compatible with both Windows and Mac devices.
Features:
It is a YouTube MP3 converter compatible with most audio and video formats and can convert the media files in any combination as per the requirement. It also facilitates the user to optimize the video for playback on particular devices, including iPods, iPads and gaming consoles, etc.
Pros:
● Ease of accessibility
● Facilitate users to customize the conversion settings.
Cons:
● The conversion speed is low
● Not available free of cost
● Low performance in comparison to other converters listed.
Rating – 4.2 star/ 5star
03FFmpeg
It is a cross-platform solution available to convert videos to audio format. The user is forced to enter the instruction from the terminal. Nevertheless, it is available free of cost for Mac users.
Features: This software uses the free FFmpeg encoder and also supports various audio and video formats, including MPEG4, ASF, MOV, AVI, and more. The considerable salient feature of the tool refers to the fact that it supports batch conversion.
Pros:
● Support various audio/ video formats
● Support vast range of filters and codec’s
Cons:
● The official documentation is complex
● Not ideal for beginner
Rating – 4.5 star/ 5star
04Xilisoft Audio Converter
This converter is compatible with both Windows and Mac platforms and holds a reputed position in the marketplace.
Features: This tool accepts the standard audio and video formats and converts them to FLAC, OCG, MP3, etc. It also includes the capability to deliver lossless output post-conversion.
Pros:
● You can extract the output file directly to the designation device.
● Lossless output post-conversion
Cons:
● A limited number of output formats.
Rating – 3.9star/ 5star
05Movavi Video Converter
It is another option available if you are looking to convert MP3 on MAC as it supports almost all ranges of formats and seems to be compatible with both Windows and Mac platforms.
Features:
This converter includes a user-friendly interface that improves navigation and usability and converts most of the standard audio and video formats. It has a predefined setting for different media players like iTunes and Window Media Player.
Pros:
● Sustains a wide range of audio/video formats
● User-friendly interface
● Facilitate users to convert YouTube videos into audio format.
Cons:
● Slow conversion speed
● Not available free of cost( only limited trial version)
Rating – 4.7 star/ 5star
06Switch Audio File Converter
This FLAC to mp3 Mac is developed by one of the reputed vendors, i.e., NCH Software. This tool can run on a 64-bit operating system and provide comparatively better performance than another converter available.
Features: The tool will facilitate the users to obtain the song information from the online database and facilitate a batch conversion. It can be used as a CLI plug-in concerning automated conversion.
Pros:
● Fast conversion speed.
● Carry out the automatic normalization.
Cons:
● Advanced features are only accessible to Pro members.
● Not ideal for beginner
Rating – 4.3 star/ 5star
07Aiseesoft Audio Converter
It is one efficient tool compatible with both Windows and Mac platforms. It is available for a free trial to check the feature before investing in the converter tool.
Features: It allows the user to trim the audio and video clip before choosing the output preference. This tool supports almost all file formats, and also according to a user review, it allows conversion at a reasonable speed.
Pros:
● Support batch conversion
● Support almost all major formats of audio/video
Cons:
● Not available free of cost
Rating – 4.1star/ 5star
08Stellar Audio/ video converter
You can even choose a stellar audio/ video converter to convert videos file into supported audio formats. The tool is compatible with both Windows and Mac platforms.
Features:
This tool supports the standard audio/video format for conversion and lets you save the converted audio format on your device. You can use the converted format for setting ringtones for your phone device.
Pros:
● Compatible with both Windows and Mac platforms
● User-friendly interface
Cons:
● Limited formats supported
Rating – 3.8 star/ 5star
Part 3 The Runner-Up MP3 Converter Software List
Some alternative MP4 to MP3 Converters are available for Mac, making the conversion process more accessible and practical without losing quality.
● Filmora for Mac is recognized as one of the leading and influential video editing software through which you can easily access advanced features such as keyframing and motion tracking. You can easily download the tool by visiting the official website of Wondershare and avail a hassle-free video editing and conversion experience.
● VLC is another option available to you, and the process to convert video to audio is already discussed in the article.
● Convertio is an online tool available free of cost and works as MP4 to MP3 Converter browser support. This tool allows the vast range of conversion and facilitate user to convert archives, audio, videos, eBooks, and presentation.
● QuickTime Player and iTunes is another option available to you offline and available free of cost. The tool is highly compatible with the Mac platform and almost supports all major types of formats.
● Online UniConvert allows the user to convert the videos to audio format online. It is identified as a popular online conversion program that supports a variety of audio and videos format, including iTunes to MP3.
Key Takeaways from This Episode
● An MP4 to MP3 converter Mac computers support will facilitate the user to convert the video format to audio file format.
● Various methods and tools are available to make your conversion process more straightforward.
● The best tool you can use is Filmora from Wondershare due to its salient features.
● It provides you with the best experience as it features complete video conversion and editing features.
● If you have distrust or suggestions about the reading, do let us know by dropping a comment in the box below.
● Some alternative MP4 to MP3 Converters are available for Mac, making the conversion process more accessible and practical without losing quality.
Top 10 Webcam Capture Tools for Windows 10 Users
10 Best Webcam Recording Software for Windows 10

Richard Bennett
Mar 27, 2024• Proven solutions
Which webcam softwarehave you installed on your laptop or desktop? Using the right webcam software to live stream videos, screen record videos, or chat on Skype results in high-quality images, smooth streaming, and high-quality images and videos.
There is a huge number of free webcam software with advanced features yet free for you to download, and use on your PC.
But how would you determine the best webcam software to use?
Before you mounted that webcam on your desktop or laptop, you had a reason. It’s your webcam features and purpose that should guide you to select the right software for the webcam camera.
In this article, we will show you 10 webcam software for Windows in this guide. Included are the most useful factors to consider as you make your choice – complexity of use, free/paid, integrations, editing tools, and more. You will learn:
- Part 1: The Best Webcam & Screen Recorder for Windows and Mac [Video Tutorial]
- Part 2: Top 10 Best Free Webcam Software for Windows
First take a quick look of the 10 best webcam software that is available on your Windows from a video:
For Win 7 or later (64-bit)
 Secure Download
For macOS 10.14 or later
Secure Download
Part 1: The Best Webcam & Screen Recorder for Computer
You need a sound and webcam recorder to record your video tutorials, streaming videos, presentations, or any other type of video. Wondershare Filmora is the software to use. Other than its most admired friendly intuitive interface, it’s simple and easy to use-suitable for both beginners and professionals.
For Win 7 or later (64-bit)
Secure Download
For macOS 10.14 or later
Secure Download
Among the outstanding features, you’ll find in Filmora include,
- Fast-paced recording speed of up to 120 fps
- Adverse professional editing tools that are easy to use
- Simultaneous recording from both webcam and computer screen
- Compatible with 50+ different file formats
- Rich title text and tutorial features
It’s free to download. Have a try now! Join in the Wondershare Video Community and get some inspiration from other Filomora users.
Part 2: Top 10 Best Free Webcam Software for Windows
To help you evaluate which webcam software best suits your needs, I’ve featured the strengths, shortcomings, and support services in each software review.
This is the list of the best free webcam software for Windows 10.
| 1 - Logitech Capture | 2 - CyberLink Youcam |
|---|---|
| 3 - ManyCam | 4 - SplitCam |
| 5 - Bandicam | 6 - NCH - Video Capture Software |
| 7 - YAWCAM | 8 - Windows Camera |
| 9 - Fake Webcam | 10 - IP Camera Viewer |
1. Logitech Capture
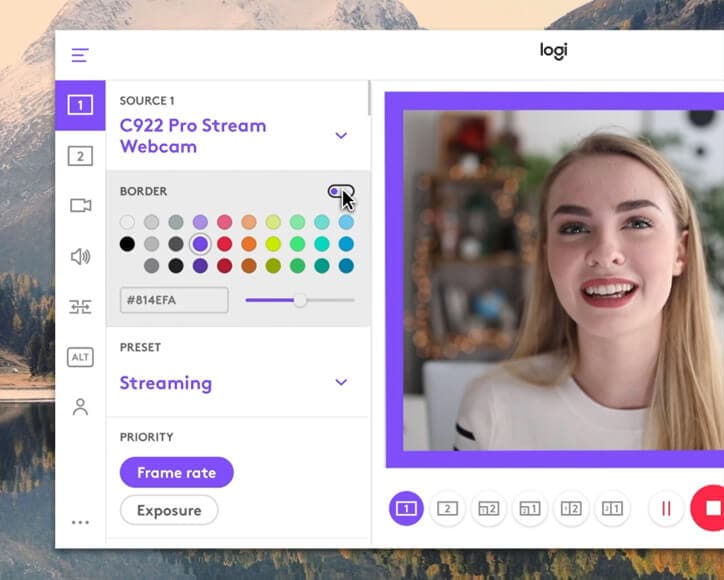
The multiple source recording feature and direct streaming app are the key strengths of this software. According to its mission statement- All-In-One Content Creation- you can use this software to record, edit, customize, and stream to your favorite channel.
Operating systems: Windows 10/8/7
Price: Free
Supported webcams: 1080P PRO STREAM, BRIO STREAM, C920s HD PRO, C922 PRO STREAM
Logitech Capture is among the few free webcam recording software for Windows 10 with studio controls applicable during recording. You can use this feature to adjust your image, create frames, adjust focus and transitions, and enable ChromaKey as you record.
In case you want to create a picture-in-picture presentation, this software allows you to use two webcams simultaneously. With the source switching and the auto-focus features, you can record the best tutorials or guides that show all dimensions and your image.
Pros
- Rich in transitions and effects
- Portrait optimization for mobile devices
- Its Capture app offers direct streaming to YouTube
- You can take passports or still images
Cons
- Limited to YouTube channel
- Account registration is mandatory
2. CyberLink Youcam
If you are used to video chatting and video recording, then, you’ll have 200+ fun effects to make your real-time videos as interesting as possible. In fact, the seamless app integration feature will keep your live streaming chats without buffering for long.
Operating systems: Windows 10/8/1.8/7
Price: Free/ Paid
Supported file formats: WMV, MP4, AVI
YouCam is the best free webcam software Windows 10 for YouTubers, business professionals, Streamers, home users, and Vloggers. It seamlessly integrates with live streaming media channels like Twitch, Wirecast, OBS Studio, Facebook Live, Xsplit, and YouTube Live.
The YouCam’s AR technology is one of its hidden treasures that will lighten up your skin by applying a natural-looking makeup. If your room is badly light, use the Live Skin Smoothing feature. Just below it is the TrueTheater Enhancement option to help you automatically adjust your facial sharpness and lighting.
Pros
- Hundreds of animated emojis
- Suitable for video conferencing services
- Plenty of interactive colorful particles and distortions
- Availability of face beautification tool
Cons
- Only limited to the Windows operating system
- Very few features for the free plan
3. ManyCam
Downloading this webcam software guarantees you smooth streaming and effortless recording of videos. Also, this software will help you during game steaming, online education, mobile live streaming, and live telehealth communication.
Operating systems: Windows 10/8/7 and macOS X
Price: Free /Paid
Supported file formats: MJPEG, IP, MP4, AVI, MPEG, MOV
ManyCam is a free webcam recording software for windows 10 . It’s among the most widely used software internationally-not for many reasons, but because of its friendly intuitive user interface and live streaming tools for lessons and lecturers.
So, if you are a lecturer/teacher, you can use the Software Development Kit (SDK) to integrate the webcam with any online teaching platform. Among the features designed to facilitate better online teaching include the picture in picture, Chroma Key, multiple video sources, and screen sharing.
Pro
- Ability to stream 4K videos
- Real-time camera control settings
- No watermark even on the free plan
- Screencasting and screen recording feature
- Real-time drop and drag effects
Cons
- Expensive business subscription plans
- No Light enhancement features
- Most features are manual as opposed to being automatic

Filmora WebCame & Screen Recorder
Filmora - WebCame & Screen Recorder
• No-time delay to record webcam and screen while live streaming or gaming
• Edit recording video for marketing replay or adding game commentary
• Cross-platform supported - (Windows, Mac, iOS, Android)
Start Webcam & Screen Record Start Webcam & Screen Record Start Webcam & Screen Record Learn More >
4. SplitCam
To stream your desktop/laptop screen SplitCam is the most appropriate software. With only the inbuilt virtual webcam, you can share your screen videos to media channels and IMS. Other uses of this software are recording webcam chatting , streaming live videos, and messaging.
Operating systems: Windows 10/8/7
Price: Free
SplitCam is not as popular as the other free webcam software windows 10 like ManyCam and YouCam. This is because it doesn’t integrate with some of the world’s renowned social media platforms- Facebook and Instagram. However, you can use this software to stream, take snapshots, and record videos for YouTube, Skype, Justin.tv, Gtalk, and Windows Live Messenger.
SplitCam is rich in fantastic webcam effects. Haven’t you been surprised to see someone appear to be streaming from the ocean or the Amazon Mountain? This is what you can do with SplitCam. Other cool effects are frames, texts on videos, filters, and facial items like masks and fake face glasses.
Pros
- Open and simple interface
- Integratable with the messaging apps
- Supports a wide range of resolutions ( between 320x180 and 2048x1536)
Cons
- Applicable to a small number of channels
- Supported file formats not defined
5. Bandicam
Do you want a recorder for screen recording, recording your gameplay, or capturing videos from devices like smartphones and PlayStation? Look for no other software but BandiCam. You can also merge two or more video files, remove unwanted parts, and select the only part to screen record.
Operating systems: Windows Vista, 10/8/7
Price: Free/paid
Supported file format: AVI, MP4, JPEG, TIF, GIF, PNG
Supported graphics cards: Nvidia NVENC, Nvidia NVENC (),
BandiCam is another HD webcam software Windows 10 with the capability of capturing high compression videos and games on your PC screen videos without compromising the video quality. Don’t forget to record all webinars aired in your niche.
Netflix is becoming more popular each day due to the thrilling videos. With the BandiCam screen recorder, you can record live-streamed videos on Netflix for over 24hrs. These are the tools to edit your recorded video: real-time drawing tool, webcam overlay, sound mixer, and Chroma Key.
Pros
- No hidden features
- Widescreen capture
- Can record 2D/3D videos in HD mode
- Can capture fast-paced videos of up to 144 FPS
Cons
- Not suitable for beginners
- Cannot be used to live stream videos
6. NCH - Video Capture Software

Of all the listed webcam software in this review, this software has the most diverse functions. You can record streaming videos, record your computer screen, record from external devices, and record from a webcam. It’s also perfect for recording audios and simultaneous recording from screen and webcam.
Operating systems: Windows 10, 8, 8.1, 7, XP, Vista 64 bit and Mac OS X 10.5 and above
Price: Free/paid
Supported file formats: MP4, WMV, AVI, MPG, FLV, MOV
Debut Video Capture is the only free webcam recording software for Windows 10 believed to capture or record videos from any external source. It has also preset settings for HD and TV with pre-production enhancement features like color adjustment settings, overlay buttons and frame rate, aspect ratio, and resolution settings.
If you always think of becoming rich, the Express Burn Disc Burner is the tool that will help you make money. Record the most trending videos and use this tool to burn DVDs and CDs.
Pros
- Can record videos for any social media platform
- Supports a wide range of audio and video file formats
- All features are open and easy to use
- Availability of video editing software
Cons
- Only monthly subscriptions for paid plans
- Watermark for the free download
- Difficult to record a full-screen movie
Try Filmora to Smoothly Record WebCame and Screen!
Filmora Web Camera & Screen Recorder can capture any area of the PC screen and webcam. It’s perfect to capture and record while making a live gaming match, marketing promotion, guiding a tour, and more. Plus, you can edit the recording video files in Filmora directly! Worth to have a try!
Start Webcam & Screen Recording Start Webcam & Screen Recording Start Webcam & Screen Recording Learn More >
7. YAWCAM
This webcam software can be referred to as the simplest for all beginners with the will to start streaming and recording videos for personal or home use.
Supported file formats: PNG, JPG, MJPEG, GIF, JavaScript
Price: Free
Supported operating systems: Windows 2000/10/8/7/ Vista and XP
YAWCAM is an absolutely free webcam software windows 10. Why is it the simplest software to use? Just download and you will find all features on one page. Simple language commands aligned in a drop-down menu ready to be used with only one click.
Some of the best features include overlay texts and images, scheduler, motion detection, and an inbuilt webserver. For you to use this webcam software, use these supported devices; DirectX compatible webcams, DV-camera, or video capture devices.
Pros
- No watermark
- Easy to use
- Friendly user interface
Cons
- Few transitions and effects
8. Windows Camera
We all trust any app or software by Microsoft over others! If you also do, then you can download Windows Camera and use it to record videos, take snapshots and shoot videos.
Operating system: Windows 10
Price: Free
Supported devices: Xbox One, Windows, mobile
Windows Camera is among the best free webcam software for Windows 10. This is because of the software’s few but easy-to-use and effective features that are expertly designed for PCs and tablets installed with Windows 10.
The automatic photo back combined with the photo-shoot timer makes it perfect for taking selfies and passports. Using the panorama feature, you can take photos of the best scenes and share them on media platforms.
Pros
- Simplicity is its main strength
- Supports resolutions above 1080p
- Good for photographers
Cons
- Has no built-in virtual webcam
- Requires a camera to support 4K videos
9. Fake Webcam

Supported file formats: AVI, MPEG, DVD, VCD, WMV, 3GP, MP4, SVCD, MOV, ASF,
Price: Free /paid
Operating systems: Windows 7/8/10 (32/64 bit)
Fake Webcam is a free webcam software Windows 10 whose name is creatively used to suggest it almost functions like a webcam. This doesn’t fall far from the truth! You can truly use this software to broadcast, add effects and filters, record on full screen, and fake your voice.
To share or stream your photos and videos on Skype, YIM, or Gtalk, using the screen recorder would give the best results. What makes Fake Webcam stand out is the free video converter and the free video toolkit.
Pros
- Free support tools
- Supports all video and audio formats
- Can convert file formats and stream to any channel
- Availability of the screen recorder
- Integratable with almost all instant messengers
Cons
- Major tools not free(Fake Webcam and Screen recorder)
10. IP Camera Viewer
Do you run a supermarket store, mall or you’ve installed security surveillance cameras in your compound? IP Camera Viewer is the most effective webcam software for video monitoring systems.
Supported file formats: JPEG, MPEG-4, MJPEG, and
Price: Free
Operating systems: Windows 10 / 8 / 7 /2012 /Vista and XP
IP Camera Viewer is the most used free webcam recording software for windows 10 as its compatible with almost all IP camera models like Panasonic, Toshiba, Canon, D-Link, Sony, and more the 2000 others. With the capability of viewing and controlling 4 camera feeds at once, you can use this software to monitor your entire compound.
Some of the important advanced IP Camera Viewer functions include listening to webcam audios, adjust image settings, zoom or tilt images, schedule monitoring times, and detect motions.
Pros
- Automatically uploads recorded videos and photos to a server
- Compatible with almost all IP camera models
- Simple and easy to use
Cons
- No inbuilt media player
- Cannot adjust the image or video quality
You may also want to read >>> 10 Best Webcams | A Buyer’s Guide
![]()
A cross-platform for making videos anywhere for all creators

Why your video editing isn’t good enough? How about some creative inspo?
- 100 Million+ Users
- 150+ Countries and Regions
- 4 Million+ Social Media Followers
- 5 Million+ Stock Media for Use
* Secure Download

FAQs about Webcam Software for Windows
1. What is Webcam Software?
A webcam is a video camera that feeds or streams images or video in real-time to or over a computer network. And webcam software enables users to record video or stream video over the Internet.
Webcam software is an application that allows you to capture video from your laptop/desktop webcam and record or stream video over the Internet. You can use them to deliver professional videos, streaming, and online courses easily.
2. Does Windows have built-in webcam software?
Windows 10 has an in-built webcam app called Camera that lets you record videos and take pictures with your webcam. This is definitely better than downloading 3rd party webcam recording software where spyware/malware is rampant.
3. Does a webcam need software?
Yes, if the camera hardware offers depth, low-light support, night vision, etc. If you use any software on the camera, these functions are only available if the driver is installed.
Conclusion
After a keen of all the webcam software above, it’s evident that every developer had an intended purpose. You cannot therefore just randomly wake up and download any without considering its functions, supported devices, file formats, and the auxiliary apps available. All this information is contained herein.
According to some users, there are free webcam software Windows 10 that more often would not show any video images but the audio is absolutely clear. To help your fellow user, what bad experience have you ever had after recording a game using webcam software ? Kindly share your comment or suggestion on our social media platforms.


Richard Bennett
Richard Bennett is a writer and a lover of all things video.
Follow @Richard Bennett
Richard Bennett
Mar 27, 2024• Proven solutions
Which webcam softwarehave you installed on your laptop or desktop? Using the right webcam software to live stream videos, screen record videos, or chat on Skype results in high-quality images, smooth streaming, and high-quality images and videos.
There is a huge number of free webcam software with advanced features yet free for you to download, and use on your PC.
But how would you determine the best webcam software to use?
Before you mounted that webcam on your desktop or laptop, you had a reason. It’s your webcam features and purpose that should guide you to select the right software for the webcam camera.
In this article, we will show you 10 webcam software for Windows in this guide. Included are the most useful factors to consider as you make your choice – complexity of use, free/paid, integrations, editing tools, and more. You will learn:
- Part 1: The Best Webcam & Screen Recorder for Windows and Mac [Video Tutorial]
- Part 2: Top 10 Best Free Webcam Software for Windows
First take a quick look of the 10 best webcam software that is available on your Windows from a video:
For Win 7 or later (64-bit)
Secure Download
For macOS 10.14 or later
Secure Download
Part 1: The Best Webcam & Screen Recorder for Computer
You need a sound and webcam recorder to record your video tutorials, streaming videos, presentations, or any other type of video. Wondershare Filmora is the software to use. Other than its most admired friendly intuitive interface, it’s simple and easy to use-suitable for both beginners and professionals.
For Win 7 or later (64-bit)
Secure Download
For macOS 10.14 or later
Secure Download
Among the outstanding features, you’ll find in Filmora include,
- Fast-paced recording speed of up to 120 fps
- Adverse professional editing tools that are easy to use
- Simultaneous recording from both webcam and computer screen
- Compatible with 50+ different file formats
- Rich title text and tutorial features
It’s free to download. Have a try now! Join in the Wondershare Video Community and get some inspiration from other Filomora users.
Part 2: Top 10 Best Free Webcam Software for Windows
To help you evaluate which webcam software best suits your needs, I’ve featured the strengths, shortcomings, and support services in each software review.
This is the list of the best free webcam software for Windows 10.
| 1 - Logitech Capture | 2 - CyberLink Youcam |
|---|---|
| 3 - ManyCam | 4 - SplitCam |
| 5 - Bandicam | 6 - NCH - Video Capture Software |
| 7 - YAWCAM | 8 - Windows Camera |
| 9 - Fake Webcam | 10 - IP Camera Viewer |
1. Logitech Capture
The multiple source recording feature and direct streaming app are the key strengths of this software. According to its mission statement- All-In-One Content Creation- you can use this software to record, edit, customize, and stream to your favorite channel.
Operating systems: Windows 10/8/7
Price: Free
Supported webcams: 1080P PRO STREAM, BRIO STREAM, C920s HD PRO, C922 PRO STREAM
Logitech Capture is among the few free webcam recording software for Windows 10 with studio controls applicable during recording. You can use this feature to adjust your image, create frames, adjust focus and transitions, and enable ChromaKey as you record.
In case you want to create a picture-in-picture presentation, this software allows you to use two webcams simultaneously. With the source switching and the auto-focus features, you can record the best tutorials or guides that show all dimensions and your image.
Pros
- Rich in transitions and effects
- Portrait optimization for mobile devices
- Its Capture app offers direct streaming to YouTube
- You can take passports or still images
Cons
- Limited to YouTube channel
- Account registration is mandatory
2. CyberLink Youcam
If you are used to video chatting and video recording, then, you’ll have 200+ fun effects to make your real-time videos as interesting as possible. In fact, the seamless app integration feature will keep your live streaming chats without buffering for long.
Operating systems: Windows 10/8/1.8/7
Price: Free/ Paid
Supported file formats: WMV, MP4, AVI
YouCam is the best free webcam software Windows 10 for YouTubers, business professionals, Streamers, home users, and Vloggers. It seamlessly integrates with live streaming media channels like Twitch, Wirecast, OBS Studio, Facebook Live, Xsplit, and YouTube Live.
The YouCam’s AR technology is one of its hidden treasures that will lighten up your skin by applying a natural-looking makeup. If your room is badly light, use the Live Skin Smoothing feature. Just below it is the TrueTheater Enhancement option to help you automatically adjust your facial sharpness and lighting.
Pros
- Hundreds of animated emojis
- Suitable for video conferencing services
- Plenty of interactive colorful particles and distortions
- Availability of face beautification tool
Cons
- Only limited to the Windows operating system
- Very few features for the free plan
3. ManyCam
Downloading this webcam software guarantees you smooth streaming and effortless recording of videos. Also, this software will help you during game steaming, online education, mobile live streaming, and live telehealth communication.
Operating systems: Windows 10/8/7 and macOS X
Price: Free /Paid
Supported file formats: MJPEG, IP, MP4, AVI, MPEG, MOV
ManyCam is a free webcam recording software for windows 10 . It’s among the most widely used software internationally-not for many reasons, but because of its friendly intuitive user interface and live streaming tools for lessons and lecturers.
So, if you are a lecturer/teacher, you can use the Software Development Kit (SDK) to integrate the webcam with any online teaching platform. Among the features designed to facilitate better online teaching include the picture in picture, Chroma Key, multiple video sources, and screen sharing.
Pro
- Ability to stream 4K videos
- Real-time camera control settings
- No watermark even on the free plan
- Screencasting and screen recording feature
- Real-time drop and drag effects
Cons
- Expensive business subscription plans
- No Light enhancement features
- Most features are manual as opposed to being automatic
Filmora WebCame & Screen Recorder
Filmora - WebCame & Screen Recorder
• No-time delay to record webcam and screen while live streaming or gaming
• Edit recording video for marketing replay or adding game commentary
• Cross-platform supported - (Windows, Mac, iOS, Android)
Start Webcam & Screen Record Start Webcam & Screen Record Start Webcam & Screen Record Learn More >
4. SplitCam
To stream your desktop/laptop screen SplitCam is the most appropriate software. With only the inbuilt virtual webcam, you can share your screen videos to media channels and IMS. Other uses of this software are recording webcam chatting , streaming live videos, and messaging.
Operating systems: Windows 10/8/7
Price: Free
SplitCam is not as popular as the other free webcam software windows 10 like ManyCam and YouCam. This is because it doesn’t integrate with some of the world’s renowned social media platforms- Facebook and Instagram. However, you can use this software to stream, take snapshots, and record videos for YouTube, Skype, Justin.tv, Gtalk, and Windows Live Messenger.
SplitCam is rich in fantastic webcam effects. Haven’t you been surprised to see someone appear to be streaming from the ocean or the Amazon Mountain? This is what you can do with SplitCam. Other cool effects are frames, texts on videos, filters, and facial items like masks and fake face glasses.
Pros
- Open and simple interface
- Integratable with the messaging apps
- Supports a wide range of resolutions ( between 320x180 and 2048x1536)
Cons
- Applicable to a small number of channels
- Supported file formats not defined
5. Bandicam
Do you want a recorder for screen recording, recording your gameplay, or capturing videos from devices like smartphones and PlayStation? Look for no other software but BandiCam. You can also merge two or more video files, remove unwanted parts, and select the only part to screen record.
Operating systems: Windows Vista, 10/8/7
Price: Free/paid
Supported file format: AVI, MP4, JPEG, TIF, GIF, PNG
Supported graphics cards: Nvidia NVENC, Nvidia NVENC (),
BandiCam is another HD webcam software Windows 10 with the capability of capturing high compression videos and games on your PC screen videos without compromising the video quality. Don’t forget to record all webinars aired in your niche.
Netflix is becoming more popular each day due to the thrilling videos. With the BandiCam screen recorder, you can record live-streamed videos on Netflix for over 24hrs. These are the tools to edit your recorded video: real-time drawing tool, webcam overlay, sound mixer, and Chroma Key.
Pros
- No hidden features
- Widescreen capture
- Can record 2D/3D videos in HD mode
- Can capture fast-paced videos of up to 144 FPS
Cons
- Not suitable for beginners
- Cannot be used to live stream videos
6. NCH - Video Capture Software
Of all the listed webcam software in this review, this software has the most diverse functions. You can record streaming videos, record your computer screen, record from external devices, and record from a webcam. It’s also perfect for recording audios and simultaneous recording from screen and webcam.
Operating systems: Windows 10, 8, 8.1, 7, XP, Vista 64 bit and Mac OS X 10.5 and above
Price: Free/paid
Supported file formats: MP4, WMV, AVI, MPG, FLV, MOV
Debut Video Capture is the only free webcam recording software for Windows 10 believed to capture or record videos from any external source. It has also preset settings for HD and TV with pre-production enhancement features like color adjustment settings, overlay buttons and frame rate, aspect ratio, and resolution settings.
If you always think of becoming rich, the Express Burn Disc Burner is the tool that will help you make money. Record the most trending videos and use this tool to burn DVDs and CDs.
Pros
- Can record videos for any social media platform
- Supports a wide range of audio and video file formats
- All features are open and easy to use
- Availability of video editing software
Cons
- Only monthly subscriptions for paid plans
- Watermark for the free download
- Difficult to record a full-screen movie
Try Filmora to Smoothly Record WebCame and Screen!
Filmora Web Camera & Screen Recorder can capture any area of the PC screen and webcam. It’s perfect to capture and record while making a live gaming match, marketing promotion, guiding a tour, and more. Plus, you can edit the recording video files in Filmora directly! Worth to have a try!
Start Webcam & Screen Recording Start Webcam & Screen Recording Start Webcam & Screen Recording Learn More >
7. YAWCAM
This webcam software can be referred to as the simplest for all beginners with the will to start streaming and recording videos for personal or home use.
Supported file formats: PNG, JPG, MJPEG, GIF, JavaScript
Price: Free
Supported operating systems: Windows 2000/10/8/7/ Vista and XP
YAWCAM is an absolutely free webcam software windows 10. Why is it the simplest software to use? Just download and you will find all features on one page. Simple language commands aligned in a drop-down menu ready to be used with only one click.
Some of the best features include overlay texts and images, scheduler, motion detection, and an inbuilt webserver. For you to use this webcam software, use these supported devices; DirectX compatible webcams, DV-camera, or video capture devices.
Pros
- No watermark
- Easy to use
- Friendly user interface
Cons
- Few transitions and effects
8. Windows Camera
We all trust any app or software by Microsoft over others! If you also do, then you can download Windows Camera and use it to record videos, take snapshots and shoot videos.
Operating system: Windows 10
Price: Free
Supported devices: Xbox One, Windows, mobile
Windows Camera is among the best free webcam software for Windows 10. This is because of the software’s few but easy-to-use and effective features that are expertly designed for PCs and tablets installed with Windows 10.
The automatic photo back combined with the photo-shoot timer makes it perfect for taking selfies and passports. Using the panorama feature, you can take photos of the best scenes and share them on media platforms.
Pros
- Simplicity is its main strength
- Supports resolutions above 1080p
- Good for photographers
Cons
- Has no built-in virtual webcam
- Requires a camera to support 4K videos
9. Fake Webcam
Supported file formats: AVI, MPEG, DVD, VCD, WMV, 3GP, MP4, SVCD, MOV, ASF,
Price: Free /paid
Operating systems: Windows 7/8/10 (32/64 bit)
Fake Webcam is a free webcam software Windows 10 whose name is creatively used to suggest it almost functions like a webcam. This doesn’t fall far from the truth! You can truly use this software to broadcast, add effects and filters, record on full screen, and fake your voice.
To share or stream your photos and videos on Skype, YIM, or Gtalk, using the screen recorder would give the best results. What makes Fake Webcam stand out is the free video converter and the free video toolkit.
Pros
- Free support tools
- Supports all video and audio formats
- Can convert file formats and stream to any channel
- Availability of the screen recorder
- Integratable with almost all instant messengers
Cons
- Major tools not free(Fake Webcam and Screen recorder)
10. IP Camera Viewer
Do you run a supermarket store, mall or you’ve installed security surveillance cameras in your compound? IP Camera Viewer is the most effective webcam software for video monitoring systems.
Supported file formats: JPEG, MPEG-4, MJPEG, and
Price: Free
Operating systems: Windows 10 / 8 / 7 /2012 /Vista and XP
IP Camera Viewer is the most used free webcam recording software for windows 10 as its compatible with almost all IP camera models like Panasonic, Toshiba, Canon, D-Link, Sony, and more the 2000 others. With the capability of viewing and controlling 4 camera feeds at once, you can use this software to monitor your entire compound.
Some of the important advanced IP Camera Viewer functions include listening to webcam audios, adjust image settings, zoom or tilt images, schedule monitoring times, and detect motions.
Pros
- Automatically uploads recorded videos and photos to a server
- Compatible with almost all IP camera models
- Simple and easy to use
Cons
- No inbuilt media player
- Cannot adjust the image or video quality
You may also want to read >>> 10 Best Webcams | A Buyer’s Guide
![]()
A cross-platform for making videos anywhere for all creators
Why your video editing isn’t good enough? How about some creative inspo?
- 100 Million+ Users
- 150+ Countries and Regions
- 4 Million+ Social Media Followers
- 5 Million+ Stock Media for Use
* Secure Download
FAQs about Webcam Software for Windows
1. What is Webcam Software?
A webcam is a video camera that feeds or streams images or video in real-time to or over a computer network. And webcam software enables users to record video or stream video over the Internet.
Webcam software is an application that allows you to capture video from your laptop/desktop webcam and record or stream video over the Internet. You can use them to deliver professional videos, streaming, and online courses easily.
2. Does Windows have built-in webcam software?
Windows 10 has an in-built webcam app called Camera that lets you record videos and take pictures with your webcam. This is definitely better than downloading 3rd party webcam recording software where spyware/malware is rampant.
3. Does a webcam need software?
Yes, if the camera hardware offers depth, low-light support, night vision, etc. If you use any software on the camera, these functions are only available if the driver is installed.
Conclusion
After a keen of all the webcam software above, it’s evident that every developer had an intended purpose. You cannot therefore just randomly wake up and download any without considering its functions, supported devices, file formats, and the auxiliary apps available. All this information is contained herein.
According to some users, there are free webcam software Windows 10 that more often would not show any video images but the audio is absolutely clear. To help your fellow user, what bad experience have you ever had after recording a game using webcam software ? Kindly share your comment or suggestion on our social media platforms.
Richard Bennett
Richard Bennett is a writer and a lover of all things video.
Follow @Richard Bennett
Also read:
- Updated In 2024, Facebook Video Cover Best Practices Size, Resolution, and More
- New The Battle for Your Living Room TiVo vs Comcast DVR
- New In 2024, From MP3 to WAV The Top 12 Audio Converters for Any Format
- New In 2024, The Best Free and Paid Sony Vegas Alternatives for Windows
- Updated 2024 Approved Beginners Guide Best Free Video Cutting and Joining Software
- New 2024 Approved Slow Down or Speed Up Videos with the Best Converter Tools
- New Get Rid of TikTok Watermarks Top-Rated Online Removers for 2024
- New In 2024, Free Animation Software Roundup Windows and Mac Compatible
- New In 2024, Unleash Your Creativity Free GIF Loop Creator Tools
- New In 2024, 10 Online Rotators for Rotating Videos
- New 2024 Approved Unleash Your Creativity Top 10 Intro Maker Websites with Free and Paid Options
- Updated Virtualdub Is It Still the Best Video Editor? Top Alternatives for 2024
- Updated Rotate Videos on iPhone for Free Top 5 Essential Tools
- Updated 2024 Approved Smooth Operator Top Free Video Stabilization Tools
- New WebM to MP3 Made Easy Top Converter Reviews for 2024
- New Looking Beyond Virtualdub The Best Video Editing Software for Your Needs for 2024
- New 2024 Approved From YouTube to MP3 How to Choose a Safe and Efficient Converter
- Updated 2024 Approved MP3 to MP4 Conversion 101 Key Considerations for Success
- New Unlock Pro-Quality Sound with These 10 Online Waveform Generators
- Updated In 2024, OGG Conversion Made Easy Top Tools and Tips
- New In 2024, Filmora Scrn Essentials Recording Your Desktop in Minutes
- New Bokeh Magic The Ultimate List of iOS and Android Apps for 2024
- Updated In 2024, The Top Windows Video Editors You Need to Know About
- Updated In 2024, Aspect Ratio Conversion in Final Cut Pro Tips and Tricks
- New 2024 Approved Change Video Playback Speed with These Top Tools
- New In 2024, Discover the Top Free and Paid Android Video Editing Apps
- Updated Revolutionize Your Videos Top 4K/8K Video Editing Software 2024
- Updated 2024 Approved S Top-Rated Video Makers with Audio Features
- New Top-Rated Video Editing Software for Windows (Similar to iMovie) for 2024
- Updated In 2024, Before You Dive In Key Concepts to Grasp About M4R Conversion
- New Lights, Camera, Action! Easy Movie Making for All for 2024
- Updated In 2024, 10 Essential Animated Text Generators to Elevate Your Visuals
- 2024 Approved TikTok Screen Real Estate Optimizing Aspect Ratio
- New In 2024, Reverse Your Footage A Step-by-Step Guide for Final Cut Pro Users
- New No Watermark, No Problem 10 Best Free Android Video Editing Apps for 2024
- Top-Rated Green Screen Software for Mobile Devices Free & Updated for 2024
- Updated 2024 Approved Windows 10 Photos Not Your Cup of Tea? Try These 8 Alternatives
- New Windows Movie Maker Alternatives 10+ iMovie-Style Video Editors for 2024
- New In 2024, Elevate Your Videos 10 Best Intro Creator Platforms (Free & Paid)
- New In 2024, Capture Lifes Moments Best Time-Lapse Apps for iOS and Android
- Updated 2024 Approved Final Cut Pro X Reset The Fastest Way to Resolve Issues
- Updated Top Free Online Video Rotators for Easy Flipping
- How To Transfer WhatsApp From iPhone SE (2020) to Android? | Dr.fone
- How to Upgrade Apple iPhone 8 Plus without Losing Any Data? | Dr.fone
- New Make a Statement with These WhatsApp Status Builder Apps for 2024
- In 2024, Full Guide on Mirroring Your Xiaomi Redmi Note 12 Pro+ 5G to Your PC/Mac | Dr.fone
- 10 Easy-to-Use FRP Bypass Tools for Unlocking Google Accounts On Motorola Moto G23
- In 2024, Hassle-Free Ways to Remove FRP Lock on Samsung Galaxy A54 5G Phones with/without a PC
- How to Change/Fake Your Apple iPhone XS Location on Viber | Dr.fone
- Top 10 Password Cracking Tools For Vivo Y02T
- 9 Best Free Android Monitoring Apps to Monitor Phone Remotely For your Xiaomi 14 | Dr.fone
- Updated In 2024, Live Chat With WooCommerce Your Gateway to Successful Live Selling
- In 2024, How to Unlock Verizon iPhone 12 Pro
- In 2024, Best Ways to Bypass iCloud Activation Lock on Apple iPhone 8/iPad/iPod
- Updated 2024 Approved Best 15 2D Animation Software Free That Worth to Try
- In 2024, How to Fake GPS on Android without Mock Location For your Samsung Galaxy A15 5G | Dr.fone
- In 2024, Pattern Locks Are Unsafe Secure Your Samsung Galaxy A15 4G Phone Now with These Tips
- In 2024, 6 Methods to Mirror Apple iPhone XR to your Windows PC | Dr.fone
- Top 9 Nokia XR21 Monitoring Apps for Parental Controls | Dr.fone
- In 2024, AddROM Bypass An Android Tool to Unlock FRP Lock Screen For your Xiaomi Redmi Note 12R
- Mac Video Editing Made Easy with MKVtoolnix 2023 Update
- Title: New 2024 Approved The Art of Visual Storytelling Ken Burns Effect in Final Cut Pro Explained
- Author: Isabella
- Created at : 2024-04-29 12:49:32
- Updated at : 2024-04-30 12:49:32
- Link: https://video-creation-software.techidaily.com/new-2024-approved-the-art-of-visual-storytelling-ken-burns-effect-in-final-cut-pro-explained/
- License: This work is licensed under CC BY-NC-SA 4.0.
