
:max_bytes(150000):strip_icc():format(webp)/GettyImages-93420821-0ce0b19097fb47d78dec8dbc039c1260.jpg)
New In 2024, The Ultimate List of Free Game Download Sites for PC, Android, and Beyond
The Ultimate List of Free Game Download Sites for PC, Android, and Beyond
Top 10 Best Free Game Download Sites [PC & Android][2024]

Ollie Mattison
Mar 27, 2024• Proven solutions


We all know and firmly believe that games are an integral part of our life. But the world has progressed, and we yearn to achieve real-life experiences through virtual reality instead of experiencing the actual thing. Online games are not only mentally stimulating, but they are also very addictive. Not everyone wants to pay to play games for a couple of hours, so here is a list of top free game downloading sites. You can download full versions of your favorite games for free.
Recommended Video Recorder & Editor for Gameplay: Filmora
If you want to edit a video recorded from games with more effects and templates, we recommend using Filmora . It is an easy-to-use video editor. It offers various title templates. You can also use it to record game videos. Just download it to have a try. Don’t know how to make a video? Visit the Wondershare Video Community and get some inspiration in video creation.
Part 1: Best Free PC Game Download Sites
1 Acid Play
Platforms: OS X and Windows

Key Features:
- Huge gaming library
The acid play has a gigantic collection of games of various types. The games at acid play have been categorized into action, arcade, board games, RPG, card games, puzzles, driving games, simulation, etc.
- Custom Search
The customized search helps you find the exact game you are looking for. It saves time since you cannot browse through thousands of games.
- Ratings
If you are new to this site or looking for a new game to play, you can choose only without trying every game to decide the best one. Just check the ratings provided by other players, and it will solve your problem. You can also rate a game according to your liking.
Pros:
- The games are easily downloadable and free.
- There is a large variety of games available to play.
Cons:
- The site is not updated, and no new games are introduced.
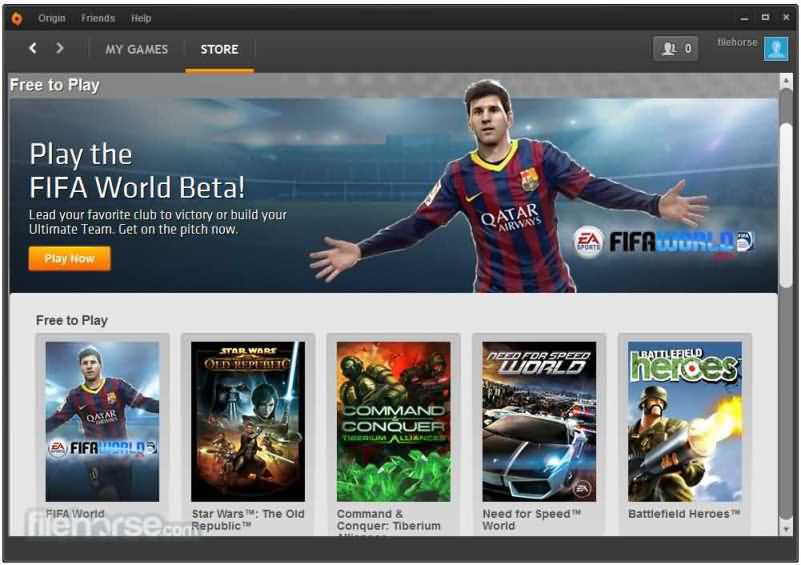
2 Origin Games
Platforms: OS X and Windows
Origin games are another best-known digital distribution platform for a free online gaming experience. It contains a fairly large library of premium games, but origin games provide links for free downloads for a limited time.
Key Features:
- Social Features
Origin provides its users with many social features like profile management, networking with friends through chatting, and video streaming via TwitchTV. You can also share your game library and community integration through social media and networking sites like Facebook, Xbox Live, PlayStation Network, and Nintendo Network.
- Variety in games
It provides various games, from PC games to Fifa and even classic games like Plant Vs. Zombies are also available.
- On-the-house games
The on-the-house features allow the customers to download a free trial of a premium game.
Pros:
- It provides great game streaming features.
- is developed by a renowned and successful company so that it can be trusted.
- The ‘on-the-house specials’ are appreciated by many gamers, allowing them to play a paid game for free now and then.
Cons:
- It has a lot of updates and takes an unreasonable amount of time to install and update the software.
- Customers have complained that they provide expired discount codes.
- Customer service needs to be improved as it is not very responsive.
3 AllGamesAtoZ
Platforms: OS X and Windows
If you want the best full version of a game for free, then AllGamesAtoZ is where you should go.
Key Features:
- The website is full of addictive games from different genres like action, arcade, shooting, role-playing, adventure, racing, simulation, etc.
- Multiple links for downloading a single game are available.
- A customized search bar is available so that you can locate the exact game you are looking for without having to browse through thousands of games.
- The games on AllGamesAtoZ are available on Windows, Linux, and Mac.
- A forum for game reviews is provided, so it is easier to decide which game you want to download without trying them all.
Pros:
- The gaming library is enormous.
- The game reviews make it easier to make a decision and save time.
- The website does not transfer viruses and is entirely safe from scams.
Cons:
- The downloading process is quite long.
- The website is not updated with new games.
4 Mega Games
Platforms: OS X and Windows
It is another highly recommended online gaming site. It not only provides PC games for free but also offers 3D PlayStation games to be downloaded on your PC without any charge.

Key Features:
- Search and download
Mega games allow a search and download option for every game published on their site.
- PlayStation games
It has provided its customers with not only PC games but also 3D PlayStation games that can be downloaded for free.
- Cheat codes
Apart from all the standard gaming features, mega games also provide free cheat codes for the games.
Pros:
- The games are easily downloaded.
- The games have variety.
Cons:
- The website stops working after a while, and the download gets interrupted
5 Caiman.us
Platforms: OS X and Windows
It is another digital distribution platform for free online gaming. After the death of the site’s developer, the site has gone offline.

Key Features:
- It has a vast collection of games and over twenty free games categories.
- 2D and 3D gaming experiences are also provided.
- A customized search is available to make it easier for players to find the game they are looking for.
Pros:
- There is a vast collection of free games to download and play.
Cons:
- The site is not well organized and confusing.
- The search bar is at the very bottom of the page, so a person might find it hard to locate.
- Since the site has gone offline, the games are not updated, so there are no new games.
Part 2: Best Android Game Download Sites to Download Free Android Games
Android is growing very fast; now, almost everyone uses it and prefers it over any other software. Here are the best websites from where you can download free android apps:
1 Google Play
Google Play is the most common website to download free android apps. It is free, it is fast, and it is efficient. You can not only use this from your android mobile but also operate it and download apps using your laptop.

Key Features:
- The apps are easily downloaded, depending upon your internet connection.
- The purchase methods are through credit cards, and the procedure is straightforward.
- The platform allows everyone and anyone to sell their games.
- Sign up through your Google account is necessary to access these features.
Pros:
- It is easily accessible.
- It is pre-installed on all android supported devices.
- It contains a massive collection of unique apps, from books to music, workout, and games of various types.
Cons:
- Since everyone and anyone can access it without paying any registration fee, it is exposed to scams and harassment.
- A few games do not function and keep crashing.
2 Android Games Room

It contains thousands of free gaming apps in different categories like action, arcade, adventure, simulation, song games, and puzzle games. The download links are readily available; you can even access this site from your mobile by scanning a QR code. This site is a pretty good platform to download free games but has certain flaws. It does not allow a multiplayer gaming experience, and no customer services are provided.
3 Android Apps
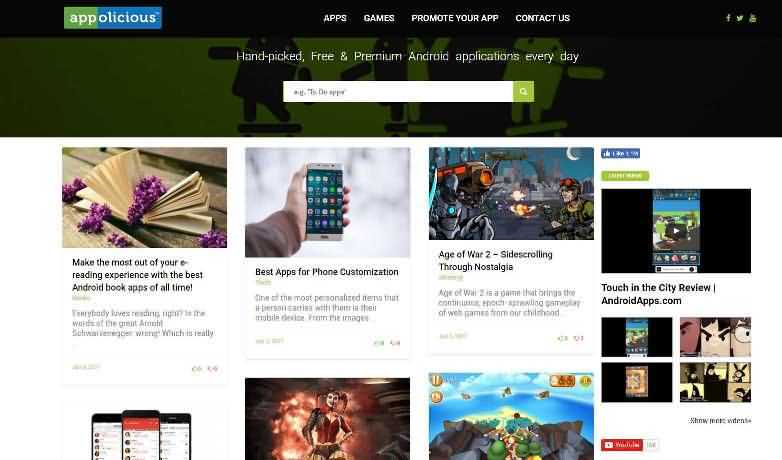
It is another platform to download android apps for free. This site is pretty good since it updates games that developers handpick almost daily. You can also promote your app using the ‘promote your app’ feature. The site has a lot of updates and takes an unreasonable amount of time to install and update the software. Furthermore, you can say that they do not have a customer service function because nobody ever responds to the customer’s queries.
4 1 Mobile
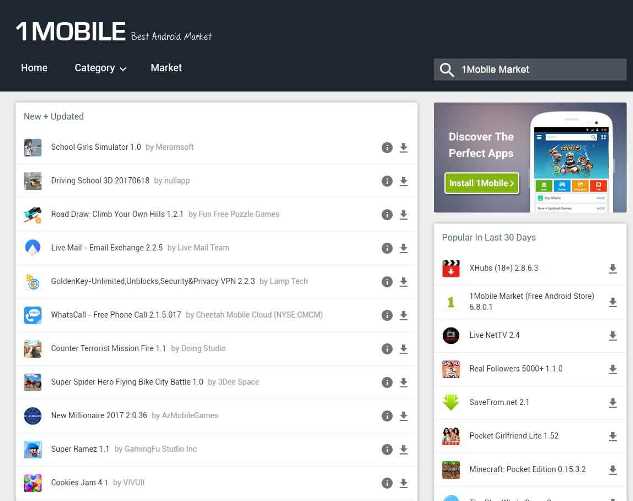
One mobile is a free android store. It provides its users the easiest way to locate, download and manage free apps. 1 Mobile has over eighty (80) million apps. One mobile has just been recently updated, has a brand new interface design, and operates much smoother. The content is more prosperous, smoother, and a thousand times better than before the latest update. All the apps and games are 100% free forever without hidden charges. It supports various languages like English, Korean, Chinese, French, Spanish, Japanese, and Portugal.
5 Approx

It provides the best free apps not only for android but OS as well. You can download it on your phone by scanning a QR code. This software has been functioning for the past six years and is free from viruses or malware.
To furnish your gameplay videos, Filmora also provides some cool effects, transitions, and elements, such as camera shake chaos effects, distortion effects, 3D change, speed blur transitions, and more. Moreover, you can always find some specially designed gaming effects in the Filmstock effects store.
Ollie Mattison
Ollie Mattison is a writer and a lover of all things video.
Follow @Ollie Mattison
Ollie Mattison
Mar 27, 2024• Proven solutions
We all know and firmly believe that games are an integral part of our life. But the world has progressed, and we yearn to achieve real-life experiences through virtual reality instead of experiencing the actual thing. Online games are not only mentally stimulating, but they are also very addictive. Not everyone wants to pay to play games for a couple of hours, so here is a list of top free game downloading sites. You can download full versions of your favorite games for free.
Recommended Video Recorder & Editor for Gameplay: Filmora
If you want to edit a video recorded from games with more effects and templates, we recommend using Filmora . It is an easy-to-use video editor. It offers various title templates. You can also use it to record game videos. Just download it to have a try. Don’t know how to make a video? Visit the Wondershare Video Community and get some inspiration in video creation.
Part 1: Best Free PC Game Download Sites
1 Acid Play
Platforms: OS X and Windows
Key Features:
- Huge gaming library
The acid play has a gigantic collection of games of various types. The games at acid play have been categorized into action, arcade, board games, RPG, card games, puzzles, driving games, simulation, etc.
- Custom Search
The customized search helps you find the exact game you are looking for. It saves time since you cannot browse through thousands of games.
- Ratings
If you are new to this site or looking for a new game to play, you can choose only without trying every game to decide the best one. Just check the ratings provided by other players, and it will solve your problem. You can also rate a game according to your liking.
Pros:
- The games are easily downloadable and free.
- There is a large variety of games available to play.
Cons:
- The site is not updated, and no new games are introduced.
2 Origin Games
Platforms: OS X and Windows
Origin games are another best-known digital distribution platform for a free online gaming experience. It contains a fairly large library of premium games, but origin games provide links for free downloads for a limited time.
Key Features:
- Social Features
Origin provides its users with many social features like profile management, networking with friends through chatting, and video streaming via TwitchTV. You can also share your game library and community integration through social media and networking sites like Facebook, Xbox Live, PlayStation Network, and Nintendo Network.
- Variety in games
It provides various games, from PC games to Fifa and even classic games like Plant Vs. Zombies are also available.
- On-the-house games
The on-the-house features allow the customers to download a free trial of a premium game.
Pros:
- It provides great game streaming features.
- is developed by a renowned and successful company so that it can be trusted.
- The ‘on-the-house specials’ are appreciated by many gamers, allowing them to play a paid game for free now and then.
Cons:
- It has a lot of updates and takes an unreasonable amount of time to install and update the software.
- Customers have complained that they provide expired discount codes.
- Customer service needs to be improved as it is not very responsive.
3 AllGamesAtoZ
Platforms: OS X and Windows
If you want the best full version of a game for free, then AllGamesAtoZ is where you should go.
Key Features:
- The website is full of addictive games from different genres like action, arcade, shooting, role-playing, adventure, racing, simulation, etc.
- Multiple links for downloading a single game are available.
- A customized search bar is available so that you can locate the exact game you are looking for without having to browse through thousands of games.
- The games on AllGamesAtoZ are available on Windows, Linux, and Mac.
- A forum for game reviews is provided, so it is easier to decide which game you want to download without trying them all.
Pros:
- The gaming library is enormous.
- The game reviews make it easier to make a decision and save time.
- The website does not transfer viruses and is entirely safe from scams.
Cons:
- The downloading process is quite long.
- The website is not updated with new games.
4 Mega Games
Platforms: OS X and Windows
It is another highly recommended online gaming site. It not only provides PC games for free but also offers 3D PlayStation games to be downloaded on your PC without any charge.
Key Features:
- Search and download
Mega games allow a search and download option for every game published on their site.
- PlayStation games
It has provided its customers with not only PC games but also 3D PlayStation games that can be downloaded for free.
- Cheat codes
Apart from all the standard gaming features, mega games also provide free cheat codes for the games.
Pros:
- The games are easily downloaded.
- The games have variety.
Cons:
- The website stops working after a while, and the download gets interrupted
5 Caiman.us
Platforms: OS X and Windows
It is another digital distribution platform for free online gaming. After the death of the site’s developer, the site has gone offline.
Key Features:
- It has a vast collection of games and over twenty free games categories.
- 2D and 3D gaming experiences are also provided.
- A customized search is available to make it easier for players to find the game they are looking for.
Pros:
- There is a vast collection of free games to download and play.
Cons:
- The site is not well organized and confusing.
- The search bar is at the very bottom of the page, so a person might find it hard to locate.
- Since the site has gone offline, the games are not updated, so there are no new games.
Part 2: Best Android Game Download Sites to Download Free Android Games
Android is growing very fast; now, almost everyone uses it and prefers it over any other software. Here are the best websites from where you can download free android apps:
1 Google Play
Google Play is the most common website to download free android apps. It is free, it is fast, and it is efficient. You can not only use this from your android mobile but also operate it and download apps using your laptop.
Key Features:
- The apps are easily downloaded, depending upon your internet connection.
- The purchase methods are through credit cards, and the procedure is straightforward.
- The platform allows everyone and anyone to sell their games.
- Sign up through your Google account is necessary to access these features.
Pros:
- It is easily accessible.
- It is pre-installed on all android supported devices.
- It contains a massive collection of unique apps, from books to music, workout, and games of various types.
Cons:
- Since everyone and anyone can access it without paying any registration fee, it is exposed to scams and harassment.
- A few games do not function and keep crashing.
2 Android Games Room
It contains thousands of free gaming apps in different categories like action, arcade, adventure, simulation, song games, and puzzle games. The download links are readily available; you can even access this site from your mobile by scanning a QR code. This site is a pretty good platform to download free games but has certain flaws. It does not allow a multiplayer gaming experience, and no customer services are provided.
3 Android Apps
It is another platform to download android apps for free. This site is pretty good since it updates games that developers handpick almost daily. You can also promote your app using the ‘promote your app’ feature. The site has a lot of updates and takes an unreasonable amount of time to install and update the software. Furthermore, you can say that they do not have a customer service function because nobody ever responds to the customer’s queries.
4 1 Mobile
One mobile is a free android store. It provides its users the easiest way to locate, download and manage free apps. 1 Mobile has over eighty (80) million apps. One mobile has just been recently updated, has a brand new interface design, and operates much smoother. The content is more prosperous, smoother, and a thousand times better than before the latest update. All the apps and games are 100% free forever without hidden charges. It supports various languages like English, Korean, Chinese, French, Spanish, Japanese, and Portugal.
5 Approx
It provides the best free apps not only for android but OS as well. You can download it on your phone by scanning a QR code. This software has been functioning for the past six years and is free from viruses or malware.
To furnish your gameplay videos, Filmora also provides some cool effects, transitions, and elements, such as camera shake chaos effects, distortion effects, 3D change, speed blur transitions, and more. Moreover, you can always find some specially designed gaming effects in the Filmstock effects store.
Ollie Mattison
Ollie Mattison is a writer and a lover of all things video.
Follow @Ollie Mattison
Green Screen Like a Pro: FCP X Chroma Keying Essentials
FCP X: Create a Chroma-Key (Green-screen) Effect

Benjamin Arango
Mar 27, 2024• Proven solutions
Chroma-key (also called “green screen”) effects are a staple in video production. What FCP X effect does is allow you to make the background behind an actor transparent so you can place the actor into a different environment than a studio.
This is a basic tutorial about Apple Final Cut Pro X, professional video editing software. However, if video editing is new to you, consider Wondershare Filmora for Mac . This is a powerful but easy-to-use tool for users just starting out. Download the free trial version below.
Download Mac Version ](https://tools.techidaily.com/wondershare/filmora/download/ )
Getting Started
First, the best thing you can do to improve the quality of your keys is to improve how you shoot them. Here are seven basic production rules:
- Actors should be at least 10 feet in front of the green screen. This avoids light from the background “spilling” around their body or shoulders.
- In general, don’t cast shadows on the green screen. Be very careful shooting feet.
- The green background should be as smooth as possible. Paint is always better than fabric; avoid wrinkles and folds.
- The green background should be lit smoothly, both from side to side and top to bottom. I try to have the green background display between 40-50% level on the waveform monitor.
- There is NO relationship between how the background is lit and how your actors are lit. This article will illustrate that.
- Light your background for smoothness. Light your actors for drama.
- Don’t worry about having the green background fill the frame. It only needs to completely surround the edges of your actors. Garbage mattes are used to get rid of junk around the edges.
Setting up the Key

The green screen image is always placed above the background. You can place either the green screen or background image into the Primary Storyline. I find it easier to put the background in the Primary Storyline, because it makes editing the green screen image easier. But this is purely personal choice.
Step 1: Select the green screen clip
From the Effects Browser > Keying category, double-click the Keyer effect, which applies it to the selected clip. (You can also drag the effect on top of the clip, if you forgot to select the green-screen clip first.)

Don’t panic if your image looks weird – we will fix it.

Click the Sample Color icon. This allows fine-tuning the selection of the background color.

In the green-screen image, drag to select a representative section of the background. I try to get close to the face, but not so close that I accidentally select loose hair or skin.
Your key should look better immediately. Most of the time, you can probably stop here. But there are three other adjustments that can make your key look even better:
- Cleaning up the matte
- Edge adjustments
- Light wrap

Click the Matte button to display your key as a white foreground on a black background.

Your goal is the make the foreground solid white, which means opaque, and the background solid black, which means transparent. Adjust the Fill Holes and Edge Distance sliders until your key looks solid. (For REALLY bad keys, you’ll need to also adjust Color Selection, mentioned below.)

If an edge is too pronounced, or needs help, click the Edges icon.

Step 2: Tweaks Video
Then, click and drag a line from the foreground to the background in the Canvas. Drag the midpoint slider (where my cursor is) until the edge looks the best it can. Different video formats make this easy (ProRes), while others (HDV, avchd) make this much harder. Perfection is impossible – do the best you can.

Final Cut provides four additional tweaks at the bottom of the keyer filter:
- Color Selection
- Matte Tools
- Spill Suppression
- Light Wrap
The first three are designed to clean up poorly shot keys – read the FCP X Help files to learn how these work. (I used the Color Selection tools to clean up the very dark key I use an example later in this article.)
Light wrap, though, is aesthetic. What it does is blend colors from the background into the edges of the foreground, to make the entire key look more “organic,” as if the foreground and background were actually in the same space.
This is a subtle effect, but very cool.

Twirl down Light Wrap and adjust the Amount slider and watch what happens. Drag the other sliders around and see what happens. The nice thing about this setting is that when it looks good to you, it is good. The amount of the effect is totally up to you. Remember, Light Wrap only affects the edges of the foreground and should be used subtly.

When you are done, you have a great looking key!
Clean up the Image with a Garbage Mask

Sometimes, however, you don’t have, ah, perhaps, the best green-screen image to work with. Here, for example, there are lighting instruments in the foreground, with a very inadequately lit green screen in the background. (Sigh… this is just pitiful.)
Once you pull the key – which is film-speak for creating a green-screen shot, as I described above – and get it looking as good as possible, there’s one more step: adding a garbage matte to get rid of all the garbage surrounding your actors.

Once you get your key looking as good as you can – which in this case isn’t all that good – drag the Mask effect (Effects > Keying > Mask) on top of the green-screen clip.
NOTE: The Mask effect should always be added after the Keying effect, so that the Mask is below the Keyer in the Inspector.

Then, drag each of the four circles to create a shape such that your foreground image is contained inside it, and everything you want to exclude is outside. Here, for instance, we removed the light stand, the edge of the green background and the tearing at the top of the image. I’ve found this Mask effect works best when applied to a connected clip.
However, the big limitation of the Mask effect is that you only have four points to work with. That’s where a free effect comes in, which allows you to create far more flexible shapes with it. It’s written by Alex Gollner and is available on his website – alex4d.wordpress.com/fcpx/ – I recommend his effects highly.
How to Create a Chroma-Key in easier ways?
Chroma-key, or green screen, is an essential part of every editor to make all kinds of effects. Is there any way to make this sophisticated procedure easier way? Yes, try Filmora.
In version 10.5 for Mac, Filmora added a new feature: AI portrait. It allows you to do a green screen effect with just one click.
By adopting AI portrait, you can add those stunning effects in simple steps: How to Remove or Change Video Background in One Step?
Or: How to Add a Shake Effect to your Videos?
Conclusion
The chroma-key filter in FCP X allows us to create some amazing effects. If you want to use green screen effects more easily, here is Filmora for you. You can appaly Chroma-Key effects with just a few click. Have fun playing with it.
Download Mac Version ](https://tools.techidaily.com/wondershare/filmora/download/ )
Benjamin Arango
Benjamin Arango is a writer and a lover of all things video.
Follow @Benjamin Arango
Benjamin Arango
Mar 27, 2024• Proven solutions
Chroma-key (also called “green screen”) effects are a staple in video production. What FCP X effect does is allow you to make the background behind an actor transparent so you can place the actor into a different environment than a studio.
This is a basic tutorial about Apple Final Cut Pro X, professional video editing software. However, if video editing is new to you, consider Wondershare Filmora for Mac . This is a powerful but easy-to-use tool for users just starting out. Download the free trial version below.
Download Mac Version ](https://tools.techidaily.com/wondershare/filmora/download/ )
Getting Started
First, the best thing you can do to improve the quality of your keys is to improve how you shoot them. Here are seven basic production rules:
- Actors should be at least 10 feet in front of the green screen. This avoids light from the background “spilling” around their body or shoulders.
- In general, don’t cast shadows on the green screen. Be very careful shooting feet.
- The green background should be as smooth as possible. Paint is always better than fabric; avoid wrinkles and folds.
- The green background should be lit smoothly, both from side to side and top to bottom. I try to have the green background display between 40-50% level on the waveform monitor.
- There is NO relationship between how the background is lit and how your actors are lit. This article will illustrate that.
- Light your background for smoothness. Light your actors for drama.
- Don’t worry about having the green background fill the frame. It only needs to completely surround the edges of your actors. Garbage mattes are used to get rid of junk around the edges.
Setting up the Key
The green screen image is always placed above the background. You can place either the green screen or background image into the Primary Storyline. I find it easier to put the background in the Primary Storyline, because it makes editing the green screen image easier. But this is purely personal choice.
Step 1: Select the green screen clip
From the Effects Browser > Keying category, double-click the Keyer effect, which applies it to the selected clip. (You can also drag the effect on top of the clip, if you forgot to select the green-screen clip first.)
Don’t panic if your image looks weird – we will fix it.
Click the Sample Color icon. This allows fine-tuning the selection of the background color.
In the green-screen image, drag to select a representative section of the background. I try to get close to the face, but not so close that I accidentally select loose hair or skin.
Your key should look better immediately. Most of the time, you can probably stop here. But there are three other adjustments that can make your key look even better:
- Cleaning up the matte
- Edge adjustments
- Light wrap
Click the Matte button to display your key as a white foreground on a black background.
Your goal is the make the foreground solid white, which means opaque, and the background solid black, which means transparent. Adjust the Fill Holes and Edge Distance sliders until your key looks solid. (For REALLY bad keys, you’ll need to also adjust Color Selection, mentioned below.)
If an edge is too pronounced, or needs help, click the Edges icon.
Step 2: Tweaks Video
Then, click and drag a line from the foreground to the background in the Canvas. Drag the midpoint slider (where my cursor is) until the edge looks the best it can. Different video formats make this easy (ProRes), while others (HDV, avchd) make this much harder. Perfection is impossible – do the best you can.
Final Cut provides four additional tweaks at the bottom of the keyer filter:
- Color Selection
- Matte Tools
- Spill Suppression
- Light Wrap
The first three are designed to clean up poorly shot keys – read the FCP X Help files to learn how these work. (I used the Color Selection tools to clean up the very dark key I use an example later in this article.)
Light wrap, though, is aesthetic. What it does is blend colors from the background into the edges of the foreground, to make the entire key look more “organic,” as if the foreground and background were actually in the same space.
This is a subtle effect, but very cool.
Twirl down Light Wrap and adjust the Amount slider and watch what happens. Drag the other sliders around and see what happens. The nice thing about this setting is that when it looks good to you, it is good. The amount of the effect is totally up to you. Remember, Light Wrap only affects the edges of the foreground and should be used subtly.
When you are done, you have a great looking key!
Clean up the Image with a Garbage Mask
Sometimes, however, you don’t have, ah, perhaps, the best green-screen image to work with. Here, for example, there are lighting instruments in the foreground, with a very inadequately lit green screen in the background. (Sigh… this is just pitiful.)
Once you pull the key – which is film-speak for creating a green-screen shot, as I described above – and get it looking as good as possible, there’s one more step: adding a garbage matte to get rid of all the garbage surrounding your actors.
Once you get your key looking as good as you can – which in this case isn’t all that good – drag the Mask effect (Effects > Keying > Mask) on top of the green-screen clip.
NOTE: The Mask effect should always be added after the Keying effect, so that the Mask is below the Keyer in the Inspector.
Then, drag each of the four circles to create a shape such that your foreground image is contained inside it, and everything you want to exclude is outside. Here, for instance, we removed the light stand, the edge of the green background and the tearing at the top of the image. I’ve found this Mask effect works best when applied to a connected clip.
However, the big limitation of the Mask effect is that you only have four points to work with. That’s where a free effect comes in, which allows you to create far more flexible shapes with it. It’s written by Alex Gollner and is available on his website – alex4d.wordpress.com/fcpx/ – I recommend his effects highly.
How to Create a Chroma-Key in easier ways?
Chroma-key, or green screen, is an essential part of every editor to make all kinds of effects. Is there any way to make this sophisticated procedure easier way? Yes, try Filmora.
In version 10.5 for Mac, Filmora added a new feature: AI portrait. It allows you to do a green screen effect with just one click.
By adopting AI portrait, you can add those stunning effects in simple steps: How to Remove or Change Video Background in One Step?
Or: How to Add a Shake Effect to your Videos?
Conclusion
The chroma-key filter in FCP X allows us to create some amazing effects. If you want to use green screen effects more easily, here is Filmora for you. You can appaly Chroma-Key effects with just a few click. Have fun playing with it.
Download Mac Version ](https://tools.techidaily.com/wondershare/filmora/download/ )
Benjamin Arango
Benjamin Arango is a writer and a lover of all things video.
Follow @Benjamin Arango
Create a Heartfelt Valentine’s Day Video Message for Your Special Someone
How to Make a Valentine’s Day Video for the Person you Love?

Liza Brown
Mar 27, 2024• Proven solutions
Finding ways to show your feelings isn’t always easy. In fact, buying presents for those you care about the most, won’t necessarily reflect how you feel, so this year you can try making something for them.
Creating a short Valentine’s Day video shouldn’t be too hard, especially if you have a great story to tell. Besides, a video is something that will last, and your significant other will always be able to watch it no matter what the future brings. So, in this article, we are going to show you how to make a Valentine’s Day video on your Windows PC or Mac, or just with your mobile phones that will truly show how you feel.
How to Make a Valentine’s Day Video on Windows and Mac
There are hundreds of video editing software for Windows and Mac computers you can use to create a Valentine’s Day video, but in this article, we are going to use Filmora as an example. However, each of the steps we will cover can be used in other video editors for Mac and Windows. Let’s check how to make a Valentine’s Day video with Filmora.
1. It all starts with an Idea
Creating any type of video without having a well-developed idea is virtually impossible because you won’t know which footage to use. Moreover, having an idea of how you want the final draft of the video to look will make it easier for you to select the footage you intend to use during the video editing process.
Once you know exactly what you want to do you can start shooting or collecting the footage you are going to include in your Valentine’s Day video. After you have all the video files you need, place them in one folder, launch Filmora, create a new project and proceed to import the footage by dragging and dropping the files to the editor’s Media tab.
2. Organize the Footage on the Timeline and Enhance the Colors
During the next step, you should add all video clips you would like to use in your video to the timeline. You can do this by simply dragging a particular video file from the Media tab and dropping it to the desired location on the timeline.

Optionally, you can use the Split tool to make cuts in a video clip and remove parts you don’t want to include in the final version of the video . When done, you should right-click on each of the video clips you added to the timeline and select the Color Correction option. You can then proceed to fine-tune the Brightness, Contrast, Saturation, or Highlights values depending on how bright or vivid the colors in the original video are. This process can take a while, which is why it is important to be patient and go through it slowly.
3. Add Romantic Filters and Elements
Filmora features Effects and Elements libraries that contain hundreds of different image overlays, filters, and predesigned elements you can add to your project. You just need to click on the Effect or Elements icons in the upper right corner of the screen to start browsing these libraries.

Once you find a romantic filter or element you want to apply to your footage, you should simply drag and drop it to the video track that is located directly above the one on which your footage is located. You should then position an overlay, a filter, or an element at the exact spot where you want them to appear in your video.

In case you want to adjust the intensity of an effect you applied you should just double-click on it and then use the Alpha slider to adjust the effect’s intensity. Double-clicking on an element you placed on the timeline will grant you access to the Video tab where you can rotate it, change its on-screen position, or set its Opacity value.
4. Apply Text Layers
The Titles tab contains more than a hundred different Openers, End Credits, or Titles options you can use in all of your projects. Simply pick the one that best matches the style of your video, then add it to the timeline and double-click on it in order to start customizing it.

Once you insert the text , you can pick the font, color, or this size of the text, as well as set the spacing between two lines of text. Optionally, you can use Filmora’s Advanced Text Edit window if you want to have complete control over all layers of text you add to your video.
5. Create the Soundtrack
Music will give your video the rhythm and it will make it more entertaining to watch, which is the reason why you shouldn’t skip this step. In case, you already have an audio file you would like to use as a soundtrack for your Valentine’s Day video, you can import it into Fimora the same way you would import a video file. You can then add it to an audio track and adjust its duration so that it matches the duration of the entire video.

You can also use Filmora’s library of royalty-free songs to create the soundtrack for the video you are making. Just head over to the Audio tab, pick a song from Electronic, Rock, or Tender & Sentimental categories, and add it to the timeline.
6. Export the Video
When done with all these steps, you should preview the video you’ve created and if you like the results click on the Export button. You can then proceed to select the video format in which your video is going to be exported, choose the preferred resolution or the frame rate .
Furthermore, Filmora lets you export all videos directly to your YouTube or Vimeo channels, which can save you a lot of time on uploading videos to these video hosting platforms. Nonetheless, how long the rendering process is going to take depends on your computer’s processing power.
Creating Videos with Valentine Video Maker for Android
If you find the process of making a Valentine’s Day video on Mac and Windows computers a bit too technical, then an app like Valentine Video Maker that lets you edit photos and videos from your Android phone is the perfect option for you. You can install the app for free and use its video editing tools to combine photos and video clips into a captivating Valentine’s Day video.

Creating slow motion or fast forward videos is yet another option you’ll have at your disposal if you choose to edit your videos with this app. The best part is that you can create a new video with Valentine Video Maker in just a few minutes and share it on social media.
Using Valentines Video Greetings Maker on iPhones
Even though there are lots of different video editing apps for iPhones, very few of them enable their users to create customized Valentine’s Day messages. So if you would like to surprise the person you love with a beautiful Valentine’s Day message, you should install Valentines Video Greetings Maker on your iPhone.

The app lets you combine an unlimited number of images or videos and record your own customized voice message to accompany the video you created. Each video greeting you create can be shared on social media with a single tap or sent directly via email. Keep in mind that you must make an in-app purchase in order to be able to save your video greetings to the Photo Gallery.
Conclusion
Making something special for the person you love is going to make this year’s Valentine’s Day a day to remember. All you need to accomplish this is a video editing software like Filmora and a great idea for a Valentine’s Day video. Are you going to make a Valentine’s Day video for your significant other this year? Leave a comment and share your opinions with us.
Liza Brown
Liza Brown is a writer and a lover of all things video.
Follow @Liza Brown
Liza Brown
Mar 27, 2024• Proven solutions
Finding ways to show your feelings isn’t always easy. In fact, buying presents for those you care about the most, won’t necessarily reflect how you feel, so this year you can try making something for them.
Creating a short Valentine’s Day video shouldn’t be too hard, especially if you have a great story to tell. Besides, a video is something that will last, and your significant other will always be able to watch it no matter what the future brings. So, in this article, we are going to show you how to make a Valentine’s Day video on your Windows PC or Mac, or just with your mobile phones that will truly show how you feel.
How to Make a Valentine’s Day Video on Windows and Mac
There are hundreds of video editing software for Windows and Mac computers you can use to create a Valentine’s Day video, but in this article, we are going to use Filmora as an example. However, each of the steps we will cover can be used in other video editors for Mac and Windows. Let’s check how to make a Valentine’s Day video with Filmora.
1. It all starts with an Idea
Creating any type of video without having a well-developed idea is virtually impossible because you won’t know which footage to use. Moreover, having an idea of how you want the final draft of the video to look will make it easier for you to select the footage you intend to use during the video editing process.
Once you know exactly what you want to do you can start shooting or collecting the footage you are going to include in your Valentine’s Day video. After you have all the video files you need, place them in one folder, launch Filmora, create a new project and proceed to import the footage by dragging and dropping the files to the editor’s Media tab.
2. Organize the Footage on the Timeline and Enhance the Colors
During the next step, you should add all video clips you would like to use in your video to the timeline. You can do this by simply dragging a particular video file from the Media tab and dropping it to the desired location on the timeline.
Optionally, you can use the Split tool to make cuts in a video clip and remove parts you don’t want to include in the final version of the video . When done, you should right-click on each of the video clips you added to the timeline and select the Color Correction option. You can then proceed to fine-tune the Brightness, Contrast, Saturation, or Highlights values depending on how bright or vivid the colors in the original video are. This process can take a while, which is why it is important to be patient and go through it slowly.
3. Add Romantic Filters and Elements
Filmora features Effects and Elements libraries that contain hundreds of different image overlays, filters, and predesigned elements you can add to your project. You just need to click on the Effect or Elements icons in the upper right corner of the screen to start browsing these libraries.
Once you find a romantic filter or element you want to apply to your footage, you should simply drag and drop it to the video track that is located directly above the one on which your footage is located. You should then position an overlay, a filter, or an element at the exact spot where you want them to appear in your video.
In case you want to adjust the intensity of an effect you applied you should just double-click on it and then use the Alpha slider to adjust the effect’s intensity. Double-clicking on an element you placed on the timeline will grant you access to the Video tab where you can rotate it, change its on-screen position, or set its Opacity value.
4. Apply Text Layers
The Titles tab contains more than a hundred different Openers, End Credits, or Titles options you can use in all of your projects. Simply pick the one that best matches the style of your video, then add it to the timeline and double-click on it in order to start customizing it.
Once you insert the text , you can pick the font, color, or this size of the text, as well as set the spacing between two lines of text. Optionally, you can use Filmora’s Advanced Text Edit window if you want to have complete control over all layers of text you add to your video.
5. Create the Soundtrack
Music will give your video the rhythm and it will make it more entertaining to watch, which is the reason why you shouldn’t skip this step. In case, you already have an audio file you would like to use as a soundtrack for your Valentine’s Day video, you can import it into Fimora the same way you would import a video file. You can then add it to an audio track and adjust its duration so that it matches the duration of the entire video.
You can also use Filmora’s library of royalty-free songs to create the soundtrack for the video you are making. Just head over to the Audio tab, pick a song from Electronic, Rock, or Tender & Sentimental categories, and add it to the timeline.
6. Export the Video
When done with all these steps, you should preview the video you’ve created and if you like the results click on the Export button. You can then proceed to select the video format in which your video is going to be exported, choose the preferred resolution or the frame rate .
Furthermore, Filmora lets you export all videos directly to your YouTube or Vimeo channels, which can save you a lot of time on uploading videos to these video hosting platforms. Nonetheless, how long the rendering process is going to take depends on your computer’s processing power.
Creating Videos with Valentine Video Maker for Android
If you find the process of making a Valentine’s Day video on Mac and Windows computers a bit too technical, then an app like Valentine Video Maker that lets you edit photos and videos from your Android phone is the perfect option for you. You can install the app for free and use its video editing tools to combine photos and video clips into a captivating Valentine’s Day video.
Creating slow motion or fast forward videos is yet another option you’ll have at your disposal if you choose to edit your videos with this app. The best part is that you can create a new video with Valentine Video Maker in just a few minutes and share it on social media.
Using Valentines Video Greetings Maker on iPhones
Even though there are lots of different video editing apps for iPhones, very few of them enable their users to create customized Valentine’s Day messages. So if you would like to surprise the person you love with a beautiful Valentine’s Day message, you should install Valentines Video Greetings Maker on your iPhone.
The app lets you combine an unlimited number of images or videos and record your own customized voice message to accompany the video you created. Each video greeting you create can be shared on social media with a single tap or sent directly via email. Keep in mind that you must make an in-app purchase in order to be able to save your video greetings to the Photo Gallery.
Conclusion
Making something special for the person you love is going to make this year’s Valentine’s Day a day to remember. All you need to accomplish this is a video editing software like Filmora and a great idea for a Valentine’s Day video. Are you going to make a Valentine’s Day video for your significant other this year? Leave a comment and share your opinions with us.
Liza Brown
Liza Brown is a writer and a lover of all things video.
Follow @Liza Brown
The XML File Crash Course for FCPX Editors
What is an XML File and How to Export XML in Final Cut Pro X?

Shanoon Cox
Mar 27, 2024• Proven solutions
The XML files have multiple usages and contain the tags and texts as their main components. The purpose of the XML file is to format the data to aid in optimal storage and transfer process. The XML file consists of tags and texts. This tag contains the main elements of the file, and the text carries readable information.
Unlike HTML, the Extensible Markup Language describes the data content in a readable format without any complex codes. It is easy to understand and displays a clear illustration of the purpose. You can find the applications of XML in web publishing, to perform web tasks, and common uses like data storage, transfers.
Most users opt for XML due to its compatible features, readability, and personalization options. In this article, you will learn how to import and export XML files in the Final Cut Pro application. Use the below guidelines to carry out the desired process successfully. It is high time to get ready for an informative takeoff. Fasten your seats for the enlightening journey on the XML file at the Final cut pro X program.
- [Part1: What is the XML file in Final cut pro X? ](#what is XML)
- [Part2: Why exporting XML in final cut pro instead?](#export XML)
- [Part3: How to import and export XML files in Final cut pro X?](#how to do it)
- Part4: What editors can import and export XML files?

Part 1: What is the XML file in Final cut pro X?
XML, or Extensible Markup Language, can be imported and exported in Final Cut Pro. The best way to transfer the Final cut pro X files to any other third-party application is to use the XML format. Many programs do not recognize the file format of Final cut pro X documents. To convert it as a readable file, transfer the output in the form of XML type.
Most users may refine or edit the Final cut pro X files further to achieve their desired outcomes. To overcome the file compatibility issues, you must adopt the XML file pattern.
The sole purpose of the XML file is to avoid the complexity in transferring the data files like libraries, media, projects from the Final cut pro X app to another application. It minimizes the difficulties in handling the export procedure of the edited media files.
Despite ample methodologies in the digital space, XML is the simplest way to overcome unnecessary compatibility issues. You can convert the output files to a flexible format for a better transfer process. All forms of metadata, documents transfers occur using the XML file.
The handling comforts aid the usage of XML in the Final Cut Pro X ambiance. Quick processing is feasible with this file format and you can export them based on your needs. The simple texts with faster transfer persuade the editors to opt for this format. This Markup language is easy to understand, and you need not require any technical skills to understand the XML content.
The tags and texts reveal the standard operation of that file. You can work on the XML fine in your comforts unlike the other file types in the digital space. The Final Cut Pro X editors use the XML file to import and export the media file’s components, libraries, events for further processing. The XML serves as a comfortable file type to edit on the FINAL CUT PRO X platform.
Part 2: Why exporting XML in final cut pro instead?
You must be wondering, why do you need to export the XML file from the Final Cut Pro X environment? What are benefits do you achieve in transferring this XML content from this ambiance? Here comes the solutions for your queries in detail for better understanding.
- For further editing
As you all know that, the foremost purpose of Final Cut Pro X is to edit, store and transfer the media files based on the requirement. In case, if you want to make a unique edit on the processed videos, then you must transfer the edited clips to the desired applications.
In this scenario, you require a reliable file format to carry the meta details of the edited videos. There is a need to export the XML file to the FINAL CUT PRO X platform. To make further edits, you must transfer the entire project to the editing tools without any data loss.
- For teamworking
If you are working in groups, make your edits to be visible to your teammates. It requires a quick share of your projects from Final Cut Pro X to any other platform. To serve this purpose, export the XML files. XML file format assists in faster shares and lossless transfer to any required ambiance.
In addition, Filmora is even easier for team-working, click to see how .
- To transfer projects, clips, and libraries to other APP or devices
The XML file carries the metadata elements of the projects. It contains crucial components like libraries, clips. Moreover, the XML format helps to overcome compatibility issues. You can transfer them to any application or device and disclose them in no time.
It acts as a standard file type to handle many digital spaces flawlessly. If there is a need for the edited XML files in Final Cut Pro X, immediately transfer them to the necessary apps or devices for further processing.
Part 3: How to import and export XML files in Final cut pro X?
The next question that arises quickly after surfing the above content is how to import and export the XML files in the Final Cut Pro X tool for further editing purposes.
In this section, you will discover efficient steps to carry out the transfer process flawlessly. It ensures lossless transfer and the XML files moves at a rapid rate to the desired ambiance from the Final Cut Pro X tool.
To import the XML file in the Final Cut Pro X program, follow the below guidelines.
Step 1: Open the Final cut pro X app on your device, then tap the File Menu at the top bar of the screen. From the dropdown list choose ‘Import -> XML’ option.
Step 2: Surf the folders in your device and select the desired XML file that requires the import action. Hit the ‘Import’ button to load the XML file into the Final Cut Pro X platform.

Another method to import the XML file into the Final Cut Pro X ambiance is that you can drag the XML files directly into the working environment of this program.
Next, you can learn how to export the XML files from the Final Cut Pro X tool for further edit and processing activities.
Step 1: Open the Final Cut Pro X program, choose the libraries or events that require the export process. Then, tap ‘File -> Export XML’. Type in the name for this XML file and choose the desired folder in your system for quick access.
Step 2: Enable the Metadata view pop-up to witness the data in the structured format. Select the XML version and press the ‘Save’ button to complete the export process.

The XML file is available in your system, and you can use it at any application for further processing.
Both the import and export process in Final Cut Pro X is simple, and you can try them without any issues. Few clicks are enough to complete the procedure flawlessly.
Part 4: What editors can import and export XML files?
There are surplus video editors available in the digital market to work with XML files to acquire the enhanced version of the clips. iMovie and Lumafusion programs can imports and exports the XML files to make depth edits as per the needs.
The iMovie application encourages the editors to import the XML files into its working timeline quickly. Simple drag and drop actions are enough to complete the import procedure. Insert the XML file in the timeline and make the necessary edits like trim, crop according to your requirement.
The Lumafusion is a renowned program that edits videos optimally on the iOS platform. You can import the XML files into this environment in no time. Press the ‘File -> Import’ option and navigate the folders to include the XML file into this video editor timeline. Using the built-in features of this app, make the perfect edits to suit your needs without any compromises.

Conclusion
Thus, you had an insightful discussion on the XML files and their associated import and export procedures in the Final Cut Pro X program. Use the above content to work with the XML files effectively.
The stepwise guidelines will aid you to tap the perfect controls for successful insertion and the transfer of the XML data. The glimpses of the video editing tools help you to understand that you can import the XML data for further edits.
This article had given you enlightening facts about XML and its importance during the transfer and storage process. Connect with this article to discover the role of XML in organizing the vital data and its associated imports and exports in the Final cut pro X program.
Shanoon Cox
Shanoon Cox is a writer and a lover of all things video.
Follow @Shanoon Cox
Shanoon Cox
Mar 27, 2024• Proven solutions
The XML files have multiple usages and contain the tags and texts as their main components. The purpose of the XML file is to format the data to aid in optimal storage and transfer process. The XML file consists of tags and texts. This tag contains the main elements of the file, and the text carries readable information.
Unlike HTML, the Extensible Markup Language describes the data content in a readable format without any complex codes. It is easy to understand and displays a clear illustration of the purpose. You can find the applications of XML in web publishing, to perform web tasks, and common uses like data storage, transfers.
Most users opt for XML due to its compatible features, readability, and personalization options. In this article, you will learn how to import and export XML files in the Final Cut Pro application. Use the below guidelines to carry out the desired process successfully. It is high time to get ready for an informative takeoff. Fasten your seats for the enlightening journey on the XML file at the Final cut pro X program.
- [Part1: What is the XML file in Final cut pro X? ](#what is XML)
- [Part2: Why exporting XML in final cut pro instead?](#export XML)
- [Part3: How to import and export XML files in Final cut pro X?](#how to do it)
- Part4: What editors can import and export XML files?
Part 1: What is the XML file in Final cut pro X?
XML, or Extensible Markup Language, can be imported and exported in Final Cut Pro. The best way to transfer the Final cut pro X files to any other third-party application is to use the XML format. Many programs do not recognize the file format of Final cut pro X documents. To convert it as a readable file, transfer the output in the form of XML type.
Most users may refine or edit the Final cut pro X files further to achieve their desired outcomes. To overcome the file compatibility issues, you must adopt the XML file pattern.
The sole purpose of the XML file is to avoid the complexity in transferring the data files like libraries, media, projects from the Final cut pro X app to another application. It minimizes the difficulties in handling the export procedure of the edited media files.
Despite ample methodologies in the digital space, XML is the simplest way to overcome unnecessary compatibility issues. You can convert the output files to a flexible format for a better transfer process. All forms of metadata, documents transfers occur using the XML file.
The handling comforts aid the usage of XML in the Final Cut Pro X ambiance. Quick processing is feasible with this file format and you can export them based on your needs. The simple texts with faster transfer persuade the editors to opt for this format. This Markup language is easy to understand, and you need not require any technical skills to understand the XML content.
The tags and texts reveal the standard operation of that file. You can work on the XML fine in your comforts unlike the other file types in the digital space. The Final Cut Pro X editors use the XML file to import and export the media file’s components, libraries, events for further processing. The XML serves as a comfortable file type to edit on the FINAL CUT PRO X platform.
Part 2: Why exporting XML in final cut pro instead?
You must be wondering, why do you need to export the XML file from the Final Cut Pro X environment? What are benefits do you achieve in transferring this XML content from this ambiance? Here comes the solutions for your queries in detail for better understanding.
- For further editing
As you all know that, the foremost purpose of Final Cut Pro X is to edit, store and transfer the media files based on the requirement. In case, if you want to make a unique edit on the processed videos, then you must transfer the edited clips to the desired applications.
In this scenario, you require a reliable file format to carry the meta details of the edited videos. There is a need to export the XML file to the FINAL CUT PRO X platform. To make further edits, you must transfer the entire project to the editing tools without any data loss.
- For teamworking
If you are working in groups, make your edits to be visible to your teammates. It requires a quick share of your projects from Final Cut Pro X to any other platform. To serve this purpose, export the XML files. XML file format assists in faster shares and lossless transfer to any required ambiance.
In addition, Filmora is even easier for team-working, click to see how .
- To transfer projects, clips, and libraries to other APP or devices
The XML file carries the metadata elements of the projects. It contains crucial components like libraries, clips. Moreover, the XML format helps to overcome compatibility issues. You can transfer them to any application or device and disclose them in no time.
It acts as a standard file type to handle many digital spaces flawlessly. If there is a need for the edited XML files in Final Cut Pro X, immediately transfer them to the necessary apps or devices for further processing.
Part 3: How to import and export XML files in Final cut pro X?
The next question that arises quickly after surfing the above content is how to import and export the XML files in the Final Cut Pro X tool for further editing purposes.
In this section, you will discover efficient steps to carry out the transfer process flawlessly. It ensures lossless transfer and the XML files moves at a rapid rate to the desired ambiance from the Final Cut Pro X tool.
To import the XML file in the Final Cut Pro X program, follow the below guidelines.
Step 1: Open the Final cut pro X app on your device, then tap the File Menu at the top bar of the screen. From the dropdown list choose ‘Import -> XML’ option.
Step 2: Surf the folders in your device and select the desired XML file that requires the import action. Hit the ‘Import’ button to load the XML file into the Final Cut Pro X platform.
Another method to import the XML file into the Final Cut Pro X ambiance is that you can drag the XML files directly into the working environment of this program.
Next, you can learn how to export the XML files from the Final Cut Pro X tool for further edit and processing activities.
Step 1: Open the Final Cut Pro X program, choose the libraries or events that require the export process. Then, tap ‘File -> Export XML’. Type in the name for this XML file and choose the desired folder in your system for quick access.
Step 2: Enable the Metadata view pop-up to witness the data in the structured format. Select the XML version and press the ‘Save’ button to complete the export process.
The XML file is available in your system, and you can use it at any application for further processing.
Both the import and export process in Final Cut Pro X is simple, and you can try them without any issues. Few clicks are enough to complete the procedure flawlessly.
Part 4: What editors can import and export XML files?
There are surplus video editors available in the digital market to work with XML files to acquire the enhanced version of the clips. iMovie and Lumafusion programs can imports and exports the XML files to make depth edits as per the needs.
The iMovie application encourages the editors to import the XML files into its working timeline quickly. Simple drag and drop actions are enough to complete the import procedure. Insert the XML file in the timeline and make the necessary edits like trim, crop according to your requirement.
The Lumafusion is a renowned program that edits videos optimally on the iOS platform. You can import the XML files into this environment in no time. Press the ‘File -> Import’ option and navigate the folders to include the XML file into this video editor timeline. Using the built-in features of this app, make the perfect edits to suit your needs without any compromises.
Conclusion
Thus, you had an insightful discussion on the XML files and their associated import and export procedures in the Final Cut Pro X program. Use the above content to work with the XML files effectively.
The stepwise guidelines will aid you to tap the perfect controls for successful insertion and the transfer of the XML data. The glimpses of the video editing tools help you to understand that you can import the XML data for further edits.
This article had given you enlightening facts about XML and its importance during the transfer and storage process. Connect with this article to discover the role of XML in organizing the vital data and its associated imports and exports in the Final cut pro X program.
Shanoon Cox
Shanoon Cox is a writer and a lover of all things video.
Follow @Shanoon Cox
Also read:
- Transform Your Footage The Ultimate 1080P Video Editor for 2024
- Updated 2024 Approved FCPX Training Academy Top Online Courses and Tutorials
- 2024 Approved Smart Video Editing Solutions with One-Touch Reframing
- 2024 Approved Remove Unwanted Elements Top Video Blur Apps for Mobile
- New The Best Free Online Video Flip and Rotate Tools for 2024
- New In 2024, Say It with Feeling A Beginners Guide to Making a Valentines Day Video
- 2024 Approved Mavericks OS X The Best Way to Edit MP4 Videos
- New 2024 Approved In This Article We Are Going to Take You Through some of the Best Online Photo and Video Collage Makers You Can Find on the Internet
- New Elevate Your WhatsApp Status Top Free and Paid Video Makers for 2024
- Updated 2024 Approved From Idea to Viral Best Reaction Video Creation Apps
- New YouTube to MP3 Made Easy Best Converter Tools and Tips for 2024
- New In 2024, What Apps Can You Use to Blur the Face or the Background on the Video? In This Article, I Will Share some of the Best Video Blur Apps that You Can Use to Blur Any Part of the Video on iPhone or Android Phones
- Updated Unlock the Power of Audio Conversion Top 12 Tools Reviewed
- New The Ultimate List of Free Online Video Invitation Generators for 2024
- Updated In 2024, Fastest Video Speed Controllers for Windows and macOS
- New Preserve Audio Perfection How to Convert Video to MP3 with No Quality Loss for 2024
- New 2024 Approved Discover the Power of Windows Movie Maker Advanced Video Editing Techniques
- Updated Compression Mastery How to Get the Most Out of Compressor in FCPX for 2024
- New The Art of Freezing Time A Comprehensive Guide to Video Freeze Frames
- New In 2024, Adobe Premiere Pro for Mac Best for Professionals
- Updated Discover the Best Free Video Editing Tools for Gamers for 2024
- Updated The Ultimate Guide to Video Dubbing Top Apps
- Updated In 2024, Unlock the Power of Microsoft Video Editor Windows Video Editing Tips and Tricks
- Updated VirtualDub Lookalikes Discover Similar Video Editing Software
- New In 2024, Vertical Video Mastery A Smartphone Creators Guide
- 2024 Approved Merge Videos Without Restrictions 7 Top Tools
- Hassle-Free Ways to Remove FRP Lock on Itel P55T Phones with/without a PC
- In 2024, Top 5 Car Locator Apps for Realme Narzo 60 Pro 5G | Dr.fone
- In 2024, iPhone 6 Plus Backup Password Never Set But Still Asking? Heres the Fix | Dr.fone
- Is Your Apple iPhone 13 in Security Lockout? Proper Ways To Unlock | Dr.fone
- 5 Easy Ways to Change Location on YouTube TV On Itel S23+ | Dr.fone
- In 2024, How to Share/Fake Location on WhatsApp for Nokia C02 | Dr.fone
- In 2024, How to Fix Apple iPhone 15 Passcode not Working?
- Edit and Send Fake Location on Telegram For your Motorola Moto G Stylus 5G (2023) in 3 Ways | Dr.fone
- In 2024, How to Change Your Apple iPhone 12 Pro Max Location on life360 Without Anyone Knowing? | Dr.fone
- How to Factory Reset Xiaomi Redmi Note 12 Pro 5G without Losing Data | Dr.fone
- In 2024, Full Guide to Bypass Samsung Galaxy S23 Ultra FRP
- In 2024, How to get the dragon scale and evolution-enabled pokemon On Vivo S18? | Dr.fone
- The Best iSpoofer Alternative to Try On Samsung Galaxy M34 5G | Dr.fone
- How to Transfer Data from Poco C51 to Other Android Devices? | Dr.fone
- Hacks to do pokemon go trainer battles For Xiaomi 13 Ultra | Dr.fone
- 3 Ways for Android Pokemon Go Spoofing On Asus ROG Phone 8 | Dr.fone
- How to Factory Reset Xiaomi Redmi Note 12R in 5 Easy Ways | Dr.fone
- Why Does My Samsung Galaxy S23 Keep Turning Off By Itself? 6 Fixes Are Here | Dr.fone
- In 2024, Latest Guide How To Bypass Vivo Y36 FRP Without Computer
- A How-To Guide on Bypassing iPhone 13 Pro iCloud Activation Lock
- How to Factory Reset Itel P55+ without Losing Data | Dr.fone
- In 2024, Guide to Mirror Your Tecno Spark Go (2023) to Other Android devices | Dr.fone
- Title: New In 2024, The Ultimate List of Free Game Download Sites for PC, Android, and Beyond
- Author: Isabella
- Created at : 2024-04-29 12:49:35
- Updated at : 2024-04-30 12:49:35
- Link: https://video-creation-software.techidaily.com/new-in-2024-the-ultimate-list-of-free-game-download-sites-for-pc-android-and-beyond/
- License: This work is licensed under CC BY-NC-SA 4.0.
