
New Silence Is Golden Removing Background Noise in Final Cut Pro X Made Easy for 2024
Silence Is Golden: Removing Background Noise in Final Cut Pro X Made Easy
How to Remove Background Noise in Final Cut Pro X?

Benjamin Arango
Oct 26, 2023• Proven solutions
As per research, audio plays a more vital role than the visuals in a video. Yes, no one will ever like a video that gets the audio track unrelated to the moving clip or has no voice. Similarly, suppose you are shooting or recording a live video. In that case, the most off-putting factors like background noise, improper microphone, and various distractions from the environment can affect the video or the movie quality.
Even if you perform recording in a proper studio, slight background noise can sneak into your video. So, tuning the voice or removing it is mandatory. If you are a Mac user, you can use the FCP noise removal to accomplish the task with no other third-party assistance. Please take a look at our today’s article to know how to get rid of background noise in Final Cut Pro. Alongside, you can also get to know some noise reduction plugins for FCPX.
And you may need this guide to learn how to remove background noise in more ways in FCPX.
Part 1: How to Remove Background Noise from Audio in Final Cut Pro X?
Want to know how to remove background noise in Final Cut Pro X? Here is a step-by-step guide for you to follow.
Step 1: Start new project & import files
Once you have launched the Final Cut Pro X application on your Mac device, go to “File > New > Project”.
Name the project and customize the video on the following pop-up window. You can then import the video files by executing “File > Import > Media”.
Step 2: Click the audio Enhancer option
Now, take the video onto the timeline and execute “Modify > Auto Enhance Audio” from the top menu bar or use the keyboard shortcut “Command-A.”
On the options above the timeline, tap the “Magic” icon, and from the drop-down, you can choose the Auto Enhancer Audio option.

You will also see another option to open an audio enhancer, which you can accomplish by clicking the Audio icon, which you can find above the Preview screen.
Step 3: Customize the Audio inspector
You will now get an audio enhancer or inspector toolbox on the right of the screen from where you can optimize or configure various options like equalization adjustments, loudness settings, noise removal, and hum removal.
Using FCP noise removal is so easy. And to remove background noise in Final Cut Pro X, you need to enable the Noise Removal checkbox and slide the pointer to a particular level. That is how to remove background noise in FCPX at ease.
Another exciting option offered for Mac users is hum removal in Final Cut Pro. Yes, under the audio enhancement window, you have a separate checkbox for hum removal where you can select either option of 50Hz or 60Hz.

Still not get it? Well, try Filmora and learn how to remove background noise in easy ways

Part 2: Noise Reduction Plugins for Final Cut Pro X
If you are wondering how to remove background noise in Final Cut Pro in any alternative way? Then, the noise reduction plugins for FCPX are the best choice. Listed are some Plugins highly recommended for noise reduction in your videos.
- Neat Video
Neat Video is our first noise reduction plugin for FCPX that helps remove background noise, flicker, digital noise, and other imperfections. It is an effective plugin with which cleaning up your video on any source like camera, TV tuners, and digital films are made possible. Preferred by professionals and enthusiasts, the Neat Video plugin is engineered with the noise-profiling approach and sophisticated mathematical algorithms for accurate and efficient results. Importantly, Neat Video works faster, taking full advantage of GPU and CPU hardware.
- ProDenoise
Introduced from Pixel Film Studios, Final Cut Pro X users can now soften or subdue noise or grain from their video clip with the ProDenoise plugin. With ProDenoise, you can sharpen your video cleaner and sharper in just a few mouse clicks quicker. A great-looking video is ready to be crafted with detailed recovery and edge protection techniques with this ProDenoise plugin. With this plugin of ProDenoise, you can access attractive tools like auto-detect rain and noise, denoise calibrator, image quality enhancer, and finally, designed especially for Final Cut Pro X users.
- ERA 5 Noise Remover
If you are looking for a Final Cut Pro noise reduction plugin for free, then, ERA 5 Noise Remover is what you should try today! With a free trial offer for its customers, it is compatible with Windows and Mac. With just one dial, you can clean up the noise and edit your video as desired. It could remove background noise , hum, buzz, A/C, fan, or any other background noise. ERA 5 can put a full stop to all your background noise worries. Offering comprehensive tools like ERA reverb remover, ERA plosive remover, and ERA de-esser, Accusonus tools run in real-time where you can get the best results with a one-knob style functionality!
Conclusion
Hence, this is how to remove background noise in Final Cut Pro hassle-free. Do you have a video to edit and clear by getting rid of unwanted background noise?
For more audio problems in FCPX, you may want to learn more about how to sync your video and audio in FCPX here.
Then, FCP noise removal is the best in-built choice to give a try. Don’t forget to endeavor the above-discussed noise reduction plugin for FCPX as well!
Benjamin Arango
Benjamin Arango is a writer and a lover of all things video.
Follow @Benjamin Arango
Benjamin Arango
Oct 26, 2023• Proven solutions
As per research, audio plays a more vital role than the visuals in a video. Yes, no one will ever like a video that gets the audio track unrelated to the moving clip or has no voice. Similarly, suppose you are shooting or recording a live video. In that case, the most off-putting factors like background noise, improper microphone, and various distractions from the environment can affect the video or the movie quality.
Even if you perform recording in a proper studio, slight background noise can sneak into your video. So, tuning the voice or removing it is mandatory. If you are a Mac user, you can use the FCP noise removal to accomplish the task with no other third-party assistance. Please take a look at our today’s article to know how to get rid of background noise in Final Cut Pro. Alongside, you can also get to know some noise reduction plugins for FCPX.
And you may need this guide to learn how to remove background noise in more ways in FCPX.
Part 1: How to Remove Background Noise from Audio in Final Cut Pro X?
Want to know how to remove background noise in Final Cut Pro X? Here is a step-by-step guide for you to follow.
Step 1: Start new project & import files
Once you have launched the Final Cut Pro X application on your Mac device, go to “File > New > Project”.
Name the project and customize the video on the following pop-up window. You can then import the video files by executing “File > Import > Media”.
Step 2: Click the audio Enhancer option
Now, take the video onto the timeline and execute “Modify > Auto Enhance Audio” from the top menu bar or use the keyboard shortcut “Command-A.”
On the options above the timeline, tap the “Magic” icon, and from the drop-down, you can choose the Auto Enhancer Audio option.
You will also see another option to open an audio enhancer, which you can accomplish by clicking the Audio icon, which you can find above the Preview screen.
Step 3: Customize the Audio inspector
You will now get an audio enhancer or inspector toolbox on the right of the screen from where you can optimize or configure various options like equalization adjustments, loudness settings, noise removal, and hum removal.
Using FCP noise removal is so easy. And to remove background noise in Final Cut Pro X, you need to enable the Noise Removal checkbox and slide the pointer to a particular level. That is how to remove background noise in FCPX at ease.
Another exciting option offered for Mac users is hum removal in Final Cut Pro. Yes, under the audio enhancement window, you have a separate checkbox for hum removal where you can select either option of 50Hz or 60Hz.
Still not get it? Well, try Filmora and learn how to remove background noise in easy ways
Part 2: Noise Reduction Plugins for Final Cut Pro X
If you are wondering how to remove background noise in Final Cut Pro in any alternative way? Then, the noise reduction plugins for FCPX are the best choice. Listed are some Plugins highly recommended for noise reduction in your videos.
- Neat Video
Neat Video is our first noise reduction plugin for FCPX that helps remove background noise, flicker, digital noise, and other imperfections. It is an effective plugin with which cleaning up your video on any source like camera, TV tuners, and digital films are made possible. Preferred by professionals and enthusiasts, the Neat Video plugin is engineered with the noise-profiling approach and sophisticated mathematical algorithms for accurate and efficient results. Importantly, Neat Video works faster, taking full advantage of GPU and CPU hardware.
- ProDenoise
Introduced from Pixel Film Studios, Final Cut Pro X users can now soften or subdue noise or grain from their video clip with the ProDenoise plugin. With ProDenoise, you can sharpen your video cleaner and sharper in just a few mouse clicks quicker. A great-looking video is ready to be crafted with detailed recovery and edge protection techniques with this ProDenoise plugin. With this plugin of ProDenoise, you can access attractive tools like auto-detect rain and noise, denoise calibrator, image quality enhancer, and finally, designed especially for Final Cut Pro X users.
- ERA 5 Noise Remover
If you are looking for a Final Cut Pro noise reduction plugin for free, then, ERA 5 Noise Remover is what you should try today! With a free trial offer for its customers, it is compatible with Windows and Mac. With just one dial, you can clean up the noise and edit your video as desired. It could remove background noise , hum, buzz, A/C, fan, or any other background noise. ERA 5 can put a full stop to all your background noise worries. Offering comprehensive tools like ERA reverb remover, ERA plosive remover, and ERA de-esser, Accusonus tools run in real-time where you can get the best results with a one-knob style functionality!
Conclusion
Hence, this is how to remove background noise in Final Cut Pro hassle-free. Do you have a video to edit and clear by getting rid of unwanted background noise?
For more audio problems in FCPX, you may want to learn more about how to sync your video and audio in FCPX here.
Then, FCP noise removal is the best in-built choice to give a try. Don’t forget to endeavor the above-discussed noise reduction plugin for FCPX as well!
Benjamin Arango
Benjamin Arango is a writer and a lover of all things video.
Follow @Benjamin Arango
Pixel Aspect Ratio Calculations: A Step-by-Step Guide
How to Calculate Pixel Calculator Ratio
An easy yet powerful editor
Numerous effects to choose from
Detailed tutorials provided by the official channel
Size, formats, and resolution… What are pixels exactly doing with it?
![]()
So let’s review some basics on pixel calculator ratio to create an easy life, your workflow more productive, and your photos of the ideal size for the intended purpose.
In this article
01 [What is Pixel Aspect Ratio?](#Part 1)
02 [How is Pixel Ratio Calculated?](#Part 2)
03 [Par (pixel Aspect Ratio) in Adobe Premiere Pro/Filmora?](#Part 3)
04 [Difference among Pixel Aspect Ratio, Display Aspect Ratio, and Storage Aspect Ratio](#Part 4)
05 [How Aspect Ratios Affect UI/UX Design?](#Part 5)
Part 1 What is Pixel Aspect Ratio?
A digital image is not a single non-dividable thing. You’ll see that your photo is like a mosaic formed by small tiles if you zoom in far enough, which are known as pixels in photography.
The amount of these pixels and the way they are divided are the two elements that you’re required to take into account to know more about the resolution and pixel calculator ratio.
The Pixel Aspect Ratio is simply the latest way of defining the length of one side of a pixel in context to the length of the other.
Let’s say the ratio is 1:1; each side of the pixel is the same length as the other, also known as a square in pixels.
If the ratio is 2:1, it means that one side is twice the length of the other.
NOTE: The ‘Aspect Ratio’ does not define the actual or exact length of the side of a pixel is, just its “relative” size of one side to the other. The actual length will depend on how much you shrink or stretch a photo when recreating it. But if the Pixel Calculator Ratio is 1:1, then the pixels will always be square irrespective of the size of that particular photo.
![]()
Part 2 How is Pixel Ratio Calculated?
You can use a pixel ratio calculator to calculate the pixels within a screen. So, we’d like to suggest a calculator by xwebtools.com.
Here, you can see tabs, namely the Common Ratios Ratio Width, Ratio Height, Pixels Width, and Pixels Height.
![]()
How it works:
This pixel ratio calculator converts pixel dimensions to aspect ratios. It is an online free tool that assists you in calculating the aspect ratio value of an object or a photo.
The conversion can be carried in both ways, aspect ratio to pixels and pixels to aspect ratio. This screen resolution calculator offers a powerful and simple tool that can convert the ratio of images to pixels resolution and pixels to ratio dimensions.
You need to provide Pixels Width and Pixels Height to calculate the aspect ratio; the aspect ratio will be automatically calculated.
You need to provide Ratio Height and Ratio Width to calculate pixel resolutions. Both the Pixels Width and Height will get automatically calculated.
Part 3 What is Par (pixel Aspect Ratio) in Adobe Premiere Pro/Filmora?
Pixel ratio: Adobe Premiere Pro
As we already discussed, an aspect ratio defines width to height. The still picture and video frames have a frame aspect ratio. The pixels that create the frame have a pixel aspect ratio (sometimes called PAR).
Different video recording standards have different aspect ratios. For instance, you record video for television in either a 16:9 or a 4:3 frame aspect ratio.
You set the frame and pixel aspect when you create a project in Adobe Premiere Pro. Once you set these ratios, you can’t change them for that project. However, you can edit the aspect ratio of a sequence. You can also use assets made with different aspect ratios in the project.
Premiere Pro automatically compensates for the pixel aspect ratio of source files.
If an asset still feels distorted, you can manually mention its pixel aspect ratio. But that isn’t very clear, especially for a beginner. This is why we recommend doing the following.
Pixel ratio: Wondershare Filmora
You need a converter or a video editor to change the aspect ratio permanently. Here we humbly recommend an excellent aspect ratio changer - Wondershare Filmora video editor, which helps you make 4:3, 9:16, 16:9, and 1:1 aspect ratio videos pretty quickly.
Wondershare Filmora
Get started easily with Filmora’s powerful performance, intuitive interface, and countless effects Try It Free Try It Free Learn More >

Furthermore, you can conveniently share these videos on YouTube, Apple TV, Vimeo, and mobile devices.
Transform aspect ratio at the beginning interface
Wondershare Filmora Video Editor helps you change the project aspect ratio right after launching the video editor program.
If you click the drop-down menu, you will see the usual 16:9, 1:1, 9:16, 4:3, and 21:9 aspect ratios.
![]()
Unlike Adobe Premiere Pro, Wondershare Filmora offers you four more ways of setting aspect ratios efficiently.
Method 2: You can change the aspect ratio under Project Settings
![]()
Method 3: Change the aspect ratio of video with Auto-Reframe
![]()
Method 4: Change aspect ratio during Editing
![]()
Method 5: Change aspect ratio while Exporting
![]()
Thus, using the Wondershare Filmora along with the pixel ratio calculator makes a difference!
Part 4 Difference among Pixel Aspect Ratio, Display Aspect Ratio, and Storage Aspect Ratio
Although the image aspect ratio comes from its width and height, it also contains multiple subsets that help to define image proportions properly.
1 - Pixel aspect ratio
Pixel aspect ratio (PAR) is the proportion of the specific pixels within an image. They are generally square within the pixel aspect ratio of 1:1.
But sometimes, specific images are optimized for certain types of displays. And, they have rectangular pixels with an aspect ratio of 4:3 or similar.
2 - Display aspect ratio
The display aspect ratio (DAR) is the designers’ most frequent aspect ratio and gets generally synced with the general term.
As the name suggests, the display aspect ratio refers to the proportions of an image as it appears on different screens out there.
Some devices, such as televisions and cameras, have a fixed DAR for images to display nicely on these devices.
They need optimization for their specific or respective aspect ratio. For instance, a typical display aspect ratio for the widescreen video on a television screen or monitor screen is 16:9.
They appear distorted when images with different aspect ratios are presented on these devices. Digital SLR camera sensors also consist of a fixed display aspect ratio, which controls how pictures captured by the camera will be displayed and saved.
3 - Storage aspect ratio
Storage aspect ratio, commonly known as (SAR) is an aspect ratio formula that concerns specifically to encoded digital video files. SAR refers to the height and the width relationship in video frame size, and it is required to be consistent among all individual frames.
SAR x PAR = DAR for max widescreen videos in a usual used formula.
Part 1 Part 5: How Aspect Ratios Affect UI/UX Design?
Aspect ratios play a vital part in any project that consists of displaying and capturing photographs, videos, or other image-based files in an ideal manner. The camera’s fixed aspect ratio can considerably impact, especially for photographers.
And for videographers or anyone working with slideshows, animations, and other motion projects, the aspect ratio is a prominent element for correct display on mobile devices and widescreen.
But even in the environment of responsive web design, problems can arise, such as when an image is not adjustable for display without compromising its quality or content.
A small example is when you need a square image with a 1:1 aspect ratio to insert into a rectangular box on a web page. To accommodate varying image size requirements, proportions and size may need adjustment.
In an increasingly picture-driven digital world, videos and images that look even slightly out of the way add to a visitor’s negative impression of a site. Besides those forced into the wrong configurations can even interfere with a site’s usability.
Poorly proportioned user guide or product images video that’s too stretched to check clearly can affect both a visitor’s want and their ability to use the site. Developers, designers, and anyone working with images will need to know how aspect ratios work and manipulate them for the best visual effect.
Various pixel calculator ratios, both paid and free, have popped up on the web to streamline the process.
Key Takeaways from This Episode
● An overview of pixels
● Understanding the importance of pixel ratio calculators
● Different pixel ratios and their impact on UI/UX design
Size, formats, and resolution… What are pixels exactly doing with it?
![]()
So let’s review some basics on pixel calculator ratio to create an easy life, your workflow more productive, and your photos of the ideal size for the intended purpose.
In this article
01 [What is Pixel Aspect Ratio?](#Part 1)
02 [How is Pixel Ratio Calculated?](#Part 2)
03 [Par (pixel Aspect Ratio) in Adobe Premiere Pro/Filmora?](#Part 3)
04 [Difference among Pixel Aspect Ratio, Display Aspect Ratio, and Storage Aspect Ratio](#Part 4)
05 [How Aspect Ratios Affect UI/UX Design?](#Part 5)
Part 1 What is Pixel Aspect Ratio?
A digital image is not a single non-dividable thing. You’ll see that your photo is like a mosaic formed by small tiles if you zoom in far enough, which are known as pixels in photography.
The amount of these pixels and the way they are divided are the two elements that you’re required to take into account to know more about the resolution and pixel calculator ratio.
The Pixel Aspect Ratio is simply the latest way of defining the length of one side of a pixel in context to the length of the other.
Let’s say the ratio is 1:1; each side of the pixel is the same length as the other, also known as a square in pixels.
If the ratio is 2:1, it means that one side is twice the length of the other.
NOTE: The ‘Aspect Ratio’ does not define the actual or exact length of the side of a pixel is, just its “relative” size of one side to the other. The actual length will depend on how much you shrink or stretch a photo when recreating it. But if the Pixel Calculator Ratio is 1:1, then the pixels will always be square irrespective of the size of that particular photo.
![]()
Part 2 How is Pixel Ratio Calculated?
You can use a pixel ratio calculator to calculate the pixels within a screen. So, we’d like to suggest a calculator by xwebtools.com.
Here, you can see tabs, namely the Common Ratios Ratio Width, Ratio Height, Pixels Width, and Pixels Height.
![]()
How it works:
This pixel ratio calculator converts pixel dimensions to aspect ratios. It is an online free tool that assists you in calculating the aspect ratio value of an object or a photo.
The conversion can be carried in both ways, aspect ratio to pixels and pixels to aspect ratio. This screen resolution calculator offers a powerful and simple tool that can convert the ratio of images to pixels resolution and pixels to ratio dimensions.
You need to provide Pixels Width and Pixels Height to calculate the aspect ratio; the aspect ratio will be automatically calculated.
You need to provide Ratio Height and Ratio Width to calculate pixel resolutions. Both the Pixels Width and Height will get automatically calculated.
Part 3 What is Par (pixel Aspect Ratio) in Adobe Premiere Pro/Filmora?
Pixel ratio: Adobe Premiere Pro
As we already discussed, an aspect ratio defines width to height. The still picture and video frames have a frame aspect ratio. The pixels that create the frame have a pixel aspect ratio (sometimes called PAR).
Different video recording standards have different aspect ratios. For instance, you record video for television in either a 16:9 or a 4:3 frame aspect ratio.
You set the frame and pixel aspect when you create a project in Adobe Premiere Pro. Once you set these ratios, you can’t change them for that project. However, you can edit the aspect ratio of a sequence. You can also use assets made with different aspect ratios in the project.
Premiere Pro automatically compensates for the pixel aspect ratio of source files.
If an asset still feels distorted, you can manually mention its pixel aspect ratio. But that isn’t very clear, especially for a beginner. This is why we recommend doing the following.
Pixel ratio: Wondershare Filmora
You need a converter or a video editor to change the aspect ratio permanently. Here we humbly recommend an excellent aspect ratio changer - Wondershare Filmora video editor, which helps you make 4:3, 9:16, 16:9, and 1:1 aspect ratio videos pretty quickly.
Wondershare Filmora
Get started easily with Filmora’s powerful performance, intuitive interface, and countless effects Try It Free Try It Free Learn More >
Furthermore, you can conveniently share these videos on YouTube, Apple TV, Vimeo, and mobile devices.
Transform aspect ratio at the beginning interface
Wondershare Filmora Video Editor helps you change the project aspect ratio right after launching the video editor program.
If you click the drop-down menu, you will see the usual 16:9, 1:1, 9:16, 4:3, and 21:9 aspect ratios.
![]()
Unlike Adobe Premiere Pro, Wondershare Filmora offers you four more ways of setting aspect ratios efficiently.
Method 2: You can change the aspect ratio under Project Settings
![]()
Method 3: Change the aspect ratio of video with Auto-Reframe
![]()
Method 4: Change aspect ratio during Editing
![]()
Method 5: Change aspect ratio while Exporting
![]()
Thus, using the Wondershare Filmora along with the pixel ratio calculator makes a difference!
Part 4 Difference among Pixel Aspect Ratio, Display Aspect Ratio, and Storage Aspect Ratio
Although the image aspect ratio comes from its width and height, it also contains multiple subsets that help to define image proportions properly.
1 - Pixel aspect ratio
Pixel aspect ratio (PAR) is the proportion of the specific pixels within an image. They are generally square within the pixel aspect ratio of 1:1.
But sometimes, specific images are optimized for certain types of displays. And, they have rectangular pixels with an aspect ratio of 4:3 or similar.
2 - Display aspect ratio
The display aspect ratio (DAR) is the designers’ most frequent aspect ratio and gets generally synced with the general term.
As the name suggests, the display aspect ratio refers to the proportions of an image as it appears on different screens out there.
Some devices, such as televisions and cameras, have a fixed DAR for images to display nicely on these devices.
They need optimization for their specific or respective aspect ratio. For instance, a typical display aspect ratio for the widescreen video on a television screen or monitor screen is 16:9.
They appear distorted when images with different aspect ratios are presented on these devices. Digital SLR camera sensors also consist of a fixed display aspect ratio, which controls how pictures captured by the camera will be displayed and saved.
3 - Storage aspect ratio
Storage aspect ratio, commonly known as (SAR) is an aspect ratio formula that concerns specifically to encoded digital video files. SAR refers to the height and the width relationship in video frame size, and it is required to be consistent among all individual frames.
SAR x PAR = DAR for max widescreen videos in a usual used formula.
Part 1 Part 5: How Aspect Ratios Affect UI/UX Design?
Aspect ratios play a vital part in any project that consists of displaying and capturing photographs, videos, or other image-based files in an ideal manner. The camera’s fixed aspect ratio can considerably impact, especially for photographers.
And for videographers or anyone working with slideshows, animations, and other motion projects, the aspect ratio is a prominent element for correct display on mobile devices and widescreen.
But even in the environment of responsive web design, problems can arise, such as when an image is not adjustable for display without compromising its quality or content.
A small example is when you need a square image with a 1:1 aspect ratio to insert into a rectangular box on a web page. To accommodate varying image size requirements, proportions and size may need adjustment.
In an increasingly picture-driven digital world, videos and images that look even slightly out of the way add to a visitor’s negative impression of a site. Besides those forced into the wrong configurations can even interfere with a site’s usability.
Poorly proportioned user guide or product images video that’s too stretched to check clearly can affect both a visitor’s want and their ability to use the site. Developers, designers, and anyone working with images will need to know how aspect ratios work and manipulate them for the best visual effect.
Various pixel calculator ratios, both paid and free, have popped up on the web to streamline the process.
Key Takeaways from This Episode
● An overview of pixels
● Understanding the importance of pixel ratio calculators
● Different pixel ratios and their impact on UI/UX design
Transform Your Videos: The Best iPhone Editing Apps
Top 5 Best Video Editing Apps for iPhone in 2024

Shanoon Cox
Mar 27, 2024• Proven solutions
An iPhone is a top user choice because it can perform time-intensive tasks without any hassle. We all are inclined to make digital content as it is an easy means to earn money and showcase our creative side. Are you able to film with your iPhone but do not know how to edit on it? You can easily edit on iPhone if you have the right editing apps with excellent mobile compatibility. Stay tuned to learn about 5 iPhone video editor apps that will make editing a smooth process. Let’s begin!
Part 1: Best Video Editing Apps for iPhone
Want to know some of the best editing apps for iPhone that can help you make attractive videos? Here you can learn about some tips and tricks to excel at YouTubing or making TikTok videos. Read more to turn your wish turn into reality:
1. Filmora - Easy-to-use and Powerful


Filmora is the best iPhone video editor app with no watermark, which is generally an issue with most video editing apps. It has a simple interface and is easy to use for beginners. Furthermore, it has many excellent features to make your video look professional such as trimming, adding transitions, adding captions, filters, etc. You can preview every single segment before saving it.
Moreover, you can edit the video and feature top-notch quality videos for your audience! It edits videos with 4K quality and offers multiple add-on options such as adding emojis, filters, text, background music, and changing background. Its intuitive interface makes editing simpler using powerful built-in tools. One of the best things about Filmora is importing custom music and adding it to any video segment. Sharing through Filmora is effortless; you can share it on various platforms directly or save it on your phone.
Additionally, the recent update from Filmora brings the plenty of new features including AR stickers, GIFs, and weekly cloud-based update. A rick integrated stock library helps you access a massive collection of GIFs and pictures from Unsplash, GIPHY and Pixabay.
Price: The monthly paid Filmora plan costs USD 6.99, and the annual plan costs USD 32.99.
Pros:
- Trim, transfer, and filter
- 4K HD video editing software
- Intuitive interface
- Cloud based weekly update
- Massive collection of AR stickers, and GIFs
Cons:
- The free version has a watermark
2. iMovie - Friendly for Beginner
The iMovie video editing app is specially developed for iOS devices and is super easy to use, making it ideal for beginners. The intuitive touch gestures and a robust assortment of editing features make it worthy of editing professional videos. Moreover, a user can use the app to create both long and short aesthetic videos. What’s crazy about this app is that it has 13 custom-designed Apple filters that make your video shots look flawless from all angles. It has eight unique themes and templates. It allows adding a solid or gradient background to videos.
Editing with iMovie becomes even simpler because it has 80 songs in the library; you do not have to pay to buy tracks. iMovie offers all essential features for free such as trimming options, transitions, filters, music, animated titles, themes, etc. Adding slow motion to your videos according to your pace choice has never been accessible before. On the other hand, a user can Airdrop videos, save them on Google Drive or iCloud for sharing or future use. The 4K quality remains intact even after downloading or sharing on various social media platforms. You know where to head when you want to make an adorable video to engage with your audience or grow your audience- iMovie has got you covered!
Price: iMovie is free iOS software; hence, a win-win situation for iPhone users.
Pros:
- 13 custom-designed Apple filters
- 80 free songs
- 4K video quality
- Eight unique themes
Cons:
- Works with only codec MP4 files
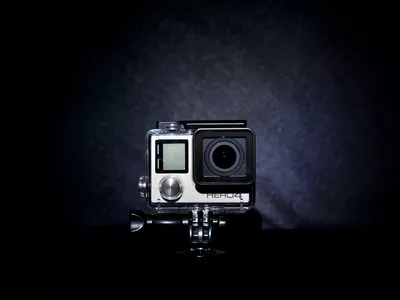
3. Quik - Best for Editing GoPro Video
Quik is a great iPhone video editor which works ideally to edit GoPro footage. The fast-paced editing capability of Quik impresses most professionals as well as beginners, especially the ones looking for a user-friendly iPhone editing app. Moving further, it does not fail to impress users with its outstanding splice feature. It is easier to merge videos by adding transitions in the middle. Twenty-four different presets help users to easily edit 4K quality videos without putting in much effort.
Here’s a crazy thing to note; you can add GIFs, emojis, and random texts to make your video more fun. It is super easy to eliminate extra footage, add voiceover, add slow-motion, and fasten a video. It has all the basic yet powerful features one needs to make a video look striking and attractive. The functionality to edit photos also makes it a multi-purpose app.
Price: Quik provides a free trial to a user, but it charges $1.99 a month and $9.99 annually after the trial is over.
Pros:
- 24 presets
- Splice videos
- Smooth transition
- Cut extra footage
Cons:
- Allows to edit 50 photos/videos
4. LumaFusion - Professional Editor for iPhone
LumaFusion is an iPhone video editor app that you can use to edit videos on the go. Isn’t it exciting to be able to edit professional videos through your iPhone? LumaFusion is known for its intense video stabilization feature through which you can eliminate shakiness from the footage. The powerful editing tools help you edit multiple segments of 4K videos.
You can resize, reframe, slow down, fasten, merge and cut out the video. It supports 10-bit HDR video export from iPhone easily. The zoom feature enables you to notice even the smallest detail in the video. It is super easy to refine the video and make it flawless according to your needs. The pre-built templates make it easier for users to edit intros, reels, Instagram stories, etc.
Price: Apple offers an in-app purchase of LumaFusion for $29.99. It is a one-time purchase; you can use it for free after that. However, you can also subscribe to storyblocks for Lumafusion for $69.99 annually and $9.99 monthly.
Pros:
- 10-bit HDR video export
- Edit 4K videos
- Easy to share
- Change video speed
Cons:
- No iCloud synchronization
5. Adobe Premiere Rush - Ideal Choice for YouTubers
Adobe Premiere Rush is great for YouTubers who want to produce content quickly without compromising on quality. The powerful tools within the app help in creating interactive and aesthetic content for all social media platforms. The built-in functionality of a camera helps you to record and edit on the go. The app has built-in royalty-free music, which you can add to different video segments to add life to it. Using pictures-in-picture features, animated graphics, overlays, and blurring, you can make your video look highly professional.
The premium features such as automatic defect and repetition detection help saving time for rewatching edited footage. The AI Sensei and auto-ducking feature help in balancing the sound. The sound automatically decreases to highlight dialogues. Adobe Premiere Rush is made for editing videos to be shared on social media. It allows the readjustment of frames to enhance its visibility on social media. The app makes it easy to share edited videos on TikTok, Facebook, Instagram, and Twitter in just one click.
Price: Adobe Premiere Rush costs $9.99 per month and gives you access to all the premium features.
Pros:
- Auto-ducking
- Royalty-free music
- Automatic problem detection
- Share on social media directly
Cons:
- No green screen feature
Part 2: Edit Video on Desktop with Filmora
Besides using an iPhone video editor to edit on the phone, you can also try desktop applications such as Filmora to edit videos on laptop . Filmora supports Mac and Windows while the Filmora is an app for iOS as well as Android. It has powerful video editing features and 300+ phenomenal effects at your disposal. YouTubers will find this app super convenient to edit videos and upload quickly. You must be wondering about its features; here are some:

1. Professional editing tools
Filmora allows you to edit professional videos by providing features such as zoom-in, zoom-out, blur, reverse audio, adding screenshots, and screen recording. Basic features such as trimming, merging, rotating, splitting merging, etc., are ideal for beginners. A user has the full ability to manage audio and video speed.

2. Video Effects
Additionally, Filmora desktop video editor supports many formats and provides advanced tools to accomplish your goals.

3. Audio tuning
Music makes a video more attractive and gets a user to stay. Through Filmora, users can edit sound also to make it sharper, remove background noise, make music fade-in or fade-out, etc. It adds more emotions and attractiveness to a video.

4. Intensify colors
Filmora has basic color gradient features through which a user can intensify video colors. It has LUT 3D effects through which you can balance out colors, add more cool or warm impact to a video.

Conclusion
There are many iPhone video editor apps available, but not all provide value to you. A good video editor app within your phone ensures that you can produce content on the go anywhere. Keeping your needs in mind, we have mentioned five of our top choices with great features. These apps do not only have outstanding features, but they are also relatively easier to use. All of the powerful editing features within these apps are ideal for creating professional videos that attract the audience. It is on you to use these apps to their maximum potential to generate content that helps you grow.
Shanoon Cox
Shanoon Cox is a writer and a lover of all things video.
Follow @Shanoon Cox
Shanoon Cox
Mar 27, 2024• Proven solutions
An iPhone is a top user choice because it can perform time-intensive tasks without any hassle. We all are inclined to make digital content as it is an easy means to earn money and showcase our creative side. Are you able to film with your iPhone but do not know how to edit on it? You can easily edit on iPhone if you have the right editing apps with excellent mobile compatibility. Stay tuned to learn about 5 iPhone video editor apps that will make editing a smooth process. Let’s begin!
Part 1: Best Video Editing Apps for iPhone
Want to know some of the best editing apps for iPhone that can help you make attractive videos? Here you can learn about some tips and tricks to excel at YouTubing or making TikTok videos. Read more to turn your wish turn into reality:
1. Filmora - Easy-to-use and Powerful
Filmora is the best iPhone video editor app with no watermark, which is generally an issue with most video editing apps. It has a simple interface and is easy to use for beginners. Furthermore, it has many excellent features to make your video look professional such as trimming, adding transitions, adding captions, filters, etc. You can preview every single segment before saving it.
Moreover, you can edit the video and feature top-notch quality videos for your audience! It edits videos with 4K quality and offers multiple add-on options such as adding emojis, filters, text, background music, and changing background. Its intuitive interface makes editing simpler using powerful built-in tools. One of the best things about Filmora is importing custom music and adding it to any video segment. Sharing through Filmora is effortless; you can share it on various platforms directly or save it on your phone.
Additionally, the recent update from Filmora brings the plenty of new features including AR stickers, GIFs, and weekly cloud-based update. A rick integrated stock library helps you access a massive collection of GIFs and pictures from Unsplash, GIPHY and Pixabay.
Price: The monthly paid Filmora plan costs USD 6.99, and the annual plan costs USD 32.99.
Pros:
- Trim, transfer, and filter
- 4K HD video editing software
- Intuitive interface
- Cloud based weekly update
- Massive collection of AR stickers, and GIFs
Cons:
- The free version has a watermark
2. iMovie - Friendly for Beginner
The iMovie video editing app is specially developed for iOS devices and is super easy to use, making it ideal for beginners. The intuitive touch gestures and a robust assortment of editing features make it worthy of editing professional videos. Moreover, a user can use the app to create both long and short aesthetic videos. What’s crazy about this app is that it has 13 custom-designed Apple filters that make your video shots look flawless from all angles. It has eight unique themes and templates. It allows adding a solid or gradient background to videos.
Editing with iMovie becomes even simpler because it has 80 songs in the library; you do not have to pay to buy tracks. iMovie offers all essential features for free such as trimming options, transitions, filters, music, animated titles, themes, etc. Adding slow motion to your videos according to your pace choice has never been accessible before. On the other hand, a user can Airdrop videos, save them on Google Drive or iCloud for sharing or future use. The 4K quality remains intact even after downloading or sharing on various social media platforms. You know where to head when you want to make an adorable video to engage with your audience or grow your audience- iMovie has got you covered!
Price: iMovie is free iOS software; hence, a win-win situation for iPhone users.
Pros:
- 13 custom-designed Apple filters
- 80 free songs
- 4K video quality
- Eight unique themes
Cons:
- Works with only codec MP4 files
3. Quik - Best for Editing GoPro Video
Quik is a great iPhone video editor which works ideally to edit GoPro footage. The fast-paced editing capability of Quik impresses most professionals as well as beginners, especially the ones looking for a user-friendly iPhone editing app. Moving further, it does not fail to impress users with its outstanding splice feature. It is easier to merge videos by adding transitions in the middle. Twenty-four different presets help users to easily edit 4K quality videos without putting in much effort.
Here’s a crazy thing to note; you can add GIFs, emojis, and random texts to make your video more fun. It is super easy to eliminate extra footage, add voiceover, add slow-motion, and fasten a video. It has all the basic yet powerful features one needs to make a video look striking and attractive. The functionality to edit photos also makes it a multi-purpose app.
Price: Quik provides a free trial to a user, but it charges $1.99 a month and $9.99 annually after the trial is over.
Pros:
- 24 presets
- Splice videos
- Smooth transition
- Cut extra footage
Cons:
- Allows to edit 50 photos/videos
4. LumaFusion - Professional Editor for iPhone
LumaFusion is an iPhone video editor app that you can use to edit videos on the go. Isn’t it exciting to be able to edit professional videos through your iPhone? LumaFusion is known for its intense video stabilization feature through which you can eliminate shakiness from the footage. The powerful editing tools help you edit multiple segments of 4K videos.
You can resize, reframe, slow down, fasten, merge and cut out the video. It supports 10-bit HDR video export from iPhone easily. The zoom feature enables you to notice even the smallest detail in the video. It is super easy to refine the video and make it flawless according to your needs. The pre-built templates make it easier for users to edit intros, reels, Instagram stories, etc.
Price: Apple offers an in-app purchase of LumaFusion for $29.99. It is a one-time purchase; you can use it for free after that. However, you can also subscribe to storyblocks for Lumafusion for $69.99 annually and $9.99 monthly.
Pros:
- 10-bit HDR video export
- Edit 4K videos
- Easy to share
- Change video speed
Cons:
- No iCloud synchronization
5. Adobe Premiere Rush - Ideal Choice for YouTubers
Adobe Premiere Rush is great for YouTubers who want to produce content quickly without compromising on quality. The powerful tools within the app help in creating interactive and aesthetic content for all social media platforms. The built-in functionality of a camera helps you to record and edit on the go. The app has built-in royalty-free music, which you can add to different video segments to add life to it. Using pictures-in-picture features, animated graphics, overlays, and blurring, you can make your video look highly professional.
The premium features such as automatic defect and repetition detection help saving time for rewatching edited footage. The AI Sensei and auto-ducking feature help in balancing the sound. The sound automatically decreases to highlight dialogues. Adobe Premiere Rush is made for editing videos to be shared on social media. It allows the readjustment of frames to enhance its visibility on social media. The app makes it easy to share edited videos on TikTok, Facebook, Instagram, and Twitter in just one click.
Price: Adobe Premiere Rush costs $9.99 per month and gives you access to all the premium features.
Pros:
- Auto-ducking
- Royalty-free music
- Automatic problem detection
- Share on social media directly
Cons:
- No green screen feature
Part 2: Edit Video on Desktop with Filmora
Besides using an iPhone video editor to edit on the phone, you can also try desktop applications such as Filmora to edit videos on laptop . Filmora supports Mac and Windows while the Filmora is an app for iOS as well as Android. It has powerful video editing features and 300+ phenomenal effects at your disposal. YouTubers will find this app super convenient to edit videos and upload quickly. You must be wondering about its features; here are some:
1. Professional editing tools
Filmora allows you to edit professional videos by providing features such as zoom-in, zoom-out, blur, reverse audio, adding screenshots, and screen recording. Basic features such as trimming, merging, rotating, splitting merging, etc., are ideal for beginners. A user has the full ability to manage audio and video speed.
2. Video Effects
Additionally, Filmora desktop video editor supports many formats and provides advanced tools to accomplish your goals.
3. Audio tuning
Music makes a video more attractive and gets a user to stay. Through Filmora, users can edit sound also to make it sharper, remove background noise, make music fade-in or fade-out, etc. It adds more emotions and attractiveness to a video.
4. Intensify colors
Filmora has basic color gradient features through which a user can intensify video colors. It has LUT 3D effects through which you can balance out colors, add more cool or warm impact to a video.
Conclusion
There are many iPhone video editor apps available, but not all provide value to you. A good video editor app within your phone ensures that you can produce content on the go anywhere. Keeping your needs in mind, we have mentioned five of our top choices with great features. These apps do not only have outstanding features, but they are also relatively easier to use. All of the powerful editing features within these apps are ideal for creating professional videos that attract the audience. It is on you to use these apps to their maximum potential to generate content that helps you grow.
Shanoon Cox
Shanoon Cox is a writer and a lover of all things video.
Follow @Shanoon Cox
Compress Videos in Minutes: 10 Free Online Tools with No Software
10 Best Free Online Video Compressors [No Download]

Ollie Mattison
Mar 27, 2024• Proven solutions
Videos you record with your iPhone, iPad or any other camera can often be larger than 1GB, especially if they were captured in high resolution. Some social networks have video size limitations, so if your video exceeds the platform’s video size limitation you have to compress that video to meet the specifications of a particular social network.
Previously, we’ve introduced some of the best free video compressor apps for iOS and Android , as well as some video compression software for Windows 10 and Mac, in this article, we will take you through the ten best free online video compressors which allow you to compress videos wherever and whenever.
Top 10 Free Online Video Compressors for Windows, macOS, Linux, and Chrome
There is no need to spend a lot of money on a professional video editing software if you are just looking for a quick way to downsize your videos. In fact, you can perform this task online for free regardless of the operating system you’re using. Let’s take a look at the ten best free online video compressors.
The software listed below are in no particular order.
2. Clipchamp
Price: Free, pricing plans start at $9 per month

This web-based video editing app , enables its users to optimize their videos for different purposes by using templates. Besides making the video editing process easier, Clipchamp converts, records and compresses video files. This video compressor lets you reduce the size without losing the quality of all videos saved in MP4, MOV or AVI file formats.

To change the size of a video with Clipchamp you just have to choose high, medium or low video quality option from the Customize Settings menu. Besides, you can alsocustomize the video resolution and format.
After compression, you can upload and share the video to YouTube, Vimeo, Facebook and Google Drive directly or download it to computer. The free version of Clipchamp will watermark video you compressed at the beginning and ending frames, and if you want to remove the watermark from a video you have to upgrade to the Business version of the video editor.
Pros
- Great batch conversion options
- Offers a huge selection of templates
- Excellent file-sharing capabilities
- Effortless video upload
Cons
- The free version of Clipchamp watermarks videos
- Modest video compression features
- A limited selection of output video file formats
3. AConvert
Price: Free
Converting PDF files, word documents or videos with AConvert is a straightforward process that takes a minimum amount of effort. However, you should keep in mind that AConvert can only compress videos that are smaller than 200 MB.

To start compressing a video with AConvert you have to navigate to the Video window and then import a video from your hard drive or from a file hosting service like Dropbox. The Target Format drop-down menu lets you choose from a variety of output video file formats, like AVI, MP4 or MOV. Afterward, you should select to change Video Size, Bitrate, Frame Rate or Video Aspect settings from the Options drop-down menu and proceed to select the new resolution from the Video Size menu. AConvert offers a huge selection of preset resolutions, and it lets you adjust the bitrate which can reduce the size of your video even further.
Pros
- Offers powerful video file conversion and video file compression tools
- Lets you import videos from Dropbox or Google Drive
- A wide selection of output video file formats
- Rich resolution template library
Cons
- No batch processing features
- Maximum video size cannot exceed 200 MB
- File sharing capabilities are limited
4. YouCompress
Price: Free
This is a simple video compressor that allows you to reduce the size of audio, video and image files. Moreover, you can reduce the size of an unlimited number of MP4, MP3, JPEG or GIF files using YouCompress. However, the entire video file compression process is automatic, so you can’t adjust the output video resolution, file format or bitrate.

You just have to import a video you’d like to compress from a folder on your computer into YouCompress and click on the Upload File & Compress button. This online video compressor doesn’t have a video file limit, so how long the file compression is going to last depends on the size of the original video file.
Pros
- Quick and easy compression of audio, video and image files
- The straightforward file compression process
- Compressed videos are not watermarked
Cons
- Selecting the output file format is not possible
- Video compression settings are automatic
- No file-sharing capabilities
5. Online Converter Video Compressor
Price: Free
In case you are looking for a video compressor that is both reliable and easy to use, you shouldn’t look much further than Online Converter. You can upload videos saved in MP4, MOV, WMV and other file formats from a URL or from your computer.

Online Converter lets you choose the final size of the video you are compressing and it offers a number of audio quality options. You should keep in mind that reducing a file’s size too much can cause the compression process to fail, and avoid compressing videos more than you need to. In addition, you can use Online Converter’s Resize Video tool to reduce the size of your videos online.
Pros
- Supports a broad range of video file formats
- Smooth upload
- Allows users to set the desired output video size directly
Cons
- Doesn’t let users choose the file format of the output video
- No support for encrypted video files
- The slow video compression process
- File size limits to 200MB
6. PS2PDF Online MP4 Video Compressor
Price: Free
Compressing a video file with this web-based video compressor can be completed in three simple steps in this tool. You can upload a file from a computer or use Dropbox or Google Drive for faster upload speeds and then proceed to select the output codec. As its names suggest this online video compressor can only create output video files in MP4 file format.

There are several ways to reduce the size of a file with PS2PDF, so you can choose if you want to shrink videos by percentage, preset quality, variable bitrate or by using the constant bitrate. Opting for slower compression speeds will enable you to preserve the quality of a video while speeding up the compression process is going to save you time, but it may result in poor output video quality.
Pros
- Quick upload speeds from Google Drive and Dropbox
- No video file size limitations
- Offers several different compression methods
- Allows users to adjust the dimensions of the output video
Cons
- Supports just MP4 output file format
- No file sharing features
- The quality of the output video depends on the speed of the compression process
7. Zamzar
Price: Free, pricing plans start at $9,00 per month
Zamzar is a file conversion platform that lets change formats of videos, images, documents or audio files. Additionally, you can also choose from a variety of video presets that enable you to prepare your video files for the use on Vimeo, YouTube platforms, Smartphones, and other devices.

To compress a video file with Zamzar you just have to upload it to the platform via the URL or directly from your computer. Afterward, you must select the output video file format from the Convert To drop-down menu and click on the Convert button to start compressing a video. How much you are going to compress a video depends on the video file format you selected.
Pros
- Supports more than a thousand file formats
- The smooth file conversion process
- Unlimited daily file conversions
- Online storage space is included in all pricing packages
Cons
- Offers basic file compression features
- The free version of Zamzar provides only limited file conversion options
- The maximum file size of a video file you can convert with Zamzar depends on the subscription model you have
8. CloudConvert
Price: Free, subscriptions start at $8,00 per month
Converting audio, video or image files with CloudConvert is easy. The platform offers several different upload options that allow you to import files from a URL, Google Drive or OneDrive. There are over 200 file formats to choose from, which enables you to select the output video file format that best meets your needs.

CloudConvert lets you change a video’s resolution, its aspect ratio, the number of frames per second and bitrate. Moreover, you can adjust the audio settings for each video you compress, so you can either remove a video’s audio entirely or fine-tune its bitrate or frequency.
Pros
- Powerful video and compression tools
- Support a broad range of video files
- Excellent batch processing options
- Lets you save files to your Dropbox account after the compression is completed
Cons
- The free version of CloudConvert has a 1GB file limit
- You must purchase one of the pricing plans if you want to convert more than five files in a row
- Prices of subscription models depend on conversion minutes
9. ConvertFiles Online File Converter
Price: Free
ConvertFiles isn’t the most powerful video compressor you can find on the market, but it can cater to the needs of most non-professional users. Its greatest advantage is that supports hundreds of presentation, eBook, drawing, image, audio, and video file formats. This enables you to change the file format of virtually any picture, sound recording, video clip or a document.

To start converting a video file you just have to import it to the platform and then choose the output video file format you want. However, you won’t be able to convert or compress video files that are larger than 250MB with the ConvertFiles platform.
Pros
- The simple file conversion process
- Supports a broad spectrum of audio, image and video file formats
- Lets users import videos via URL
- No watermark on converted videos
Cons
- Maximum video file size limited to 250MB
- The file conversion process is slow
- Provides only basic file compression tools
10. Clideo
Price: Free, pricing plans start at $6,00 per month
Clideo is a web-based video editing app that lets you perform basic video editing tasks with ease. Besides trimming, rotating or merging videos you can also use Clideo to compress video files. After you sign-in to the platform through your Google or Facebook account you just have to click on the Compress Video option.

You can then upload a video file from your computer, Google Drive, Dropbox or via URL and Clideo will set all the compression parameters automatically. The free version of Clideo watermarks all videos you compress with it, and you have to opt for a subscription plan if you want to edit your videos or remove watermarks from them after the compression process is completed.
Pros
- Offers several methods of reducing the size of video files
- Provides video editing tools
- The easy sign-in process through Facebook or Google
- The quick video compression process
Cons
- The automatic video compression process
- Choosing the output video file format is not possible
- The free version of Clideo watermarks videos
Conclusion
The size of a video you recorded with your digital camera or a Smartphone can sometimes prevent you from sharing them with your friends and colleagues. You can solve this problem by using any of the free online video compressors we featured in this article. Which free online video compressor are you going to choose? Leave a comment below and share your opinions with us.
| Online Video Compressor | Max Video Size | Supported formats | Batch Conversion Options | Watermark |
|---|---|---|---|---|
| Clipchamp | Unlimited | MOV, MP4, AVI… | No | Yes |
| AConvert | 200MB | FLV, MOV, MP4… | Yes | No |
| Media.io Online Uniconverter | 100MB | MOV, MP4, FLV | No | No |
| YouCompress | Unlimited | MP4, JPEG, GIF… | No | No |
| Online Converter | Unlimited | AVI, FLV, MP4… | No | No |
| PS2PDF Online MP4 Video Compressor | Unlimited | MP4 | Yes | No |
| Zamzar | 150MB | MP4, DOCX, JPEG… | Yes | No |
| Cloud Convert | 1GB | MP4, DOCX, JPEG… | Yes | No |
| Convert Files | 250MB | MP4, DOCX, JPEG… | No | Yes |
| Clideo | 500MB | MOV, MP4, AVI… | No | Yes |
Edit and Compress Video Size with Wondershare Filmora Video Editor
If you are using Filmora to edit video and want to compress the video size at export, you can adjust the frame rate, bit rate or resolution to compress the video size.
For Win 7 or later (64-bit)
 Secure Download
For macOS 10.12 or later
Secure Download
Ollie Mattison
Ollie Mattison is a writer and a lover of all things video.
Follow @Ollie Mattison
Ollie Mattison
Mar 27, 2024• Proven solutions
Videos you record with your iPhone, iPad or any other camera can often be larger than 1GB, especially if they were captured in high resolution. Some social networks have video size limitations, so if your video exceeds the platform’s video size limitation you have to compress that video to meet the specifications of a particular social network.
Previously, we’ve introduced some of the best free video compressor apps for iOS and Android , as well as some video compression software for Windows 10 and Mac, in this article, we will take you through the ten best free online video compressors which allow you to compress videos wherever and whenever.
Top 10 Free Online Video Compressors for Windows, macOS, Linux, and Chrome
There is no need to spend a lot of money on a professional video editing software if you are just looking for a quick way to downsize your videos. In fact, you can perform this task online for free regardless of the operating system you’re using. Let’s take a look at the ten best free online video compressors.
The software listed below are in no particular order.
2. Clipchamp
Price: Free, pricing plans start at $9 per month
This web-based video editing app , enables its users to optimize their videos for different purposes by using templates. Besides making the video editing process easier, Clipchamp converts, records and compresses video files. This video compressor lets you reduce the size without losing the quality of all videos saved in MP4, MOV or AVI file formats.
To change the size of a video with Clipchamp you just have to choose high, medium or low video quality option from the Customize Settings menu. Besides, you can alsocustomize the video resolution and format.
After compression, you can upload and share the video to YouTube, Vimeo, Facebook and Google Drive directly or download it to computer. The free version of Clipchamp will watermark video you compressed at the beginning and ending frames, and if you want to remove the watermark from a video you have to upgrade to the Business version of the video editor.
Pros
- Great batch conversion options
- Offers a huge selection of templates
- Excellent file-sharing capabilities
- Effortless video upload
Cons
- The free version of Clipchamp watermarks videos
- Modest video compression features
- A limited selection of output video file formats
3. AConvert
Price: Free
Converting PDF files, word documents or videos with AConvert is a straightforward process that takes a minimum amount of effort. However, you should keep in mind that AConvert can only compress videos that are smaller than 200 MB.
To start compressing a video with AConvert you have to navigate to the Video window and then import a video from your hard drive or from a file hosting service like Dropbox. The Target Format drop-down menu lets you choose from a variety of output video file formats, like AVI, MP4 or MOV. Afterward, you should select to change Video Size, Bitrate, Frame Rate or Video Aspect settings from the Options drop-down menu and proceed to select the new resolution from the Video Size menu. AConvert offers a huge selection of preset resolutions, and it lets you adjust the bitrate which can reduce the size of your video even further.
Pros
- Offers powerful video file conversion and video file compression tools
- Lets you import videos from Dropbox or Google Drive
- A wide selection of output video file formats
- Rich resolution template library
Cons
- No batch processing features
- Maximum video size cannot exceed 200 MB
- File sharing capabilities are limited
4. YouCompress
Price: Free
This is a simple video compressor that allows you to reduce the size of audio, video and image files. Moreover, you can reduce the size of an unlimited number of MP4, MP3, JPEG or GIF files using YouCompress. However, the entire video file compression process is automatic, so you can’t adjust the output video resolution, file format or bitrate.
You just have to import a video you’d like to compress from a folder on your computer into YouCompress and click on the Upload File & Compress button. This online video compressor doesn’t have a video file limit, so how long the file compression is going to last depends on the size of the original video file.
Pros
- Quick and easy compression of audio, video and image files
- The straightforward file compression process
- Compressed videos are not watermarked
Cons
- Selecting the output file format is not possible
- Video compression settings are automatic
- No file-sharing capabilities
5. Online Converter Video Compressor
Price: Free
In case you are looking for a video compressor that is both reliable and easy to use, you shouldn’t look much further than Online Converter. You can upload videos saved in MP4, MOV, WMV and other file formats from a URL or from your computer.
Online Converter lets you choose the final size of the video you are compressing and it offers a number of audio quality options. You should keep in mind that reducing a file’s size too much can cause the compression process to fail, and avoid compressing videos more than you need to. In addition, you can use Online Converter’s Resize Video tool to reduce the size of your videos online.
Pros
- Supports a broad range of video file formats
- Smooth upload
- Allows users to set the desired output video size directly
Cons
- Doesn’t let users choose the file format of the output video
- No support for encrypted video files
- The slow video compression process
- File size limits to 200MB
6. PS2PDF Online MP4 Video Compressor
Price: Free
Compressing a video file with this web-based video compressor can be completed in three simple steps in this tool. You can upload a file from a computer or use Dropbox or Google Drive for faster upload speeds and then proceed to select the output codec. As its names suggest this online video compressor can only create output video files in MP4 file format.
There are several ways to reduce the size of a file with PS2PDF, so you can choose if you want to shrink videos by percentage, preset quality, variable bitrate or by using the constant bitrate. Opting for slower compression speeds will enable you to preserve the quality of a video while speeding up the compression process is going to save you time, but it may result in poor output video quality.
Pros
- Quick upload speeds from Google Drive and Dropbox
- No video file size limitations
- Offers several different compression methods
- Allows users to adjust the dimensions of the output video
Cons
- Supports just MP4 output file format
- No file sharing features
- The quality of the output video depends on the speed of the compression process
7. Zamzar
Price: Free, pricing plans start at $9,00 per month
Zamzar is a file conversion platform that lets change formats of videos, images, documents or audio files. Additionally, you can also choose from a variety of video presets that enable you to prepare your video files for the use on Vimeo, YouTube platforms, Smartphones, and other devices.
To compress a video file with Zamzar you just have to upload it to the platform via the URL or directly from your computer. Afterward, you must select the output video file format from the Convert To drop-down menu and click on the Convert button to start compressing a video. How much you are going to compress a video depends on the video file format you selected.
Pros
- Supports more than a thousand file formats
- The smooth file conversion process
- Unlimited daily file conversions
- Online storage space is included in all pricing packages
Cons
- Offers basic file compression features
- The free version of Zamzar provides only limited file conversion options
- The maximum file size of a video file you can convert with Zamzar depends on the subscription model you have
8. CloudConvert
Price: Free, subscriptions start at $8,00 per month
Converting audio, video or image files with CloudConvert is easy. The platform offers several different upload options that allow you to import files from a URL, Google Drive or OneDrive. There are over 200 file formats to choose from, which enables you to select the output video file format that best meets your needs.
CloudConvert lets you change a video’s resolution, its aspect ratio, the number of frames per second and bitrate. Moreover, you can adjust the audio settings for each video you compress, so you can either remove a video’s audio entirely or fine-tune its bitrate or frequency.
Pros
- Powerful video and compression tools
- Support a broad range of video files
- Excellent batch processing options
- Lets you save files to your Dropbox account after the compression is completed
Cons
- The free version of CloudConvert has a 1GB file limit
- You must purchase one of the pricing plans if you want to convert more than five files in a row
- Prices of subscription models depend on conversion minutes
9. ConvertFiles Online File Converter
Price: Free
ConvertFiles isn’t the most powerful video compressor you can find on the market, but it can cater to the needs of most non-professional users. Its greatest advantage is that supports hundreds of presentation, eBook, drawing, image, audio, and video file formats. This enables you to change the file format of virtually any picture, sound recording, video clip or a document.
To start converting a video file you just have to import it to the platform and then choose the output video file format you want. However, you won’t be able to convert or compress video files that are larger than 250MB with the ConvertFiles platform.
Pros
- The simple file conversion process
- Supports a broad spectrum of audio, image and video file formats
- Lets users import videos via URL
- No watermark on converted videos
Cons
- Maximum video file size limited to 250MB
- The file conversion process is slow
- Provides only basic file compression tools
10. Clideo
Price: Free, pricing plans start at $6,00 per month
Clideo is a web-based video editing app that lets you perform basic video editing tasks with ease. Besides trimming, rotating or merging videos you can also use Clideo to compress video files. After you sign-in to the platform through your Google or Facebook account you just have to click on the Compress Video option.
You can then upload a video file from your computer, Google Drive, Dropbox or via URL and Clideo will set all the compression parameters automatically. The free version of Clideo watermarks all videos you compress with it, and you have to opt for a subscription plan if you want to edit your videos or remove watermarks from them after the compression process is completed.
Pros
- Offers several methods of reducing the size of video files
- Provides video editing tools
- The easy sign-in process through Facebook or Google
- The quick video compression process
Cons
- The automatic video compression process
- Choosing the output video file format is not possible
- The free version of Clideo watermarks videos
Conclusion
The size of a video you recorded with your digital camera or a Smartphone can sometimes prevent you from sharing them with your friends and colleagues. You can solve this problem by using any of the free online video compressors we featured in this article. Which free online video compressor are you going to choose? Leave a comment below and share your opinions with us.
| Online Video Compressor | Max Video Size | Supported formats | Batch Conversion Options | Watermark |
|---|---|---|---|---|
| Clipchamp | Unlimited | MOV, MP4, AVI… | No | Yes |
| AConvert | 200MB | FLV, MOV, MP4… | Yes | No |
| Media.io Online Uniconverter | 100MB | MOV, MP4, FLV | No | No |
| YouCompress | Unlimited | MP4, JPEG, GIF… | No | No |
| Online Converter | Unlimited | AVI, FLV, MP4… | No | No |
| PS2PDF Online MP4 Video Compressor | Unlimited | MP4 | Yes | No |
| Zamzar | 150MB | MP4, DOCX, JPEG… | Yes | No |
| Cloud Convert | 1GB | MP4, DOCX, JPEG… | Yes | No |
| Convert Files | 250MB | MP4, DOCX, JPEG… | No | Yes |
| Clideo | 500MB | MOV, MP4, AVI… | No | Yes |
Edit and Compress Video Size with Wondershare Filmora Video Editor
If you are using Filmora to edit video and want to compress the video size at export, you can adjust the frame rate, bit rate or resolution to compress the video size.
For Win 7 or later (64-bit)
Secure Download
For macOS 10.12 or later
Secure Download
Ollie Mattison
Ollie Mattison is a writer and a lover of all things video.
Follow @Ollie Mattison
Also read:
- In 2024, Unleash Your Creativity Best Stop Motion Animation Tools for Mac and PC
- New Top Picks Best Video to GIF Converters for 2024
- Updated In 2024, Top-Rated Free M4A Editing Software for PC and Mac
- Updated 2024 Approved Animation in Education Top Picks for Teachers and Educators
- New In 2024, Skip Reddit, Get Your Filmora Coupon Code Fast
- New Transform Your Footage Expert Video Editing for Sony Camcorder Users for 2024
- In 2024, The Best of the Best 10 Cartoon Video Maker Apps for Android and iPhone
- New Windows 10S Most Popular Free Video Trimming Tools for 2024
- New 2024 Approved Everything You Need to Know About XMLFiles in FCPX
- In 2024, No-Cost FLV Video Editing The Best Software
- New The Ultimate List of Free Online Video Invitation Generators for 2024
- Updated 2024 Approved Get Slo-Mo on VLC How to Play Videos in Slow Motion on Desktop and Mobile
- Updated 2024 Approved Best Free Split Screen Video Editor Online & Offline
- New 2024 Approved Laugh, Share, Repeat The Best Face Swap Apps for iPhone and Android
- Updated 2024 Approved Virtualdub Vs. The Competition A Comprehensive Review and Alternative Options
- New 2024 Approved Best Free AVI Video Rotation Apps for Windows, MAC, Android, and iPhone Devices
- New Unlock Adobe Premieres Full Potential Top 15 Plugins (Free Download)
- Updated Unleash Your Creativity The Best Online Waveform Generators to Explore for 2024
- New Motion Blur Magic A Comprehensive Guide to Final Cut Pro Effects
- New In 2024, Android Essentials Top 5 Free Video Stabilization Apps You Need
- Updated 2024 Approved The Ultimate List of Free Video Stabilizer Apps for Android Users
- Updated Online Sound Wave Video Makers Top Picks for 2024
- New GoPro Footage Made Easy Top Alternatives to GoPro Studio This Year for 2024
- Updated Fixing the Wobble A Beginners Guide to Video Stabilization in After Effects for 2024
- New In 2024, Learn How to Cut, Trim, and Merge 3GP Files with Ease
- 2024 Approved Slow and Steady Wins the Race How to Use VLCs Slow Motion Feature
- Updated 2024 Approved The Ultimate Guide to Video Dubbing Top Apps
- How to Erase an Apple iPhone XS Max without Apple ID?
- Can I view AVCHD .mts files on Samsung Galaxy F54 5G?
- How To Transfer WhatsApp From iPhone 12 Pro to others devices? | Dr.fone
- In 2024, How To Change Your Apple ID on Apple iPhone 14 Pro With or Without Password
- Which is the Best Fake GPS Joystick App On Samsung Galaxy S24? | Dr.fone
- In 2024, List of Pokémon Go Joysticks On Lava Storm 5G | Dr.fone
- In 2024, 3 Facts You Need to Know about Screen Mirroring Oppo Reno 11F 5G | Dr.fone
- Apple ID Unlock From iPhone 6s? How to Fix it?
- In 2024, Things You Should Know When Unlocking Total Wireless Of Apple iPhone 14
- Troubleshooting Guide How to Fix an Unresponsive Samsung Galaxy A14 4G Screen | Dr.fone
- In 2024, How to Change Netflix Location to Get More Country Version On Apple iPhone 15 Pro | Dr.fone
- Hard Reset Tecno Phantom V Flip in 3 Efficient Ways | Dr.fone
- New YouTube Live Selling Boost Your Sales With These Tips
- 2024 Approved Choosing From a Wide Array of Movie Maker Android Applications Can Be a Challenge for New Video Content Creators. Here Is a List of Best Movie Maker Android Apps to Create High-Quality Videos
- In 2024, A Step-by-Step Guide to Finding Your Apple ID From Your iPhone 12 mini
- How to Spy on Text Messages from Computer & Apple iPhone 14 Pro | Dr.fone
- How to Come up With the Best Pokemon Team On Tecno Spark 10 4G? | Dr.fone
- Title: New Silence Is Golden Removing Background Noise in Final Cut Pro X Made Easy for 2024
- Author: Isabella
- Created at : 2024-06-24 09:06:32
- Updated at : 2024-06-25 09:06:32
- Link: https://video-creation-software.techidaily.com/new-silence-is-golden-removing-background-noise-in-final-cut-pro-x-made-easy-for-2024/
- License: This work is licensed under CC BY-NC-SA 4.0.
