
:max_bytes(150000):strip_icc():format(webp)/001_how-to-transfer-data-from-ps4-to-ps5-3392eb400af3482fabad65cabb2a1a91.jpg)
New Unlock Adobe Premieres Full Potential Top 15 Plugins (Free Download)
Unlock Adobe Premiere’s Full Potential: Top 15 Plugins (Free Download)
Top 15 Adobe Premiere Plugins for Effects and Transitions

Benjamin Arango
Mar 27, 2024• Proven solutions
Although Premiere is a complete and robust platform, there is always room for customization, extras, and just plain cool add-ons that are too niche for Adobe to produce themselves.
For example, you can add free Adobe Premiere title templates to make your video excellent.
While everyone’s list will be different depending on what they use Premiere for, here is my choice of tools and effects that I find the most useful.
- Part 1: Top 15 Adobe Premiere Pro Plugins for Transitions and Effects
- Part 2: FAQ about Adobe Premiere Plugins
Best Alternative to Adobe Premiere - Filmora
The Premiere is excellent if you can find the best Adobe Premiere plugin at the time and money price.
If you want to edit videos easily, here we recommend using Filmora . It is designed for pros who want to make video easily or want to enter a professional video editing level.
For transitions, it has various built-in creative tools to use, including dissolve, motion, zoom, and more. For effects, you can use cinematic effects without efforts.
Unlimited tracks can power up your story with various videos and audio. Free download it to have a try!
 Download Mac Version ](https://tools.techidaily.com/wondershare/filmora/download/ )
You may also like:
How to Use Adobe Premiere Pro >>
How to add transitions in Adobe Premiere Pro >>
Before choosing a plugin, you should consider compatibility and extensibility in case the plugin is not working with Premiere. You can also visit the Adobe partner finder database to have a closer relationship with developers around the world if you want to search for plugin partners
Part 1: Top 15 Adobe Premiere Pro Plugins for Transitions and Effects
1After Effects
Some may say this is cheating, but for me, this is the number one add-on for Premiere. There is a reason for this, and that is that After Effects enables you to create anything you can dream of wanting within the Premiere environment.
Graphics, transitions, titles and templates, composites and a myriad of other options can be created and imported directly into Premiere. They integrate perfectly and enable smooth transitions between a Premiere project, creating an effect or graphic in After Effects.
Other plugins appear in this list that are extremely capable of a specific scenario, but none of the breadth of ability that After Effects brings to the table.
It is the best Adobe Premiere plugins to download.
Price: $20.99/month
Features
- Steep learning: we have to admit that it is not easy to make Adobe Premiere plugins with Effects, but if you have learned how-to, you are the master.
- Animation: If you like animation style video, you can use it to make Adobe Premiere animation plugins.

2Neat Video
Neat Video is a great plugin for Premiere, unlike After Effects it has a single function, and that is noise reduction. It is very good at it.
While Camera technology has advanced at a remarkable rate, there are still circumstances when even the best cameras available to us produce a video that is a little too noisy for its intended use, and this is where Neat Video steps in.
It works as a video filter from within the Premiere environment. It can be applied to a sequence in its entirety of any number of individual clips within the sequence as desired.
Although aimed at noise reduction for modern digital cameras, Neat Video is also very useful in the digitization process of older VHS or film stock. It can be used to clean up the resulting digital file.
Price: $74.9/month
Features
- Underwater shots: You can make underwater shots with this plug-in. With it, you can make your video more beautiful.
- Accurate and efficient: As the best Adobe Premiere plugin, it can offer you an accurate effect.

3Final Effects
A utility box of effects and transitions if ever there was one, Final Effects integrates smoothly with Premiere and includes over 120 different items. If you want to broaden your effects library but do not have any specific requirements, then this is the product for you. I particularly like the 3D relief effect, but there is something in here for every type of project you can think.
Price: $2495 for all bundles
Features
- Stylized looks: it offers various filters to use
- Auto-animating transitions: you can make animation style transitions auto.

4Magic Bullet Looks
This is a wondrous plugin that is primarily a color finishing tool but includes a raft of options that make it much more useful. The color finishing is first class. It comes with over 100 included presets organized by category so you can quickly find the right one for your project, plus the ability to fine-tune and save the results as custom presets meaning the possibilities are endless to obtain the right unified look you wish for your project.
In addition, options for lens distortion and lighting enable either corrections or stylized looks to be implemented to complement the color choices made.
Price: $899
Features
- Great compatibility: it works well on Windows and Mac.
- Price: the price may be higher than we thought.

5Flicker Free
This one is quite a specific plugin that won’t be for everyone, but if you are a regular proponent of time-lapse or slow-motion footage, this is a plugin that will be your best friend for life. One of the time-lapse issues is the changing exposures during such filming that produce a flickering effect when viewed.
What flicker-free does is to normalize the exposure and remove the flicker. It not only works on time-lapse, but can solve similar issues with slow-motion filming, and even assist with the rolling effect you can get from LED lighting and computer monitors.
It works from within Premiere and comes with useful presets to make the process as simple as possible. However, they can all be individually tweaked where necessary to get the perfect results.
Price: $79/$99.
Features
- Fluent workflow: the working experience is great if you try it.
- Time-lapse: You can make the time-lapse or slow-motion video better by specific Premiere plugin.

6Damage
Another great plugin that is very specific in its use, Damage is, despite the name, a non-destructive filter plugin that simulates the grain, glitches, scan lines, and grit of aged film stock. There are over 80 presets available to use, and whilst its use is not going to be hugely widespread, for producing that aged effect there is nothing better.
Price: $299
Features
- 5 tool kits: it includes 5 Adobe Premiere plug-ins

Download Mac Version ](https://tools.techidaily.com/wondershare/filmora/download/ )
7Rays
This is a nice plugin that allows the creation of, you’ve guessed it, Rays. That is light rays to be precise. Atmospheric, beautiful, they can be many things, but there is no questioning the effectiveness of this plugin at simulating light rays. It’s outstanding, as this promotional image shows.
Price: $95
Features
- Rays only: if you love rays, this one won’t let you regret it.
- Natural lights: this Premiere offers natural lights

8 Coremelt
Another ‘box of tricks’ style product, Coremelt includes a huge number over 220 of effects and transitions.
It’s the sheer breadth of options within the package that makes this one a must for any aspiring video editor.
Price: $199
Features
- Well-designed: you can make great Adobe Premiere plugins as it is well designed. It is easy and quick to use.
- Various plugs: it offers over Premiere 220 plugins to download.

9VitaScene
This is a professional grade package of effects and transitions that raises the bar for what is possible. My favorite one is the tilt-shift that produces that toy-like landscape that has become popular within the photography world in recent years.
There are over 600 effects within the Vitascene package. It is not the cheapest out there by any means, but is aimed squarely at the professional output and has the quality to do it.
Price: $599
Features
- Customizable plugins: you can customize your plugins after downloading.
- High quality: all the plugins are HD quality

10Sapphire
Last but not least is Sapphire, a suite comprising over 250 effects and presets to produce innovative and eye-catching transitions and effects in your work.
From light glows and lens flares to mimicking the look of the film and a couple of hundred others, there is something there for everyone.
Price: $1695
Features
- Major update: it is a major update from the previous plug-ins.
- CPU and GPU: it performs well in low CPU and GPU.

11FilmConvert
If you want to give your video clip a cinematic look quickly, here is another Adobe Premiere plugin you should know. FilmConvert can help you adjust your video color, so you won’t spend much time making a color correction. You can also add film grain to your video within a few clicks. You even can apply it to 4K videos. If you want to have a real filmmaking video, this one is worth trying.
Price: $117
Features
- 6K video editing effects applied
- You can use 3D lut to export video

12UNIVERSE
With the UNIVERSE, you can make a fast and smooth transition. If you also want to glow your video, you can add it to video to make a glow effect. It supports using hotkeys, so editing with hotkeys can be really useful. It fits quite well with Premiere Pro. You can customize the real effects to make it what you want.
Price: $199/year
Features
- Various effects and transition to choose
- You can also generate text in the video clip

13Mercalli Pro
If you want to stabilize videos in Premiere Pro, use this Adobe Premiere plugin to make your video stable. It supports 3D stabilization to adjust precise settings. The best part is you can quickly this plugin to make video stable. You can also stabilize video with a lower zoom-in option. It owns a multi-core CPU for fast rendering.
Price: $249
Features
- Roller Shutter Compensation to use for pros
- Automatic profile selection to save your time

14Separate RGB
As its name suggested, you can use this adobe premiere plugins to separate red, green, and blue. You can also move, blur fades these 3 color channels, which is very useful when you want to distort RGB. Floating licenses are available if you select from License Type, but this only works with the Floating License Server.
Price: $29.99
Features
- Lens Distortion according to RGB channel
- It quite fits well with Adobe Premiere Pro

15BORIS FX SAPPHIRE V11
If you want to improve your video editing skills to a higher level, you can use BORIS FX SAPPHIRE V11 to be your premiere pro plugins. It includes more than 3000 presets and some other popular presets such as WHIPLASH TRANSITION, GLITCH, and SHAKE. You just need to import these plugins to make your video more powerful.
Price: $1695
Features
- You can make a stunning organic video looking by adding this plugin
- It includes 270 visual effects to make editing powerful

Part 2: FAQ about Adobe Premiere Plugins
1. How do I add plugins to Premiere Pro on Mac?
Adding premiere pro plugins on Mac is no longer a challenging task. Follow these steps to add plugins:
- Choose the Safari browser on your Mac.
- Go to preference and choose a website.
- Check the box to enable the plugin.
- For Adobe premiere pro plugin, you may also need to turn on the plugin for each website that you use.
We hope following this simple step will solve your plugin problem on Mac.
2. Where are Premiere Pro plugins?
You need to check the application folder in your device to find the Premiere Pro plugins’ location. Once you locate the application folder, right-click on the folder.
The right-click will show the package content in that folder. You will find the Premiere Pro plugin within that. I hope you will find the plugin without any problems.
Conclusion
If you are tired of using Adobe Premiere, why not choose Wondershare Filmora ? It is a professional video editing software that can power up your story. It is easy to use compared with Premiere. You will have more control over the video effects and transitions. Auto color correction and automatic audio sync can help you save a lot of time. So, if you want to experience a new way to edit video, download Wondershare Filmora now!
Download Mac Version ](https://tools.techidaily.com/wondershare/filmora/download/ )
Benjamin Arango
Benjamin Arango is a writer and a lover of all things video.
Follow @Benjamin Arango
Benjamin Arango
Mar 27, 2024• Proven solutions
Although Premiere is a complete and robust platform, there is always room for customization, extras, and just plain cool add-ons that are too niche for Adobe to produce themselves.
For example, you can add free Adobe Premiere title templates to make your video excellent.
While everyone’s list will be different depending on what they use Premiere for, here is my choice of tools and effects that I find the most useful.
- Part 1: Top 15 Adobe Premiere Pro Plugins for Transitions and Effects
- Part 2: FAQ about Adobe Premiere Plugins
Best Alternative to Adobe Premiere - Filmora
The Premiere is excellent if you can find the best Adobe Premiere plugin at the time and money price.
If you want to edit videos easily, here we recommend using Filmora . It is designed for pros who want to make video easily or want to enter a professional video editing level.
For transitions, it has various built-in creative tools to use, including dissolve, motion, zoom, and more. For effects, you can use cinematic effects without efforts.
Unlimited tracks can power up your story with various videos and audio. Free download it to have a try!
Download Mac Version ](https://tools.techidaily.com/wondershare/filmora/download/ )
You may also like:
How to Use Adobe Premiere Pro >>
How to add transitions in Adobe Premiere Pro >>
Before choosing a plugin, you should consider compatibility and extensibility in case the plugin is not working with Premiere. You can also visit the Adobe partner finder database to have a closer relationship with developers around the world if you want to search for plugin partners
Part 1: Top 15 Adobe Premiere Pro Plugins for Transitions and Effects
1After Effects
Some may say this is cheating, but for me, this is the number one add-on for Premiere. There is a reason for this, and that is that After Effects enables you to create anything you can dream of wanting within the Premiere environment.
Graphics, transitions, titles and templates, composites and a myriad of other options can be created and imported directly into Premiere. They integrate perfectly and enable smooth transitions between a Premiere project, creating an effect or graphic in After Effects.
Other plugins appear in this list that are extremely capable of a specific scenario, but none of the breadth of ability that After Effects brings to the table.
It is the best Adobe Premiere plugins to download.
Price: $20.99/month
Features
- Steep learning: we have to admit that it is not easy to make Adobe Premiere plugins with Effects, but if you have learned how-to, you are the master.
- Animation: If you like animation style video, you can use it to make Adobe Premiere animation plugins.
2Neat Video
Neat Video is a great plugin for Premiere, unlike After Effects it has a single function, and that is noise reduction. It is very good at it.
While Camera technology has advanced at a remarkable rate, there are still circumstances when even the best cameras available to us produce a video that is a little too noisy for its intended use, and this is where Neat Video steps in.
It works as a video filter from within the Premiere environment. It can be applied to a sequence in its entirety of any number of individual clips within the sequence as desired.
Although aimed at noise reduction for modern digital cameras, Neat Video is also very useful in the digitization process of older VHS or film stock. It can be used to clean up the resulting digital file.
Price: $74.9/month
Features
- Underwater shots: You can make underwater shots with this plug-in. With it, you can make your video more beautiful.
- Accurate and efficient: As the best Adobe Premiere plugin, it can offer you an accurate effect.
3Final Effects
A utility box of effects and transitions if ever there was one, Final Effects integrates smoothly with Premiere and includes over 120 different items. If you want to broaden your effects library but do not have any specific requirements, then this is the product for you. I particularly like the 3D relief effect, but there is something in here for every type of project you can think.
Price: $2495 for all bundles
Features
- Stylized looks: it offers various filters to use
- Auto-animating transitions: you can make animation style transitions auto.
4Magic Bullet Looks
This is a wondrous plugin that is primarily a color finishing tool but includes a raft of options that make it much more useful. The color finishing is first class. It comes with over 100 included presets organized by category so you can quickly find the right one for your project, plus the ability to fine-tune and save the results as custom presets meaning the possibilities are endless to obtain the right unified look you wish for your project.
In addition, options for lens distortion and lighting enable either corrections or stylized looks to be implemented to complement the color choices made.
Price: $899
Features
- Great compatibility: it works well on Windows and Mac.
- Price: the price may be higher than we thought.
5Flicker Free
This one is quite a specific plugin that won’t be for everyone, but if you are a regular proponent of time-lapse or slow-motion footage, this is a plugin that will be your best friend for life. One of the time-lapse issues is the changing exposures during such filming that produce a flickering effect when viewed.
What flicker-free does is to normalize the exposure and remove the flicker. It not only works on time-lapse, but can solve similar issues with slow-motion filming, and even assist with the rolling effect you can get from LED lighting and computer monitors.
It works from within Premiere and comes with useful presets to make the process as simple as possible. However, they can all be individually tweaked where necessary to get the perfect results.
Price: $79/$99.
Features
- Fluent workflow: the working experience is great if you try it.
- Time-lapse: You can make the time-lapse or slow-motion video better by specific Premiere plugin.
6Damage
Another great plugin that is very specific in its use, Damage is, despite the name, a non-destructive filter plugin that simulates the grain, glitches, scan lines, and grit of aged film stock. There are over 80 presets available to use, and whilst its use is not going to be hugely widespread, for producing that aged effect there is nothing better.
Price: $299
Features
- 5 tool kits: it includes 5 Adobe Premiere plug-ins
Download Mac Version ](https://tools.techidaily.com/wondershare/filmora/download/ )
7Rays
This is a nice plugin that allows the creation of, you’ve guessed it, Rays. That is light rays to be precise. Atmospheric, beautiful, they can be many things, but there is no questioning the effectiveness of this plugin at simulating light rays. It’s outstanding, as this promotional image shows.
Price: $95
Features
- Rays only: if you love rays, this one won’t let you regret it.
- Natural lights: this Premiere offers natural lights
8 Coremelt
Another ‘box of tricks’ style product, Coremelt includes a huge number over 220 of effects and transitions.
It’s the sheer breadth of options within the package that makes this one a must for any aspiring video editor.
Price: $199
Features
- Well-designed: you can make great Adobe Premiere plugins as it is well designed. It is easy and quick to use.
- Various plugs: it offers over Premiere 220 plugins to download.
9VitaScene
This is a professional grade package of effects and transitions that raises the bar for what is possible. My favorite one is the tilt-shift that produces that toy-like landscape that has become popular within the photography world in recent years.
There are over 600 effects within the Vitascene package. It is not the cheapest out there by any means, but is aimed squarely at the professional output and has the quality to do it.
Price: $599
Features
- Customizable plugins: you can customize your plugins after downloading.
- High quality: all the plugins are HD quality
10Sapphire
Last but not least is Sapphire, a suite comprising over 250 effects and presets to produce innovative and eye-catching transitions and effects in your work.
From light glows and lens flares to mimicking the look of the film and a couple of hundred others, there is something there for everyone.
Price: $1695
Features
- Major update: it is a major update from the previous plug-ins.
- CPU and GPU: it performs well in low CPU and GPU.
11FilmConvert
If you want to give your video clip a cinematic look quickly, here is another Adobe Premiere plugin you should know. FilmConvert can help you adjust your video color, so you won’t spend much time making a color correction. You can also add film grain to your video within a few clicks. You even can apply it to 4K videos. If you want to have a real filmmaking video, this one is worth trying.
Price: $117
Features
- 6K video editing effects applied
- You can use 3D lut to export video
12UNIVERSE
With the UNIVERSE, you can make a fast and smooth transition. If you also want to glow your video, you can add it to video to make a glow effect. It supports using hotkeys, so editing with hotkeys can be really useful. It fits quite well with Premiere Pro. You can customize the real effects to make it what you want.
Price: $199/year
Features
- Various effects and transition to choose
- You can also generate text in the video clip
13Mercalli Pro
If you want to stabilize videos in Premiere Pro, use this Adobe Premiere plugin to make your video stable. It supports 3D stabilization to adjust precise settings. The best part is you can quickly this plugin to make video stable. You can also stabilize video with a lower zoom-in option. It owns a multi-core CPU for fast rendering.
Price: $249
Features
- Roller Shutter Compensation to use for pros
- Automatic profile selection to save your time
14Separate RGB
As its name suggested, you can use this adobe premiere plugins to separate red, green, and blue. You can also move, blur fades these 3 color channels, which is very useful when you want to distort RGB. Floating licenses are available if you select from License Type, but this only works with the Floating License Server.
Price: $29.99
Features
- Lens Distortion according to RGB channel
- It quite fits well with Adobe Premiere Pro
15BORIS FX SAPPHIRE V11
If you want to improve your video editing skills to a higher level, you can use BORIS FX SAPPHIRE V11 to be your premiere pro plugins. It includes more than 3000 presets and some other popular presets such as WHIPLASH TRANSITION, GLITCH, and SHAKE. You just need to import these plugins to make your video more powerful.
Price: $1695
Features
- You can make a stunning organic video looking by adding this plugin
- It includes 270 visual effects to make editing powerful
Part 2: FAQ about Adobe Premiere Plugins
1. How do I add plugins to Premiere Pro on Mac?
Adding premiere pro plugins on Mac is no longer a challenging task. Follow these steps to add plugins:
- Choose the Safari browser on your Mac.
- Go to preference and choose a website.
- Check the box to enable the plugin.
- For Adobe premiere pro plugin, you may also need to turn on the plugin for each website that you use.
We hope following this simple step will solve your plugin problem on Mac.
2. Where are Premiere Pro plugins?
You need to check the application folder in your device to find the Premiere Pro plugins’ location. Once you locate the application folder, right-click on the folder.
The right-click will show the package content in that folder. You will find the Premiere Pro plugin within that. I hope you will find the plugin without any problems.
Conclusion
If you are tired of using Adobe Premiere, why not choose Wondershare Filmora ? It is a professional video editing software that can power up your story. It is easy to use compared with Premiere. You will have more control over the video effects and transitions. Auto color correction and automatic audio sync can help you save a lot of time. So, if you want to experience a new way to edit video, download Wondershare Filmora now!
Download Mac Version ](https://tools.techidaily.com/wondershare/filmora/download/ )
Benjamin Arango
Benjamin Arango is a writer and a lover of all things video.
Follow @Benjamin Arango
Glitchy Goodness: Top Video Editing Apps for Mobile
Top 10 Glitch Art Video Editing Apps

Ollie Mattison
Mar 27, 2024• Proven solutions
If you are a fan of electronic, noise, and other experimental genres of music that emerged in the early and mid-1990s, then you probably already know what Glitch art is. Those of you who are a bit younger and don’t know the VJ-ing scene well, have probably encountered glitch art through music videos released by bands like The Glitch Mob or Gorrilaz. Even though intentionally creating glitches and distortions that look like they were caused by hardware malfunction used to be a complex and highly technical process, video editing apps that appeared on the market in the last couple of years have made this video technique almost automatic. If you would like to create glitch art, but you’re not sure where to start, you’ve come to the right place because in this article we are going to take you through the ten best glitch art video editing apps for iOS and Android.
Note: With Filmora’s built-in glitch effects and the latest Human Glitch effects under AI Portrait, you can easily add glitch distortion effects to video in just one click. For detailed information, you can check How to Add Glitch Effects to Videos . Download Filmora now and have a try.
For Win 7 or later (64-bit)
 Secure Download
For macOS 10.14 or later
Secure Download
Click here to get Filmora for PC by email
or Try Filmora App for mobile >>>
download filmora app for ios ](https://app.adjust.com/b0k9hf2%5F4bsu85t ) download filmora app for android ](https://app.adjust.com/b0k9hf2%5F4bsu85t )
10 Best Glitch Art Video Editing Apps for iOS and Android-based Devices
Besides, stunning glitch art effects, nearly all apps we featured in this article are also equipped with powerful video editing tools you can use to manipulate the footage you’ve captured with your phone in any way you want. So, let’s take a look at some of the best glitch art video editing apps for iOS and Android devices.
1. GlitchFX

Price: Free, but offers in-app purchases
Compatibility: iOS, Android
Making music videos with the GlitchFX app is fun and easy since you only have to pick a video you’d like to edit from your phone’s camera roll, choose the song you’d like to use as a soundtrack, and apply a VHS, Glitch, or any other visual effect you like. The app also features Cut and Trim tools that let you remove all parts of the selected video you don’t want to include in the final cut of your glitch art video. GlicthFX’s file-sharing capabilities present you with a number of options as you can post your latest creations on Musical.ly, Facebook, YouTube, and other popular social networks directly from the app. The only downside is that you have to make in-app purchases in order to be able to use all the VHS and glitch effects the app has to offer.
2. Glitch Video Effects

Price: Free, but contains ads
Compatibility: Android
If you are a fan of vaporwave aesthetics and you like making experimental mind-bending videos, then this Android-based app might be the right choice for you. The app lets you capture glitch photos and videos in real-time, so you can see how your images are going to look like even before you press the record button. There are more than a hundred trippy and glitch video effects you can choose from that enable you to recreate some vintage styles of videos or make unique videos with hallucinogenic colors. When done experimenting, you can share your Glitch art videos with your friends on social media with a single tap.
3. Groovo

Price: Free
Compatibility: Android , iOS
Groovo is a community of like-minded people where you can discover new content on a daily basis and find inspiration for your own work. This AI-powered app grants you access to huge music and visual effects libraries, which enables you to create stunning music videos effortlessly. Groovo also features basic video editing tools, so you can remove all parts of the audio or video files you don’t want to share with your friends on social media. What’s more, all the videos you create with Groovo are going to be watermark-free, but you shouldn’t expect too much from this app in terms of its video editing capabilities.
4. Glitché

Price: $0,99, offers in-app purchases
Compatibility: iOS
Ariana Grande, Kylie Jenner or Travis Scott are just a few among countless celebrities who are already using this app to take photos or capture videos. Glitché offers a rich selection of real-time photo and video filters you can control even while you’re still recording. There are more than 30 creative tools that let you create VHS style videos or make digital glitches in just a few simple taps, and if you want to edit your photos and videos with a more powerful software you can export your projects to Adobe Creative Cloud. However, you are going to have to make a few in-app purchases if you want to have access to all of the app’s features.
5. HYPERSPECTIVE

Price: Free, but offers in-app purchases
Compatibility: iOS
There is so much more you can do with this app, besides creating glitch art, because even the free version HYPERSPECTIVE offers a powerful mirroring system and a rich selection of visual effects. In order to be able to record videos for your Instagram stories, you must upgrade to the paid version of the app that lets you capture HD videos and adjust their bitrate. In addition, the app suggests the content you can use as a source of inspiration for your work, so you can never run out of the ideas for your next video. HYPERSPECTIVE’s exporting capabilities, however, leave much to be desired for.
6. Glitch Wizard

Price: $1,99
Compatibility: iOS
The app offers more than thirty glitches you can use to create different styles of glitch art videos. You can try out different options and once you get the result you like you can export it as a GIF or a short video. However, Glitch Wizard doesn’t offer video editing options, so there isn’t much more you can do with it other than experiment with different glitches. Even so, this app is an excellent choice for all glitch video artists in need of a creative tool that lets them produce amazing visuals effortlessly. Adding the glitchwizard hashtag to your creations can help you become one of the app’s featured artists.
7. Glitch!

Price: Free, but offers in-app purchases
Compatibility: Android
Even though Glitch! is primarily a photo editing app, you can still use it to generate both GIF and MP4 animations. All you have to do in order to create a glitch photo is to select a picture from your phone’s gallery, upload it into the app and choose the effect you like the most. Afterward, you just have to set the X and Y values that determine how many errors your picture is going to contain and proceed to share it on social media. Keep in mind that some of the app’s advanced features have to be purchased before you can use them to create your artwork.
9. Glitch Cam – Video Effects

Price: Free, but offers in-app purchases
Compatibility: iOS
Recording glitch art masterpieces is going to become so easy if you install the Glitch Cam because this app provides you with a ridiculous amount of effects you can combine in real time. In addition to stunning glitch effects, the app is also equipped with a VHS Camcorder that lets you make vintage videos that look like they’re recorded in the late 1980s or early 1990s. The best part is that you can export all your creations in full HD resolution and share them to your favorite social networks directly from the app in just a few quick taps.
10. KineMaster

Price: Free, but offers in-app purchases
Compatibility: iOS , Android
Before you can start creating a glitch video with KineMaster, you must first install the Anaglyph Slide effect from the app’s Asset Store. Once the effect is installed, you can import the file you’d like to edit and proceed to make cuts, apply transitions or add a voiceover. When you complete all other video editing actions, you should head over to the Effects menu in order to apply the Anaglyph Slide effect to the video. You can then adjust the effect’s settings by assigning new Angle, Speed, and Distance values and that’s it you’ve created a glitch video with KineMaster.
Ollie Mattison
Ollie Mattison is a writer and a lover of all things video.
Follow @Ollie Mattison
Ollie Mattison
Mar 27, 2024• Proven solutions
If you are a fan of electronic, noise, and other experimental genres of music that emerged in the early and mid-1990s, then you probably already know what Glitch art is. Those of you who are a bit younger and don’t know the VJ-ing scene well, have probably encountered glitch art through music videos released by bands like The Glitch Mob or Gorrilaz. Even though intentionally creating glitches and distortions that look like they were caused by hardware malfunction used to be a complex and highly technical process, video editing apps that appeared on the market in the last couple of years have made this video technique almost automatic. If you would like to create glitch art, but you’re not sure where to start, you’ve come to the right place because in this article we are going to take you through the ten best glitch art video editing apps for iOS and Android.
Note: With Filmora’s built-in glitch effects and the latest Human Glitch effects under AI Portrait, you can easily add glitch distortion effects to video in just one click. For detailed information, you can check How to Add Glitch Effects to Videos . Download Filmora now and have a try.
For Win 7 or later (64-bit)
Secure Download
For macOS 10.14 or later
Secure Download
Click here to get Filmora for PC by email
or Try Filmora App for mobile >>>
download filmora app for ios ](https://app.adjust.com/b0k9hf2%5F4bsu85t ) download filmora app for android ](https://app.adjust.com/b0k9hf2%5F4bsu85t )
10 Best Glitch Art Video Editing Apps for iOS and Android-based Devices
Besides, stunning glitch art effects, nearly all apps we featured in this article are also equipped with powerful video editing tools you can use to manipulate the footage you’ve captured with your phone in any way you want. So, let’s take a look at some of the best glitch art video editing apps for iOS and Android devices.
1. GlitchFX
Price: Free, but offers in-app purchases
Compatibility: iOS, Android
Making music videos with the GlitchFX app is fun and easy since you only have to pick a video you’d like to edit from your phone’s camera roll, choose the song you’d like to use as a soundtrack, and apply a VHS, Glitch, or any other visual effect you like. The app also features Cut and Trim tools that let you remove all parts of the selected video you don’t want to include in the final cut of your glitch art video. GlicthFX’s file-sharing capabilities present you with a number of options as you can post your latest creations on Musical.ly, Facebook, YouTube, and other popular social networks directly from the app. The only downside is that you have to make in-app purchases in order to be able to use all the VHS and glitch effects the app has to offer.
2. Glitch Video Effects
Price: Free, but contains ads
Compatibility: Android
If you are a fan of vaporwave aesthetics and you like making experimental mind-bending videos, then this Android-based app might be the right choice for you. The app lets you capture glitch photos and videos in real-time, so you can see how your images are going to look like even before you press the record button. There are more than a hundred trippy and glitch video effects you can choose from that enable you to recreate some vintage styles of videos or make unique videos with hallucinogenic colors. When done experimenting, you can share your Glitch art videos with your friends on social media with a single tap.
3. Groovo
Price: Free
Compatibility: Android , iOS
Groovo is a community of like-minded people where you can discover new content on a daily basis and find inspiration for your own work. This AI-powered app grants you access to huge music and visual effects libraries, which enables you to create stunning music videos effortlessly. Groovo also features basic video editing tools, so you can remove all parts of the audio or video files you don’t want to share with your friends on social media. What’s more, all the videos you create with Groovo are going to be watermark-free, but you shouldn’t expect too much from this app in terms of its video editing capabilities.
4. Glitché
Price: $0,99, offers in-app purchases
Compatibility: iOS
Ariana Grande, Kylie Jenner or Travis Scott are just a few among countless celebrities who are already using this app to take photos or capture videos. Glitché offers a rich selection of real-time photo and video filters you can control even while you’re still recording. There are more than 30 creative tools that let you create VHS style videos or make digital glitches in just a few simple taps, and if you want to edit your photos and videos with a more powerful software you can export your projects to Adobe Creative Cloud. However, you are going to have to make a few in-app purchases if you want to have access to all of the app’s features.
5. HYPERSPECTIVE
Price: Free, but offers in-app purchases
Compatibility: iOS
There is so much more you can do with this app, besides creating glitch art, because even the free version HYPERSPECTIVE offers a powerful mirroring system and a rich selection of visual effects. In order to be able to record videos for your Instagram stories, you must upgrade to the paid version of the app that lets you capture HD videos and adjust their bitrate. In addition, the app suggests the content you can use as a source of inspiration for your work, so you can never run out of the ideas for your next video. HYPERSPECTIVE’s exporting capabilities, however, leave much to be desired for.
6. Glitch Wizard
Price: $1,99
Compatibility: iOS
The app offers more than thirty glitches you can use to create different styles of glitch art videos. You can try out different options and once you get the result you like you can export it as a GIF or a short video. However, Glitch Wizard doesn’t offer video editing options, so there isn’t much more you can do with it other than experiment with different glitches. Even so, this app is an excellent choice for all glitch video artists in need of a creative tool that lets them produce amazing visuals effortlessly. Adding the glitchwizard hashtag to your creations can help you become one of the app’s featured artists.
7. Glitch!
Price: Free, but offers in-app purchases
Compatibility: Android
Even though Glitch! is primarily a photo editing app, you can still use it to generate both GIF and MP4 animations. All you have to do in order to create a glitch photo is to select a picture from your phone’s gallery, upload it into the app and choose the effect you like the most. Afterward, you just have to set the X and Y values that determine how many errors your picture is going to contain and proceed to share it on social media. Keep in mind that some of the app’s advanced features have to be purchased before you can use them to create your artwork.
9. Glitch Cam – Video Effects
Price: Free, but offers in-app purchases
Compatibility: iOS
Recording glitch art masterpieces is going to become so easy if you install the Glitch Cam because this app provides you with a ridiculous amount of effects you can combine in real time. In addition to stunning glitch effects, the app is also equipped with a VHS Camcorder that lets you make vintage videos that look like they’re recorded in the late 1980s or early 1990s. The best part is that you can export all your creations in full HD resolution and share them to your favorite social networks directly from the app in just a few quick taps.
10. KineMaster
Price: Free, but offers in-app purchases
Compatibility: iOS , Android
Before you can start creating a glitch video with KineMaster, you must first install the Anaglyph Slide effect from the app’s Asset Store. Once the effect is installed, you can import the file you’d like to edit and proceed to make cuts, apply transitions or add a voiceover. When you complete all other video editing actions, you should head over to the Effects menu in order to apply the Anaglyph Slide effect to the video. You can then adjust the effect’s settings by assigning new Angle, Speed, and Distance values and that’s it you’ve created a glitch video with KineMaster.
Ollie Mattison
Ollie Mattison is a writer and a lover of all things video.
Follow @Ollie Mattison
Top 16 AVI Video Cutters: Trim/Cut AVI Videos [Windows, MAC, Android
With the growing fame of video-sharing and social media applications like Twitter, Instagram, and TikTok, the demand for simple and fast video cutting and trimming tools has dramatically increased. Nowadays, you don’t have to play with complex video editing tools to produce high-quality videos.
Thanks to several user-friendly editing software to make things easy for everybody. However, finding the right programs to trim/cut videos is still challenging, especially in AVI format.
But, guess what? These top 16 AVI video cutters for Windows, MAC, Android, iPhone, and online will make video cutting and trimming fun, especially when you learn to do it using Filmora.
In this Article
Part 1: Best AVI Video Cutter to Trim/Cut AVI Video on Windows and MAC – Filmora Video Cutter [with steps}
Part 2: Top 3 Free AVI Video Cutter on Windows
Part 3: Top 3 Free AVI Video Cutter on MAC
Part 4: Top 3 Free AVI Video Cutter on Android
Part 5: Top 3 Free AVI Video Cutter on iPhone
Part 6: Top 3 Free AVI Video Cutter Online
Part 7: Bottom Line
Part 8: FAQs
Part 1: Best AVI Video Cutter to Trim/Cut AVI Video on Windows and MAC – Filmora Video Cutter [with steps]
Filmora by Wondershare is a star video editor with outstanding outcomes. Whether you have a MAC or Windows PC, you can download Filmora regardless of your operating system. The program best serves those who intend to make high-quality videos. The software provides editing support for all video formats, including AVI.
Although Filmora is an affordable editor with tons of audio and video editing options, you can still download the software for free and create projects if watermarks don’t bother you. Moreover, you can count this tool’s capabilities in cropping, resizing, and Chroma screen support. But that’s not the only sweet fruit.
In fact, Filmora is equipped with many jaw-dropping features, including preset templates, auto beat sync, split-screen, speed ramping, motion tracking, keyframing, creative transitions, titles, filters, and much more. And the best part is, you can learn and understand Filmora in no time. That’s why the program is loved and supported by all types of users.
So does Filmora helps cut and trim AVI videos? Yes! It does if you follow these steps correctly.
Step 1: Download Filmora Video Editor
First, download Filmora Video Editor by choosing your operating system, as seen in the screenshot below.
Run the setup and let it finish without any pause or break.
Step 2: Import Your Video to Filmora Video Editor
Importing your AVI video is a very simple process. Just click on the “Film Clip” icon.
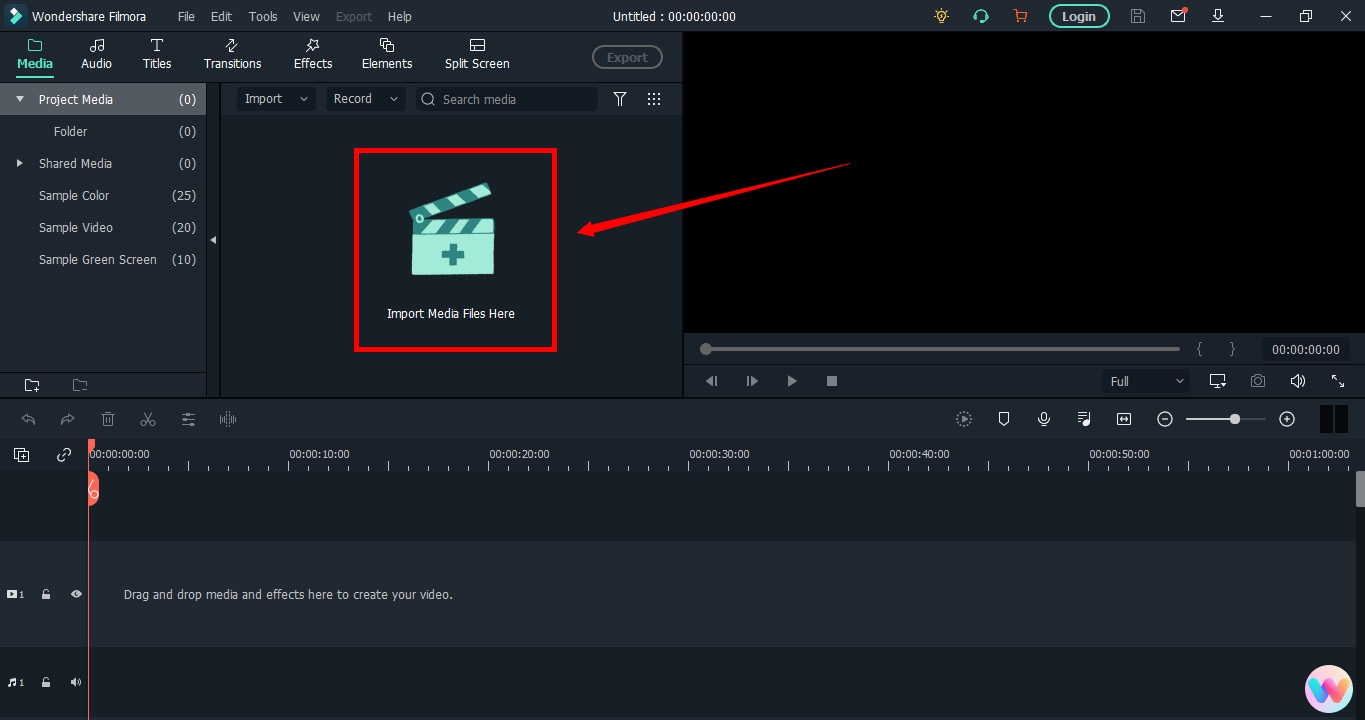
It will open a new window screen on your computer to select the video from the directory. Find the clip you want to import and cut. Use your mouse to select it and click the “Open” button.
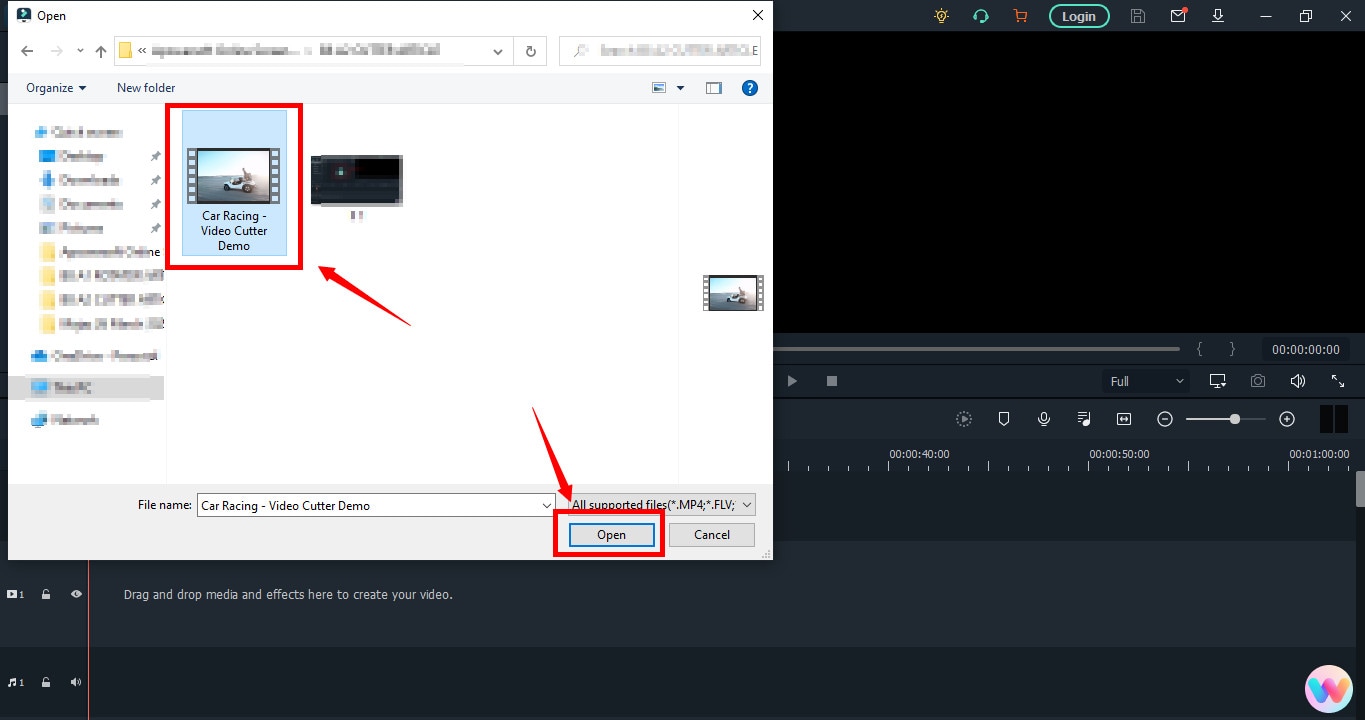
The video will be loaded in the “Media” folder of Filmora. The clip’s thumbnail should be visible to assure you have done everything correctly.
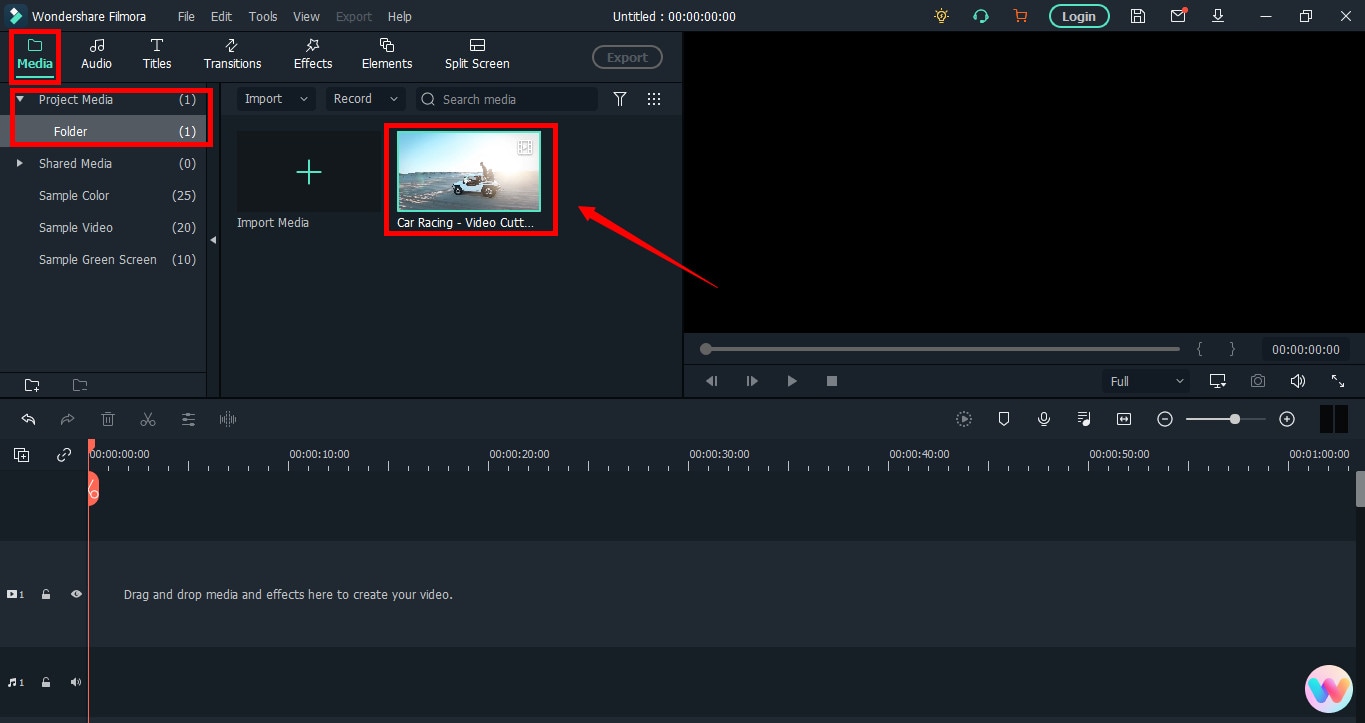
If you can see that, let’s go to the next step.
Step 3: Drag and Drop Video to Filmora’s Timeline
Select the video in the media folder by clicking over it once. Now, without leaving the hold of the left button of your mouse, slide the video down to the track in the timeline.
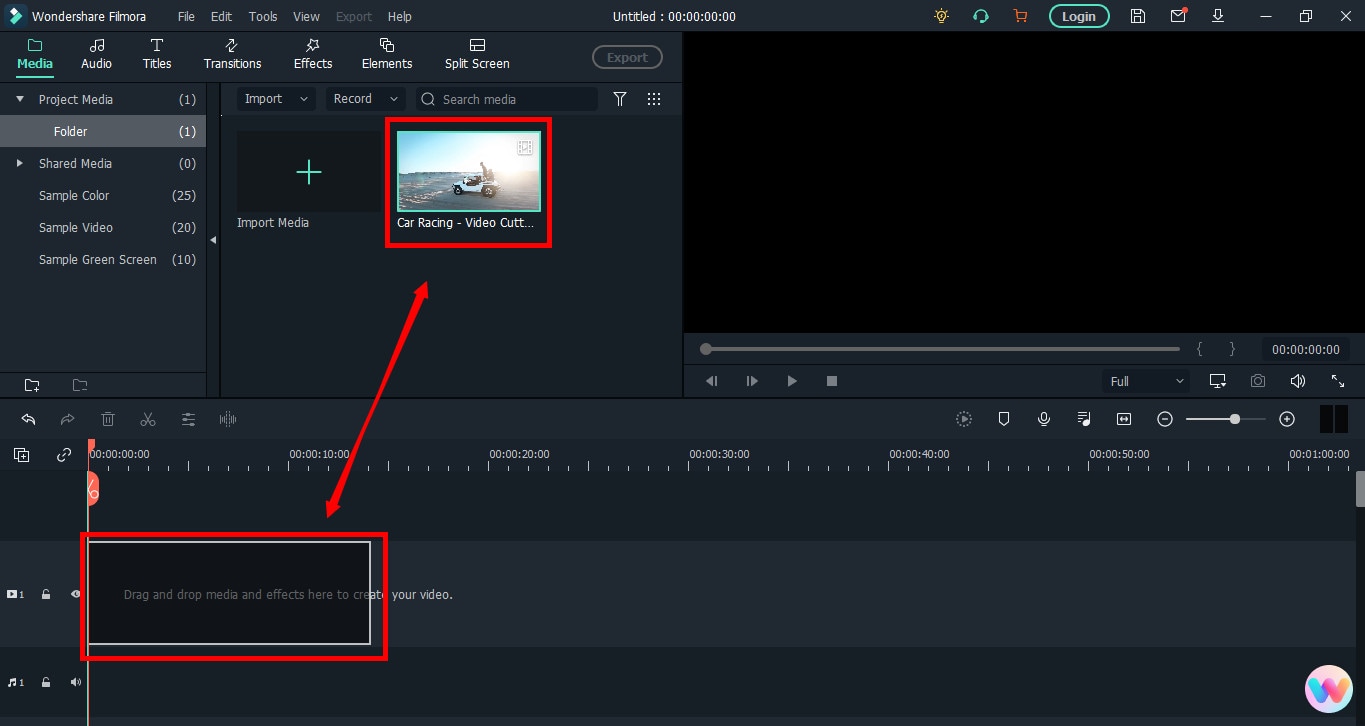
After that, a message will pop up, asking about your preference for the project settings. It is recommended to choose the “Match to Media” option unless you’re an experienced video editor who knows how to play with the resolution and frame rates.
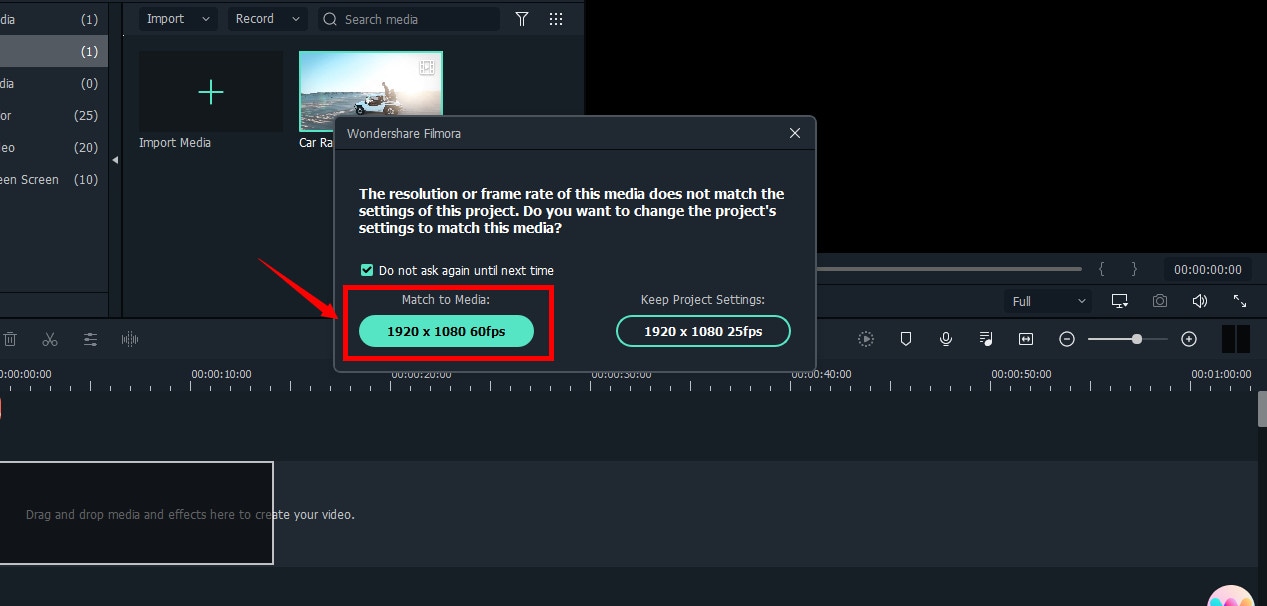
You will see the video on the timeline with its preview on the “Preview Screen” on the right side of the interface.
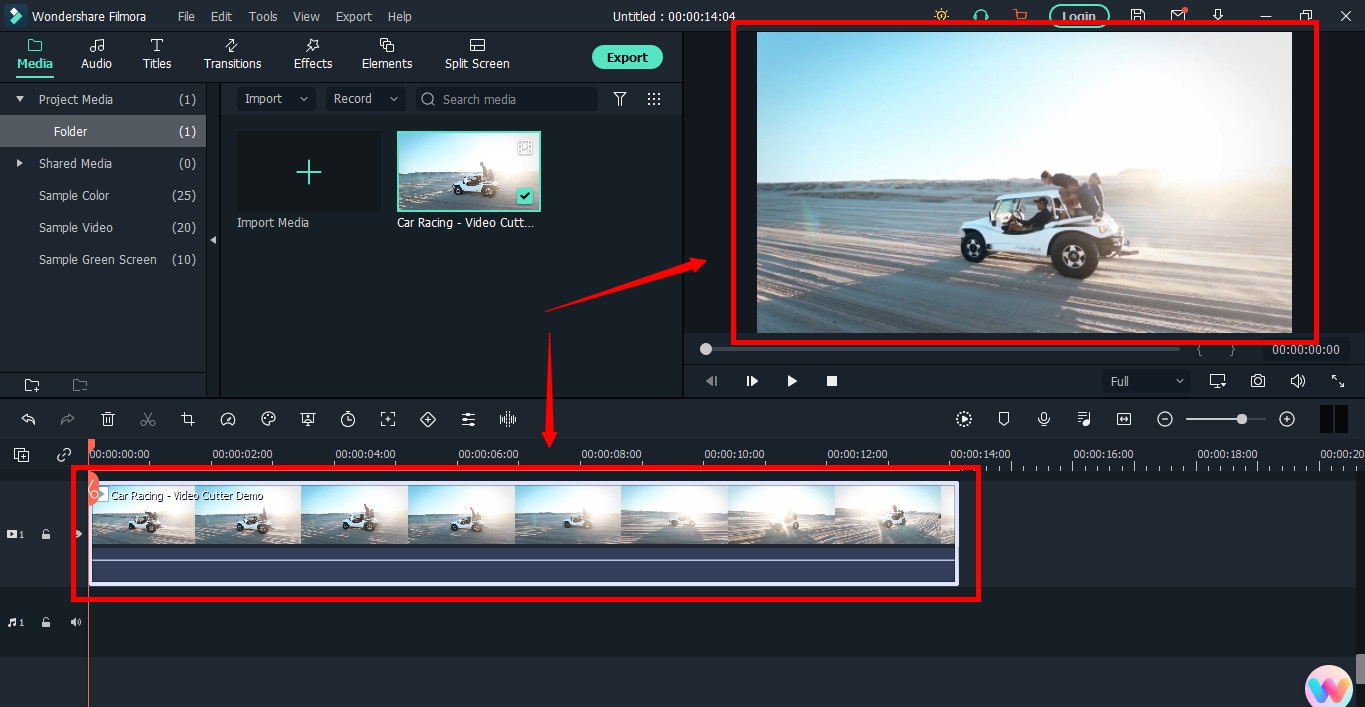
Step 4: Cutting Your Video in Filmora
Here comes the core step you have been waiting for. But before you go any further, you need to know about the “Playhead.”
Playhead is an orange-reddish marker you can find on the timeline.
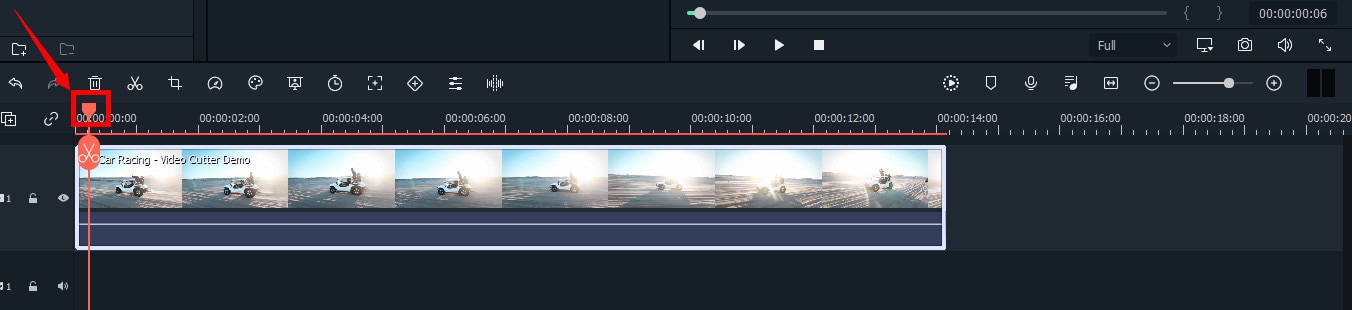
It has an important role in cutting your videos.
So, move the playhead to your desired frame and click on the “scissor” icon to make the “starting” cut.
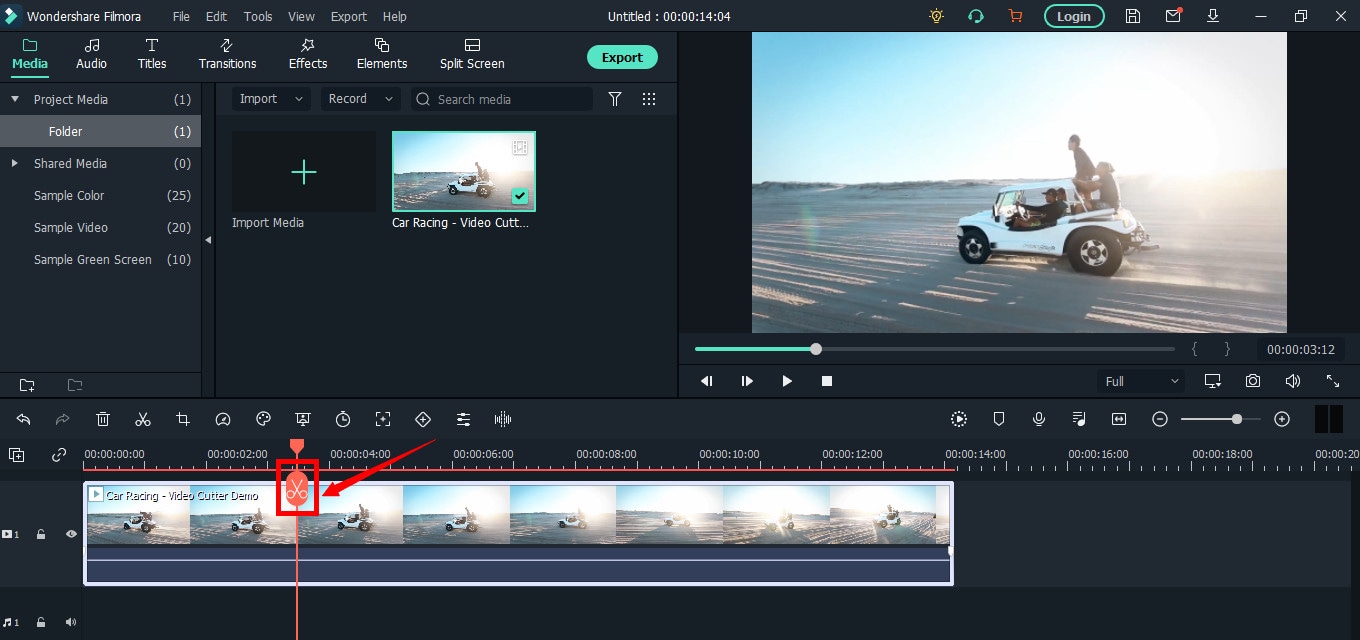
As soon as you do it, you will see that the single clip is now divided into two parts similar to this image.
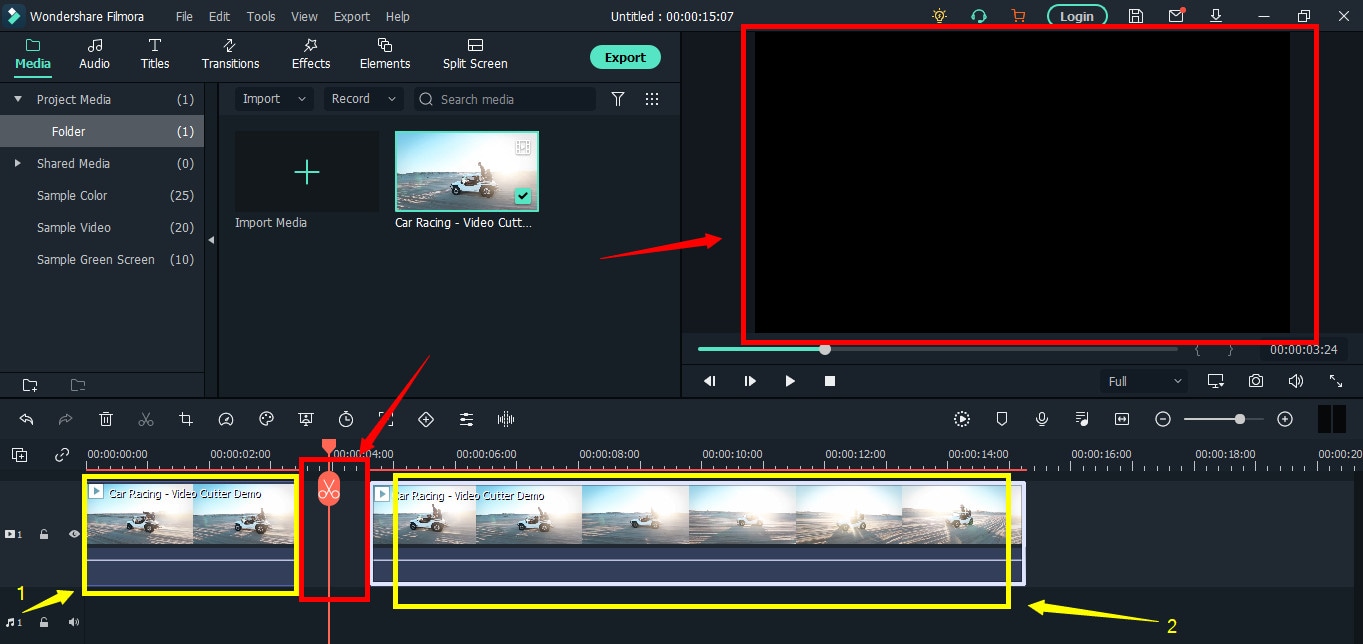
The “Red” marked area in the above screenshot ensures a gap between the clips on the timeline. The “Yellow” arrows confirm two separate clips of the same video.
Place the two clips together as seen in this “Green” area.
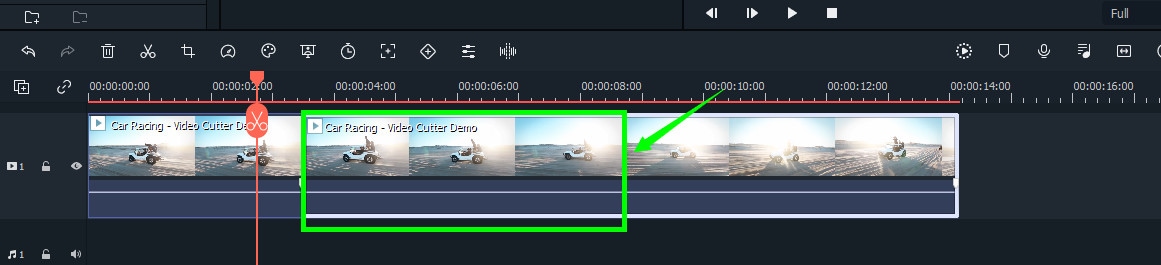
And place the playhead anywhere on the clip. And click on the “scissor” icon once again to make the “ending” cut (second cut).
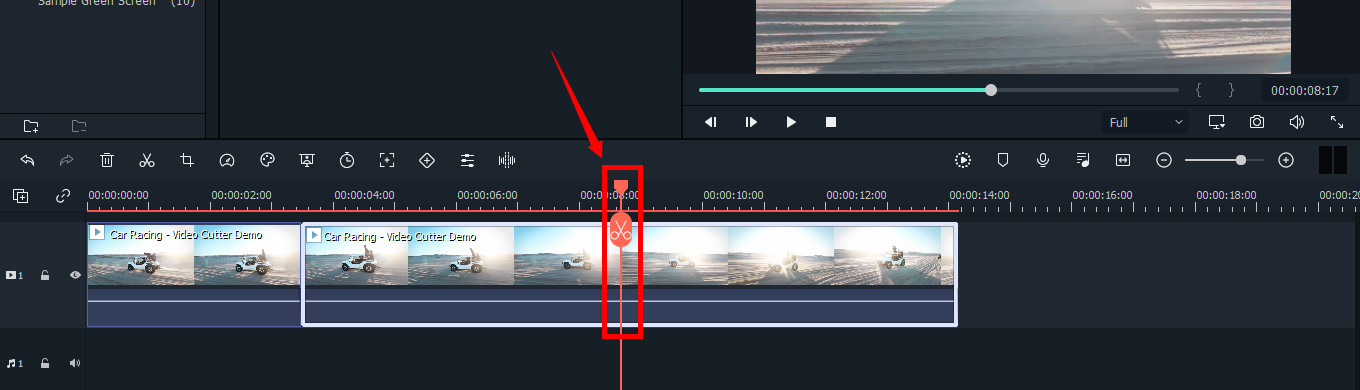
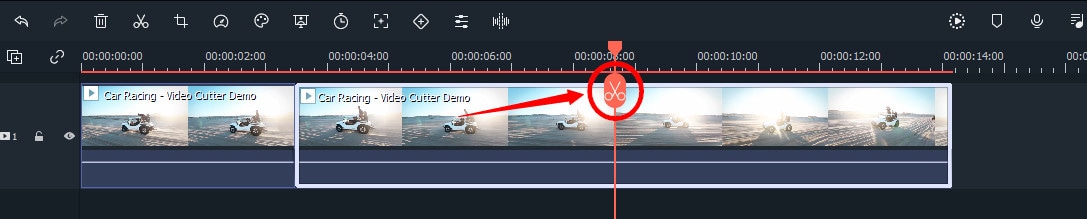
If done correctly, there should be three clips now of the same video, as you can observe in this screenshot.
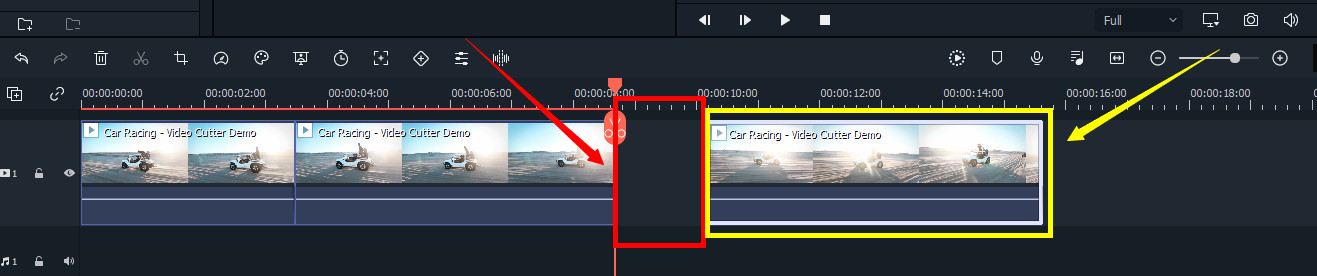
Again, the “Red” area in the above photo indicates the gap, and the “Yellow” area ensures a third segment of the video.
Note: The gaps you can see in the divided clips are made intentionally for understanding. Practically, Filmora doesn’t move the clip or make gaps in between after you have made the cuts.
Keep in mind that there are three clips on the timeline. Now, if you want to remove the second clip from the video, you need to select that portion first by clicking on it.
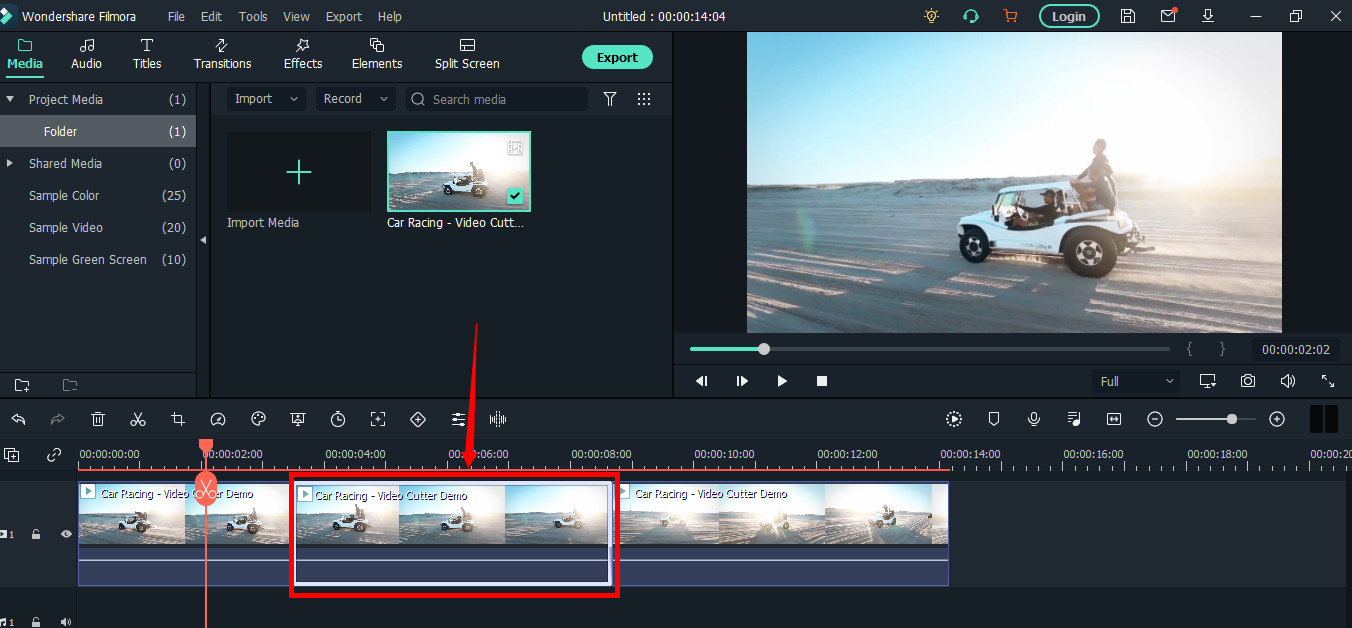
Then, right-click on the mouse and choose “Cut” from the menu.
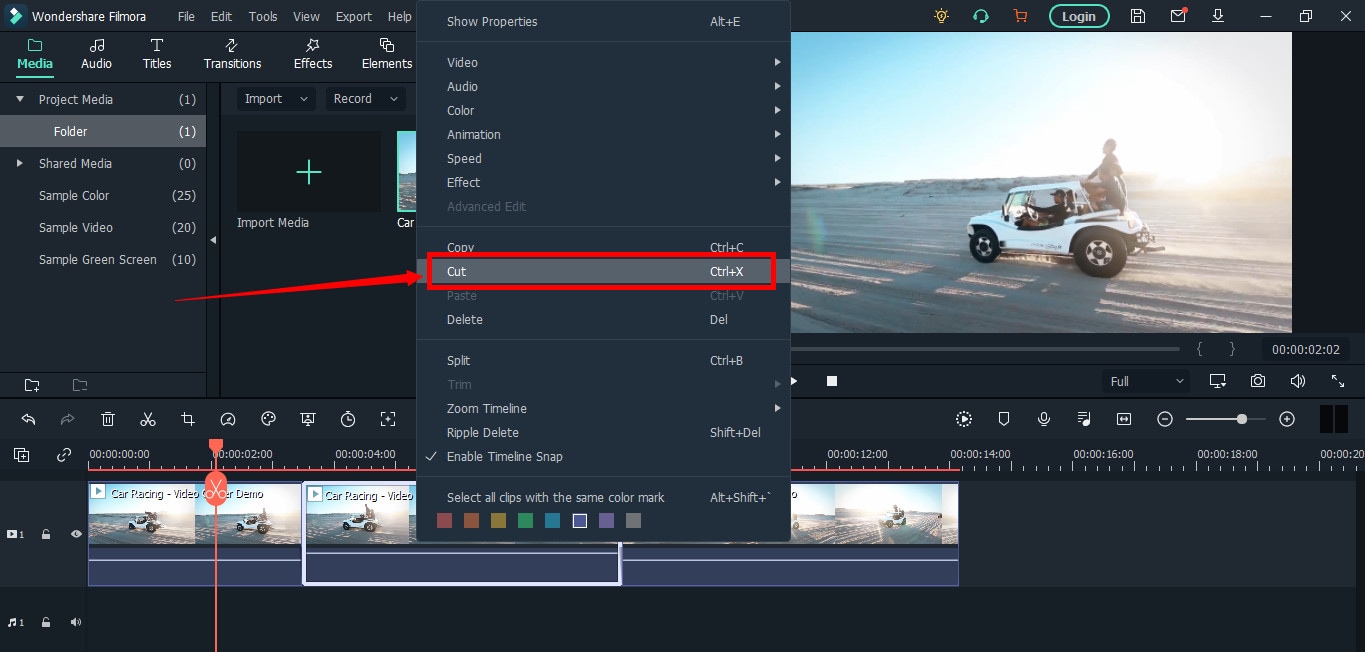
Within a semi-second, the selected portion will be removed from the timeline. And you will be able to see the remaining parts of the video. Now, pull the second clip using your mouse and place it at the end of the first clip without leaving a gap in between.
Then, click the “Play” button under the preview screen to see the results.
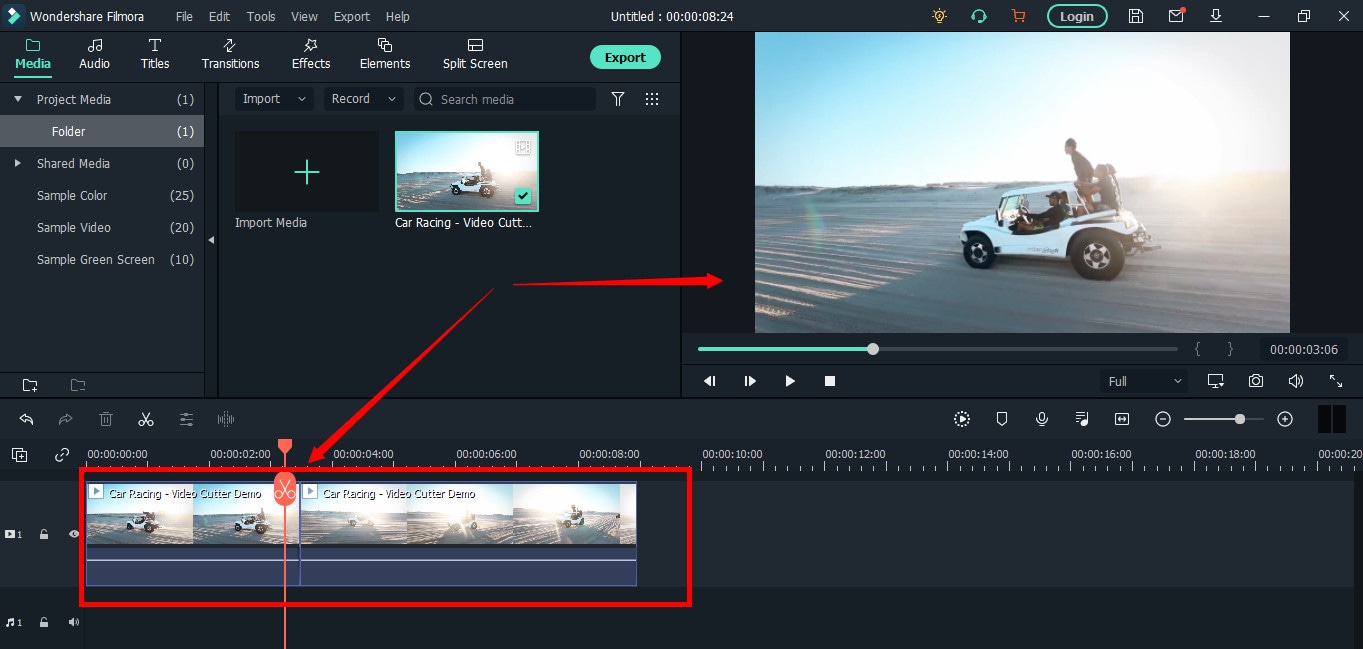
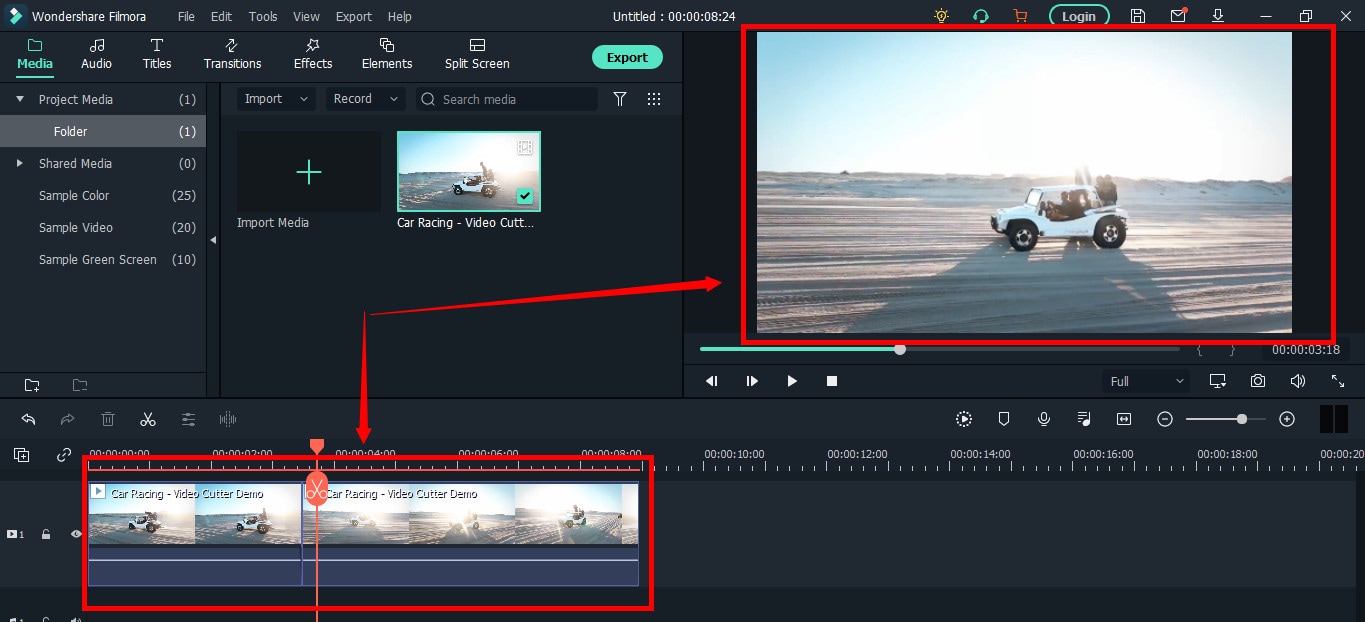
You can see in the above two screenshots that there’s a jump between the scenes due to cuts, confirming that video has been cut significantly.
Step 5: Trimming Your Video in Filmora
Remember that cutting and trimming in Filmora are two different things. Trimming allows you to remove a particular video part from visibility without deleting the portion.
So feel free to skip this step if you’re happy learning the cutting technique. But if you’re interested in trimming, here’s how you do it.
Take your mouse cursor at the beginning or end of the clip you want to trim. Keep holding the clip’s corner and slide the mouse back or front to trim the part
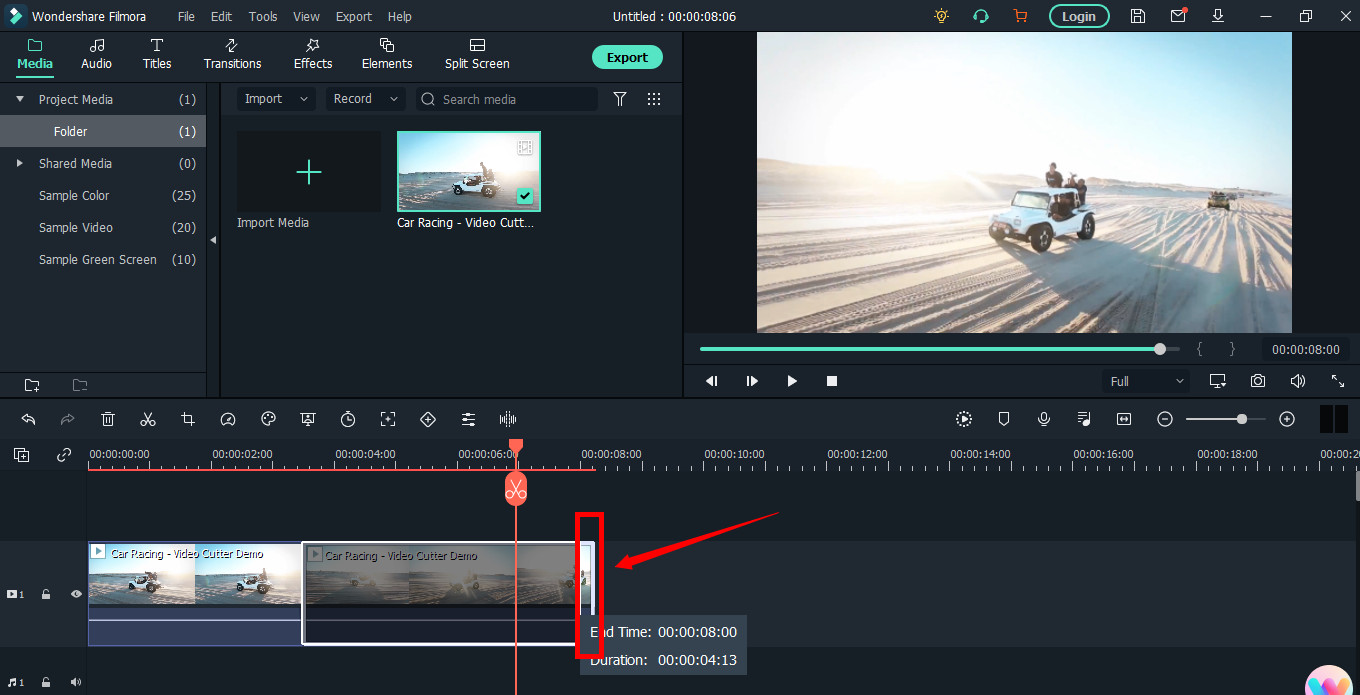
Note: Since the trim tool doesn’t delete the video, the final project based on trimming will be of a larger size. Therefore, it is advised to cut videos rather than trimming for fast rendering, better results, and small video size.
Step 6: Save Project and Export Your Cut/Trimmed AVI Video
Choose “Save Project” from the “File” menu.
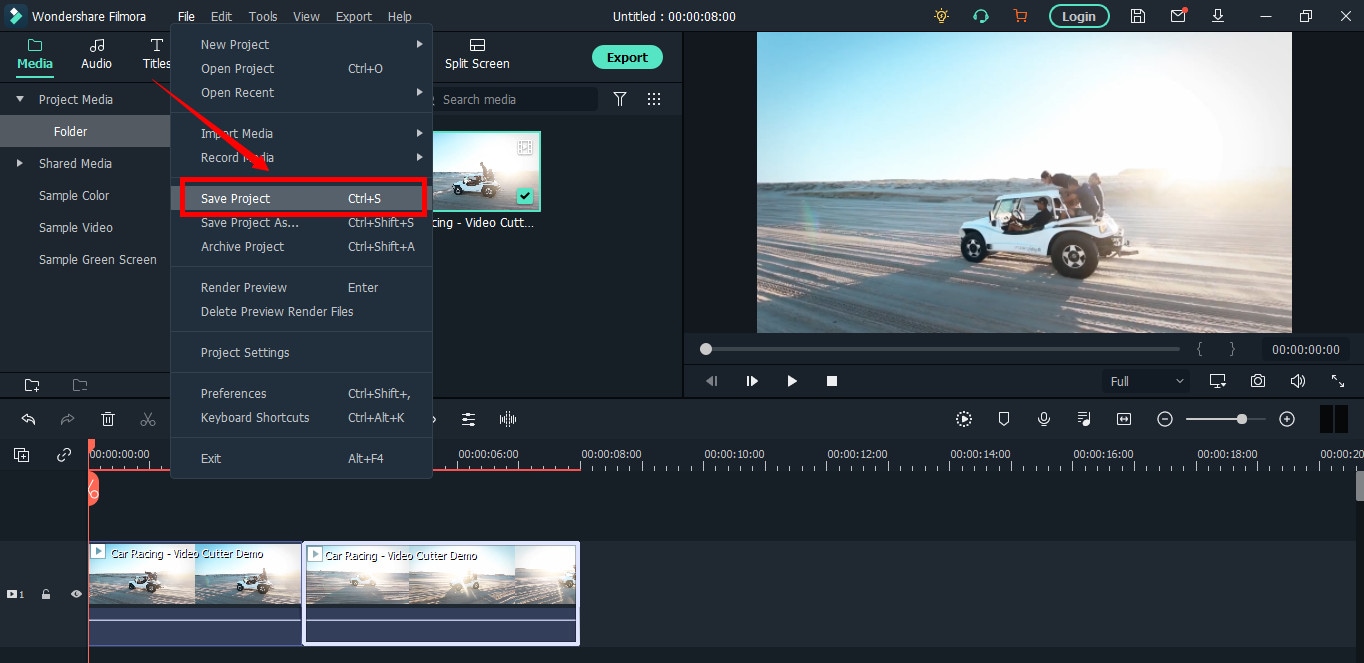
Select the directory to save the project, rename the new video, and click the “Save” button.

Click on the “Export” button to save the video in AVI or any other video format of your choice on your computer.
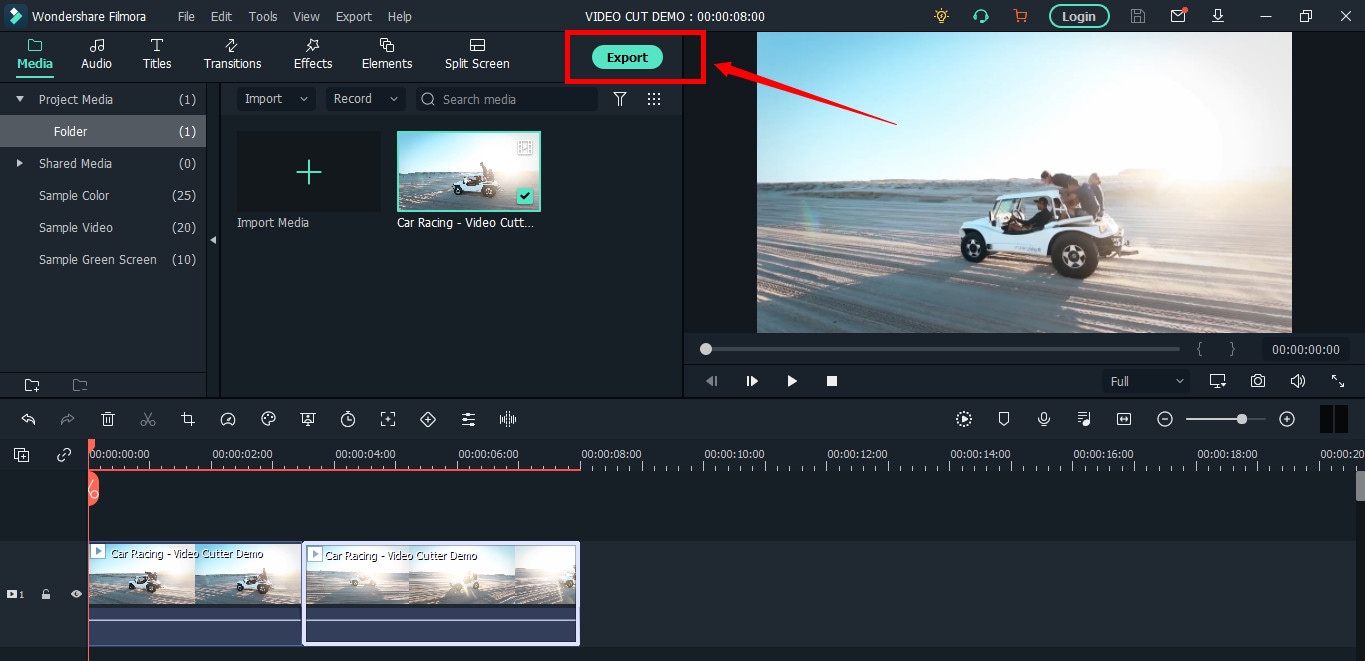
Part 2: Top 3 Free AVI Video Cutter on Windows
As a Windows user, finding an excellent video cutter is relatively easy. However, not all software permits importing AVI videos. In the same way, some video trimmers come at a price. So if you really don’t want to pay and enjoy cutting your AVI files, try using these three video cutting tools.
Microsoft Photos (Windows 10)
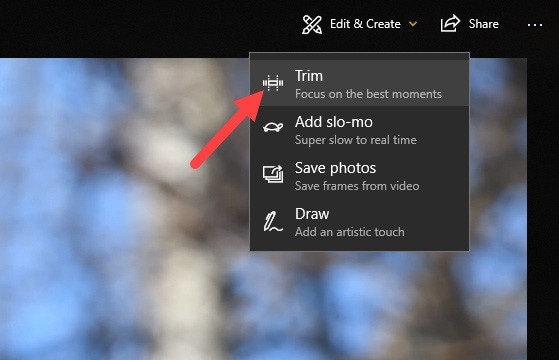
Microsoft Photos or Photo App is a free photo viewer and editor with your Windows 10. It offers incredible photo editing and enhancement along with different tools for organizing and editing videos in a very friendly way. Likewise, you can create drawings over the videos and add 3D effects and background music to your clips.
You can also trim AVI videos with Microsoft Photos quickly. All you need to do is open your clip with the Photo App, choose the “Trim” option, select a portion of the video you want to trim, and go ahead.
That’s it!
Features
- Quick video trimming
- Cool text effects
- 3D library and effects
- It has a clear interface
- You can find and tag people’s faces
- The program has 15+ filters for editing
- Motion tracking option for drawing on videos
- Allows you to view and organize your files easily
Pros
- Microsoft Photos is free for Windows users
- It automatically creates albums
- The program has a touch-friendly interface
- You can integrate your OneDrive with the software
Cons
- Lacks before and after view
- Not included in older Windows versions
- It doesn’t support selective focus or panorama stitching
Handbrake
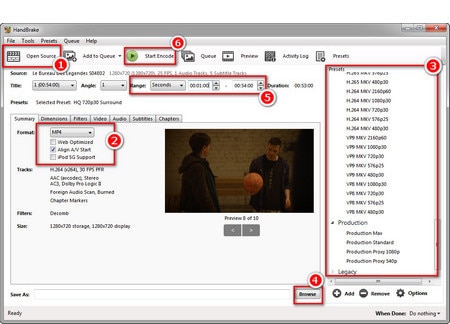
Handbrake is best-known for its video transcoding traits. Unlike typical video editors, this open-source tool includes limited options to rip Blu-rays and DVDs. Moreover, you can mix the 5.1 soundtracks and convert them to stereo to make the audio compatible with your TV speakers.
But the exciting thing about Handbrake is that you can use this software on your macOS 10.13 or later versions to cut AVI videos for free. However, it’s a bit technical process, as there’s no timeline to help you trim or make cuts on the clips directly with the help of your mouse.
You are required to mention a time range (seconds, minutes, or hours) to keep a specific part of the video while the software removes the non-ranged parts of the clip. For instance, you have a video of 10 seconds. You start the range from 5 seconds and end it at 10 seconds. So, the first four seconds of the video will be cut from the entire clip.
Features
- Video cutting, cropping, and resizing
- Low-quality and old video restoration
- Video conversion from any format to MKV or MP4
Pros
- Handbrake is free
- You can convert batch videos with ease
- It supports MAC, Windows, and Linux OS
- Allows you to import video files in all major formats
- The software comes with various video conversion presets
Cons
- Handbrake is not a user-friendly tool
- The video file output is limited to two formats (MKV and MP4) only
Gihosoft Video Cutter
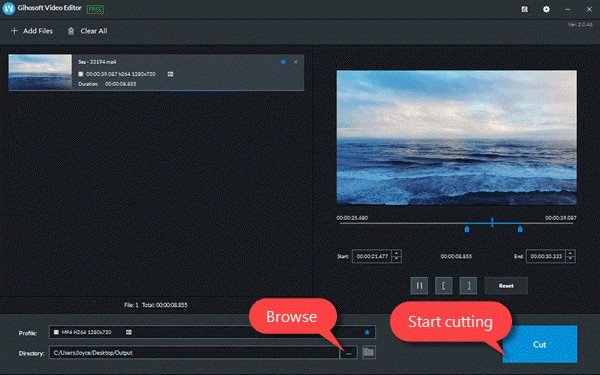
Gihosoft is a clean, free, lossless video cutter on your Windows PC. It’s a simple tool that helps you cut video files into various output formats. So be it AVI, MPEG, or any other file, with Gihosoft, everything becomes handy.
Another fascinating fact about this software is that it allows you to cut videos in three simple steps without losing the quality. So right after installing the program, you simply need to import your file, choose the start and end time, and click the “Cut” button to remove the part of the video.
Features
- Fast video and audio cutting
- Easy drag and drop audio/video files
- It supports most audio and video formats
Pros
- Free for both Windows and MAC operating systems
- The cutter saves video in original quality
Cons
- It does not include basic video editing features
Part 3: Top 3 Free AVI Video Cutter on MAC
Are you looking for a great AVI video cutter for your MAC? Sadly, you have limited product choices as compared to Windows users. But to ensure you don’t waste time looking for a suitable tool, here’s a list of three AVI video cutting programs you can use on your Macintosh.
iMovie
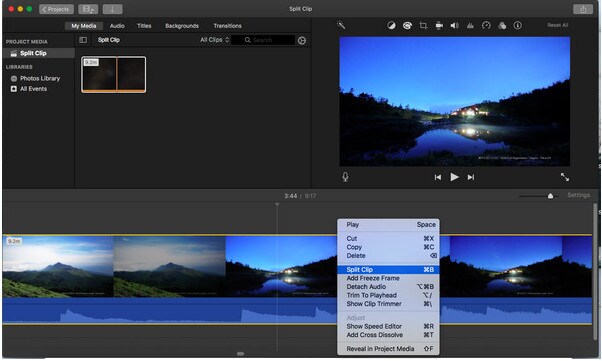
The first and foremost recommended software for free video cutting on MAC is Apple’s own tool, iMovie . It is a built-in program that comes with your system, so there is no need to spend extra on a video editor. iMovie allows you to browse and import most video files, including AVI, right from your computer. Also, this tool is equipped with multiple functions, such as audio editing, video quality enhancement, and much more.
This MAC’s video editor is ideal for beginners. Many home users and small business owners find this tool extremely simple, as they don’t like to be confused with complex features. So, if you want to make cuts to your video clips, start working on iMovie. And within a few clicks, you can trim or cut your videos for free.
Features
- Video cutting and trimming
- Cropping and rotation
- Effects and transitions
- Built-in themes
- HD and 4K video support
- Movie sharing
- Audio adjustments
- Chroma screen controls
- Character tracking
Pros
- Free to use for MAC users
- Clean timeline
- One-click video cutting and trimming
- Easy-to-remember keyboard shortcuts
- Direct share projects to your social media, like YouTube
Cons
- It takes a lot of time to export videos
- iMovie needs high HDD storage space
VideoPad by NCH

VideoPad by NCH is a beginner-level video editor with all the basic features. The software is specifically designed for home movie makers. That is why VideoPad is easy to understand and use.
VideoPad is entirely free of cost for non-commercial purposes, but it has limited features. On the other hand, if you want to enjoy full traits, you can purchase the tool.
VideoPad supports video files, including AVI, WMV, MPEG, MOV, MP4, ASF, and XviD. Likewise, you can also burn movies to Blu-ray, DVD, HD-DVD, or CD. And most importantly, you can easily cut or trim AVI videos on your MAC, as the software is available on both MAC and Windows systems.
Features
- Audio tools
- Video rotation
- Video sharing
- Visual effects
- Video transitions
- 3D Video editing
- Color correction
- Overlays and texts
- Video optimization
- Great plugin support
- Direct video uploading
- Multiple video resolutions
- Video cutting and trimming
- Files exportation to various devices
- Stereoscopic conversion from 2D to 3D
Pros
- You can use the basic tools for free
- Allows 360-degree video production
- It supports a wide range of video formats
- Compatible with MAC and Windows computers
Cons
- The auto speech feature performs poorly
- The free version has annoying notifications
Xilisoft Video Cutter
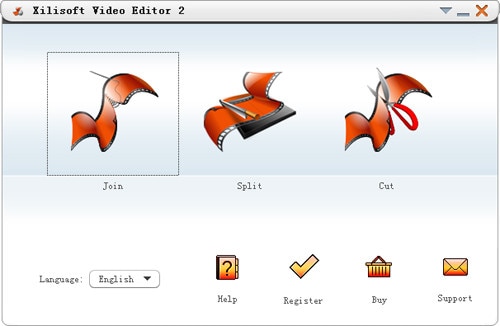
Xilisoft Video Cutter is the simplest tool to cut videos on MAC. This software has a straightforward option to cut the clip after importing it to the timeline. The program is fast and has a user-friendly interface.
Moreover, you can polish your videos by merging multiple clips or increasing the video quality once you’re done with the cutting process. At the same time, this video cutter allows you to import all video formats, including XviD, DivX, MOV, FLV, MP4, MPEG-4/, MKV, MPEG, WMV, and AVI.
Features
- Video joining
- Support multiple output video formats, including HD
Pros
- Easy video cutting and merging
- It doesn’t require a large storage space
- Extremely uncomplicated interface
- Real-time preview to make better cuts
- Available on both MAC and Windows systems
Cons
- The trial version is free to use but limits you from enjoying extra features
Part 4: Top 3 Free AVI Video Cutter on Android
After capturing nice videos with your Android mobile phone, you may need to cut unnecessary scenes to make your clips look professional. While there are numerous Android cutters, not all support the AVI format. So below, you will find the 3 best AVI video cutters for Android, which are free to use.
Quick – Video Editor & Maker
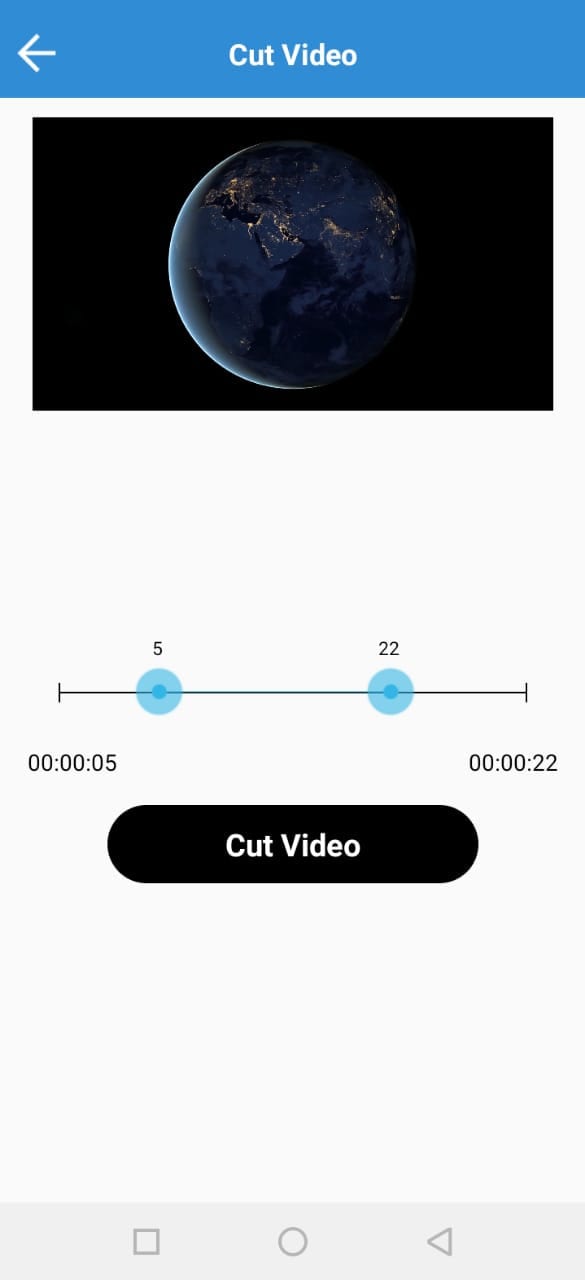
Quick – Video Editor & Maker is a free video editor with PRO results. Many photographers and vloggers love using this app to cut clips immediately. Furthermore, the application offers a wide range of options to assure you don’t have to look to any other tool to rotate or compress video. Quick – Video Editor & Maker lets you import videos in all major formats, including AVI, MPEG, WMA, and more.
Features
- Video cutting, fading, and rotation
- Speed control tools
- Conversion from video to GIF
Pros
- Free app
- Simple interface
Cons
- Lack of updates
- Some users complain about app crash
Funimate Video Editor & Maker
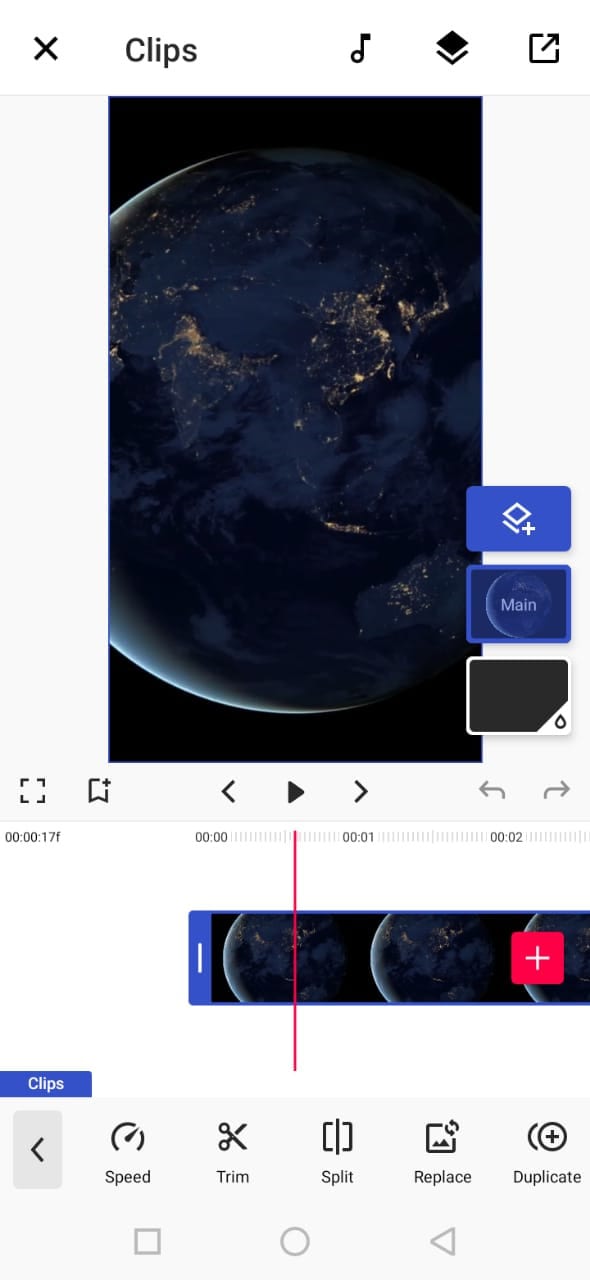
If you want to make some professional-grade video edits quickly, you are welcome to download and use Funimate Video Editor & Maker on your Android device. It’s a free tool to cut videos. It has an easy procedure, and you can cut AVI videos in a few seconds.
Plus, you can use the app to add custom animations, effects, and many other exciting elements. You can share your makes on social media like TikTok, Instagram, and other platforms. Contrarily, the app itself is a community with millions of Funimate-users who share their creations daily. You can also join or watch videos from other creators to learn more about new techniques and trends in video editing.
Features
- Video trimming and splitting
- Animation and cropping
- Filters and AI effects
- Speed adjustment
- Keyframing and video merging
Pros
- Free Android application with several editing tools
- Easy trimming, splitting, and cropping
- Aspect ratio, border, and color customization
- Direct social media sharing
Cons
- Free users cannot use templates
- The free version stamps watermarks on each project
Part 5: Top 3 Free AVI Video Cutter on iPhone
No wonder iPhone’s camera captures high-quality videos. But the problem begins when there’s no free app to cut AVI videos. So if you’re recording great spots, but deep inside, you really want to remove some parts, then these 3 free AVI video cutters will work smoothly on your iPhone.
Cut, Trim, Split Video Editor
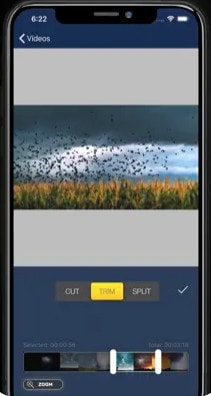
Download Cut, Trim, Split Video Editor on your iPhone to delete/cut unwanted portions of your video clips. The tool is also best for trimming iPhone-recorded clips without messing with the frames. Or, if you just want to split the video into multiple parts for your next WhatsApp status, this iPhone app can do that job for you.
The app supports multiple video file types, including MOV, MP4, AVI, MPEG, MPEG-2, and 3GPP
Features
- Easy trimming and cutting video clips
- Splitting big-sized videos into two smaller clips
- Import video from file-sharing platforms, like iCloud, using Wi-Fi
Pros
- Free app for fast video cutting and sharing
- Simple UI interface
Cons
- The free version shows advertisements
Splice - Video Editor & Maker
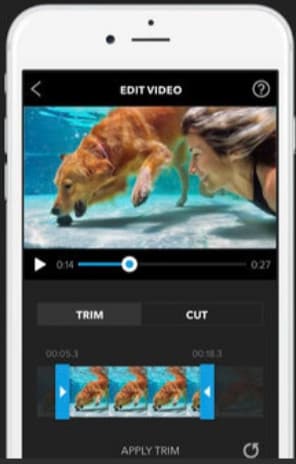
Splice is an extraordinary video editor that makes it easy to make fully customized and professional videos from your iPhone. The app is also best for video cutting. Besides, it has many interesting features, which you can use from your device.
Features
- Cutting, trimming, and cropping your videos
- Exposure, saturation, and exposure adjustment
- Slow and fast motion with speed ramping option
- Video masking and overlay
- Color correction and text overlays
Pros
- Free basic features, such as video cutting
- iTunes integration
- Supports AVI video input
- User-friendly application
- Access to the music library
- Quick and simple social sharing
Cons
- Output videos require high mobile storage space
Part 6: Top 3 Free AVI Video Cutter Online
Don’t want to install video cutters on your MAC, Windows, smartphone, or any other device? No problem! You can use online video cutters and trimmers to split, cut, or trim your clips for free.
However, the problem still exists in online tools, as not all web-based editors allow importing AVI files. So to save your time and energy, you can directly go to the following online AVI cutters to complete your tasks.
Kapwing
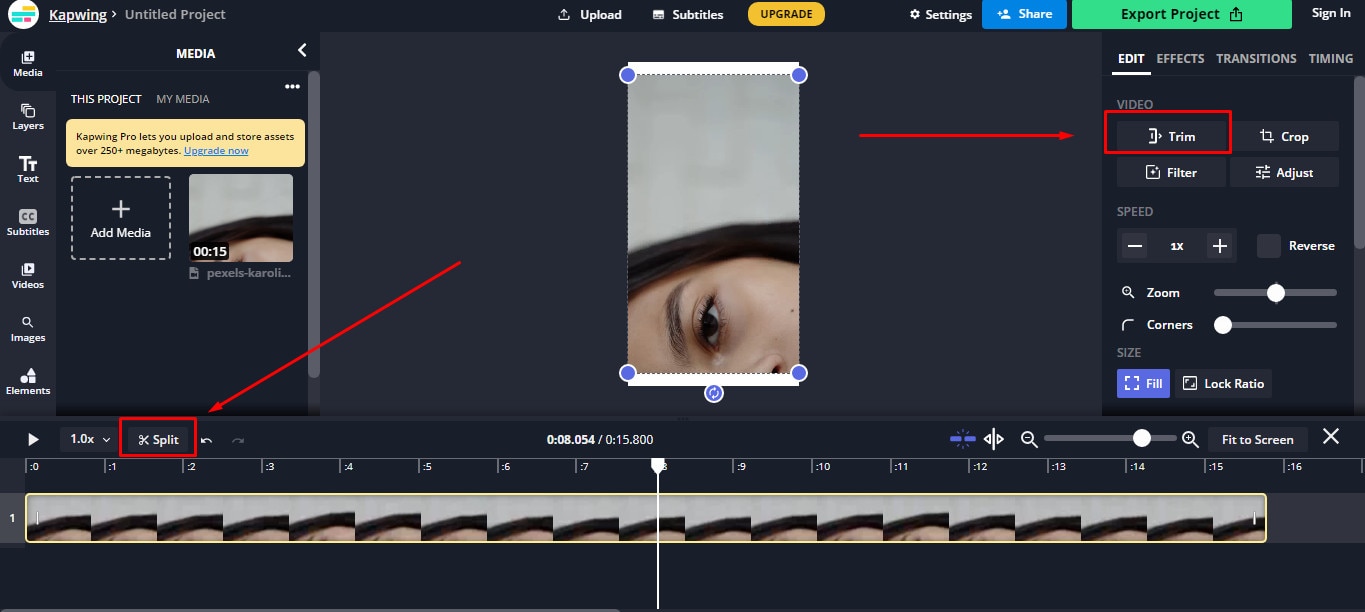
Kapwing is an online video editor best for casual creatives, such as Vloggers and YouTubers. You can use this web-based platform to cut your videos. Gladly, Kapwing supports all AVI incomings. You can upload your AVI video files to this platform and use its trim or split feature. To do that, you need to upload your AVI video and choose the “Trim” or “Split” tool to see the magic. Once done with the trimming process, you can explore Kapwing’s other incredible traits and apply them to your project.
Features
- Video splitting, trimming, and merging
- Audio capturing
- Speed adjustment
- Image and video library
- Text editing and overlay
- Auto-generated subtitles
- Several collaboration tools
- Video creation from scratch
- Templates, shapes, and emojis
- Simple drag-and-drop interface
- Video transitions, plugins, and elements
Pros
- Free online video trimmer
- User-friendly interface
- You can export 30-minutes long projects
- Allows you to export unlimited videos with a watermark
- One watermark-free video export is available each month
Cons
- Cannot export long videos with a free account
- Only 10 minutes transcription limit is available for free users
- You need to purchase a monthly or annual subscription to remove the watermark from multiple videos
Clideo
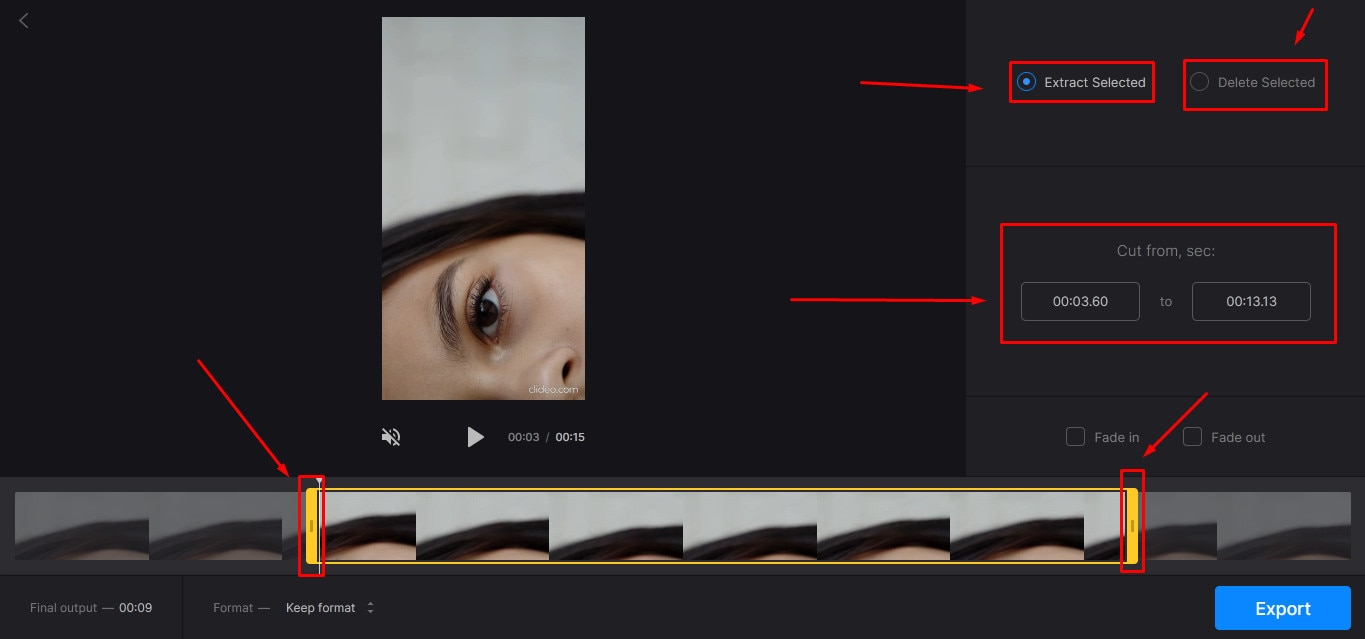
Clideo is not just a video cutter but an online solution to all your video editing problems. The tool is super popular, with 4 million+ users a month. And why not? This is one of those web-based platforms that allow AVI video files to be imported and exported without converting them into any other formats.
Nevertheless, if you’re only looking for video cutting options, this tool makes your life easy. Simply upload your video, and select the portion of it by setting start and end times. Choose whether you want to delete or extract the selected part from the clip, and hit the “Export” button.
And within a few moments, you can enjoy a trimmed video clip. And if you plan to be more creative, you can look for other Clideo features to make videos more fascinating.
Features
- Video combining and cutting
- Resize and crop clips
- Compress your videos
- Add text and subtitles
- Add music to your video files
- Filters and color correction tools
- Audio mute, cutting, and muting
- Video rotation, flipping, and speed adjustment
Pros
- Basic tools can be used for free
- Best for beginners and intermediate users
- Ideal for AVI videos and also supports other video formats
Cons
- You cannot use the free version regularly
Aspose
Aspose is a free web-based application to cut clips. You can use this tool on any operating system. It supports all major video file formats, including AVI, MKV, MOV, MP4, FLV, WMV, WEBM, and GIF. Additionally, you can use Aspose for various other reasons, such as audio extraction, video resizing, and more.
Features
- Video cutting and compressing
- Looping, rotation, and video merging
- Adding watermarks on videos
- Sound muting
- Speed change and audio addition
Pros
- Aspose is a free online tool
- It offers straightforward options to cut and edit videos
Cons
- No color correction option
- Slow video cutting process
- Lacks timeline and other valuable features
Part 7: Bottom Line
Tired of finding AVI cutters? Relax and try these top 16 AVI video cutters for Windows, MAC, iPhone, Android, and online. Almost all these tools are free to use and are extremely handy. On the other hand, if you want to cut and trim videos professionally, download Filmora and follow the step-by-step guide in this article for making clean cuts.
Part 8: FAQs
Q1. How do I trim an AVI video?
To trim an AVI video file, ensure that the software or tool you use supports AVI input. Generally, you need to upload or import a clip on the program, select the portion of the video, and apply the cut/trim feature to make it happen.
Q2. Which is the best online video cutter?
Kapwing and Clideo are the two best online video cutters you can use for free. Both web-based tools also allow you to cut your AVI videos.
Q3. Which is the best video cutter and joiner software?
Filmora, iMovie, and Kapwing are some of the best video cutters and joiner tools. These video editors are also free to use and come with different features.
Q4. How do I trim an AVI file in Windows 10?
Trimming an AVI video file in Windows 10 is very simple. Launch the Microsoft Photos (Photo App) application on your computer, add clip, and select the “Trim” tool to trim a specific video part.
Q5. How can I cut a video on my computer for free?
MAC and Windows users can download Filmora to cut videos for free. Filmora also offers a wide range of other features to make your clips exciting. Contrarily, Windows users can use the built-in Photo App in Windows 10 or download Gihosoft or Handbrake software to cut clips. Likewise, MAC users can download VideoPad, Xilisoft Video Cutter, or iMovie for free.
With the growing fame of video-sharing and social media applications like Twitter, Instagram, and TikTok, the demand for simple and fast video cutting and trimming tools has dramatically increased. Nowadays, you don’t have to play with complex video editing tools to produce high-quality videos.
Thanks to several user-friendly editing software to make things easy for everybody. However, finding the right programs to trim/cut videos is still challenging, especially in AVI format.
But, guess what? These top 16 AVI video cutters for Windows, MAC, Android, iPhone, and online will make video cutting and trimming fun, especially when you learn to do it using Filmora.
In this Article
Part 1: Best AVI Video Cutter to Trim/Cut AVI Video on Windows and MAC – Filmora Video Cutter [with steps}
Part 2: Top 3 Free AVI Video Cutter on Windows
Part 3: Top 3 Free AVI Video Cutter on MAC
Part 4: Top 3 Free AVI Video Cutter on Android
Part 5: Top 3 Free AVI Video Cutter on iPhone
Part 6: Top 3 Free AVI Video Cutter Online
Part 7: Bottom Line
Part 8: FAQs
Part 1: Best AVI Video Cutter to Trim/Cut AVI Video on Windows and MAC – Filmora Video Cutter [with steps]
Filmora by Wondershare is a star video editor with outstanding outcomes. Whether you have a MAC or Windows PC, you can download Filmora regardless of your operating system. The program best serves those who intend to make high-quality videos. The software provides editing support for all video formats, including AVI.
Although Filmora is an affordable editor with tons of audio and video editing options, you can still download the software for free and create projects if watermarks don’t bother you. Moreover, you can count this tool’s capabilities in cropping, resizing, and Chroma screen support. But that’s not the only sweet fruit.
In fact, Filmora is equipped with many jaw-dropping features, including preset templates, auto beat sync, split-screen, speed ramping, motion tracking, keyframing, creative transitions, titles, filters, and much more. And the best part is, you can learn and understand Filmora in no time. That’s why the program is loved and supported by all types of users.
So does Filmora helps cut and trim AVI videos? Yes! It does if you follow these steps correctly.
Step 1: Download Filmora Video Editor
First, download Filmora Video Editor by choosing your operating system, as seen in the screenshot below.
Run the setup and let it finish without any pause or break.
Step 2: Import Your Video to Filmora Video Editor
Importing your AVI video is a very simple process. Just click on the “Film Clip” icon.
It will open a new window screen on your computer to select the video from the directory. Find the clip you want to import and cut. Use your mouse to select it and click the “Open” button.
The video will be loaded in the “Media” folder of Filmora. The clip’s thumbnail should be visible to assure you have done everything correctly.
If you can see that, let’s go to the next step.
Step 3: Drag and Drop Video to Filmora’s Timeline
Select the video in the media folder by clicking over it once. Now, without leaving the hold of the left button of your mouse, slide the video down to the track in the timeline.
After that, a message will pop up, asking about your preference for the project settings. It is recommended to choose the “Match to Media” option unless you’re an experienced video editor who knows how to play with the resolution and frame rates.
You will see the video on the timeline with its preview on the “Preview Screen” on the right side of the interface.
Step 4: Cutting Your Video in Filmora
Here comes the core step you have been waiting for. But before you go any further, you need to know about the “Playhead.”
Playhead is an orange-reddish marker you can find on the timeline.
It has an important role in cutting your videos.
So, move the playhead to your desired frame and click on the “scissor” icon to make the “starting” cut.
As soon as you do it, you will see that the single clip is now divided into two parts similar to this image.
The “Red” marked area in the above screenshot ensures a gap between the clips on the timeline. The “Yellow” arrows confirm two separate clips of the same video.
Place the two clips together as seen in this “Green” area.
And place the playhead anywhere on the clip. And click on the “scissor” icon once again to make the “ending” cut (second cut).
If done correctly, there should be three clips now of the same video, as you can observe in this screenshot.
Again, the “Red” area in the above photo indicates the gap, and the “Yellow” area ensures a third segment of the video.
Note: The gaps you can see in the divided clips are made intentionally for understanding. Practically, Filmora doesn’t move the clip or make gaps in between after you have made the cuts.
Keep in mind that there are three clips on the timeline. Now, if you want to remove the second clip from the video, you need to select that portion first by clicking on it.
Then, right-click on the mouse and choose “Cut” from the menu.
Within a semi-second, the selected portion will be removed from the timeline. And you will be able to see the remaining parts of the video. Now, pull the second clip using your mouse and place it at the end of the first clip without leaving a gap in between.
Then, click the “Play” button under the preview screen to see the results.
You can see in the above two screenshots that there’s a jump between the scenes due to cuts, confirming that video has been cut significantly.
Step 5: Trimming Your Video in Filmora
Remember that cutting and trimming in Filmora are two different things. Trimming allows you to remove a particular video part from visibility without deleting the portion.
So feel free to skip this step if you’re happy learning the cutting technique. But if you’re interested in trimming, here’s how you do it.
Take your mouse cursor at the beginning or end of the clip you want to trim. Keep holding the clip’s corner and slide the mouse back or front to trim the part
Note: Since the trim tool doesn’t delete the video, the final project based on trimming will be of a larger size. Therefore, it is advised to cut videos rather than trimming for fast rendering, better results, and small video size.
Step 6: Save Project and Export Your Cut/Trimmed AVI Video
Choose “Save Project” from the “File” menu.
Select the directory to save the project, rename the new video, and click the “Save” button.
Click on the “Export” button to save the video in AVI or any other video format of your choice on your computer.
Part 2: Top 3 Free AVI Video Cutter on Windows
As a Windows user, finding an excellent video cutter is relatively easy. However, not all software permits importing AVI videos. In the same way, some video trimmers come at a price. So if you really don’t want to pay and enjoy cutting your AVI files, try using these three video cutting tools.
Microsoft Photos (Windows 10)
Microsoft Photos or Photo App is a free photo viewer and editor with your Windows 10. It offers incredible photo editing and enhancement along with different tools for organizing and editing videos in a very friendly way. Likewise, you can create drawings over the videos and add 3D effects and background music to your clips.
You can also trim AVI videos with Microsoft Photos quickly. All you need to do is open your clip with the Photo App, choose the “Trim” option, select a portion of the video you want to trim, and go ahead.
That’s it!
Features
- Quick video trimming
- Cool text effects
- 3D library and effects
- It has a clear interface
- You can find and tag people’s faces
- The program has 15+ filters for editing
- Motion tracking option for drawing on videos
- Allows you to view and organize your files easily
Pros
- Microsoft Photos is free for Windows users
- It automatically creates albums
- The program has a touch-friendly interface
- You can integrate your OneDrive with the software
Cons
- Lacks before and after view
- Not included in older Windows versions
- It doesn’t support selective focus or panorama stitching
Handbrake
Handbrake is best-known for its video transcoding traits. Unlike typical video editors, this open-source tool includes limited options to rip Blu-rays and DVDs. Moreover, you can mix the 5.1 soundtracks and convert them to stereo to make the audio compatible with your TV speakers.
But the exciting thing about Handbrake is that you can use this software on your macOS 10.13 or later versions to cut AVI videos for free. However, it’s a bit technical process, as there’s no timeline to help you trim or make cuts on the clips directly with the help of your mouse.
You are required to mention a time range (seconds, minutes, or hours) to keep a specific part of the video while the software removes the non-ranged parts of the clip. For instance, you have a video of 10 seconds. You start the range from 5 seconds and end it at 10 seconds. So, the first four seconds of the video will be cut from the entire clip.
Features
- Video cutting, cropping, and resizing
- Low-quality and old video restoration
- Video conversion from any format to MKV or MP4
Pros
- Handbrake is free
- You can convert batch videos with ease
- It supports MAC, Windows, and Linux OS
- Allows you to import video files in all major formats
- The software comes with various video conversion presets
Cons
- Handbrake is not a user-friendly tool
- The video file output is limited to two formats (MKV and MP4) only
Gihosoft Video Cutter
Gihosoft is a clean, free, lossless video cutter on your Windows PC. It’s a simple tool that helps you cut video files into various output formats. So be it AVI, MPEG, or any other file, with Gihosoft, everything becomes handy.
Another fascinating fact about this software is that it allows you to cut videos in three simple steps without losing the quality. So right after installing the program, you simply need to import your file, choose the start and end time, and click the “Cut” button to remove the part of the video.
Features
- Fast video and audio cutting
- Easy drag and drop audio/video files
- It supports most audio and video formats
Pros
- Free for both Windows and MAC operating systems
- The cutter saves video in original quality
Cons
- It does not include basic video editing features
Part 3: Top 3 Free AVI Video Cutter on MAC
Are you looking for a great AVI video cutter for your MAC? Sadly, you have limited product choices as compared to Windows users. But to ensure you don’t waste time looking for a suitable tool, here’s a list of three AVI video cutting programs you can use on your Macintosh.
iMovie
The first and foremost recommended software for free video cutting on MAC is Apple’s own tool, iMovie . It is a built-in program that comes with your system, so there is no need to spend extra on a video editor. iMovie allows you to browse and import most video files, including AVI, right from your computer. Also, this tool is equipped with multiple functions, such as audio editing, video quality enhancement, and much more.
This MAC’s video editor is ideal for beginners. Many home users and small business owners find this tool extremely simple, as they don’t like to be confused with complex features. So, if you want to make cuts to your video clips, start working on iMovie. And within a few clicks, you can trim or cut your videos for free.
Features
- Video cutting and trimming
- Cropping and rotation
- Effects and transitions
- Built-in themes
- HD and 4K video support
- Movie sharing
- Audio adjustments
- Chroma screen controls
- Character tracking
Pros
- Free to use for MAC users
- Clean timeline
- One-click video cutting and trimming
- Easy-to-remember keyboard shortcuts
- Direct share projects to your social media, like YouTube
Cons
- It takes a lot of time to export videos
- iMovie needs high HDD storage space
VideoPad by NCH
VideoPad by NCH is a beginner-level video editor with all the basic features. The software is specifically designed for home movie makers. That is why VideoPad is easy to understand and use.
VideoPad is entirely free of cost for non-commercial purposes, but it has limited features. On the other hand, if you want to enjoy full traits, you can purchase the tool.
VideoPad supports video files, including AVI, WMV, MPEG, MOV, MP4, ASF, and XviD. Likewise, you can also burn movies to Blu-ray, DVD, HD-DVD, or CD. And most importantly, you can easily cut or trim AVI videos on your MAC, as the software is available on both MAC and Windows systems.
Features
- Audio tools
- Video rotation
- Video sharing
- Visual effects
- Video transitions
- 3D Video editing
- Color correction
- Overlays and texts
- Video optimization
- Great plugin support
- Direct video uploading
- Multiple video resolutions
- Video cutting and trimming
- Files exportation to various devices
- Stereoscopic conversion from 2D to 3D
Pros
- You can use the basic tools for free
- Allows 360-degree video production
- It supports a wide range of video formats
- Compatible with MAC and Windows computers
Cons
- The auto speech feature performs poorly
- The free version has annoying notifications
Xilisoft Video Cutter
Xilisoft Video Cutter is the simplest tool to cut videos on MAC. This software has a straightforward option to cut the clip after importing it to the timeline. The program is fast and has a user-friendly interface.
Moreover, you can polish your videos by merging multiple clips or increasing the video quality once you’re done with the cutting process. At the same time, this video cutter allows you to import all video formats, including XviD, DivX, MOV, FLV, MP4, MPEG-4/, MKV, MPEG, WMV, and AVI.
Features
- Video joining
- Support multiple output video formats, including HD
Pros
- Easy video cutting and merging
- It doesn’t require a large storage space
- Extremely uncomplicated interface
- Real-time preview to make better cuts
- Available on both MAC and Windows systems
Cons
- The trial version is free to use but limits you from enjoying extra features
Part 4: Top 3 Free AVI Video Cutter on Android
After capturing nice videos with your Android mobile phone, you may need to cut unnecessary scenes to make your clips look professional. While there are numerous Android cutters, not all support the AVI format. So below, you will find the 3 best AVI video cutters for Android, which are free to use.
Quick – Video Editor & Maker
Quick – Video Editor & Maker is a free video editor with PRO results. Many photographers and vloggers love using this app to cut clips immediately. Furthermore, the application offers a wide range of options to assure you don’t have to look to any other tool to rotate or compress video. Quick – Video Editor & Maker lets you import videos in all major formats, including AVI, MPEG, WMA, and more.
Features
- Video cutting, fading, and rotation
- Speed control tools
- Conversion from video to GIF
Pros
- Free app
- Simple interface
Cons
- Lack of updates
- Some users complain about app crash
Funimate Video Editor & Maker
If you want to make some professional-grade video edits quickly, you are welcome to download and use Funimate Video Editor & Maker on your Android device. It’s a free tool to cut videos. It has an easy procedure, and you can cut AVI videos in a few seconds.
Plus, you can use the app to add custom animations, effects, and many other exciting elements. You can share your makes on social media like TikTok, Instagram, and other platforms. Contrarily, the app itself is a community with millions of Funimate-users who share their creations daily. You can also join or watch videos from other creators to learn more about new techniques and trends in video editing.
Features
- Video trimming and splitting
- Animation and cropping
- Filters and AI effects
- Speed adjustment
- Keyframing and video merging
Pros
- Free Android application with several editing tools
- Easy trimming, splitting, and cropping
- Aspect ratio, border, and color customization
- Direct social media sharing
Cons
- Free users cannot use templates
- The free version stamps watermarks on each project
Part 5: Top 3 Free AVI Video Cutter on iPhone
No wonder iPhone’s camera captures high-quality videos. But the problem begins when there’s no free app to cut AVI videos. So if you’re recording great spots, but deep inside, you really want to remove some parts, then these 3 free AVI video cutters will work smoothly on your iPhone.
Cut, Trim, Split Video Editor
Download Cut, Trim, Split Video Editor on your iPhone to delete/cut unwanted portions of your video clips. The tool is also best for trimming iPhone-recorded clips without messing with the frames. Or, if you just want to split the video into multiple parts for your next WhatsApp status, this iPhone app can do that job for you.
The app supports multiple video file types, including MOV, MP4, AVI, MPEG, MPEG-2, and 3GPP
Features
- Easy trimming and cutting video clips
- Splitting big-sized videos into two smaller clips
- Import video from file-sharing platforms, like iCloud, using Wi-Fi
Pros
- Free app for fast video cutting and sharing
- Simple UI interface
Cons
- The free version shows advertisements
Splice - Video Editor & Maker
Splice is an extraordinary video editor that makes it easy to make fully customized and professional videos from your iPhone. The app is also best for video cutting. Besides, it has many interesting features, which you can use from your device.
Features
- Cutting, trimming, and cropping your videos
- Exposure, saturation, and exposure adjustment
- Slow and fast motion with speed ramping option
- Video masking and overlay
- Color correction and text overlays
Pros
- Free basic features, such as video cutting
- iTunes integration
- Supports AVI video input
- User-friendly application
- Access to the music library
- Quick and simple social sharing
Cons
- Output videos require high mobile storage space
Part 6: Top 3 Free AVI Video Cutter Online
Don’t want to install video cutters on your MAC, Windows, smartphone, or any other device? No problem! You can use online video cutters and trimmers to split, cut, or trim your clips for free.
However, the problem still exists in online tools, as not all web-based editors allow importing AVI files. So to save your time and energy, you can directly go to the following online AVI cutters to complete your tasks.
Kapwing
Kapwing is an online video editor best for casual creatives, such as Vloggers and YouTubers. You can use this web-based platform to cut your videos. Gladly, Kapwing supports all AVI incomings. You can upload your AVI video files to this platform and use its trim or split feature. To do that, you need to upload your AVI video and choose the “Trim” or “Split” tool to see the magic. Once done with the trimming process, you can explore Kapwing’s other incredible traits and apply them to your project.
Features
- Video splitting, trimming, and merging
- Audio capturing
- Speed adjustment
- Image and video library
- Text editing and overlay
- Auto-generated subtitles
- Several collaboration tools
- Video creation from scratch
- Templates, shapes, and emojis
- Simple drag-and-drop interface
- Video transitions, plugins, and elements
Pros
- Free online video trimmer
- User-friendly interface
- You can export 30-minutes long projects
- Allows you to export unlimited videos with a watermark
- One watermark-free video export is available each month
Cons
- Cannot export long videos with a free account
- Only 10 minutes transcription limit is available for free users
- You need to purchase a monthly or annual subscription to remove the watermark from multiple videos
Clideo
Clideo is not just a video cutter but an online solution to all your video editing problems. The tool is super popular, with 4 million+ users a month. And why not? This is one of those web-based platforms that allow AVI video files to be imported and exported without converting them into any other formats.
Nevertheless, if you’re only looking for video cutting options, this tool makes your life easy. Simply upload your video, and select the portion of it by setting start and end times. Choose whether you want to delete or extract the selected part from the clip, and hit the “Export” button.
And within a few moments, you can enjoy a trimmed video clip. And if you plan to be more creative, you can look for other Clideo features to make videos more fascinating.
Features
- Video combining and cutting
- Resize and crop clips
- Compress your videos
- Add text and subtitles
- Add music to your video files
- Filters and color correction tools
- Audio mute, cutting, and muting
- Video rotation, flipping, and speed adjustment
Pros
- Basic tools can be used for free
- Best for beginners and intermediate users
- Ideal for AVI videos and also supports other video formats
Cons
- You cannot use the free version regularly
Aspose
Aspose is a free web-based application to cut clips. You can use this tool on any operating system. It supports all major video file formats, including AVI, MKV, MOV, MP4, FLV, WMV, WEBM, and GIF. Additionally, you can use Aspose for various other reasons, such as audio extraction, video resizing, and more.
Features
- Video cutting and compressing
- Looping, rotation, and video merging
- Adding watermarks on videos
- Sound muting
- Speed change and audio addition
Pros
- Aspose is a free online tool
- It offers straightforward options to cut and edit videos
Cons
- No color correction option
- Slow video cutting process
- Lacks timeline and other valuable features
Part 7: Bottom Line
Tired of finding AVI cutters? Relax and try these top 16 AVI video cutters for Windows, MAC, iPhone, Android, and online. Almost all these tools are free to use and are extremely handy. On the other hand, if you want to cut and trim videos professionally, download Filmora and follow the step-by-step guide in this article for making clean cuts.
Part 8: FAQs
Q1. How do I trim an AVI video?
To trim an AVI video file, ensure that the software or tool you use supports AVI input. Generally, you need to upload or import a clip on the program, select the portion of the video, and apply the cut/trim feature to make it happen.
Q2. Which is the best online video cutter?
Kapwing and Clideo are the two best online video cutters you can use for free. Both web-based tools also allow you to cut your AVI videos.
Q3. Which is the best video cutter and joiner software?
Filmora, iMovie, and Kapwing are some of the best video cutters and joiner tools. These video editors are also free to use and come with different features.
Q4. How do I trim an AVI file in Windows 10?
Trimming an AVI video file in Windows 10 is very simple. Launch the Microsoft Photos (Photo App) application on your computer, add clip, and select the “Trim” tool to trim a specific video part.
Q5. How can I cut a video on my computer for free?
MAC and Windows users can download Filmora to cut videos for free. Filmora also offers a wide range of other features to make your clips exciting. Contrarily, Windows users can use the built-in Photo App in Windows 10 or download Gihosoft or Handbrake software to cut clips. Likewise, MAC users can download VideoPad, Xilisoft Video Cutter, or iMovie for free.
Create Hollywood-Style Movies with These 8 Mac Apps
Many video editors will agree that Apple’s Mac computers are perfect for video editing and other creative media arts such as animation. Unlike, Chrome OS, Windows, or Linux, macOS comes with much-noted preferences. This operating system emphasizes on creativity and design and gives the best producing results with top movie maker software.
8 Stunning Movie Creator for Mac
Browsing through the internet, you will find a myriad of movie maker video editors. However, not every tool is compatible with Mac. If you are getting started with video editing on your Mac, the first step is to choose movie maker software that gives high-quality results. Below, you will find some of the best video editing tools to put out short films and movies professionally.
1. Wondershare Filmora - Best Overall
Filmora by Wondershare is a popular video movie maker for Mac with a wide array of transition, trimming, and overlay options. Notable benefits of using Filmora are modern and advanced features. Also, developers in Filmora consistently introduce new updates and features. For instance, they recently introduced a motion tracking feature. Motion tracking maps objects in a frame and enables the video editor to create texts and graphics that follow that motion. Filmora has a straightforward interface, which makes this tool suitable for beginners as well as professional video editors.

For Win 7 or later (64-bit)
For macOS 10.12 or later
The tool supports 4K videos and offers a plethora of options to add effects, styles, and enable editors to customize videos. Filmora is an affordable tool with many elements and animations. With this tool, editors can insert text and add audio to their videos. Here are some top features offered by Wondershare Filmora:
- Layer multiple video clips
- Video stabilization
- Audio equalizer
- Advanced text editing
- Speed control
- Mosaic (blurring)
- Noise removal
- Screen recording
2. Adobe Premiere Pro – Best for Professionals
Adobe Premiere is another popular platform suitable for video editing. Like Filmora, Adobe Premiere also offers a convenient and simple interface. With embedded layouts, you can use this movie video maker for different purposes. Furthermore, Adobe Premiere also offers complete customization. You can arrange and remove windows and tabs according to your preference.

With a great number of presets and codecs, you can easily export videos in different formats. While exporting, you can customize the settings according to your needs, although default settings also offer decent quality. Besides coding formats, Adobe Premiere boasts numerous templates, plug-ins, and scripts to simplify the working process and include professional elements to your video. Exciting features of Adobe Premiere includes:
- Motion graphics templates
- Simultaneous projects
- Transitions
- Effects
- VR rotate sphere
- VR audio editing
- VR editing
- Multiple formats support
3. Shotcut – Best Open Source Software
Shotcut is a simple tool with customized filters that enable you to create collage videos. This movie video maker enables you to adjust video and audio quality and change the volume. Furthermore, you can export videos in different folders such as MJpeg, and WebM.

With Shotcut, you can export videos in Lossless mode. This mode keeps the original quality of the videos after the export, which is suitable for professional tasks. This means that you can save time by downloading high-quality videos on default settings. Using this movie creator, you can add filters and effects to enhance the video quality and color grading. Shotcut movie maker offers the following features:
- Multiple audio features
- Video effects
- Hardware support
- Display and monitoring
- Codec independent
- Cross-platform
4. Adobe Premiere Elements – Best for Beginners
Adobe Premiere Elements is a beginners’ version of Premiere Pro. This doesn’t mean that it is less capable, but the tool offers simple features for high-quality tasks. That’s why this video movie makeris highly suitable for beginners. So, if you are just starting with video editing, you should consider trying Premiere elements.

Premiere elements offers a wide array of tools to compile multiple videos, audio, and images into a single video. There are few tools available to scale video quality. This movie video maker is compatible with Mac as well as PC. Premiere Elements also helps you add fun minor effects to maintain flow and spice up the video. The tool uses Sensei AI technology that automatically keeps the important video elements in the frame through re-framing.
If you edit videos for social media platforms, using Adobe Premiere elements would be ideal. It enables you to create a social-friendly square or vertical format of videos. Furthermore, you can include backgrounds, mattes, and motion titles in the videos. Abode Premiere Elements offers the following features:
- Animated overlays
- Auto reframe
- New slideshow styles
- Compress video output
- Shadow and highlight guided edit
- Ample video effects
- Cross-platform support
5. Final Cut Pro – Best Tool for Timeline
Final Cut is a convenient and powerful movie creator tool produced by Apple Company. This platform gives a new approach to video editing and has a flexible Magnetic Timeline. The interface is quite uncommon with fixed windows. You can conveniently add new videos and organize clips with Final Cut Pro, and the video clips you no longer use will easily disappear.

The Clip Connections feature enables you to join basic clips with other elements. The downside of this tool is that you can’t use the keyboard to enter the parameters for color correction. Instead, you have to use a mouse for every modification. This can be overwhelming sometimes, especially for minimum correction. Some features of Final Cut Pro include:
- Supports 360° VR content
- Supports 4K XAVC-S format
- 3D editing
- Motion tracking
- Exports to video ()
6. Blender – Best for 3D
Blender is an open-source and free-to-use movie maker video editor. A notable feature of this tool is 3D rendering. It offers excellent functions to work with movable objects such as animation, opening UV, training, modeling, interface, and shading. The video movie maker offers a highly-technological interface, unlike other similar programs. Blender is perfect for 3D enthusiasts, designers, and artists, as it offers professional 3D quality. Some popular Blender features are:
- Modeling
- Sculpting
- Rendering
- VFX
- Animation and rigging
- Scripting

7. OpenShot – Best for Open-Source
OpenShot is another open-source movie video maker but the interface and features are quite different than Blender. It offers drag-and-drop options and a simple interface. This Mac video editing tool creates a perfect balance with simplicity and advanced features. With this tool, you can include wide-ranging transition effects and elements and create high-quality videos. OpenShot offers:
- Desktop integration
- Keyframe animation
- Trim and slice
- Slow-motion and time effect
- Audio waveform

8. Lightworks – Best Tool for Fast Rendering
You can download Lightworks for free on your Mac and include unlimited videos and audio tracks in them. The post-promotion video processing feature performed in real-time saves a tremendous amount of time. With the auto-save feature, you don’t have to worry about losing your progress. Lightworks also offers screen capture features to create YouTube tutorial videos. Features of Lightworks movie maker tool are:
- Unlimited sources
- Live cut
- Unique sync group feature.
- Sync with edits.
- Sync to time code or lock frame

Closing Word
Hopefully, now you can easily choose the best movie maker from the above list and scale your editing skills. Our top pick, Wondershare Filmora is budget-friendly movie maker software with an easy-to-use interface and creative features. There are wide-ranging transitions and effects such as speed blur, ripple and dissolve, making this software a unique option.
Versatile Video Editor - Wondershare Filmora
An easy yet powerful editor
Numerous effects to choose from
Detailed tutorials provided by the official channel
For macOS 10.12 or later
The tool supports 4K videos and offers a plethora of options to add effects, styles, and enable editors to customize videos. Filmora is an affordable tool with many elements and animations. With this tool, editors can insert text and add audio to their videos. Here are some top features offered by Wondershare Filmora:
- Layer multiple video clips
- Video stabilization
- Audio equalizer
- Advanced text editing
- Speed control
- Mosaic (blurring)
- Noise removal
- Screen recording
2. Adobe Premiere Pro – Best for Professionals
Adobe Premiere is another popular platform suitable for video editing. Like Filmora, Adobe Premiere also offers a convenient and simple interface. With embedded layouts, you can use this movie video maker for different purposes. Furthermore, Adobe Premiere also offers complete customization. You can arrange and remove windows and tabs according to your preference.
With a great number of presets and codecs, you can easily export videos in different formats. While exporting, you can customize the settings according to your needs, although default settings also offer decent quality. Besides coding formats, Adobe Premiere boasts numerous templates, plug-ins, and scripts to simplify the working process and include professional elements to your video. Exciting features of Adobe Premiere includes:
- Motion graphics templates
- Simultaneous projects
- Transitions
- Effects
- VR rotate sphere
- VR audio editing
- VR editing
- Multiple formats support
3. Shotcut – Best Open Source Software
Shotcut is a simple tool with customized filters that enable you to create collage videos. This movie video maker enables you to adjust video and audio quality and change the volume. Furthermore, you can export videos in different folders such as MJpeg, and WebM.
With Shotcut, you can export videos in Lossless mode. This mode keeps the original quality of the videos after the export, which is suitable for professional tasks. This means that you can save time by downloading high-quality videos on default settings. Using this movie creator, you can add filters and effects to enhance the video quality and color grading. Shotcut movie maker offers the following features:
- Multiple audio features
- Video effects
- Hardware support
- Display and monitoring
- Codec independent
- Cross-platform
4. Adobe Premiere Elements – Best for Beginners
Adobe Premiere Elements is a beginners’ version of Premiere Pro. This doesn’t mean that it is less capable, but the tool offers simple features for high-quality tasks. That’s why this video movie makeris highly suitable for beginners. So, if you are just starting with video editing, you should consider trying Premiere elements.
Premiere elements offers a wide array of tools to compile multiple videos, audio, and images into a single video. There are few tools available to scale video quality. This movie video maker is compatible with Mac as well as PC. Premiere Elements also helps you add fun minor effects to maintain flow and spice up the video. The tool uses Sensei AI technology that automatically keeps the important video elements in the frame through re-framing.
If you edit videos for social media platforms, using Adobe Premiere elements would be ideal. It enables you to create a social-friendly square or vertical format of videos. Furthermore, you can include backgrounds, mattes, and motion titles in the videos. Abode Premiere Elements offers the following features:
- Animated overlays
- Auto reframe
- New slideshow styles
- Compress video output
- Shadow and highlight guided edit
- Ample video effects
- Cross-platform support
5. Final Cut Pro – Best Tool for Timeline
Final Cut is a convenient and powerful movie creator tool produced by Apple Company. This platform gives a new approach to video editing and has a flexible Magnetic Timeline. The interface is quite uncommon with fixed windows. You can conveniently add new videos and organize clips with Final Cut Pro, and the video clips you no longer use will easily disappear.
The Clip Connections feature enables you to join basic clips with other elements. The downside of this tool is that you can’t use the keyboard to enter the parameters for color correction. Instead, you have to use a mouse for every modification. This can be overwhelming sometimes, especially for minimum correction. Some features of Final Cut Pro include:
- Supports 360° VR content
- Supports 4K XAVC-S format
- 3D editing
- Motion tracking
- Exports to video ()
6. Blender – Best for 3D
Blender is an open-source and free-to-use movie maker video editor. A notable feature of this tool is 3D rendering. It offers excellent functions to work with movable objects such as animation, opening UV, training, modeling, interface, and shading. The video movie maker offers a highly-technological interface, unlike other similar programs. Blender is perfect for 3D enthusiasts, designers, and artists, as it offers professional 3D quality. Some popular Blender features are:
- Modeling
- Sculpting
- Rendering
- VFX
- Animation and rigging
- Scripting
7. OpenShot – Best for Open-Source
OpenShot is another open-source movie video maker but the interface and features are quite different than Blender. It offers drag-and-drop options and a simple interface. This Mac video editing tool creates a perfect balance with simplicity and advanced features. With this tool, you can include wide-ranging transition effects and elements and create high-quality videos. OpenShot offers:
- Desktop integration
- Keyframe animation
- Trim and slice
- Slow-motion and time effect
- Audio waveform
8. Lightworks – Best Tool for Fast Rendering
You can download Lightworks for free on your Mac and include unlimited videos and audio tracks in them. The post-promotion video processing feature performed in real-time saves a tremendous amount of time. With the auto-save feature, you don’t have to worry about losing your progress. Lightworks also offers screen capture features to create YouTube tutorial videos. Features of Lightworks movie maker tool are:
- Unlimited sources
- Live cut
- Unique sync group feature.
- Sync with edits.
- Sync to time code or lock frame
Closing Word
Hopefully, now you can easily choose the best movie maker from the above list and scale your editing skills. Our top pick, Wondershare Filmora is budget-friendly movie maker software with an easy-to-use interface and creative features. There are wide-ranging transitions and effects such as speed blur, ripple and dissolve, making this software a unique option.
Versatile Video Editor - Wondershare Filmora
An easy yet powerful editor
Numerous effects to choose from
Detailed tutorials provided by the official channel
Also read:
- Updated Windows Movie Maker Free Download A Comprehensive Guide for 2024
- 2024 Approved Reaction Video Mastery The Top Tools and Software
- New 2024 Approved Best iMovie Equivalent Apps for Android Top Picks
- Updated Troubleshooting Final Cut Pro X Crashes A Step-by-Step Guide
- New Videopad Video Editor Is It Worth the Investment, In 2024
- Updated The Best Audio Converters A Comprehensive Review
- Updated 2024 Approved Final Cut Pro Color Correction Tips, Tricks, and Techniques
- 2024 Approved Mastering FCPX The Most Comprehensive Tutorial Collection
- Updated In 2024, FCP Aspect Ratio Adjustment A Beginners Guide (Updated )
- Updated Uncovered The Best Mac Speech Recognition Apps You Never Knew Existed
- Updated Watermark-Less Video Combining 7 Expert-Approved Tools for 2024
- New In 2024, Unlock Smooth Editing Premiere Pro System Requirements Explained
- Updated The Best of the Rest 10 Vegas Pro Alternatives for Mac Video Editing Enthusiasts for 2024
- Updated Quickly Edit Video Speed in Camtasia for 2024
- Updated 2024 Approved Lumafusion for Mac Install It or Get Alternatives
- Updated Time Lapse Like a Pro Expert Techniques for Final Cut Pro Users
- Updated 2024 Approved Simplify Your Workflow Top Aspect Ratio Calculators Online
- New From Novice to Star The 5 Best Lip Sync Apps for Creating Engaging Videos for 2024
- New No-Cost Video Editing Solutions Top iMovie Alternatives for 2024
- Updated In 2024, Download Now Top 20 Premiere Pro Title Templates
- 2024 Approved Top-Rated AVI Editor for Windows 8 Advanced Video Editing Features
- New 2024 Approved Adjust Video Playback Best Free and Paid Speed Changers for Windows & Mac
- In 2024, Resize, Crop, and Convert Top Online Image Ratio Tools
- Updated MP4 File Editor for PC Quickly Trim, Cut, and Merge Videos
- New Take Your Videos to the Next Level FCPX Stabilization Secrets
- New 10 Essential Video Rotation Software for Web and Social Media for 2024
- In 2024, Mobile Video Magic Best Apps for Animating Text on Your Phone
- 2024 Approved Quality Matters A Step-by-Step Guide to Converting Video to MP3
- New In 2024, Easy Video Editor for Mac MKVtoolnix Review
- New Video Editing on a Budget Free Software for 32-Bit Windows for 2024
- New In 2024, Loop Videos Without Spending a Dime Best Free Tools for Windows and Mac
- New Brighten Up Best Video Editing Apps for Mobile Devices for 2024
- New Unleash Your Creativity 5 Best Lip Sync Apps for Making Epic Videos
- New The FCPX Fix-It Guide Solving Common Problems and Optimizing Workflow
- New 2024 Approved Discover the Truth Is VN Video Editor Pro a Top-Notch Video Editor?
- Updated 2024 Approved Get Lumafusion for Mac OS Explore Alternative Video Editors
- New 2024 Approved Elevate Your Video Content with Advanced 64-Bit Editing Capabilities
- How To Exit DFU Mode on iPhone 6 Plus? | Dr.fone
- What To Do if Your Vivo S17 Auto Does Not Work | Dr.fone
- In 2024, How to Track Nokia C210 by Phone Number | Dr.fone
- Process of Screen Sharing OnePlus 12 to PC- Detailed Steps | Dr.fone
- How To Get Out of Recovery on iPhone 14? | Dr.fone
- What is Fake GPS Location Pro and Is It Good On Apple iPhone 12 Pro? | Dr.fone
- In 2024, How Do You Unlock your Apple iPhone XR? Learn All 4 Methods | Dr.fone
- New How To Create A Green Screen Video In After Effects for 2024
- 3 Ways for Android Pokemon Go Spoofing On Realme GT 5 (240W) | Dr.fone
- Thinking About Changing Your Netflix Region Without a VPN On Infinix Hot 30i? | Dr.fone
- How to Perform Hard Reset on Poco F5 5G? | Dr.fone
- Elevate Your Videos Best Apple Video Editing Apps for 2024
- 6 Proven Ways to Unlock Xiaomi Civi 3 Disney 100th Anniversary Edition Phone When You Forget the Password
- Adobe Premiere Pro Essentials 6 Time-Saving Tips for Better Video Edits
- In 2024, How does the stardust trade cost In pokemon go On Apple iPhone 12 mini? | Dr.fone
- Remove Vivo Lock Screen without Password(Vivo Y200)
- In 2024, Forgot Pattern Lock? Heres How You Can Unlock Xiaomi Redmi Note 12 Pro 5G Pattern Lock Screen
- Title: New Unlock Adobe Premieres Full Potential Top 15 Plugins (Free Download)
- Author: Isabella
- Created at : 2024-05-19 13:03:37
- Updated at : 2024-05-20 13:03:37
- Link: https://video-creation-software.techidaily.com/new-unlock-adobe-premieres-full-potential-top-15-plugins-free-download/
- License: This work is licensed under CC BY-NC-SA 4.0.
