
:max_bytes(150000):strip_icc():format(webp)/tiktok-smart-tv-12dcac76114b4747b9b3db8bb3551ddc.jpg)
New Vertical by Design Optimizing Your Mobile Video Strategy
Vertical by Design: Optimizing Your Mobile Video Strategy
Best Practices for Creating Phone Aspect Ratio Vertical on Your Smartphone
An easy yet powerful editor
Numerous effects to choose from
Detailed tutorials provided by the official channel
When you’re taking a snapshot of someone or something and posting it to social media, you’ll need to decide if it’ll be a portrait or a landscape orientation. And that’s where the knowledge regarding the phone aspect ratio vertical comes in!

This post will dive into the rise of the phone aspect ratio vertical, including best practices on using phone ratio calculator and mobile vertical video size based on its final viewing platforms such as YouTube, Instagram, or broadcast.
In this article
01 [Why Vertical Videos Are in the Frame?](#Part 1)
02 [Different Aspect Ratios on Mobile Screens](#Part 2)
03 [Tips to Shoot a Vertical Video](#Part 3)
04 [Top 6 Practices for Creating Phone Aspect Ratio Vertical on Your Smartphone](#Part 4)
Part 1 Why Vertical Videos Are in the Frame?
Did you know that there are six aspect ratios in total for videos and photos that marketers and creators use? These aspect ratios are 9:16, 16:9, 1:1, 4:3, 3:2, 21:9. The first way to choose the right aspect ratio for your video is whether the video needs to be vertical or horizontal.
A video that’s portrait or vertical mode is taller than it is wide. The entire screen is devoted to vertical video capturing while gaining attention.
Smartphones are to be held vertically, and although you can view media always horizontally, it’s far simpler for watchers to consume media while keeping their mobile phones upright.
Vertical videos are available in different sizes, but the most standard instances come in the 9:16 aspect ratio. While the traditional format of watching videos on phones has been horizontal with an aspect ratio of 16:9, vertical videos are taller than more comprehensive, hence the reversed aspect ratio. And, this is the main reason you see vertical videos in the frame, and thus, they need to be fixed or rightly shot in terms of ideal phone aspect ratio vertical.
Part 2 Different Aspect Ratios on Mobile Screens
The aspect ratio also measures how tall or wide a display is. Still, it shouldn’t be mistaken for ‘display/screen size’ calculated by diagonally measuring throughout the screen.
The phone aspect ratio vertical is commonly written in proportions with the more petite figure on the right side and the more prominent figure on the left-hand side. It’s also sometimes called a decimal, the more prominent figure divided by, the more petite figure.
It means that a display aspect ratio of 16:9 can also be called an aspect ratio of 1.78, i.e., 16/9.
Types of Aspect ratio
● 16:9 Aspect Ratio
16:9 is one of the most common aspect ratios used on smartphones. Sometimes showcased as 1.78 or 4²:3², the aspect ratio has become typical for smartphones and other devices since 2010.
It generally means there will be 16 pixels in one direction for every 9 pixels in the other for a device with a 16:9 display.

Devices with a 16:9 aspect ratio are usually broad, and they became the standard aspect ratio for smartphones because most contents are also available in the exact format. So you would enjoy videos and gaming in full widescreen quality on a 16:9 aspect ratio device.
On the other hand, you’ll experience the “Letterboxing effect“ on devices that aren’t available in 16:9 aspect ratios and where black bars/bands appear at the bottom and the top of the content you are wandering.

● 18:9 Aspect ratio
This 18:9 aspect ratio was born out of the need to maximize the size of displays without increasing the dimensions of phone sizes.
The narrow design of 18:9 aspect ratio devices assisted for better one-hand grip, smooth multitasking, enhanced usability, and more screen real estate, etc. Yet, because contents are highly present in the 16:9 aspect ratio, there will be “black bands” at the top, bottom or to your display’s right or left.

The 18:9 aspect ratio allows for convenient usage of smartphones, provided we put the content-cropping and letterboxing aside.
● 19:9 Aspect ratio
19:9 is another smartphone aspect ratio that is becoming increasingly famous and used by top OEMs like Samsung, Huawei, ASUS, and Apple on their flagship devices.
The smartphones with a 19:9 aspect ratio are available with increased height and 19 pixels in single direction for every 9 pixels in the other. Similar to 18:9, devices with a 19:9 aspect ratio generally have pretty non-existent and slimmer bezels, but you’ll enjoy vast screen real estate with the latter.
Understanding iPhone Vertical Video Dimensions
Apple boasts a 16:9 screen for the versions of iPhone 5 onwards. Most Google/Android phones already had a 16:9 screen at that point. Thus, to export a vertical video, you would want it to be 9:16. (16:9 standing up!) and it’s the ideal size for iPhone vertical video dimensions.
The highest quality vertical video’s output is 720 Horizontal by 1280 vertical for 1080p (1080X1920).
The highest quality vertical video’s output is 576 horizontal by 1024 vertical for 720p (720X1280).
Vertical Phone Aspect Ratio for Video
Let’s now understand the mobile vertical video size! Vertical video is pretty higher than it is wide. Instead of being shown in a landscape orientation or widescreen format, the way video has traditionally intended for television and cinema and television, and the vertical video rotated by 90 degrees.

Hold your phone upright and record video in a 9:16 aspect ratio. Hence, the name vertical video is said to be!
It’s because if you horizontally hold your phone, the viewable screen area is 16:9 aspect ratio. The same standard is for most HDTV, video production, and cinema screen sizes.
Part 3 Tips to Shoot a Vertical Video
Besides using the photo ratio calculator, we’d like to enlist some tips on getting started with your phone aspect ratio vertical shooting.
1 – High production quality is not essential
Yes, the content is the king, and people or the end customers may not notice your video quality than the content. So, don’t be afraid when you start and move ahead with your DIY budget.
2 – Use the Ideal Dimensions
Whether it’s iPhone vertical video dimensions or other Android and Windows devices, you need to use the ideal dimensions already discussed above.
3 – Engage your audience better
You can incorporate little details within the video and engage your audience better. You can also add captions and burn them within the video.
4 – Optimize vertical videos
You can optimize vertical videos for viewing without sound. Try watching your videos without audio to see if they still make sense without that context. You likely won’t achieve the same excellent results made possible with good video marketing if they don’t.
5 – Capture Attention
Yes, you need to attract the audience and capture their attention within seconds. And, it’s the only or one of the best tricks t get your audience hooked for the long term. Don’t underestimate the significance of storytelling, and you can thus add them for creative looks.
Part 4 Top 6 Practices for Creating Phone Aspect Ratio Vertical on Your Smartphone
Are you looking to capture the video in the correct phone aspect ratio vertical? In this section, we will discuss a few helpful tips that will assist you in shooting a better vertical video in any condition you want to sort.
1 – Shoot in the desired or ideal aspect ratio
Any video bigger than the aspect ratio of 1:1 is vertical video.
It’s possible to create vertical videos two ways:
● By framing a camera in portrait mode.
● By rendering it vertically by scaling or cutting the video.
2 – Split the screen
You can use the tall height of the vertical frame to stack horizontal clips on top of each other creatively.
Clips can be related in appearance and content or appear to mend into one another. Various music videos have also used this technique.
You can also try merging various diagonal lines or clips for a unique look.
3 - Fill the vertical space
You can quickly fill vacant space in the frame automatically by getting closer to the subject.

When the camera is angled down and raised high, you automatically get a deep frame for filming long shots that fill space.
The above-the-head perspective provides an attractive and latest POV that serves the exact purpose.

4 - Try not to shake (or use a gimbal or a selfie stick)
While watching a video, jerking camera movements are almost always disturbing and distracting. This must be avoided quickly from side to side when creating vertical videos with minimized space on sides.
While a normal 360-degree or pan rotation is outstanding (and even crucial), cameras cannot manage the data amount they must process once they begin to move too quickly.
Slow down when in doubt!

5 - Remember to resize as per the platform
You don’t essentially have to shoot everything at eye level or arm’s length when you shoot videos vertically.
Changing your angles and shot length will assist make your videos more interactive, and you can create something compelling out of them within the video frame.
Screen recordings are usually horizontal, but they will be vertically viewed when you upload them to Instagram. They also make sure the edges did not get cut off while uploading them and the writing is still legible.
6 - Add graphics, fun text, GIFs, or stickers
Use text that complements visuals. Make sure your text isn’t highlighting your subject. Any graphics elements, such as stickers or emojis, should follow this exact approach.
Line them up where they’ll improve your video and scale them up as required.
Pro Tip: Use Wondershare Filmora Video Editor to get your desired phone aspect ratio vertical

Wondershare Filmora - Best Video Editor for Mac/Windows
5,481,435 people have downloaded it.
Build unique custom animations without breaking a sweat.
Focus on creating epic stories and leave the details to Filmora’s auto features.
Start a creative adventure with drag & drop effects and endless possibilities.
Filmora simplifies advanced features to save you time and effort.
Filmora cuts out repetition so you can move on to your next creative breakthrough.
Filmora provides various functions to resize your video, which means you can change video bitrate or directly crop your video when exporting. Despite resizing a video, you can also zoom your video to highlight the best section of your video. Here are certain features or functions of Filmora to resize a video. Download it now and have a try!
● Resize the video size and aspect ratio of video;
● Crop/trim/cut video to highlight an object within the video;
● Add multiple video effects
● Export the edited video portion to a mobile device, DVD, or YouTube;
● Supported OS: Mac OS X (above 10.10) and Windows (Windows 10 included).
Resize Video by Cropping
Step 1: Upload the video to the program
Firstly, upload your media via the “Import” tab or drag and drop it from the Windows File Explorer tab to the User’s Album.
Thereafter, drag videos from the User’s Album to the Timeline.

Step 2: Crop the video
You can aim at a specific part of the video by cropping and resizing your video display dimensions. Hit the added video on Timeline, a “Crop, and Zoom” button to cut the video. It will appear in the options menu.
Hit it to bring up the editing panel and crop videos.

Hit the Crop tab. Just hover the mouse to move and resize the marquee to decide how to crop the original video.
You have five options while video cropping at the bottom to assist you: Custom, 16:9, 4:3, 1:1, and 9:16 aspect radio.
Select Aspect Ratio of Project
After you launch Filmora, you can select the project aspect ratio. There are options among 16:9 (widescreen), 4:3 (standard), 9:16 (portrait), 1:1 (Instagram). Select the one you desire and begin by clicking the New Project.

Key Takeaways from This Episode
● Understanding phone aspect ratio vertical on both the Windows and iPhone.
● Different types of mobile vertical video sizes.
● Best six practices to shoot the video in the proper phone aspect ratio vertical.
When you’re taking a snapshot of someone or something and posting it to social media, you’ll need to decide if it’ll be a portrait or a landscape orientation. And that’s where the knowledge regarding the phone aspect ratio vertical comes in!
This post will dive into the rise of the phone aspect ratio vertical, including best practices on using phone ratio calculator and mobile vertical video size based on its final viewing platforms such as YouTube, Instagram, or broadcast.
In this article
01 [Why Vertical Videos Are in the Frame?](#Part 1)
02 [Different Aspect Ratios on Mobile Screens](#Part 2)
03 [Tips to Shoot a Vertical Video](#Part 3)
04 [Top 6 Practices for Creating Phone Aspect Ratio Vertical on Your Smartphone](#Part 4)
Part 1 Why Vertical Videos Are in the Frame?
Did you know that there are six aspect ratios in total for videos and photos that marketers and creators use? These aspect ratios are 9:16, 16:9, 1:1, 4:3, 3:2, 21:9. The first way to choose the right aspect ratio for your video is whether the video needs to be vertical or horizontal.
A video that’s portrait or vertical mode is taller than it is wide. The entire screen is devoted to vertical video capturing while gaining attention.
Smartphones are to be held vertically, and although you can view media always horizontally, it’s far simpler for watchers to consume media while keeping their mobile phones upright.
Vertical videos are available in different sizes, but the most standard instances come in the 9:16 aspect ratio. While the traditional format of watching videos on phones has been horizontal with an aspect ratio of 16:9, vertical videos are taller than more comprehensive, hence the reversed aspect ratio. And, this is the main reason you see vertical videos in the frame, and thus, they need to be fixed or rightly shot in terms of ideal phone aspect ratio vertical.
Part 2 Different Aspect Ratios on Mobile Screens
The aspect ratio also measures how tall or wide a display is. Still, it shouldn’t be mistaken for ‘display/screen size’ calculated by diagonally measuring throughout the screen.
The phone aspect ratio vertical is commonly written in proportions with the more petite figure on the right side and the more prominent figure on the left-hand side. It’s also sometimes called a decimal, the more prominent figure divided by, the more petite figure.
It means that a display aspect ratio of 16:9 can also be called an aspect ratio of 1.78, i.e., 16/9.
Types of Aspect ratio
● 16:9 Aspect Ratio
16:9 is one of the most common aspect ratios used on smartphones. Sometimes showcased as 1.78 or 4²:3², the aspect ratio has become typical for smartphones and other devices since 2010.
It generally means there will be 16 pixels in one direction for every 9 pixels in the other for a device with a 16:9 display.
Devices with a 16:9 aspect ratio are usually broad, and they became the standard aspect ratio for smartphones because most contents are also available in the exact format. So you would enjoy videos and gaming in full widescreen quality on a 16:9 aspect ratio device.
On the other hand, you’ll experience the “Letterboxing effect“ on devices that aren’t available in 16:9 aspect ratios and where black bars/bands appear at the bottom and the top of the content you are wandering.
● 18:9 Aspect ratio
This 18:9 aspect ratio was born out of the need to maximize the size of displays without increasing the dimensions of phone sizes.
The narrow design of 18:9 aspect ratio devices assisted for better one-hand grip, smooth multitasking, enhanced usability, and more screen real estate, etc. Yet, because contents are highly present in the 16:9 aspect ratio, there will be “black bands” at the top, bottom or to your display’s right or left.
The 18:9 aspect ratio allows for convenient usage of smartphones, provided we put the content-cropping and letterboxing aside.
● 19:9 Aspect ratio
19:9 is another smartphone aspect ratio that is becoming increasingly famous and used by top OEMs like Samsung, Huawei, ASUS, and Apple on their flagship devices.
The smartphones with a 19:9 aspect ratio are available with increased height and 19 pixels in single direction for every 9 pixels in the other. Similar to 18:9, devices with a 19:9 aspect ratio generally have pretty non-existent and slimmer bezels, but you’ll enjoy vast screen real estate with the latter.
Understanding iPhone Vertical Video Dimensions
Apple boasts a 16:9 screen for the versions of iPhone 5 onwards. Most Google/Android phones already had a 16:9 screen at that point. Thus, to export a vertical video, you would want it to be 9:16. (16:9 standing up!) and it’s the ideal size for iPhone vertical video dimensions.
The highest quality vertical video’s output is 720 Horizontal by 1280 vertical for 1080p (1080X1920).
The highest quality vertical video’s output is 576 horizontal by 1024 vertical for 720p (720X1280).
Vertical Phone Aspect Ratio for Video
Let’s now understand the mobile vertical video size! Vertical video is pretty higher than it is wide. Instead of being shown in a landscape orientation or widescreen format, the way video has traditionally intended for television and cinema and television, and the vertical video rotated by 90 degrees.
Hold your phone upright and record video in a 9:16 aspect ratio. Hence, the name vertical video is said to be!
It’s because if you horizontally hold your phone, the viewable screen area is 16:9 aspect ratio. The same standard is for most HDTV, video production, and cinema screen sizes.
Part 3 Tips to Shoot a Vertical Video
Besides using the photo ratio calculator, we’d like to enlist some tips on getting started with your phone aspect ratio vertical shooting.
1 – High production quality is not essential
Yes, the content is the king, and people or the end customers may not notice your video quality than the content. So, don’t be afraid when you start and move ahead with your DIY budget.
2 – Use the Ideal Dimensions
Whether it’s iPhone vertical video dimensions or other Android and Windows devices, you need to use the ideal dimensions already discussed above.
3 – Engage your audience better
You can incorporate little details within the video and engage your audience better. You can also add captions and burn them within the video.
4 – Optimize vertical videos
You can optimize vertical videos for viewing without sound. Try watching your videos without audio to see if they still make sense without that context. You likely won’t achieve the same excellent results made possible with good video marketing if they don’t.
5 – Capture Attention
Yes, you need to attract the audience and capture their attention within seconds. And, it’s the only or one of the best tricks t get your audience hooked for the long term. Don’t underestimate the significance of storytelling, and you can thus add them for creative looks.
Part 4 Top 6 Practices for Creating Phone Aspect Ratio Vertical on Your Smartphone
Are you looking to capture the video in the correct phone aspect ratio vertical? In this section, we will discuss a few helpful tips that will assist you in shooting a better vertical video in any condition you want to sort.
1 – Shoot in the desired or ideal aspect ratio
Any video bigger than the aspect ratio of 1:1 is vertical video.
It’s possible to create vertical videos two ways:
● By framing a camera in portrait mode.
● By rendering it vertically by scaling or cutting the video.
2 – Split the screen
You can use the tall height of the vertical frame to stack horizontal clips on top of each other creatively.
Clips can be related in appearance and content or appear to mend into one another. Various music videos have also used this technique.
You can also try merging various diagonal lines or clips for a unique look.
3 - Fill the vertical space
You can quickly fill vacant space in the frame automatically by getting closer to the subject.
When the camera is angled down and raised high, you automatically get a deep frame for filming long shots that fill space.
The above-the-head perspective provides an attractive and latest POV that serves the exact purpose.
4 - Try not to shake (or use a gimbal or a selfie stick)
While watching a video, jerking camera movements are almost always disturbing and distracting. This must be avoided quickly from side to side when creating vertical videos with minimized space on sides.
While a normal 360-degree or pan rotation is outstanding (and even crucial), cameras cannot manage the data amount they must process once they begin to move too quickly.
Slow down when in doubt!
5 - Remember to resize as per the platform
You don’t essentially have to shoot everything at eye level or arm’s length when you shoot videos vertically.
Changing your angles and shot length will assist make your videos more interactive, and you can create something compelling out of them within the video frame.
Screen recordings are usually horizontal, but they will be vertically viewed when you upload them to Instagram. They also make sure the edges did not get cut off while uploading them and the writing is still legible.
6 - Add graphics, fun text, GIFs, or stickers
Use text that complements visuals. Make sure your text isn’t highlighting your subject. Any graphics elements, such as stickers or emojis, should follow this exact approach.
Line them up where they’ll improve your video and scale them up as required.
Pro Tip: Use Wondershare Filmora Video Editor to get your desired phone aspect ratio vertical
Wondershare Filmora - Best Video Editor for Mac/Windows
5,481,435 people have downloaded it.
Build unique custom animations without breaking a sweat.
Focus on creating epic stories and leave the details to Filmora’s auto features.
Start a creative adventure with drag & drop effects and endless possibilities.
Filmora simplifies advanced features to save you time and effort.
Filmora cuts out repetition so you can move on to your next creative breakthrough.
Filmora provides various functions to resize your video, which means you can change video bitrate or directly crop your video when exporting. Despite resizing a video, you can also zoom your video to highlight the best section of your video. Here are certain features or functions of Filmora to resize a video. Download it now and have a try!
● Resize the video size and aspect ratio of video;
● Crop/trim/cut video to highlight an object within the video;
● Add multiple video effects
● Export the edited video portion to a mobile device, DVD, or YouTube;
● Supported OS: Mac OS X (above 10.10) and Windows (Windows 10 included).
Resize Video by Cropping
Step 1: Upload the video to the program
Firstly, upload your media via the “Import” tab or drag and drop it from the Windows File Explorer tab to the User’s Album.
Thereafter, drag videos from the User’s Album to the Timeline.
Step 2: Crop the video
You can aim at a specific part of the video by cropping and resizing your video display dimensions. Hit the added video on Timeline, a “Crop, and Zoom” button to cut the video. It will appear in the options menu.
Hit it to bring up the editing panel and crop videos.
Hit the Crop tab. Just hover the mouse to move and resize the marquee to decide how to crop the original video.
You have five options while video cropping at the bottom to assist you: Custom, 16:9, 4:3, 1:1, and 9:16 aspect radio.
Select Aspect Ratio of Project
After you launch Filmora, you can select the project aspect ratio. There are options among 16:9 (widescreen), 4:3 (standard), 9:16 (portrait), 1:1 (Instagram). Select the one you desire and begin by clicking the New Project.
Key Takeaways from This Episode
● Understanding phone aspect ratio vertical on both the Windows and iPhone.
● Different types of mobile vertical video sizes.
● Best six practices to shoot the video in the proper phone aspect ratio vertical.
Free and Fabulous: 20 Adobe Premiere Intro Templates
Top 20 Adobe Premiere Title/Intro Templates [Free Download]

Benjamin Arango
Mar 29, 2024• Proven solutions
One of the things that can make your output stand out from the crowd is the titles. Many people think creating eye-catching title effects is beyond them, but with Premiere Pro, you really couldn’t be more wrong.
As Premiere Pro doesn’t have built-in templates, the ability to import free Premiere Pro templates is a must. Anyone need to find a custom title style that suits the project and looks professional and carries impact.
The great thing is that there are many of these resources that are offered entirely free! If you don’t know how to add text/title to Adobe Premiere, here are steps to add text resources .
In this article, we will share with you 20 Free to download Title Templates for Premiere Pro.
- Part1: Top 15 Free Adobe Premiere Pro Title Templates
- Part2: Best 5 Premiere Pro Intro Templates Free Download
- Part3: How to Import and Customize Title Templates in Premiere
You may also like: 10 Free Star Wars Fonts to Make Your Video Amazing
Part 1: Top 15 Free Adobe Premiere Title Templates
Adding the finishing touches to a project, like creating the opening titles or end credits, is often not at the top of anyone’s priority list during the video editing process.
Nonetheless, making a unique opening sequence along with impressive animations in Adobe Premiere Pro can be a time-consuming endeavor, so instead of spending countless hours on producing a perfect combination of text and images, you can just download a title template from the Internet.
1 Premier Pro
Jarle Leirpoll runs this site, and it is a treasure trove of information, help, and advice on Premiere from a man who wrote the book (literally, it’s for sale on the site!) on Premiere.
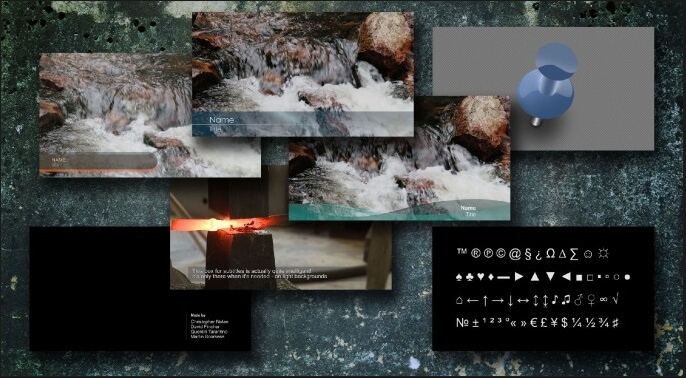
His first title collection is consisting of 8 templates, including Lower Thirds templates, end credit template, and some special characters. However, it well worth a look around the site as there is plenty more free stuff including presets, and a whole range of tips and tricks to help with your editing.
Features:
- Free Premiere Pro templates to download
- Easy to import the title template to Premiere
- 100% ready to use
In case that you’re just a beginner of video editing software, you can start with Wondershare Filmora (Latest Filmora version 11) to add text to videos, which is powerful but easy-to-use for green hands. Download the Wondershare Filmora below.
There are hundreds of Text and Titles presets available in Filmora, which allows you to add titles, subtitles, scrolling end credits, lower 3d, and openers with ease. You can also apply some animation effects to the selected title presets.
Check the video below to find out how to add text to video with Wondershare Filmora.
Besides the built-in title presets, Wondershare Filmora (Latest Filmora version X) also provides more title templates in Filmstock , which offers lots of special effects templates.
Currently, there are Title Expansion Set, business title set, wedding title set, and lower third expansion set to download. Check the video below to watch the Title Expansion set templates.
 Download Mac Version ](https://tools.techidaily.com/wondershare/filmora/download/ )
Learn more details about How to Add Text to Video with Filmora.
2 Richard Harrington
This is another site that offers templates for download but is also a great place to visit for ideas and information. Richard approaches Premiere from a photographer’s viewpoint, and so has a slightly different view on many topics that are well worth reading.
He has links to a sizable number of templates on Richard Harrington covering a range of styles and subjects, including DVD menus, animated text, and high-quality models. Still, his blog is updated regularly and often includes free downloads.
Features:
- Supports Adobe Premiere intro templates to use
- It includes various templates and presets on Windows and Mac
- More than title templates also has DVD menus and animated text
3 ProVideoCoalition
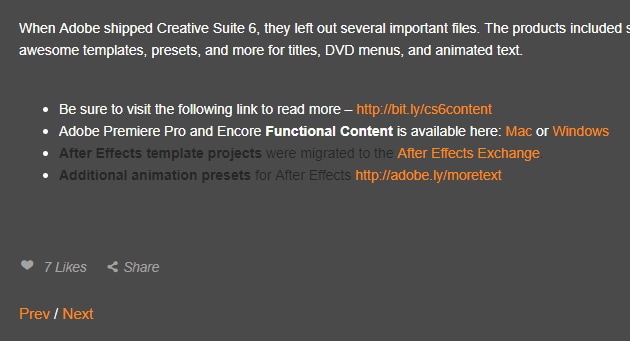
Another all-encompassing site has a huge amount of information and knowledge to be gained. The templates are just part of the story. They are available on Pro Video Coalition and include numerous files and even some free video content showing their implementation.
Also on this page are links to some other sites offering free content or advice on various aspects of Premiere, making it well worth a visit and definitely worth its place in this top 10.
Of particular interest on this site is the regularly updated news which focuses on the latest hardware and software announcements.
Features:
- Supports lower thirds for Adobe Premiere
- You can customize the Premiere Pro intro template free download
- You can create graphic elements
4 Coremelt
This is a commercial site that offers a wide variety of high-quality plugins and templates for several video editing platforms. However, we are on the lookout for that fabulous price of free here, so a little digging finds this page , here you will find ten templates from one of their best selling products offered entirely free.
All templates are quality professionally produced products and worth the visit alone. For anyone who is looking to take their editing output to the professional level, the commercial products on offer here are well worth a look, high quality, and a reasonable cost.
Features:
- It includes 3D text and motion graphics templates
- Free and safe download the Premiere template

5 Bestproaction
Another commercial site. This one has a range of free templates and presets to download for Premiere. Fourteen open items altogether can be downloaded. This site at least deserves a browse through their catalog after a download. The emphasis here is on low cost but high quality, useful templates, and plugins to suit any project.
Even for those of us with a limited budget, there may be something that catches the eye. It is an excellent site for browsing when looking for inspiration.
Features:
- Offers multimedia products like free Premiere Pro text, title templates
- Includes professional Premiere Pro template for videographers
- You can create graphic elements

6 FXFactory
This is another commercial site that has a smattering of very high-quality free downloads on offer, including a beautiful template for the original Star Wars movie style scrolling titles.
Again, it is worth browsing the catalog when you are on the site, but all the free products can be found here .
FX Factory has also created some great video tutorials on a variety of aspects of video production that are well worth a view when you are at the site.
Features:
- Free Premiere Pro effects templates to download
- Includes a step by step Premiere Pro tutorial
7 Creative Impatience
A fantastic site full of information, tips, and opinion on all aspects of video production, it’s a great place to spend some time, with the bonus of a bunch of free downloads for Premiere.
Of particular note are the tutorials, an excellent source of information and tricks that you may not have seen before, with their YouTube channel being a great source of free guidance for editors of any sort of experience.
Features:
- Apart from free Premiere Pro templates, you can also find blogs
- Easy steps to make Premiere Pro templates
- Safe and clean to use. All real
8Filmimpact
A commercial site is offering some great products at competitive prices. At first glance, this may not seem to be a useful place for our search for the free stuff.
However, all the products do have a free trial download, and as a bonus, the trial for pack one includes four free to use templates. They are quality products too, and well worth a look.

9 Style4Type
Style4Type is an exciting site regularly updated with new free templates as well as offering technical advice and having further templates available as commercial products.
And to the side is even a free download for a PDF file that walks you through installing and using the templates within Premiere once you have them.
There are already a lot of free templates on offer covering a wide variety of styles, but they are added to with regularity, so it is a site to bookmark for the future.
Features:
- Free title templates to use including texture templates
- Professional tools to better your video

10 Premiere Beat
Lots of information on this site as its been running for a decade, it is a website that imparts a wealth of knowledge along the way on not just video editing but music.
The pack includes 21 Premiere title templates to use. Another site that you will want to visit again and again.
Features:
- High-quality Premiere Pro templates to download
- A large number of Premiere templates to use
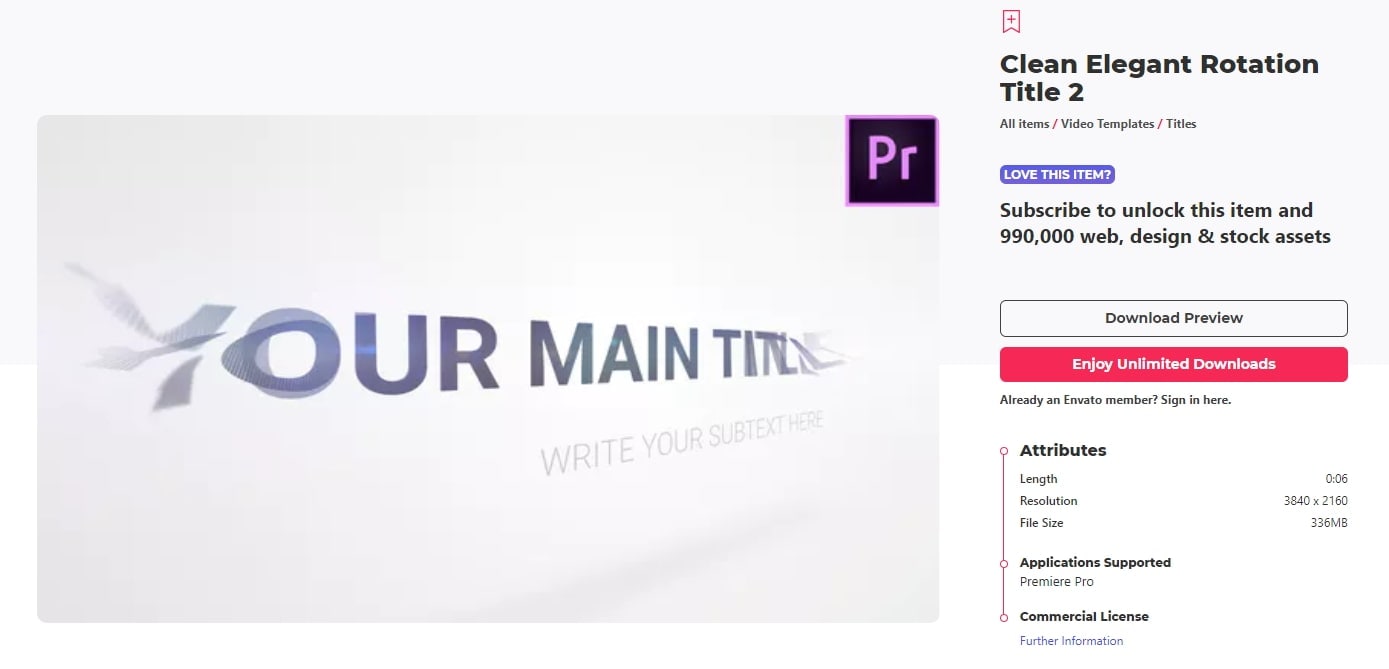
11 Clean Elegant Rotation Title
It is a clean title template without unnecessary parts. If you like simple titles, this one is best for you. You can customize in Premiere easily with a few clicks. For beginners, it also includes free tutorials to use.
Features:
- Simple and clean Premiere title templates
- Customizable in Premiere
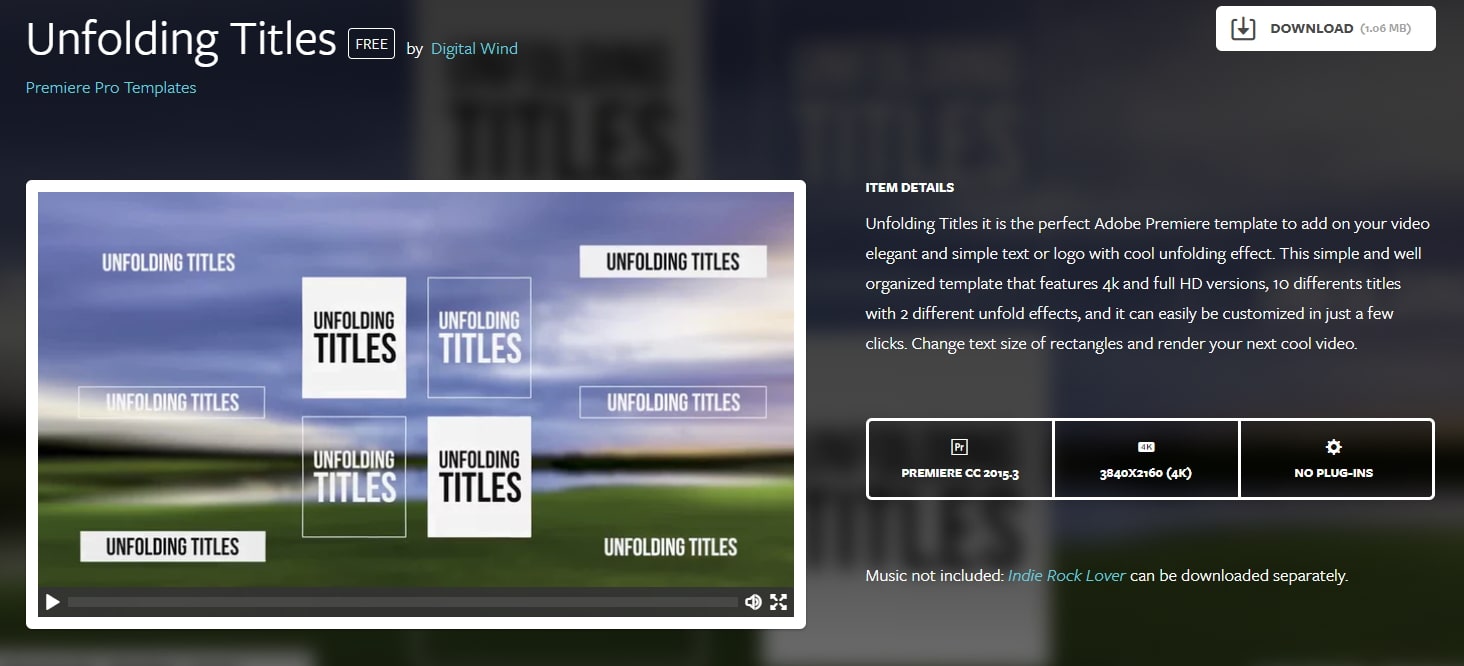
12 Unfolding Titles
It is a clean title template with an unfolding effect. Each text has two unfolding effects, which are convenient to use with customization. It supports 4K and HD versions. In this pack, it wons 10 title formats. After importing Premiere, you can also change text size.
Features:
- 20 unfolding title effects
- Supports rendering your video
13 Orange83
These are five modern title packs for Premiere. With it, you don’t need to use After Effects as you can import them to edit. The best part is you can include your logo and other stuff you like.
Features:
- Include 5 title packs
- Modern and clean titles
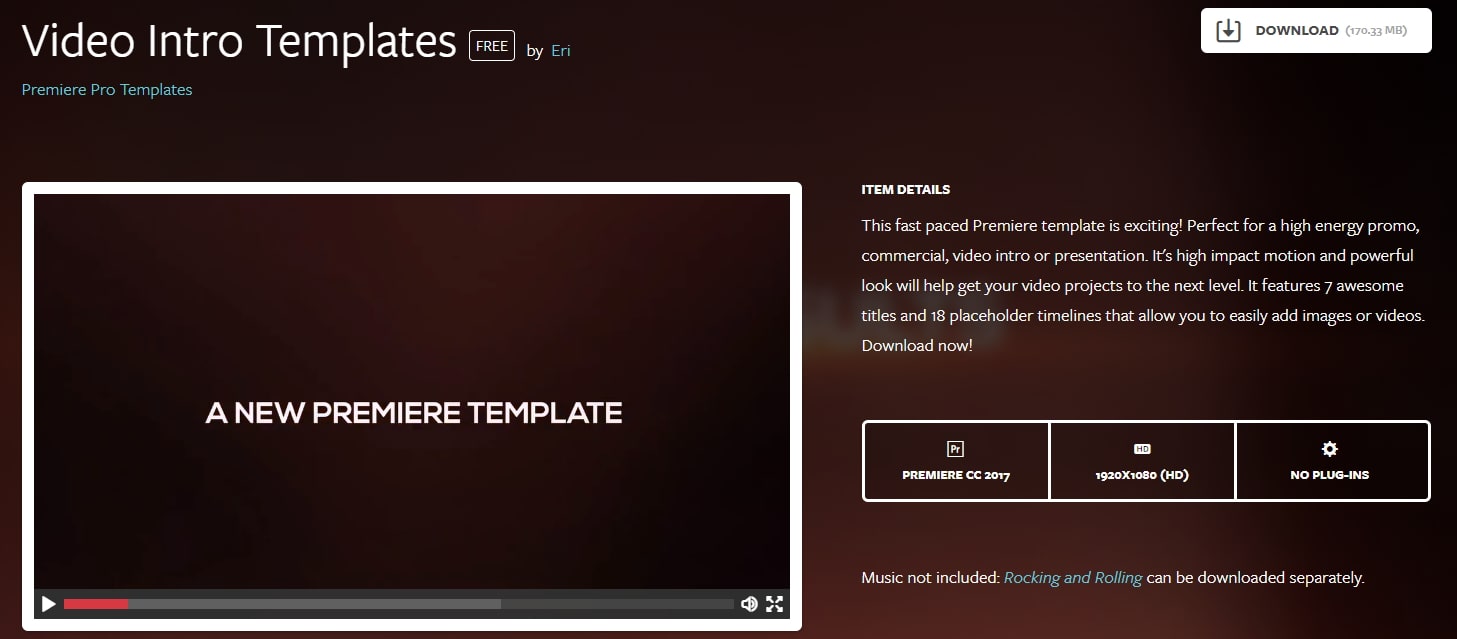
14 Video Intro Templates - Premiere Pro intro template free download
It is a free download Premiere Pro intro template that you can add to your video. It is highly recommended to use promotion and commercial video.
This intro template can be adjusted after you import it to Premiere Pro. This Premiere Pro intro template is HD, so you don’t need to worry about the whole video quality.
Features:
- 1920X1080 (HD) is supported
- This intro template doesn’t include built-in music
15 Elegant Promo - another Premiere Pro intro template free to use
It is intro template for Premiere Pro is modern and free to use. The whole style is young and energetic, which will give viewers a fresh new feeling. It includes 12 images and 26 text layers, and all of them are free to download.
You can use it for your presentation, promotional video, and product video. Besides, it doesn’t require a plug in to use this intro template in Premiere Pro.
Features:
- It includes animated intro elements.
- Use an HD intro template to make a popular video.

These are free templates, and they are enough to get anyone up and running with a new project. As said before, with the commercial enterprises that offer freebies, it’s always worth checking out their paid for output as well, you may not be in the market for it right now, but something may stick for a later time.
Part 2: Bonus: Best 5 Premiere Pro Intro Templates Free Download
Even though all websites we featured in this article offer some free intro templates for Adobe Premiere Pro. However, it is still a much better solution to buy a subscription plan on a platform if you are working on a large number of projects each month.
Let’s see which websites you can use to download the intro and title templates for Premiere Pro.
16. Motion Array
In addition to an impressive library of intro templates, Motion Array offers presets, sound effects, royalty-free music, and stock footage.
Furthermore, you can choose the software version to make sure that the templates you download can be used with the version of Adobe Premiere Pro you have installed on your computer.
The website provides you with powerful search tools, so you can select the resolution of the template, up to 8K, or choose which types of templates are going to be displayed.
Using the free subscription plan can limit your options since you’ll only be able to download free templates, and your upload storage will be limited to just 1GB.
The Pro subscription plan that can be purchased for $54 per month will grant you access to an almost endless selection of title templates as well as a huge selection of plugins for Adobe Premiere Pro.

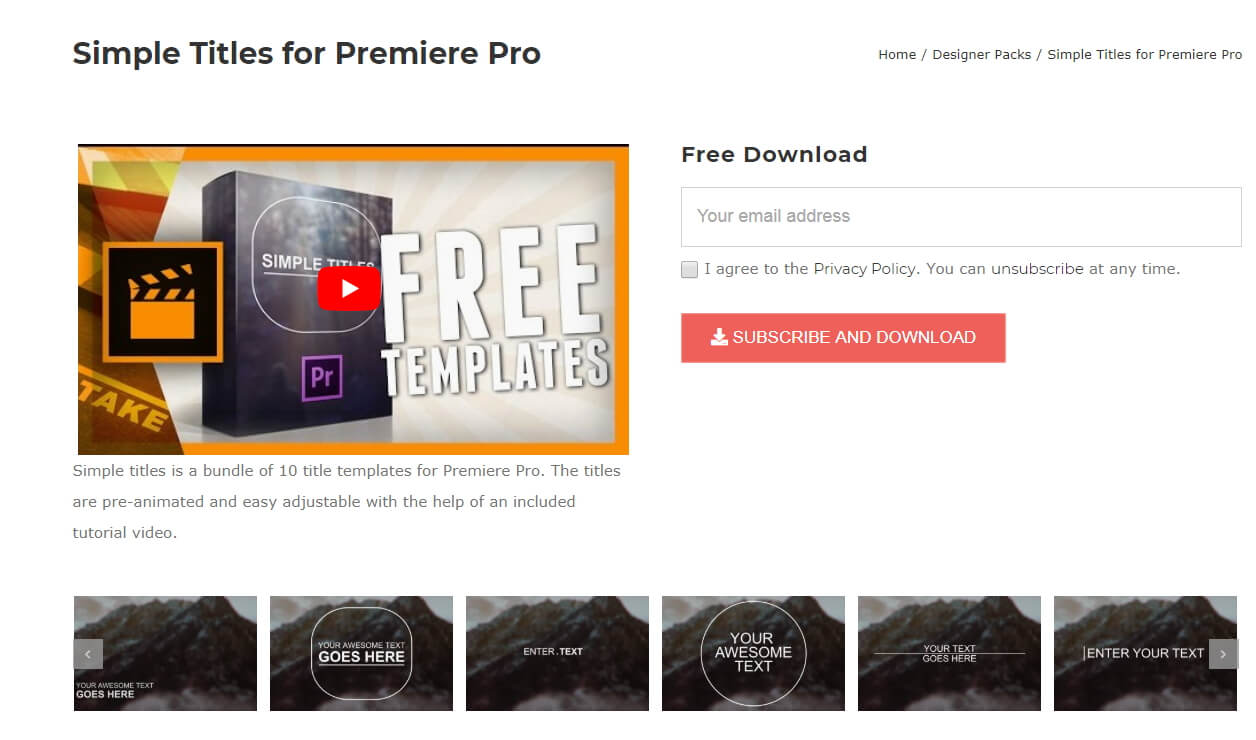
17. Cinecom – Simple Intro for Premiere Pro
It is a designer pack that features ten pre-animated lower-thirds intro templates. You can change the duration of the font and color of the text in each template, and you can choose if you want to download a 1080 or the 4K version of the designer pack.
The templates are compatible with CS6, CC2013, CC2014, and CC2016 versions of the Premiere Pro. The Simple Titles pack can be easily installed, as you just have to drag and drop it into the software.
However, before you can download these title templates, you have to subscribe to Cinecom’s mailing list.
Even though this can be a bit inconvenient, it is very well worth the trouble since you’ll be able to transform or build upon the intro templates and use them freely in all videos you edit in Adobe Premiere Pro.
18. EnvatoElements
You can find much more than intro templates on the EnvatoElements platform since you can choose from 740.000 items you can use for anything from creating a WordPress website to preparing your next business presentation.
The Video Templates category alone features over 4000 items, including Logo Stings or Infographics assets.
There are nearly one hundred available intro templates for Adobe Premiere Pro, but downloading any of them requires you to create an account and purchase a subscription plan.
Prices start from $16.50 per month, and packages include virtually unlimited access to stock photos and videos, video templates, and much more. The EnvatoElements platform also offers assets that can be used with Final Cut Pro, Adobe After Effects or Apple Motion.

19. Videohive
Videohive is a part of the Envato Market platform that also features Web Themes and Templates, Code, Audio, or Graphic sections. It is free to use, but only a limited amount of assets can be downloaded for free.
To download an item, you must purchase it, and prices can range from $16 to $50 for a single title template.
Videohive is also a great source of title templates for Adobe After Effects, as it offers more than 5000 titles and intros that are compatible with this software.
Furthermore, you can download presets for both Premiere Pro and After Effects that can be used to create stop-motion animations, perform color correction, or make the footage look like it was captured with a VHS camera.

20. RocketStock
This option is best suited for video editors who want to create their intros because RocketStok’s Cinematic Style Library extends the scope of options provided by Premiere Pro.
Downloading all fonts except Helvetica Neue is free, but you must check which fonts you can use in commercial projects. You will have no trouble installing the fonts since you can just double-click on the font and follow the on-screen instructions.
Once you’ve installed all the fonts from the library, you can use them to replace the software’s default library. You just have to click on the Replace Style Library option that can be accessed from Premiere Pro’s Title Style tab.
If you don’t feel comfortable creating your titles or if you simply don’t have the time to create your own titles, the Free Cinematic Style Library is not the best choice for you.
On the other hand, Premiere Pro’s users who don’t often use title templates can benefit from downloading RocketStock’s intro library.

Part 3: How to Import and Customize Title Templates in Premiere
If you download the template, all the title templates support customization. You can change its size, font, color, and add 3D effects.
It is easy to import and use it to touch up your video. Check out the steps below to know how to import title templates quickly.
- Install the title template. Choose one template you like and download it to your PC. Remember to unzip it before importing it. Now install them.
- Import the title template. You just need to go to click Effects at the top. Then at right, you will find Presets in the effects section.
- Right-click on presets, and choose Import Presets. If the title template format is .mogrt, you need to open it in Essential Graphics Panel. At the bottom right corner, click the plus icon to import the title template and install it.
- Customize the title template. Once the title template is imported, drag it to the timeline. Click the Editing tab. Here you can customize colors, text, opacities, and positions. There are more options for you to explore.
- You can also copy and paste the title template to another place in the timeline. If you change one place of the pasted template, the original one will remain the same.
Note: each version of Premiere’s interface will look different, but the workflow is similar.
Conclusion
Using title templates can help you achieve a certain visual style faster, so you don’t have to spend a lot of time looking for a perfect background or animating the text.
The Internet provides almost unlimited video editing resources, but not all of these resources can be acquired for free.
Which website you will choose as a source of fresh title templates depends on how often you work on new projects in Adobe Premiere Pro.
If you want to make professional video editing and tired of Premiere, try Filmora! It includes various titles templates to use.
You can sync audio automatically, use detailed color correction to make your title and video like a movie. Download it now (FREE)!
Benjamin Arango
Benjamin Arango is a writer and a lover of all things video.
Follow @Benjamin Arango
Benjamin Arango
Mar 29, 2024• Proven solutions
One of the things that can make your output stand out from the crowd is the titles. Many people think creating eye-catching title effects is beyond them, but with Premiere Pro, you really couldn’t be more wrong.
As Premiere Pro doesn’t have built-in templates, the ability to import free Premiere Pro templates is a must. Anyone need to find a custom title style that suits the project and looks professional and carries impact.
The great thing is that there are many of these resources that are offered entirely free! If you don’t know how to add text/title to Adobe Premiere, here are steps to add text resources .
In this article, we will share with you 20 Free to download Title Templates for Premiere Pro.
- Part1: Top 15 Free Adobe Premiere Pro Title Templates
- Part2: Best 5 Premiere Pro Intro Templates Free Download
- Part3: How to Import and Customize Title Templates in Premiere
You may also like: 10 Free Star Wars Fonts to Make Your Video Amazing
Part 1: Top 15 Free Adobe Premiere Title Templates
Adding the finishing touches to a project, like creating the opening titles or end credits, is often not at the top of anyone’s priority list during the video editing process.
Nonetheless, making a unique opening sequence along with impressive animations in Adobe Premiere Pro can be a time-consuming endeavor, so instead of spending countless hours on producing a perfect combination of text and images, you can just download a title template from the Internet.
1 Premier Pro
Jarle Leirpoll runs this site, and it is a treasure trove of information, help, and advice on Premiere from a man who wrote the book (literally, it’s for sale on the site!) on Premiere.
His first title collection is consisting of 8 templates, including Lower Thirds templates, end credit template, and some special characters. However, it well worth a look around the site as there is plenty more free stuff including presets, and a whole range of tips and tricks to help with your editing.
Features:
- Free Premiere Pro templates to download
- Easy to import the title template to Premiere
- 100% ready to use
In case that you’re just a beginner of video editing software, you can start with Wondershare Filmora (Latest Filmora version 11) to add text to videos, which is powerful but easy-to-use for green hands. Download the Wondershare Filmora below.
There are hundreds of Text and Titles presets available in Filmora, which allows you to add titles, subtitles, scrolling end credits, lower 3d, and openers with ease. You can also apply some animation effects to the selected title presets.
Check the video below to find out how to add text to video with Wondershare Filmora.
Besides the built-in title presets, Wondershare Filmora (Latest Filmora version X) also provides more title templates in Filmstock , which offers lots of special effects templates.
Currently, there are Title Expansion Set, business title set, wedding title set, and lower third expansion set to download. Check the video below to watch the Title Expansion set templates.
Download Mac Version ](https://tools.techidaily.com/wondershare/filmora/download/ )
Learn more details about How to Add Text to Video with Filmora.
2 Richard Harrington
This is another site that offers templates for download but is also a great place to visit for ideas and information. Richard approaches Premiere from a photographer’s viewpoint, and so has a slightly different view on many topics that are well worth reading.
He has links to a sizable number of templates on Richard Harrington covering a range of styles and subjects, including DVD menus, animated text, and high-quality models. Still, his blog is updated regularly and often includes free downloads.
Features:
- Supports Adobe Premiere intro templates to use
- It includes various templates and presets on Windows and Mac
- More than title templates also has DVD menus and animated text
3 ProVideoCoalition
Another all-encompassing site has a huge amount of information and knowledge to be gained. The templates are just part of the story. They are available on Pro Video Coalition and include numerous files and even some free video content showing their implementation.
Also on this page are links to some other sites offering free content or advice on various aspects of Premiere, making it well worth a visit and definitely worth its place in this top 10.
Of particular interest on this site is the regularly updated news which focuses on the latest hardware and software announcements.
Features:
- Supports lower thirds for Adobe Premiere
- You can customize the Premiere Pro intro template free download
- You can create graphic elements
4 Coremelt
This is a commercial site that offers a wide variety of high-quality plugins and templates for several video editing platforms. However, we are on the lookout for that fabulous price of free here, so a little digging finds this page , here you will find ten templates from one of their best selling products offered entirely free.
All templates are quality professionally produced products and worth the visit alone. For anyone who is looking to take their editing output to the professional level, the commercial products on offer here are well worth a look, high quality, and a reasonable cost.
Features:
- It includes 3D text and motion graphics templates
- Free and safe download the Premiere template
5 Bestproaction
Another commercial site. This one has a range of free templates and presets to download for Premiere. Fourteen open items altogether can be downloaded. This site at least deserves a browse through their catalog after a download. The emphasis here is on low cost but high quality, useful templates, and plugins to suit any project.
Even for those of us with a limited budget, there may be something that catches the eye. It is an excellent site for browsing when looking for inspiration.
Features:
- Offers multimedia products like free Premiere Pro text, title templates
- Includes professional Premiere Pro template for videographers
- You can create graphic elements
6 FXFactory
This is another commercial site that has a smattering of very high-quality free downloads on offer, including a beautiful template for the original Star Wars movie style scrolling titles.
Again, it is worth browsing the catalog when you are on the site, but all the free products can be found here .
FX Factory has also created some great video tutorials on a variety of aspects of video production that are well worth a view when you are at the site.
Features:
- Free Premiere Pro effects templates to download
- Includes a step by step Premiere Pro tutorial
7 Creative Impatience
A fantastic site full of information, tips, and opinion on all aspects of video production, it’s a great place to spend some time, with the bonus of a bunch of free downloads for Premiere.
Of particular note are the tutorials, an excellent source of information and tricks that you may not have seen before, with their YouTube channel being a great source of free guidance for editors of any sort of experience.
Features:
- Apart from free Premiere Pro templates, you can also find blogs
- Easy steps to make Premiere Pro templates
- Safe and clean to use. All real
8Filmimpact
A commercial site is offering some great products at competitive prices. At first glance, this may not seem to be a useful place for our search for the free stuff.
However, all the products do have a free trial download, and as a bonus, the trial for pack one includes four free to use templates. They are quality products too, and well worth a look.
9 Style4Type
Style4Type is an exciting site regularly updated with new free templates as well as offering technical advice and having further templates available as commercial products.
And to the side is even a free download for a PDF file that walks you through installing and using the templates within Premiere once you have them.
There are already a lot of free templates on offer covering a wide variety of styles, but they are added to with regularity, so it is a site to bookmark for the future.
Features:
- Free title templates to use including texture templates
- Professional tools to better your video
10 Premiere Beat
Lots of information on this site as its been running for a decade, it is a website that imparts a wealth of knowledge along the way on not just video editing but music.
The pack includes 21 Premiere title templates to use. Another site that you will want to visit again and again.
Features:
- High-quality Premiere Pro templates to download
- A large number of Premiere templates to use
11 Clean Elegant Rotation Title
It is a clean title template without unnecessary parts. If you like simple titles, this one is best for you. You can customize in Premiere easily with a few clicks. For beginners, it also includes free tutorials to use.
Features:
- Simple and clean Premiere title templates
- Customizable in Premiere
12 Unfolding Titles
It is a clean title template with an unfolding effect. Each text has two unfolding effects, which are convenient to use with customization. It supports 4K and HD versions. In this pack, it wons 10 title formats. After importing Premiere, you can also change text size.
Features:
- 20 unfolding title effects
- Supports rendering your video
13 Orange83
These are five modern title packs for Premiere. With it, you don’t need to use After Effects as you can import them to edit. The best part is you can include your logo and other stuff you like.
Features:
- Include 5 title packs
- Modern and clean titles
14 Video Intro Templates - Premiere Pro intro template free download
It is a free download Premiere Pro intro template that you can add to your video. It is highly recommended to use promotion and commercial video.
This intro template can be adjusted after you import it to Premiere Pro. This Premiere Pro intro template is HD, so you don’t need to worry about the whole video quality.
Features:
- 1920X1080 (HD) is supported
- This intro template doesn’t include built-in music
15 Elegant Promo - another Premiere Pro intro template free to use
It is intro template for Premiere Pro is modern and free to use. The whole style is young and energetic, which will give viewers a fresh new feeling. It includes 12 images and 26 text layers, and all of them are free to download.
You can use it for your presentation, promotional video, and product video. Besides, it doesn’t require a plug in to use this intro template in Premiere Pro.
Features:
- It includes animated intro elements.
- Use an HD intro template to make a popular video.
These are free templates, and they are enough to get anyone up and running with a new project. As said before, with the commercial enterprises that offer freebies, it’s always worth checking out their paid for output as well, you may not be in the market for it right now, but something may stick for a later time.
Part 2: Bonus: Best 5 Premiere Pro Intro Templates Free Download
Even though all websites we featured in this article offer some free intro templates for Adobe Premiere Pro. However, it is still a much better solution to buy a subscription plan on a platform if you are working on a large number of projects each month.
Let’s see which websites you can use to download the intro and title templates for Premiere Pro.
16. Motion Array
In addition to an impressive library of intro templates, Motion Array offers presets, sound effects, royalty-free music, and stock footage.
Furthermore, you can choose the software version to make sure that the templates you download can be used with the version of Adobe Premiere Pro you have installed on your computer.
The website provides you with powerful search tools, so you can select the resolution of the template, up to 8K, or choose which types of templates are going to be displayed.
Using the free subscription plan can limit your options since you’ll only be able to download free templates, and your upload storage will be limited to just 1GB.
The Pro subscription plan that can be purchased for $54 per month will grant you access to an almost endless selection of title templates as well as a huge selection of plugins for Adobe Premiere Pro.
17. Cinecom – Simple Intro for Premiere Pro
It is a designer pack that features ten pre-animated lower-thirds intro templates. You can change the duration of the font and color of the text in each template, and you can choose if you want to download a 1080 or the 4K version of the designer pack.
The templates are compatible with CS6, CC2013, CC2014, and CC2016 versions of the Premiere Pro. The Simple Titles pack can be easily installed, as you just have to drag and drop it into the software.
However, before you can download these title templates, you have to subscribe to Cinecom’s mailing list.
Even though this can be a bit inconvenient, it is very well worth the trouble since you’ll be able to transform or build upon the intro templates and use them freely in all videos you edit in Adobe Premiere Pro.
18. EnvatoElements
You can find much more than intro templates on the EnvatoElements platform since you can choose from 740.000 items you can use for anything from creating a WordPress website to preparing your next business presentation.
The Video Templates category alone features over 4000 items, including Logo Stings or Infographics assets.
There are nearly one hundred available intro templates for Adobe Premiere Pro, but downloading any of them requires you to create an account and purchase a subscription plan.
Prices start from $16.50 per month, and packages include virtually unlimited access to stock photos and videos, video templates, and much more. The EnvatoElements platform also offers assets that can be used with Final Cut Pro, Adobe After Effects or Apple Motion.
19. Videohive
Videohive is a part of the Envato Market platform that also features Web Themes and Templates, Code, Audio, or Graphic sections. It is free to use, but only a limited amount of assets can be downloaded for free.
To download an item, you must purchase it, and prices can range from $16 to $50 for a single title template.
Videohive is also a great source of title templates for Adobe After Effects, as it offers more than 5000 titles and intros that are compatible with this software.
Furthermore, you can download presets for both Premiere Pro and After Effects that can be used to create stop-motion animations, perform color correction, or make the footage look like it was captured with a VHS camera.
20. RocketStock
This option is best suited for video editors who want to create their intros because RocketStok’s Cinematic Style Library extends the scope of options provided by Premiere Pro.
Downloading all fonts except Helvetica Neue is free, but you must check which fonts you can use in commercial projects. You will have no trouble installing the fonts since you can just double-click on the font and follow the on-screen instructions.
Once you’ve installed all the fonts from the library, you can use them to replace the software’s default library. You just have to click on the Replace Style Library option that can be accessed from Premiere Pro’s Title Style tab.
If you don’t feel comfortable creating your titles or if you simply don’t have the time to create your own titles, the Free Cinematic Style Library is not the best choice for you.
On the other hand, Premiere Pro’s users who don’t often use title templates can benefit from downloading RocketStock’s intro library.
Part 3: How to Import and Customize Title Templates in Premiere
If you download the template, all the title templates support customization. You can change its size, font, color, and add 3D effects.
It is easy to import and use it to touch up your video. Check out the steps below to know how to import title templates quickly.
- Install the title template. Choose one template you like and download it to your PC. Remember to unzip it before importing it. Now install them.
- Import the title template. You just need to go to click Effects at the top. Then at right, you will find Presets in the effects section.
- Right-click on presets, and choose Import Presets. If the title template format is .mogrt, you need to open it in Essential Graphics Panel. At the bottom right corner, click the plus icon to import the title template and install it.
- Customize the title template. Once the title template is imported, drag it to the timeline. Click the Editing tab. Here you can customize colors, text, opacities, and positions. There are more options for you to explore.
- You can also copy and paste the title template to another place in the timeline. If you change one place of the pasted template, the original one will remain the same.
Note: each version of Premiere’s interface will look different, but the workflow is similar.
Conclusion
Using title templates can help you achieve a certain visual style faster, so you don’t have to spend a lot of time looking for a perfect background or animating the text.
The Internet provides almost unlimited video editing resources, but not all of these resources can be acquired for free.
Which website you will choose as a source of fresh title templates depends on how often you work on new projects in Adobe Premiere Pro.
If you want to make professional video editing and tired of Premiere, try Filmora! It includes various titles templates to use.
You can sync audio automatically, use detailed color correction to make your title and video like a movie. Download it now (FREE)!
Benjamin Arango
Benjamin Arango is a writer and a lover of all things video.
Follow @Benjamin Arango
The Ultimate Choice: Final Cut Pro or LumaFusion for Your Video Needs
LumaFusion vs Final Cut Pro X: Which Do You Need?

Shanoon Cox
Oct 26, 2023• Proven solutions
Deciding which option to go for when you have two high-performance video editing software like LumaFusion and Final Cut Pro X can be a tough choice to make.
LumaFusion was originally a hands-on video editing app on iOS, adapted to iPad and iPhone alone. At the same time, Final Cut Pro X was designed to run on Mac.
With the recent compatibility of LumaFusion on the M1 MacBook Air, which surfaced in 2020, there have been recent concerns from expert users that very soon, these iOS Pro editing giants may lock horns in no time; if the latter sees more advanced upgrades.
This article will be giving you a concise yet comprehensive comparison of this editing software, what features to expect, and professional advice to help you choose which one suits your editing needs. Stick with me as I take you on this brief journey into the creative world of LumaFusion and Final Cut Pro X.
Pros and Cons of Final Cut Pro X and LumaFusion
| Pros of LumaFusion | Pros of Final Cut Pro X |
|---|---|
| Portable. You can access all features on the phone | Allows constant autosave |
| Runs on the , which is twice as fast as the . | Integrates well with studio products |
| straightforward interface; easy to navigate | Professional and rich Interface and layout |
| Allows to trim out unused media before export. | Comes with custom transitions |
| Enhance stability and performance | Sync well with other Apple products |
| Quick response while looking for Storyblocks | Perfect for Hi-tech video manipulation |
| Cons of LumaFusion | Cons of Final Cut Pro X |
| Difficult with large projects and multi-task | Relatively expensive |
| Advanced features like motion tracking and missing | Advanced tools are unfriendly for beginners |
| Advantages like touch control are limited in Mac | Exclusively on Mac |
Since LumaFusion is less complex because of its user interface flexibility, most users who do not see a need for advanced video manipulation features tend to use it. All you need to do is drag and drop, and in a few minutes, you will be through with your editing process.
However, since Final Cut Pro X adopts highly advanced features and effects, it is best for Pro users who want to edit projects which need major manipulation and complex editing. We still have to keep our fingers crossed for subsequent LumaFusion upgrades since it recently welcomed compatibility on Mac.
But in the meantime, if you need an editing process with all the professional features and high manipulation toolsets, then Final Cut Pro X is the best option for you.
Price comparison between Final Cut Pro X Vs LumaFusion
Final Cut Pro X Price
Final Cut Pro X comes with a free 90-day trial option on the recent version, and of course, it is only available exclusively on Mac App Store.
Within the trial period, you would not have access to the 1000+ royalty-free sound effects in the premium version. Still, you can use other unique features for editing, like color correction, adding effects, organizing, editing, and importing and exporting files in different formats.

During the 90-free trial, you can purchase your Final Cut Pro X, which comes with the Logic Pro built-in for $299, or try the Pro Apps Bundle for Education which has the Final Cut Pro X, Logic Pro, Compressor, MainStage, and Motion pre-installed for just $199, which gives you a direct and automatic update on purchase. Final Cut Pro comes with a 6 years license span.
LumaFusion Price
Compared to other video editing apps in the same category as LumaFision, it has a very flexible pricing system. And since users prefer something with creativity and have a simple interface, it is evident while many new users choose to enjoy the fluid system it portends.
For a fantastic software like this, offering multiple editing with professional and highly detailed effects, audio, and color, a one-off payment as low as $29.99 is just so perfect.

Though it comes with no trial policy, recent updates and fixes show that LumaFusion can generally be a dominating app in the editing world.
Plus, you can always try Filmora for free, it’s popular among beginners and professionals!

Final Cut Pro X Vs LumaFusion: Interface
Final Cut Pro X
Many features endeared Final Cut Pro versions to expert users, but more precise advance features like trackless Magnetic Timeline view and great tools for splitting and trimming videos made it more impressive. You can edit, split or trim your videos with a few clicks of your mouse and easily undo any move if you prefer to leave previous options.

Final Cut Pro X comes with a highly efficient tool known as the Compound Clips. This feature helps you group your clips, effects, and audio in a single space, so they become a perfectly synchronized piece.
Also, it comes with the Roles feature, which helps explain a particular clip, ranging from videos to titles, dialog, effect, etc. It is a great organizing tool, which enables you to identify what kind of track you are playing.
LumaFusion
LumaFusion is well-known for its portability and easy-to-use interface, which is why I recommend it for beginners. However, LumaFusion is in many ways like a professional video editing tool, with editing interface features like preview monitor, search panel, source clip which helps you identify your timeline edit on the fascinating multitrack timeline.

Though many users prefer it to other mobile-based editing apps, others think it is best to introduce it fully on the Mac version because the buttons look a lot more complex for an App. Also, stating that the use of the preview screen is almost irrelevant since it isn’t big due to the mobile display screen.
However, with a simple drag and drop feature, it is easy to fall in love with this tool, as the interface doesn’t look as complex as some make it seem.
Summary for Final Cut Pro X Vs LumaFusion
Is LumaFusion worth it?
It is no story that the LumaFusion Team has tried their best in developing an amazing piece like this. And with the pace at which it is welcoming many advanced features, it could turn out to be one of the most used editing software on iOS. Sadly, you cannot run LumaFusion on Android or Windows now, but hopefully, subsequent upgrades and adjustments could introduce other device and OS compatibility.
Ultimately, if you are looking for a low-budget app to work on a minor project with less stress and more productivity, then LumaFusion is the best option for you. You will most likely cut down the stress of carrying a larger screen and clicking on your mouse at intervals by 70%.
Also, with a one-time payment of just $29, you can just save your two days lunch money to enjoy your editing process forever! I’m just saying that you don’t have to break a bank to get one.
However, if you are looking for a software or editing tool to handle a huge project with advanced effects, this option isn’t just what you should try out.
Why should you try Final Cut Pro X?
High definition editing options, professional audio effects, and at least 1300 royalty-free sound effects are some reasons Pro editors will always run to Final Cut. Though all software has setbacks, Final Cut Pro X has proven efficient as an advanced tool for professionals who want to deliver their best. It has more intricate features which provide more detailed effects and manipulations in simple click and drag patterns.
So if you are looking for software to handle bulk editing projects, Final Cut Pro X is the best option for you, as against the latter. Even though it costs a whopping $199 for the Pro Bundle option, it is well worth it.
Final Cut Pro X in every ramification is more suitable to Pro users because their designers focused on making it ideal for complex projects, which is why many professional editors prefer it. But the highly flexible and fluid user interface of LumaFusion has recently endeared it to many.
Quite evidently, either of them serves the same purpose and at a very proficient level, but your choice strictly depends on what you want to use them for. So first, consider that factor before setting out to buy any of them.
Shanoon Cox
Shanoon Cox is a writer and a lover of all things video.
Follow @Shanoon Cox
Shanoon Cox
Oct 26, 2023• Proven solutions
Deciding which option to go for when you have two high-performance video editing software like LumaFusion and Final Cut Pro X can be a tough choice to make.
LumaFusion was originally a hands-on video editing app on iOS, adapted to iPad and iPhone alone. At the same time, Final Cut Pro X was designed to run on Mac.
With the recent compatibility of LumaFusion on the M1 MacBook Air, which surfaced in 2020, there have been recent concerns from expert users that very soon, these iOS Pro editing giants may lock horns in no time; if the latter sees more advanced upgrades.
This article will be giving you a concise yet comprehensive comparison of this editing software, what features to expect, and professional advice to help you choose which one suits your editing needs. Stick with me as I take you on this brief journey into the creative world of LumaFusion and Final Cut Pro X.
Pros and Cons of Final Cut Pro X and LumaFusion
| Pros of LumaFusion | Pros of Final Cut Pro X |
|---|---|
| Portable. You can access all features on the phone | Allows constant autosave |
| Runs on the , which is twice as fast as the . | Integrates well with studio products |
| straightforward interface; easy to navigate | Professional and rich Interface and layout |
| Allows to trim out unused media before export. | Comes with custom transitions |
| Enhance stability and performance | Sync well with other Apple products |
| Quick response while looking for Storyblocks | Perfect for Hi-tech video manipulation |
| Cons of LumaFusion | Cons of Final Cut Pro X |
| Difficult with large projects and multi-task | Relatively expensive |
| Advanced features like motion tracking and missing | Advanced tools are unfriendly for beginners |
| Advantages like touch control are limited in Mac | Exclusively on Mac |
Since LumaFusion is less complex because of its user interface flexibility, most users who do not see a need for advanced video manipulation features tend to use it. All you need to do is drag and drop, and in a few minutes, you will be through with your editing process.
However, since Final Cut Pro X adopts highly advanced features and effects, it is best for Pro users who want to edit projects which need major manipulation and complex editing. We still have to keep our fingers crossed for subsequent LumaFusion upgrades since it recently welcomed compatibility on Mac.
But in the meantime, if you need an editing process with all the professional features and high manipulation toolsets, then Final Cut Pro X is the best option for you.
Price comparison between Final Cut Pro X Vs LumaFusion
Final Cut Pro X Price
Final Cut Pro X comes with a free 90-day trial option on the recent version, and of course, it is only available exclusively on Mac App Store.
Within the trial period, you would not have access to the 1000+ royalty-free sound effects in the premium version. Still, you can use other unique features for editing, like color correction, adding effects, organizing, editing, and importing and exporting files in different formats.
During the 90-free trial, you can purchase your Final Cut Pro X, which comes with the Logic Pro built-in for $299, or try the Pro Apps Bundle for Education which has the Final Cut Pro X, Logic Pro, Compressor, MainStage, and Motion pre-installed for just $199, which gives you a direct and automatic update on purchase. Final Cut Pro comes with a 6 years license span.
LumaFusion Price
Compared to other video editing apps in the same category as LumaFision, it has a very flexible pricing system. And since users prefer something with creativity and have a simple interface, it is evident while many new users choose to enjoy the fluid system it portends.
For a fantastic software like this, offering multiple editing with professional and highly detailed effects, audio, and color, a one-off payment as low as $29.99 is just so perfect.
Though it comes with no trial policy, recent updates and fixes show that LumaFusion can generally be a dominating app in the editing world.
Plus, you can always try Filmora for free, it’s popular among beginners and professionals!
Final Cut Pro X Vs LumaFusion: Interface
Final Cut Pro X
Many features endeared Final Cut Pro versions to expert users, but more precise advance features like trackless Magnetic Timeline view and great tools for splitting and trimming videos made it more impressive. You can edit, split or trim your videos with a few clicks of your mouse and easily undo any move if you prefer to leave previous options.
Final Cut Pro X comes with a highly efficient tool known as the Compound Clips. This feature helps you group your clips, effects, and audio in a single space, so they become a perfectly synchronized piece.
Also, it comes with the Roles feature, which helps explain a particular clip, ranging from videos to titles, dialog, effect, etc. It is a great organizing tool, which enables you to identify what kind of track you are playing.
LumaFusion
LumaFusion is well-known for its portability and easy-to-use interface, which is why I recommend it for beginners. However, LumaFusion is in many ways like a professional video editing tool, with editing interface features like preview monitor, search panel, source clip which helps you identify your timeline edit on the fascinating multitrack timeline.
Though many users prefer it to other mobile-based editing apps, others think it is best to introduce it fully on the Mac version because the buttons look a lot more complex for an App. Also, stating that the use of the preview screen is almost irrelevant since it isn’t big due to the mobile display screen.
However, with a simple drag and drop feature, it is easy to fall in love with this tool, as the interface doesn’t look as complex as some make it seem.
Summary for Final Cut Pro X Vs LumaFusion
Is LumaFusion worth it?
It is no story that the LumaFusion Team has tried their best in developing an amazing piece like this. And with the pace at which it is welcoming many advanced features, it could turn out to be one of the most used editing software on iOS. Sadly, you cannot run LumaFusion on Android or Windows now, but hopefully, subsequent upgrades and adjustments could introduce other device and OS compatibility.
Ultimately, if you are looking for a low-budget app to work on a minor project with less stress and more productivity, then LumaFusion is the best option for you. You will most likely cut down the stress of carrying a larger screen and clicking on your mouse at intervals by 70%.
Also, with a one-time payment of just $29, you can just save your two days lunch money to enjoy your editing process forever! I’m just saying that you don’t have to break a bank to get one.
However, if you are looking for a software or editing tool to handle a huge project with advanced effects, this option isn’t just what you should try out.
Why should you try Final Cut Pro X?
High definition editing options, professional audio effects, and at least 1300 royalty-free sound effects are some reasons Pro editors will always run to Final Cut. Though all software has setbacks, Final Cut Pro X has proven efficient as an advanced tool for professionals who want to deliver their best. It has more intricate features which provide more detailed effects and manipulations in simple click and drag patterns.
So if you are looking for software to handle bulk editing projects, Final Cut Pro X is the best option for you, as against the latter. Even though it costs a whopping $199 for the Pro Bundle option, it is well worth it.
Final Cut Pro X in every ramification is more suitable to Pro users because their designers focused on making it ideal for complex projects, which is why many professional editors prefer it. But the highly flexible and fluid user interface of LumaFusion has recently endeared it to many.
Quite evidently, either of them serves the same purpose and at a very proficient level, but your choice strictly depends on what you want to use them for. So first, consider that factor before setting out to buy any of them.
Shanoon Cox
Shanoon Cox is a writer and a lover of all things video.
Follow @Shanoon Cox
Cropping Images in FCPX: Tips, Tricks, and Best Practices
Final Cut Pro X: How to Crop an Image
Benjamin Arango
Mar 27, 2024• Proven solutions
Cropping an image means to remove a portion of the image, either to hide something you don’t want the audience to see or emphasize different elements within the image. Just as Photoshop allows us to crop still images, Final Cut Pro X allows us to crop moving video clips, as you’ll learn in this article.
This is a basic tutorial about Apple Final Cut Pro X, professional video editing software. However, if video editing is new to you, consider Wondershare Filmora for Mac . This is a powerful but easy-to-use tool for users just starting out. Download the free trial version below.
Download Mac Version ](https://tools.techidaily.com/wondershare/filmora/download/ )
How to Crop an Image in Final Cut Pro X
However, before I show how this is done, I need to explain one really important fact about video: all video uses what’s called “fixed resolution.” Fixed resolution means that high-definition video is always displayed at one of two sizes:
You May Also Like: How to Crop GIF Images >>
- 1920 x 1080 pixels
- 1920 x 1080 pixels
Unlike still images which can be thousands of pixels on a side, video clips are locked into one of these two sizes. This means that if you crop a video clip, to remove something you don’t like, the remaining pixels are often enlarged to fill the frame. Crop too much and your video clip will look blurry, blocky, and edges will look stair-stepped.
I’ll show you two ways to crop a video clip in this article, one that maintains a high image quality but reduces the size of the frame (called “trimming”) and the other that fills the frame with the image but reduces image quality (called “cropping”). You get to pick which one works the best for you.
TRIMMING
Trimming is the process of removing portions of a video clip without changing the size of the clip. This retains the highest amount of image quality.

For instance, here an image - courtesy of Pond5 (<www.pond5.com>). Let’s say that we want to emphasize the barn and not the sky.

The easiest way to do this is to click the icon in the lower left corner of the Viewer and choose “Crop.”

This displays the cropping tools in the Viewer.

Click the Trim button to turn on Trim mode. (This article discusses Trim and Crop. I’ll cover the Ken Burns effect in a future article.)

Grab one of the blue dots and drag to hide portions of the frame. I generally grab a corner, but any blue dot will do.
NOTE: Press and hold the Option key while dragging to drag opposite edges or corners. Press and hold the Shift key to constrain the trim to the same aspect ratio as the frame.

Drag other corners or edges to further trim the image.

When you have trimmed the image the way you want, click the “Done” button in the top right corner to exit trimming mode.

If no other clip is below the trimmed clip, the background will be black.

But, it actually isn’t black, it’s transparent. If you put another clip below it, you’ll see the lower clip underneath the trimmed image.
Trimming allows us to hide portions of a video clip, without changing the image quality of the clip that remains. However, trimming always creates transparent sections within an image.
CROPPING
Cropping allows us to select just a portion of a video clip, without creating any transparent sections, BUT, it degrades image quality.
There are several ways we can choose to crop an image:

- Click the Crop icon, as we illustrated above

- Right-mouse click (or Control-click) inside the Viewer and choose
- Type Shift+C

* In the Inspector > Video tab > Crop (this option provides the most precision, but is the least intuitive to use)

If you selected any option except the Inspector, click the Crop button in the Viewer.

Now, drag a blue button in one of the corners. Because cropping, unlike trimming, fills the frame with the portion of the image we select, we can only move corners and the image is always sized to match the aspect ratio of our sequence.
Final Cut displays numbers at the top of the Viewer indicating how much the image has been cropped.

Reposition the frame by grabbing inside the rectangle and dragging.

When you are happy with the results, click the Done button in the top right corner.

Notice that the selected portion of the image now fills the frame. Even though there is a clip below our cropped clip, we don’t see it.
And, if you look closely, you’ll see that the cropped image is softer (blurrier) than the original and edges are more likely to be stair-stepped.
RESET

To reset a cropped image back to its default settings, open the Inspector and click the small curved arrow to the right of the word “Crop.”
SUMMARY
Trimming is used to hide portions of an image and superimpose it over another image.
Cropping is used to reframe an image, say from a medium shot to a close-up, but runs the risk of overly softening an image. The general rule is that cropping a little is OK, but don’t crop too much.
I use both these techniques frequently in my own editing.
Benjamin Arango
Benjamin Arango is a writer and a lover of all things video.
Follow @Benjamin Arango
Benjamin Arango
Mar 27, 2024• Proven solutions
Cropping an image means to remove a portion of the image, either to hide something you don’t want the audience to see or emphasize different elements within the image. Just as Photoshop allows us to crop still images, Final Cut Pro X allows us to crop moving video clips, as you’ll learn in this article.
This is a basic tutorial about Apple Final Cut Pro X, professional video editing software. However, if video editing is new to you, consider Wondershare Filmora for Mac . This is a powerful but easy-to-use tool for users just starting out. Download the free trial version below.
Download Mac Version ](https://tools.techidaily.com/wondershare/filmora/download/ )
How to Crop an Image in Final Cut Pro X
However, before I show how this is done, I need to explain one really important fact about video: all video uses what’s called “fixed resolution.” Fixed resolution means that high-definition video is always displayed at one of two sizes:
You May Also Like: How to Crop GIF Images >>
- 1920 x 1080 pixels
- 1920 x 1080 pixels
Unlike still images which can be thousands of pixels on a side, video clips are locked into one of these two sizes. This means that if you crop a video clip, to remove something you don’t like, the remaining pixels are often enlarged to fill the frame. Crop too much and your video clip will look blurry, blocky, and edges will look stair-stepped.
I’ll show you two ways to crop a video clip in this article, one that maintains a high image quality but reduces the size of the frame (called “trimming”) and the other that fills the frame with the image but reduces image quality (called “cropping”). You get to pick which one works the best for you.
TRIMMING
Trimming is the process of removing portions of a video clip without changing the size of the clip. This retains the highest amount of image quality.
For instance, here an image - courtesy of Pond5 (<www.pond5.com>). Let’s say that we want to emphasize the barn and not the sky.
The easiest way to do this is to click the icon in the lower left corner of the Viewer and choose “Crop.”
This displays the cropping tools in the Viewer.
Click the Trim button to turn on Trim mode. (This article discusses Trim and Crop. I’ll cover the Ken Burns effect in a future article.)
Grab one of the blue dots and drag to hide portions of the frame. I generally grab a corner, but any blue dot will do.
NOTE: Press and hold the Option key while dragging to drag opposite edges or corners. Press and hold the Shift key to constrain the trim to the same aspect ratio as the frame.
Drag other corners or edges to further trim the image.
When you have trimmed the image the way you want, click the “Done” button in the top right corner to exit trimming mode.
If no other clip is below the trimmed clip, the background will be black.
But, it actually isn’t black, it’s transparent. If you put another clip below it, you’ll see the lower clip underneath the trimmed image.
Trimming allows us to hide portions of a video clip, without changing the image quality of the clip that remains. However, trimming always creates transparent sections within an image.
CROPPING
Cropping allows us to select just a portion of a video clip, without creating any transparent sections, BUT, it degrades image quality.
There are several ways we can choose to crop an image:
- Click the Crop icon, as we illustrated above
- Right-mouse click (or Control-click) inside the Viewer and choose
- Type Shift+C
* In the Inspector > Video tab > Crop (this option provides the most precision, but is the least intuitive to use)
If you selected any option except the Inspector, click the Crop button in the Viewer.
Now, drag a blue button in one of the corners. Because cropping, unlike trimming, fills the frame with the portion of the image we select, we can only move corners and the image is always sized to match the aspect ratio of our sequence.
Final Cut displays numbers at the top of the Viewer indicating how much the image has been cropped.
Reposition the frame by grabbing inside the rectangle and dragging.
When you are happy with the results, click the Done button in the top right corner.
Notice that the selected portion of the image now fills the frame. Even though there is a clip below our cropped clip, we don’t see it.
And, if you look closely, you’ll see that the cropped image is softer (blurrier) than the original and edges are more likely to be stair-stepped.
RESET
To reset a cropped image back to its default settings, open the Inspector and click the small curved arrow to the right of the word “Crop.”
SUMMARY
Trimming is used to hide portions of an image and superimpose it over another image.
Cropping is used to reframe an image, say from a medium shot to a close-up, but runs the risk of overly softening an image. The general rule is that cropping a little is OK, but don’t crop too much.
I use both these techniques frequently in my own editing.
Benjamin Arango
Benjamin Arango is a writer and a lover of all things video.
Follow @Benjamin Arango
Also read:
- Updated 2024 Approved From Cassette to Smartphone Best VHS Effect Apps for Mobile Devices
- 2024 Approved Streamline Your MPEG2 Videos with VirtualDub Download
- In 2024, Online Video Editing on Chromebook The Ultimate Guide
- New In 2024, The Ultimate List 10 Best Free AVI Joiner Software for Windows and Mac
- Updated In 2024, Video Brightness Enhancement Best Online and Desktop Editing Tools
- Updated Stop Motion Mastery A Beginners Guide to Freeze Frames for 2024
- New In 2024, The Ultimate FCPX Plugin Troubleshooting Checklist (Updated 2023)
- New Streamline Your Workflow The Top 8 Video Editing Apps for 4K Proxy Files
- Updated In 2024, Filmora Torrent Download 100 Safe and Free Method
- New 2024 Approved Extracting Audio From Instagram A Step-by-Step Guide
- New 2024 Approved Top Video Editing Software for Windows 11 Free & Premium Options
- Updated 2024 Approved Macs Most Powerful Video Editor for Pros Adobe Premiere Pro
- New In 2024, Unleash Your Creativity Top Apple Video Editing Tools
- New Unbiased Review Find the Ideal AIFF Converter for Your Audio Files for 2024
- New 2024 Approved Edit Like a Pro GoPro Quik Review & Best PC Alternatives for Video Editing
- Unleash Cinematic Quality Top 1080P Video Editing Software for Creators for 2024
- Updated Video Editing on Windows 11 Our Top Recommendations for 2024
- Updated In 2024, Video Velocity 10 Free Apps to Control Video Speed on Your Mobile
- New Best Free Video Editing Apps for Android No Watermark Required for 2024
- Virtualdub Vs. The Competition A Comprehensive Review and Alternative Options for 2024
- Updated 2024 Approved How to Choose the Right Video to Audio Conversion Tool My Checklist
- In 2024, Mac Users Rejoice The Ultimate MP3 Conversion Software Roundup
- New Perfecting Your Facebook Video Cover Tips for Ideal Dimensions for 2024
- Updated 2024 Approved Boost Your Videos Top 10 Free Online Video Enhancement Tools
- New 2024 Approved The Auto-Frame Feature Is Needed to Edit the Videos Professionally and Effectively for Social Sharing. In This Article, I Have Picked up some of the Best Video Editors with AI Smart Reframing and Cropping Features
- Updated S Best Mobile Video Editors with Audio Tracks for 2024
- New Get Talking The Best Free Speech-to-Text Apps for Mac That Dont Require a Download for 2024
- New Edit Like a Pro Top 8 Video Editing Apps for 4K Proxy for 2024
- In 2024, S Must-Have Time-Lapse Apps for Smartphone Photography
- New 2024 Approved NEW Best Free Game Video Editing Software
- Updated 2024 Approved Make Unforgettable Home Movies on Your Mac with Ease
- Updated 2024 Approved Sound Design on a Budget How to Find and Integrate Free Sound Effects in Final Cut Pro
- Updated Master VLC How to Play Videos in Slow Motion on Desktop and Mobile
- New 2024 Approved Audio Refinement The Ultimate Guide to Removing Background Noise in FCPX
- Two Ways to Track My Boyfriends Apple iPhone 13 Pro without Him Knowing | Dr.fone
- New In-Depth Review of Ivona Text to Speech Converter for 2024
- How to Hide/Fake Snapchat Location on Your Realme C67 4G | Dr.fone
- New HDR Photography How to Use HDR Mode on Your Android Devices
- How to Soft Reset Honor 100 Pro phone? | Dr.fone
- How to Quickly Fix Bluetooth Not Working on Infinix Note 30 Pro | Dr.fone
- 11 Best Location Changers for Oppo Find N3 Flip | Dr.fone
- How To Repair System Issues of iPhone 6 Plus? | Dr.fone
- How To Reset the Security Questions of Your Apple ID On Your iPhone X
- In 2024, Ultimate Guide from Motorola Moto G34 5G FRP Bypass
- Unova Stone Pokémon Go Evolution List and How Catch Them For Vivo X Fold 2 | Dr.fone
- In 2024, Full Guide to Bypass Samsung Galaxy F04 FRP
- About Vivo Y100i FRP Bypass
- How to Put iPhone 13 or iPad on Recovery mode? (Step by Step Tutorial) | Stellar
- How to Make the Most of Your Apple iPhone 15 Pro Max Lock Screen with Notifications?
- Complete Tutorial Sending Photos From Apple iPhone 12 Pro Max to iPad | Dr.fone
- Top-Rated Free Game Download Sites for PC, Android, and Mobile Devices for 2024
- What Does Enter PUK Code Mean And Why Did The Sim Get PUK Blocked On Samsung Galaxy A25 5G Device
- Title: New Vertical by Design Optimizing Your Mobile Video Strategy
- Author: Isabella
- Created at : 2024-05-19 13:03:39
- Updated at : 2024-05-20 13:03:39
- Link: https://video-creation-software.techidaily.com/new-vertical-by-design-optimizing-your-mobile-video-strategy/
- License: This work is licensed under CC BY-NC-SA 4.0.
