
:max_bytes(150000):strip_icc():format(webp)/TwitterVideoDownload-5b605aaac9e77c002c3a42f3.jpg)
Updated 2024 Approved Unleash Your Creativity A Beginners Guide to Stop Motion Animation on Instagram
Unleash Your Creativity: A Beginner’s Guide to Stop Motion Animation on Instagram
How to Make a Stop Motion Video on Instagram

Liza Brown
Mar 27, 2024• Proven solutions
Instagram’s announcement that the stop motion feature will become available in the Stories section created quite a buzz on the Internet, a while ago. In 2020, the feature remains relatively unknown to social media users, even though on paper it seemed promising.
Stop motion videos, are simply sequentially taken photos that create an illusion of movement once they are played one after the other. These types of videos are growing more popular on social media, as they can make Instagram stories or any other social media feed more interesting. You are at the right place if you would like to join video content creators who already produce stop motion videos because in this article we are going to show you how to make a stop motion video on Instagram.
Part 1: How to Make a Stop Motion Video on Instagram?
The technical side of making a stop motion video on Instagram is rather simple since you can enable this feature in just a few taps. After you launch the app, you should tap on the Camera icon in the upper left corner of the screen. The new window will open where you can choose the type of Instagram story you want to create, so you can pick to go live , record a video normally or use the app’s Boomerang feature.
You will find the Stop Motion option at the end of this menu, and after you tap on it you just have to press the white button in the middle of the toolbar that is located near the bottom of the screen in order to start taking pictures.
Currently, Instagram limits the number of photos you can take with the stop motion feature to ten. Tap on the Done button that is located at the top of the screen once you completed the process of making a stop motion video and then proceed to choose stickers you would like to include in the story you created. Press the Send To button and decide if you want to share the stop motion video to your Instagram or Facebook story or with some of your Instagram followers. ;
Check the ultimate guide about how to use Instagram Stories
Cons of Making Stop Motion Videos with Instagram
Even though Instagram’s new stop motion feature offers an easy way to make your stories more interesting, it still has a few downsides. Adding sound or music to stop motion videos you create with Instagram isn’t possible at the moment, and you can’t do much more other than downloading the video to your device.
Like all other Instagram stories, stop motion videos created with this app are only available for 24 hours if you don’t save them on your phone. Moreover, downloading the stories you create with Instagram ’s stop motion tool will enable you to edit them with video editing apps for iPhone and Android devices and post them to any social media platform you choose.
In addition, the maximum number of frames a stop motion video created with Instagram can have is limited to just ten.
Frequently Asked Questions: Why Can’t I See the Stop Motion Feature in Instagram Stories?
Instagram’s stop motion feature is still in its beta stage, which means that it isn’t available on all versions of the app. So, if you can’t see this option you must go to Google Play or Apps Store and install the version of Instagram that has this feature. If the issue persists, you should opt for some other stop motion app you can use free of charge. ;
Part 2: 3 Best Stop Motion Apps you can Use to Create Animated Videos for Instagram
You shouldn’t worry if the stop motion feature isn’t available on the version of Instagram you’re using, because there are so many apps that are equipped with this tool. With so many different options on the market, finding the app that provides you with all features you need to create stop motion videos can be a difficult task. That’s why we shortlisted the three best apps for iPhones and Android devices that enable you to make animated stop motion videos for Instagram.
1. Over
Price: Free, offers in-app purchase
Compatibility: iOS, Android
Over allows you to do much more than just create stop motion videos you can post on Instagram since it is equipped with a versatile set of tools that can help you improve the brand awareness on social media. There are more than 700 templates to choose from and each of them enables you to adjust your photos and videos to the social network’s demands. However, the free version of the app offers only limited capabilities, and you must upgrade to the Pro version if you want to have access to all photo and video editing tools Over have to offer.
2. Mojo
Price: Free, offers in-app purchases

Creating content for social media with Mojo is a simple process that can be completed in just three easy steps. You don’t even need a Mojo account to start creating stories with this app. All you have to do is select an animated template, import videos or photos and edit it before tapping on the share button. There are more than a hundred animated templates to choose from, so after you pick one, you just have to add text overlays , but you must purchase Mojo Pro if you want to change aspect ratios , duplicate stories or have access to all text styles and templates.
3. Life Lapse
Price: Free, offers in-app purchases

The fact that more than a million video content creators and brands are using Life Lapse to make stop motion videos says a lot about the app’s capabilities. Unlike Over and Mojo, Life Lapse lets you set the exposure and focus locks, switch on a grid or use the ghosted image overlay. Besides capturing photos and videos, the app also allows you to import photos you want to include in the stop motion animation. Furthermore, even the free version of Life Lapse offers a variety of video editing tools that allow you to crop images or adjust saturation, brightness or white balance values in each frame.
Check more video editing apps for Instagram
Part 3: How to Create a Stop Motion Videos with Life Lapse
You don’t have to be a skilled cinematographer to make a stop motion video using the Life Lapse app. Once you’ve installed and launched Life Lapse you should create a new project by tapping on the + icon. As soon as the camera loads you’ll be asked to choose if you would like to create a photo or a video project. Tap on the photo option and start taking photos of the objects or people you want to include in your stop motion video.
The app also grants you access to a broad range of tools that will make composing the shots easier or reduce the flickering effect. Even though Life Lapse doesn’t limit the maximum duration of the stop motion videos you can create with it, an Instagram story cannot be longer than 15 seconds. Furthermore, changing a video’s aspect ratio to 9:16 is recommended, as it will enable you to know exactly how your stop motion video is going to look like after you upload it to Instagram.
Part 4: Tips for Creating Stop Motion Videos for Instagram
The process of making a stop motion animation is not technically complicated since you just need to place your phone on a tripod and take a photo each time you move an object in the shot. Even so, working on a stop motion project requires previous preparations. Here are a few tips that will help you make a better stop motion animation video.
1. Develop a concept
What is your stop motion video about? This is the first and the most important question you will have to answer before you start making a stop motion video. Developing a concept will enable you to know which props you are going to need or how many actors you have to find before you can actually start shooting. Stop motion videos can be virtually about anything, and you should choose a story that will keep the audience interested from start to finish.
2. Shoot in studio conditions
Although it is not impossible to make a stop motion video in outdoor conditions, having control over sudden light changes is. That is why it is much better to shoot stop motion videos in studio-like conditions where you can easily adjust all the parameters in accordance with the demands of the project you’re working on. In addition, it is paramount to keep your phone perfectly steady, which is why it is better to mount it on a tripod than to shoot handheld.
Conclusion
Instagram’s stop motion feature is still under development and it may be some time before you can use it to create professional-looking videos. Apps like Over or Life Lapse are a much better option for all video content creators who would like to impress their audience with stop motion videos. Which app are you using to create stop motion videos? Leave a comment and let us know.
Liza Brown
Liza Brown is a writer and a lover of all things video.
Follow @Liza Brown
Liza Brown
Mar 27, 2024• Proven solutions
Instagram’s announcement that the stop motion feature will become available in the Stories section created quite a buzz on the Internet, a while ago. In 2020, the feature remains relatively unknown to social media users, even though on paper it seemed promising.
Stop motion videos, are simply sequentially taken photos that create an illusion of movement once they are played one after the other. These types of videos are growing more popular on social media, as they can make Instagram stories or any other social media feed more interesting. You are at the right place if you would like to join video content creators who already produce stop motion videos because in this article we are going to show you how to make a stop motion video on Instagram.
Part 1: How to Make a Stop Motion Video on Instagram?
The technical side of making a stop motion video on Instagram is rather simple since you can enable this feature in just a few taps. After you launch the app, you should tap on the Camera icon in the upper left corner of the screen. The new window will open where you can choose the type of Instagram story you want to create, so you can pick to go live , record a video normally or use the app’s Boomerang feature.
You will find the Stop Motion option at the end of this menu, and after you tap on it you just have to press the white button in the middle of the toolbar that is located near the bottom of the screen in order to start taking pictures.
Currently, Instagram limits the number of photos you can take with the stop motion feature to ten. Tap on the Done button that is located at the top of the screen once you completed the process of making a stop motion video and then proceed to choose stickers you would like to include in the story you created. Press the Send To button and decide if you want to share the stop motion video to your Instagram or Facebook story or with some of your Instagram followers. ;
Check the ultimate guide about how to use Instagram Stories
Cons of Making Stop Motion Videos with Instagram
Even though Instagram’s new stop motion feature offers an easy way to make your stories more interesting, it still has a few downsides. Adding sound or music to stop motion videos you create with Instagram isn’t possible at the moment, and you can’t do much more other than downloading the video to your device.
Like all other Instagram stories, stop motion videos created with this app are only available for 24 hours if you don’t save them on your phone. Moreover, downloading the stories you create with Instagram ’s stop motion tool will enable you to edit them with video editing apps for iPhone and Android devices and post them to any social media platform you choose.
In addition, the maximum number of frames a stop motion video created with Instagram can have is limited to just ten.
Frequently Asked Questions: Why Can’t I See the Stop Motion Feature in Instagram Stories?
Instagram’s stop motion feature is still in its beta stage, which means that it isn’t available on all versions of the app. So, if you can’t see this option you must go to Google Play or Apps Store and install the version of Instagram that has this feature. If the issue persists, you should opt for some other stop motion app you can use free of charge. ;
Part 2: 3 Best Stop Motion Apps you can Use to Create Animated Videos for Instagram
You shouldn’t worry if the stop motion feature isn’t available on the version of Instagram you’re using, because there are so many apps that are equipped with this tool. With so many different options on the market, finding the app that provides you with all features you need to create stop motion videos can be a difficult task. That’s why we shortlisted the three best apps for iPhones and Android devices that enable you to make animated stop motion videos for Instagram.
1. Over
Price: Free, offers in-app purchase
Compatibility: iOS, Android
Over allows you to do much more than just create stop motion videos you can post on Instagram since it is equipped with a versatile set of tools that can help you improve the brand awareness on social media. There are more than 700 templates to choose from and each of them enables you to adjust your photos and videos to the social network’s demands. However, the free version of the app offers only limited capabilities, and you must upgrade to the Pro version if you want to have access to all photo and video editing tools Over have to offer.
2. Mojo
Price: Free, offers in-app purchases
Creating content for social media with Mojo is a simple process that can be completed in just three easy steps. You don’t even need a Mojo account to start creating stories with this app. All you have to do is select an animated template, import videos or photos and edit it before tapping on the share button. There are more than a hundred animated templates to choose from, so after you pick one, you just have to add text overlays , but you must purchase Mojo Pro if you want to change aspect ratios , duplicate stories or have access to all text styles and templates.
3. Life Lapse
Price: Free, offers in-app purchases
The fact that more than a million video content creators and brands are using Life Lapse to make stop motion videos says a lot about the app’s capabilities. Unlike Over and Mojo, Life Lapse lets you set the exposure and focus locks, switch on a grid or use the ghosted image overlay. Besides capturing photos and videos, the app also allows you to import photos you want to include in the stop motion animation. Furthermore, even the free version of Life Lapse offers a variety of video editing tools that allow you to crop images or adjust saturation, brightness or white balance values in each frame.
Check more video editing apps for Instagram
Part 3: How to Create a Stop Motion Videos with Life Lapse
You don’t have to be a skilled cinematographer to make a stop motion video using the Life Lapse app. Once you’ve installed and launched Life Lapse you should create a new project by tapping on the + icon. As soon as the camera loads you’ll be asked to choose if you would like to create a photo or a video project. Tap on the photo option and start taking photos of the objects or people you want to include in your stop motion video.
The app also grants you access to a broad range of tools that will make composing the shots easier or reduce the flickering effect. Even though Life Lapse doesn’t limit the maximum duration of the stop motion videos you can create with it, an Instagram story cannot be longer than 15 seconds. Furthermore, changing a video’s aspect ratio to 9:16 is recommended, as it will enable you to know exactly how your stop motion video is going to look like after you upload it to Instagram.
Part 4: Tips for Creating Stop Motion Videos for Instagram
The process of making a stop motion animation is not technically complicated since you just need to place your phone on a tripod and take a photo each time you move an object in the shot. Even so, working on a stop motion project requires previous preparations. Here are a few tips that will help you make a better stop motion animation video.
1. Develop a concept
What is your stop motion video about? This is the first and the most important question you will have to answer before you start making a stop motion video. Developing a concept will enable you to know which props you are going to need or how many actors you have to find before you can actually start shooting. Stop motion videos can be virtually about anything, and you should choose a story that will keep the audience interested from start to finish.
2. Shoot in studio conditions
Although it is not impossible to make a stop motion video in outdoor conditions, having control over sudden light changes is. That is why it is much better to shoot stop motion videos in studio-like conditions where you can easily adjust all the parameters in accordance with the demands of the project you’re working on. In addition, it is paramount to keep your phone perfectly steady, which is why it is better to mount it on a tripod than to shoot handheld.
Conclusion
Instagram’s stop motion feature is still under development and it may be some time before you can use it to create professional-looking videos. Apps like Over or Life Lapse are a much better option for all video content creators who would like to impress their audience with stop motion videos. Which app are you using to create stop motion videos? Leave a comment and let us know.
Liza Brown
Liza Brown is a writer and a lover of all things video.
Follow @Liza Brown
From Chrome OS to Linux: A Seamless Transition (2023 Update)
How to Install Linux on Chromebook

Ollie Mattison
Mar 27, 2024• Proven solutions
Chromebooks are an excellent choice for educational institutions or businesses that require their employees to have constant access to the Internet. Even though these devices are a perfect tool that can accompany you on business trips and enable you to answer important emails or have access to crucial information stored on the cloud, performing more demanding tasks, like video editing, is still a challenge. However, it is far from impossible, although you may have to take a few extra steps before running a video editing software on your Chromebook.
Chrome OS is a Linux based environment and for that reason, Chromebook owners who would like to use professional editing software on their Chromebooks can install a Linux OS that will enable them to use programs such as Lightworks that are perfectly suited for high-end video editing. There are two different ways to install Linux on a Chromebook, you can either do it using Gallium OS or ChrUbuntu or in a Chroot environment using Crouton. Each of these methods is relatively easy and we will take you through the process step by step. Here’s how you can install Linux on your Chromebook.
- Part 1: Preparing before installing Linux OS on Chromebook
- Part 2: How to Install Linux as a Chroot Using Crouton on Chromebook
- Part 3: How to Dual-Boot a Chromebook Using ChrUbuntu
- Part 4: How to Install Linux as a Chroot Using Crouton on Chromebook
- Part 5: Recommended Linux Video Editing Software
Part 1: Preparing before installing Linux OS on Chromebook
The first step of the process of installing the Linux OS is the decision itself, and you need to have all the necessary information before you decide to install a Linux OS on your Chromebook.
- Make sure that the version of Chromebook you have is capable of supporting a Linux OS. Your device must be equipped with an ARM or Intel chip in order to be able to run the version of Linux OS you want to install. Although both chips will allow you to go through the process, running closed source software such the Steam is only possible with Intel chips.
- Regardless of which method of installing Linux OS you choose, you will have to switch to the Developer Mode, a special built-in function that allows you to install the unapproved operating system, among other things.
- Now that you are aware of the requirements and risks, you will have to backup all the files you have on your Chromebook because once you switch to the Developer Mode all the information stored locally will be erased. You can save the files on another computer or on the cloud depending on how much data you need to move and which one is more convenient for you.
Part 2: How to Install Linux as a Chroot Using Crouton on Chromebook
After you have stored all your data safely, your Chromebook is ready for the beginning of the installation process of the secondary operating system. You will have to perform a series of actions that will allow you to start the installation, starting from accessing the Developer Mode.
1. Acessing the developer mode
The first step of the process is to reboot your system, while your Chromebook is on. In order to do so hold Escape and Refresh keys on your keyboard and then hit the power button. Once your device is back online you will find yourself in the recovery mode, and you will see a message telling you to insert a recovery disc. Instead of inserting the disc, hold Ctrl+D and wait for OS verification menu to appear on the screen. At this point, if you are still having second thoughts about this process, you can hit the spacebar to return to recovery mode, or press Enter to proceed. Hitting Enter will delete all the data stored on your device and take you into the Developer Mode. Once your Chromebook lets you know that you are now in the Developer Mode, reboot the system and install a fresh version of the Chrome OS. Insert your login information and follow the instructions until you are looking at the Chrome OS desktop.

2. Installing Chroot
At this stage of the process, your Chromebook is ready for the installation of the Crouton environment. Crouton is a series of scripts that makes running a Linux OS much easier, especially for inexperienced users. In order to download Crouton, go to GitHub and find the download link, detailed instructions or extensions that can add more functionality to your OS. Once the installation file or files are in the Download folder, your next step is to access the Chromebook’s terminal a feature called ‘Crosh’. The fastest way to do this is to hold CTRL + ALT keys and then hit the T key. This action will cause the Chrome window to appear on the screen, and you will need to type the ‘shell’ command without using quotation marks. Afterwards, enter the following command: ‘sudo sh ~/Downloads/crouton -t xfce’ and if you want to install extensions you will have to add ‘xfce,extension’ command at the end.

Press the Enter key and wait for the system to start setting up the Chroot. This process may take a while, so it is important to be patient, but more importantly, do not interfere with it in any way. Installation of your secondary OS is now on the way, and you may be asked to insert your login data, like your Gmail username and password. Wait patiently until the process is over and then return to shell and enter this command: ‘sudo enter-chroot startxfce4’. Your screen will go black for a while, but after the black screen is gone your Chromebook will be in the freshly installed Linux OS.
3. Optimizing your new OS
You may have to optimize your new OS in order to improve the experience of using it. Enabling your keyboard’s brightness and volume keys inside the new OS can be done easily by holding CTRL+ALT+T and then typing shell once you’ve accessed Chrome OS’s shell and hit Enter. Issue the following command: ‘sudo sh -e ~/Downloads/crouton-r precise-t keyboard–u’ and then press Enter again. Removing the screen saver or installing more extensions may also be a good way to enable more options in the new OS. Most importantly, you can now download and install the video editing software you want to use for editing your footage.
4. Remove Chroot from your Chromebook
If for some reason you want to uninstall Linux from your Chromebook, simply reboot the system and press the spacebar when the ‘OS verification is off’ message appears on the screen. In this manner, you will exit the Developer Mode and all locally stored data, including all installed environments, will be deleted.
Part 3: How to Dual-Boot a Chromebook Using ChrUbuntu
An alternative option is available for Chromebook users that have Intel based devices like recently released Haswell models. The ChrUbuntu can be installed on the USB stick or external hard-drive or directly to the local memory of your Chromebook. Even though ARM-based machines can also use ChrUbuntu it isn’t advisable because they may perform poorly due to slower processor speeds and less RAM power. Unlike Chroot, ChrUbuntu will not allow you to switch between operating systems without a reboot, and if the system is stored locally, you may need to go through the full system recovery.
1. Preparation for the installation
Like with the previous method you will have to go into the Developer Mode and make sure that you have access to a WiFi connection. When you are asked to provide your login details, instead of entering them press Ctrl+Alt+Forward and then type ‘chronos’ and press Enter. The next step will require you to issue the following command: ‘curl -L -O http://goo.gl/9sgchs ; sudo bash 9sgchs’ and then once more hit Enter. Again press Enter after the information about the installation is displayed on the screen and then you will be asked to decide how much space you want to allocate for Linux installation. Experts say that 9GB is the upper limit. After you’ve made your choice press Enter.
2. Installing ChrUbuntu
Once the partitioning of your hard-drive is completed, you will have to repeat the first several steps from typing ‘chronos’ to pressing enter when information about the installation is displayed on the screen. The installation process is now in progress and you will be occasionally asked to select a few settings, make sure you always click on default. At the end of the installation process, you will have to choose the location where GRUB should be installed, please select /dev/sda, because the failure to do so may interrupt the installation.
Once the installation is completed, restart your Chromebook to finalize the process, and when you see the ‘OS Verification is Off’ notification press Ctrl+L to access Linux or Ctrl+D boot into Chrome OS.

3. Uninstall ChrUbuntu
Removing ChrUbuntu is a relatively painless process that can be completed with just a few simple commands. If the OS is stored locally the only way to erase it is to perform a full system recovery. While all your data located on the cloud will re-sync with your Chromebook, the data stored locally will be deleted, which is why it is important to backup all the important files before starting a system recovery process. The fastest and easiest way to perform a system recovery is by creating a recovery disk from your device. Insert ‘chrome://imageburner’ in your browser’s address bar, and carefully read and follow the instructions.
This Linux removal method will also require you to have a USB stick with a minimum of 4GB of storage space. After you created the disk, you can go into the Recovery Mode, by holding Esc and Refresh buttons simultaneously and then pressing the Power button. In the Recovery Mode, you will be asked to insert the recovery disk and the process will be on the way.
Part 4: How to Dual-Boot a Chromebook Using Gallium OS
If neither Chroot nor ChrUbuntu work for you, using Gallium OS may be the right choice. The Gallium is Xbuntu-based OS that is equipped with touchpad mouse drivers among other advantages it offers over other operating systems. The installation process isn’t complicated, although it may require more effort than installing Crouton.
1. Preparation for the installation
In order to be aware of all the preparation steps, you need to take, you must first find out your device’s Hardware ID number and you can obtain this information by navigating to Chrome://System, Hardware Class within the Chrome OS. Hardware Compatibility page will provide the information regarding the CPU’s family, which can be crucial for the OS’ performance. You can run the installation either from an ISO image on an external USB drive or from the Chrome OS command line using Chrx. We will describe how to install Gallium OS from the Chrome OS command line because the other option doesn’t allow you to dual-boot your Chromebook.
2. Enabling the Legacy Mode
Like previously described, enter the Developer Mode and when the ‘ OS verification is OFF’ notification appears on the screen proceed to enable the Legacy Mode. You can do this by holding CTRL+D keys to enable the Chrome OS to boot in the Developer Mode. After you’ve successfully made this step, press CTRl+ALT+T to access the ‘Crosh’ terminal and then type ‘shell’. At the ‘chronos/localhost/$ issue the following command: ‘sudo crossystem dev_boot_legacy=1’. Update and install all the necessary firmware by running the Firmware Utility Script.
3. Installation process
If you choose to install Gallium OS through Chrome OS command line using Chrx that will enable you to dual-boot your Chromebook, you should start by booting the device into Chrome OS and configuring networking. The next step you’ll need to take is switching to a virtual terminal by holding Ctrl+Alt+F2, and then you should log in as user chronos without a password. Once you’ve completed this step issue the following command: ‘curl -O https://chrx.org/go && sh go’ and follow the on-screen instructions to repartition your hard-drive and install the Gallium OS. Once the installation is over reboot the device and press Ctrl+L when the ‘OS Verification is Off’ notification appears on the screen to boot Gallium OS or hold Ctrl+D to access Chrome OS. After the Gallium OS is successfully installed on your Chromebook you can start using programs such as Skype or Lightworks.
Which Method is the Best?
Each of the options to install a Linux OS on your Chromebook we described has its advantages and disadvantages. It is our opinion that the Crouton method is the easiest and the fastest. Furthermore, this method enables you to switch between your primary and secondary OS without the need to reboot the device and the Downloads folder makes working in both environments much easier.
On the other hand, other methods require more knowledge about the Linux OS installation process and switching between OS’ is not that simple. If you are looking for an easy way to dual-boot your Chromebook that best way to do it is to install Linux as a Chroot using Crouton.
Part 5: Recommended Linux Video Editing Software: Lightworks
Price: $24.99/month, although free versions of the software are also available.
What we like: A powerful video and audio editor perfectly suited for the production of professional video content.
What we don’t like: The software isn’t easy to use and inexperienced editors will find it difficult to use at first.
Lightworks Resolve may not be as popular as Adobe Premiere Pro or Final Cut Pro, but that doesn’t mean that this video editing software isn’t as capable as its more popular counterparts.
The software is compatible with Mac, Windows, and Linux OS, which makes it a perfect choice for Chromebook users that have a Linux OS installed on their devices. Lightworks features literally every editing tool imaginable and for that reason, it is a perfect choice for editing videos you would like to upload to Vimeo or YouTube or high-end professional projects. This editing software offers plenty of transitions and visual effects that will help its users to create seamless jumps between shots and visually impressive videos.
Ollie Mattison
Ollie Mattison is a writer and a lover of all things video.
Follow @Ollie Mattison
Ollie Mattison
Mar 27, 2024• Proven solutions
Chromebooks are an excellent choice for educational institutions or businesses that require their employees to have constant access to the Internet. Even though these devices are a perfect tool that can accompany you on business trips and enable you to answer important emails or have access to crucial information stored on the cloud, performing more demanding tasks, like video editing, is still a challenge. However, it is far from impossible, although you may have to take a few extra steps before running a video editing software on your Chromebook.
Chrome OS is a Linux based environment and for that reason, Chromebook owners who would like to use professional editing software on their Chromebooks can install a Linux OS that will enable them to use programs such as Lightworks that are perfectly suited for high-end video editing. There are two different ways to install Linux on a Chromebook, you can either do it using Gallium OS or ChrUbuntu or in a Chroot environment using Crouton. Each of these methods is relatively easy and we will take you through the process step by step. Here’s how you can install Linux on your Chromebook.
- Part 1: Preparing before installing Linux OS on Chromebook
- Part 2: How to Install Linux as a Chroot Using Crouton on Chromebook
- Part 3: How to Dual-Boot a Chromebook Using ChrUbuntu
- Part 4: How to Install Linux as a Chroot Using Crouton on Chromebook
- Part 5: Recommended Linux Video Editing Software
Part 1: Preparing before installing Linux OS on Chromebook
The first step of the process of installing the Linux OS is the decision itself, and you need to have all the necessary information before you decide to install a Linux OS on your Chromebook.
- Make sure that the version of Chromebook you have is capable of supporting a Linux OS. Your device must be equipped with an ARM or Intel chip in order to be able to run the version of Linux OS you want to install. Although both chips will allow you to go through the process, running closed source software such the Steam is only possible with Intel chips.
- Regardless of which method of installing Linux OS you choose, you will have to switch to the Developer Mode, a special built-in function that allows you to install the unapproved operating system, among other things.
- Now that you are aware of the requirements and risks, you will have to backup all the files you have on your Chromebook because once you switch to the Developer Mode all the information stored locally will be erased. You can save the files on another computer or on the cloud depending on how much data you need to move and which one is more convenient for you.
Part 2: How to Install Linux as a Chroot Using Crouton on Chromebook
After you have stored all your data safely, your Chromebook is ready for the beginning of the installation process of the secondary operating system. You will have to perform a series of actions that will allow you to start the installation, starting from accessing the Developer Mode.
1. Acessing the developer mode
The first step of the process is to reboot your system, while your Chromebook is on. In order to do so hold Escape and Refresh keys on your keyboard and then hit the power button. Once your device is back online you will find yourself in the recovery mode, and you will see a message telling you to insert a recovery disc. Instead of inserting the disc, hold Ctrl+D and wait for OS verification menu to appear on the screen. At this point, if you are still having second thoughts about this process, you can hit the spacebar to return to recovery mode, or press Enter to proceed. Hitting Enter will delete all the data stored on your device and take you into the Developer Mode. Once your Chromebook lets you know that you are now in the Developer Mode, reboot the system and install a fresh version of the Chrome OS. Insert your login information and follow the instructions until you are looking at the Chrome OS desktop.
2. Installing Chroot
At this stage of the process, your Chromebook is ready for the installation of the Crouton environment. Crouton is a series of scripts that makes running a Linux OS much easier, especially for inexperienced users. In order to download Crouton, go to GitHub and find the download link, detailed instructions or extensions that can add more functionality to your OS. Once the installation file or files are in the Download folder, your next step is to access the Chromebook’s terminal a feature called ‘Crosh’. The fastest way to do this is to hold CTRL + ALT keys and then hit the T key. This action will cause the Chrome window to appear on the screen, and you will need to type the ‘shell’ command without using quotation marks. Afterwards, enter the following command: ‘sudo sh ~/Downloads/crouton -t xfce’ and if you want to install extensions you will have to add ‘xfce,extension’ command at the end.
Press the Enter key and wait for the system to start setting up the Chroot. This process may take a while, so it is important to be patient, but more importantly, do not interfere with it in any way. Installation of your secondary OS is now on the way, and you may be asked to insert your login data, like your Gmail username and password. Wait patiently until the process is over and then return to shell and enter this command: ‘sudo enter-chroot startxfce4’. Your screen will go black for a while, but after the black screen is gone your Chromebook will be in the freshly installed Linux OS.
3. Optimizing your new OS
You may have to optimize your new OS in order to improve the experience of using it. Enabling your keyboard’s brightness and volume keys inside the new OS can be done easily by holding CTRL+ALT+T and then typing shell once you’ve accessed Chrome OS’s shell and hit Enter. Issue the following command: ‘sudo sh -e ~/Downloads/crouton-r precise-t keyboard–u’ and then press Enter again. Removing the screen saver or installing more extensions may also be a good way to enable more options in the new OS. Most importantly, you can now download and install the video editing software you want to use for editing your footage.
4. Remove Chroot from your Chromebook
If for some reason you want to uninstall Linux from your Chromebook, simply reboot the system and press the spacebar when the ‘OS verification is off’ message appears on the screen. In this manner, you will exit the Developer Mode and all locally stored data, including all installed environments, will be deleted.
Part 3: How to Dual-Boot a Chromebook Using ChrUbuntu
An alternative option is available for Chromebook users that have Intel based devices like recently released Haswell models. The ChrUbuntu can be installed on the USB stick or external hard-drive or directly to the local memory of your Chromebook. Even though ARM-based machines can also use ChrUbuntu it isn’t advisable because they may perform poorly due to slower processor speeds and less RAM power. Unlike Chroot, ChrUbuntu will not allow you to switch between operating systems without a reboot, and if the system is stored locally, you may need to go through the full system recovery.
1. Preparation for the installation
Like with the previous method you will have to go into the Developer Mode and make sure that you have access to a WiFi connection. When you are asked to provide your login details, instead of entering them press Ctrl+Alt+Forward and then type ‘chronos’ and press Enter. The next step will require you to issue the following command: ‘curl -L -O http://goo.gl/9sgchs ; sudo bash 9sgchs’ and then once more hit Enter. Again press Enter after the information about the installation is displayed on the screen and then you will be asked to decide how much space you want to allocate for Linux installation. Experts say that 9GB is the upper limit. After you’ve made your choice press Enter.
2. Installing ChrUbuntu
Once the partitioning of your hard-drive is completed, you will have to repeat the first several steps from typing ‘chronos’ to pressing enter when information about the installation is displayed on the screen. The installation process is now in progress and you will be occasionally asked to select a few settings, make sure you always click on default. At the end of the installation process, you will have to choose the location where GRUB should be installed, please select /dev/sda, because the failure to do so may interrupt the installation.
Once the installation is completed, restart your Chromebook to finalize the process, and when you see the ‘OS Verification is Off’ notification press Ctrl+L to access Linux or Ctrl+D boot into Chrome OS.
3. Uninstall ChrUbuntu
Removing ChrUbuntu is a relatively painless process that can be completed with just a few simple commands. If the OS is stored locally the only way to erase it is to perform a full system recovery. While all your data located on the cloud will re-sync with your Chromebook, the data stored locally will be deleted, which is why it is important to backup all the important files before starting a system recovery process. The fastest and easiest way to perform a system recovery is by creating a recovery disk from your device. Insert ‘chrome://imageburner’ in your browser’s address bar, and carefully read and follow the instructions.
This Linux removal method will also require you to have a USB stick with a minimum of 4GB of storage space. After you created the disk, you can go into the Recovery Mode, by holding Esc and Refresh buttons simultaneously and then pressing the Power button. In the Recovery Mode, you will be asked to insert the recovery disk and the process will be on the way.
Part 4: How to Dual-Boot a Chromebook Using Gallium OS
If neither Chroot nor ChrUbuntu work for you, using Gallium OS may be the right choice. The Gallium is Xbuntu-based OS that is equipped with touchpad mouse drivers among other advantages it offers over other operating systems. The installation process isn’t complicated, although it may require more effort than installing Crouton.
1. Preparation for the installation
In order to be aware of all the preparation steps, you need to take, you must first find out your device’s Hardware ID number and you can obtain this information by navigating to Chrome://System, Hardware Class within the Chrome OS. Hardware Compatibility page will provide the information regarding the CPU’s family, which can be crucial for the OS’ performance. You can run the installation either from an ISO image on an external USB drive or from the Chrome OS command line using Chrx. We will describe how to install Gallium OS from the Chrome OS command line because the other option doesn’t allow you to dual-boot your Chromebook.
2. Enabling the Legacy Mode
Like previously described, enter the Developer Mode and when the ‘ OS verification is OFF’ notification appears on the screen proceed to enable the Legacy Mode. You can do this by holding CTRL+D keys to enable the Chrome OS to boot in the Developer Mode. After you’ve successfully made this step, press CTRl+ALT+T to access the ‘Crosh’ terminal and then type ‘shell’. At the ‘chronos/localhost/$ issue the following command: ‘sudo crossystem dev_boot_legacy=1’. Update and install all the necessary firmware by running the Firmware Utility Script.
3. Installation process
If you choose to install Gallium OS through Chrome OS command line using Chrx that will enable you to dual-boot your Chromebook, you should start by booting the device into Chrome OS and configuring networking. The next step you’ll need to take is switching to a virtual terminal by holding Ctrl+Alt+F2, and then you should log in as user chronos without a password. Once you’ve completed this step issue the following command: ‘curl -O https://chrx.org/go && sh go’ and follow the on-screen instructions to repartition your hard-drive and install the Gallium OS. Once the installation is over reboot the device and press Ctrl+L when the ‘OS Verification is Off’ notification appears on the screen to boot Gallium OS or hold Ctrl+D to access Chrome OS. After the Gallium OS is successfully installed on your Chromebook you can start using programs such as Skype or Lightworks.
Which Method is the Best?
Each of the options to install a Linux OS on your Chromebook we described has its advantages and disadvantages. It is our opinion that the Crouton method is the easiest and the fastest. Furthermore, this method enables you to switch between your primary and secondary OS without the need to reboot the device and the Downloads folder makes working in both environments much easier.
On the other hand, other methods require more knowledge about the Linux OS installation process and switching between OS’ is not that simple. If you are looking for an easy way to dual-boot your Chromebook that best way to do it is to install Linux as a Chroot using Crouton.
Part 5: Recommended Linux Video Editing Software: Lightworks
Price: $24.99/month, although free versions of the software are also available.
What we like: A powerful video and audio editor perfectly suited for the production of professional video content.
What we don’t like: The software isn’t easy to use and inexperienced editors will find it difficult to use at first.
Lightworks Resolve may not be as popular as Adobe Premiere Pro or Final Cut Pro, but that doesn’t mean that this video editing software isn’t as capable as its more popular counterparts.
The software is compatible with Mac, Windows, and Linux OS, which makes it a perfect choice for Chromebook users that have a Linux OS installed on their devices. Lightworks features literally every editing tool imaginable and for that reason, it is a perfect choice for editing videos you would like to upload to Vimeo or YouTube or high-end professional projects. This editing software offers plenty of transitions and visual effects that will help its users to create seamless jumps between shots and visually impressive videos.
Ollie Mattison
Ollie Mattison is a writer and a lover of all things video.
Follow @Ollie Mattison
MOD Video Editing on a Budget: Top 5 Free Options
Top 5 Best Free MOD Video Editors
Ollie Mattison
Mar 27, 2024• Proven solutions
Are you looking for a MOD editing tool? Well, in this era of high-tech communication and online technology, finding nothing is impossible. However, the dilemma is that various video editing tools are available and it is quite difficult to judge which one is good and which is bad. Moreover, you should find a tool, which would match your requirements precisely, providing the output that you exactly desired. So, how to find such a tool or software? Read this article to get a fair and unbiased guide on the top five MOD editors. The article will illustrate the features, pros, and cons of each of the tools.
- Recommended: Wondershare Filmora
- Avidemux
- Free Video Dub
- MPEG Streamclip
- Any Video Converter
- VSDC Video Editor
Recommended: Wondershare Filmora (originally Wondershare Video Editor)
Filmora Video Editor is a more powerful video editing tool. It has an interactive interface and use-friendly options to endorse to the users: options or features are easy to understand and the interface is simplified for providing ease of operations to the users. Now download and try it out yourself.
 Download Mac Version ](https://tools.techidaily.com/wondershare/filmora/download/ )
1. Avidemux
Avidemux is a popular video editing tool which is around the internet for a few years. It supports a wide range of video formats and provides excellent features and seamless options to offer to the users. The software has three compatible versions for Windows, Mac OS and Linux.

Pros:
- Basic video editing functions;
- Simple to use.
Cons:
- Outdated interface.
2. Free Video Dub
Free Video Dub is lightweight and user-friendly video editing tool. It supports a number of video formats including AVI, MOV, FLV, MOD, MKV, MTS/M2TS and more. With it, you can easily edit your video files by simply deleting off the unwanted sections. The best part about this tool is that you don’t need to re-encode anything, which keeps the original quality of your video.

Pros:
- Multi-lingual interface which makes it easy to use;
- Several video formats supported.
Cons:
- May be difficult to add visual effects.
3. MPEG Streamclip
MPEG Streamclip is not only a powerful video conversion tool, but also comes with a lot of features to offer to the users. It supports various video formats VOB, PS, M2P, MOD, VRO, DAT, MOV, DV, AVI, MP4, TS, M2T, MMV and more. It also includes simple nonlinear editing, cropping and scaling functions, which make it a great tool for editing your videos, especially if your project uses video from many different sources that need to fit in the same sequence.

Pros:
- Can convert a range of other video files;
- Has a glitched button and window.
Cons:
- Restricts your file sizes to 600MB.
4. Any Video Converter
Any Video Converter is a popular file conversion tool, which easily convert MOD files and beside that it features loads of conversion options from one video file to another. It can also be marked as a video editing tool, which can serve multiple purposes with precision.

Pros:
- Supports many video formats;
- Easy to use interface.
Cons:
- Can’t convert audio files.
5. VSDC Video Editor
VSDC Free Video Editor is powerful video editing tool, which is completely free and quite popular. It supports a wide range of video formats including MOD, AVI, MP4, MKV, MPG, WMV, 3GP, FLV. Besides the very basic video editing functions, a bunch of filters can turn even a commonplace video sequence into a classy pro-quality movie, while thousands of video and audio effects conveniently grouped into four categories help you making your video to look and sound more dynamic.

Pros:
- Many useful options provided;
- Can also be used as a video converter.
Cons:
- Computer resources (CPU and RAM) are required at a high level.
Ollie Mattison
Ollie Mattison is a writer and a lover of all things video.
Follow @Ollie Mattison
Ollie Mattison
Mar 27, 2024• Proven solutions
Are you looking for a MOD editing tool? Well, in this era of high-tech communication and online technology, finding nothing is impossible. However, the dilemma is that various video editing tools are available and it is quite difficult to judge which one is good and which is bad. Moreover, you should find a tool, which would match your requirements precisely, providing the output that you exactly desired. So, how to find such a tool or software? Read this article to get a fair and unbiased guide on the top five MOD editors. The article will illustrate the features, pros, and cons of each of the tools.
- Recommended: Wondershare Filmora
- Avidemux
- Free Video Dub
- MPEG Streamclip
- Any Video Converter
- VSDC Video Editor
Recommended: Wondershare Filmora (originally Wondershare Video Editor)
Filmora Video Editor is a more powerful video editing tool. It has an interactive interface and use-friendly options to endorse to the users: options or features are easy to understand and the interface is simplified for providing ease of operations to the users. Now download and try it out yourself.
Download Mac Version ](https://tools.techidaily.com/wondershare/filmora/download/ )
1. Avidemux
Avidemux is a popular video editing tool which is around the internet for a few years. It supports a wide range of video formats and provides excellent features and seamless options to offer to the users. The software has three compatible versions for Windows, Mac OS and Linux.
Pros:
- Basic video editing functions;
- Simple to use.
Cons:
- Outdated interface.
2. Free Video Dub
Free Video Dub is lightweight and user-friendly video editing tool. It supports a number of video formats including AVI, MOV, FLV, MOD, MKV, MTS/M2TS and more. With it, you can easily edit your video files by simply deleting off the unwanted sections. The best part about this tool is that you don’t need to re-encode anything, which keeps the original quality of your video.
Pros:
- Multi-lingual interface which makes it easy to use;
- Several video formats supported.
Cons:
- May be difficult to add visual effects.
3. MPEG Streamclip
MPEG Streamclip is not only a powerful video conversion tool, but also comes with a lot of features to offer to the users. It supports various video formats VOB, PS, M2P, MOD, VRO, DAT, MOV, DV, AVI, MP4, TS, M2T, MMV and more. It also includes simple nonlinear editing, cropping and scaling functions, which make it a great tool for editing your videos, especially if your project uses video from many different sources that need to fit in the same sequence.
Pros:
- Can convert a range of other video files;
- Has a glitched button and window.
Cons:
- Restricts your file sizes to 600MB.
4. Any Video Converter
Any Video Converter is a popular file conversion tool, which easily convert MOD files and beside that it features loads of conversion options from one video file to another. It can also be marked as a video editing tool, which can serve multiple purposes with precision.
Pros:
- Supports many video formats;
- Easy to use interface.
Cons:
- Can’t convert audio files.
5. VSDC Video Editor
VSDC Free Video Editor is powerful video editing tool, which is completely free and quite popular. It supports a wide range of video formats including MOD, AVI, MP4, MKV, MPG, WMV, 3GP, FLV. Besides the very basic video editing functions, a bunch of filters can turn even a commonplace video sequence into a classy pro-quality movie, while thousands of video and audio effects conveniently grouped into four categories help you making your video to look and sound more dynamic.
Pros:
- Many useful options provided;
- Can also be used as a video converter.
Cons:
- Computer resources (CPU and RAM) are required at a high level.
Ollie Mattison
Ollie Mattison is a writer and a lover of all things video.
Follow @Ollie Mattison
Capture Perfection: Top-Rated Webcam Recording Software for Windows 10
10 Best Webcam Recording Software for Windows 10

Richard Bennett
Mar 27, 2024• Proven solutions
Which webcam softwarehave you installed on your laptop or desktop? Using the right webcam software to live stream videos, screen record videos, or chat on Skype results in high-quality images, smooth streaming, and high-quality images and videos.
There is a huge number of free webcam software with advanced features yet free for you to download, and use on your PC.
But how would you determine the best webcam software to use?
Before you mounted that webcam on your desktop or laptop, you had a reason. It’s your webcam features and purpose that should guide you to select the right software for the webcam camera.
In this article, we will show you 10 webcam software for Windows in this guide. Included are the most useful factors to consider as you make your choice – complexity of use, free/paid, integrations, editing tools, and more. You will learn:
- Part 1: The Best Webcam & Screen Recorder for Windows and Mac [Video Tutorial]
- Part 2: Top 10 Best Free Webcam Software for Windows
First take a quick look of the 10 best webcam software that is available on your Windows from a video:
For Win 7 or later (64-bit)
 Secure Download
For macOS 10.14 or later
Secure Download
Part 1: The Best Webcam & Screen Recorder for Computer
You need a sound and webcam recorder to record your video tutorials, streaming videos, presentations, or any other type of video. Wondershare Filmora is the software to use. Other than its most admired friendly intuitive interface, it’s simple and easy to use-suitable for both beginners and professionals.
For Win 7 or later (64-bit)
Secure Download
For macOS 10.14 or later
Secure Download
Among the outstanding features, you’ll find in Filmora include,
- Fast-paced recording speed of up to 120 fps
- Adverse professional editing tools that are easy to use
- Simultaneous recording from both webcam and computer screen
- Compatible with 50+ different file formats
- Rich title text and tutorial features
It’s free to download. Have a try now! Join in the Wondershare Video Community and get some inspiration from other Filomora users.
Part 2: Top 10 Best Free Webcam Software for Windows
To help you evaluate which webcam software best suits your needs, I’ve featured the strengths, shortcomings, and support services in each software review.
This is the list of the best free webcam software for Windows 10.
| 1 - Logitech Capture | 2 - CyberLink Youcam |
|---|---|
| 3 - ManyCam | 4 - SplitCam |
| 5 - Bandicam | 6 - NCH - Video Capture Software |
| 7 - YAWCAM | 8 - Windows Camera |
| 9 - Fake Webcam | 10 - IP Camera Viewer |
1. Logitech Capture
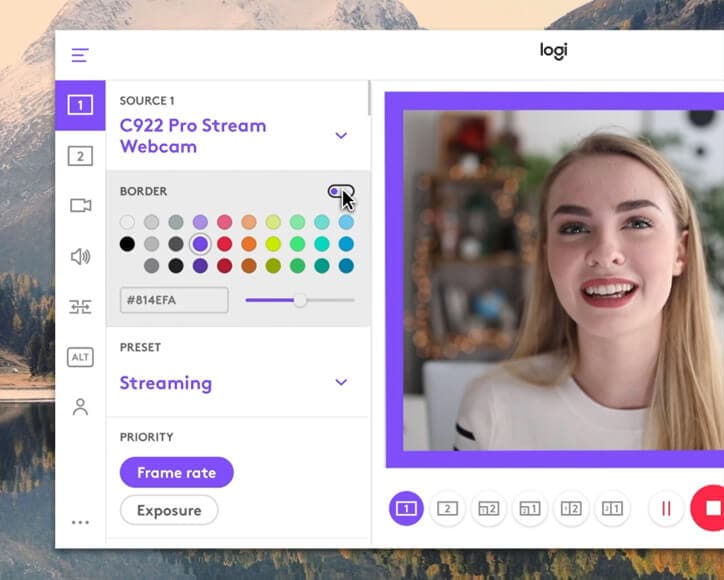
The multiple source recording feature and direct streaming app are the key strengths of this software. According to its mission statement- All-In-One Content Creation- you can use this software to record, edit, customize, and stream to your favorite channel.
Operating systems: Windows 10/8/7
Price: Free
Supported webcams: 1080P PRO STREAM, BRIO STREAM, C920s HD PRO, C922 PRO STREAM
Logitech Capture is among the few free webcam recording software for Windows 10 with studio controls applicable during recording. You can use this feature to adjust your image, create frames, adjust focus and transitions, and enable ChromaKey as you record.
In case you want to create a picture-in-picture presentation, this software allows you to use two webcams simultaneously. With the source switching and the auto-focus features, you can record the best tutorials or guides that show all dimensions and your image.
Pros
- Rich in transitions and effects
- Portrait optimization for mobile devices
- Its Capture app offers direct streaming to YouTube
- You can take passports or still images
Cons
- Limited to YouTube channel
- Account registration is mandatory
2. CyberLink Youcam
If you are used to video chatting and video recording, then, you’ll have 200+ fun effects to make your real-time videos as interesting as possible. In fact, the seamless app integration feature will keep your live streaming chats without buffering for long.
Operating systems: Windows 10/8/1.8/7
Price: Free/ Paid
Supported file formats: WMV, MP4, AVI
YouCam is the best free webcam software Windows 10 for YouTubers, business professionals, Streamers, home users, and Vloggers. It seamlessly integrates with live streaming media channels like Twitch, Wirecast, OBS Studio, Facebook Live, Xsplit, and YouTube Live.
The YouCam’s AR technology is one of its hidden treasures that will lighten up your skin by applying a natural-looking makeup. If your room is badly light, use the Live Skin Smoothing feature. Just below it is the TrueTheater Enhancement option to help you automatically adjust your facial sharpness and lighting.
Pros
- Hundreds of animated emojis
- Suitable for video conferencing services
- Plenty of interactive colorful particles and distortions
- Availability of face beautification tool
Cons
- Only limited to the Windows operating system
- Very few features for the free plan
3. ManyCam
Downloading this webcam software guarantees you smooth streaming and effortless recording of videos. Also, this software will help you during game steaming, online education, mobile live streaming, and live telehealth communication.
Operating systems: Windows 10/8/7 and macOS X
Price: Free /Paid
Supported file formats: MJPEG, IP, MP4, AVI, MPEG, MOV
ManyCam is a free webcam recording software for windows 10 . It’s among the most widely used software internationally-not for many reasons, but because of its friendly intuitive user interface and live streaming tools for lessons and lecturers.
So, if you are a lecturer/teacher, you can use the Software Development Kit (SDK) to integrate the webcam with any online teaching platform. Among the features designed to facilitate better online teaching include the picture in picture, Chroma Key, multiple video sources, and screen sharing.
Pro
- Ability to stream 4K videos
- Real-time camera control settings
- No watermark even on the free plan
- Screencasting and screen recording feature
- Real-time drop and drag effects
Cons
- Expensive business subscription plans
- No Light enhancement features
- Most features are manual as opposed to being automatic

Filmora WebCame & Screen Recorder
Filmora - WebCame & Screen Recorder
• No-time delay to record webcam and screen while live streaming or gaming
• Edit recording video for marketing replay or adding game commentary
• Cross-platform supported - (Windows, Mac, iOS, Android)
Start Webcam & Screen Record Start Webcam & Screen Record Start Webcam & Screen Record Learn More >
4. SplitCam
To stream your desktop/laptop screen SplitCam is the most appropriate software. With only the inbuilt virtual webcam, you can share your screen videos to media channels and IMS. Other uses of this software are recording webcam chatting , streaming live videos, and messaging.
Operating systems: Windows 10/8/7
Price: Free
SplitCam is not as popular as the other free webcam software windows 10 like ManyCam and YouCam. This is because it doesn’t integrate with some of the world’s renowned social media platforms- Facebook and Instagram. However, you can use this software to stream, take snapshots, and record videos for YouTube, Skype, Justin.tv, Gtalk, and Windows Live Messenger.
SplitCam is rich in fantastic webcam effects. Haven’t you been surprised to see someone appear to be streaming from the ocean or the Amazon Mountain? This is what you can do with SplitCam. Other cool effects are frames, texts on videos, filters, and facial items like masks and fake face glasses.
Pros
- Open and simple interface
- Integratable with the messaging apps
- Supports a wide range of resolutions ( between 320x180 and 2048x1536)
Cons
- Applicable to a small number of channels
- Supported file formats not defined
5. Bandicam
Do you want a recorder for screen recording, recording your gameplay, or capturing videos from devices like smartphones and PlayStation? Look for no other software but BandiCam. You can also merge two or more video files, remove unwanted parts, and select the only part to screen record.
Operating systems: Windows Vista, 10/8/7
Price: Free/paid
Supported file format: AVI, MP4, JPEG, TIF, GIF, PNG
Supported graphics cards: Nvidia NVENC, Nvidia NVENC (),
BandiCam is another HD webcam software Windows 10 with the capability of capturing high compression videos and games on your PC screen videos without compromising the video quality. Don’t forget to record all webinars aired in your niche.
Netflix is becoming more popular each day due to the thrilling videos. With the BandiCam screen recorder, you can record live-streamed videos on Netflix for over 24hrs. These are the tools to edit your recorded video: real-time drawing tool, webcam overlay, sound mixer, and Chroma Key.
Pros
- No hidden features
- Widescreen capture
- Can record 2D/3D videos in HD mode
- Can capture fast-paced videos of up to 144 FPS
Cons
- Not suitable for beginners
- Cannot be used to live stream videos
6. NCH - Video Capture Software

Of all the listed webcam software in this review, this software has the most diverse functions. You can record streaming videos, record your computer screen, record from external devices, and record from a webcam. It’s also perfect for recording audios and simultaneous recording from screen and webcam.
Operating systems: Windows 10, 8, 8.1, 7, XP, Vista 64 bit and Mac OS X 10.5 and above
Price: Free/paid
Supported file formats: MP4, WMV, AVI, MPG, FLV, MOV
Debut Video Capture is the only free webcam recording software for Windows 10 believed to capture or record videos from any external source. It has also preset settings for HD and TV with pre-production enhancement features like color adjustment settings, overlay buttons and frame rate, aspect ratio, and resolution settings.
If you always think of becoming rich, the Express Burn Disc Burner is the tool that will help you make money. Record the most trending videos and use this tool to burn DVDs and CDs.
Pros
- Can record videos for any social media platform
- Supports a wide range of audio and video file formats
- All features are open and easy to use
- Availability of video editing software
Cons
- Only monthly subscriptions for paid plans
- Watermark for the free download
- Difficult to record a full-screen movie
Try Filmora to Smoothly Record WebCame and Screen!
Filmora Web Camera & Screen Recorder can capture any area of the PC screen and webcam. It’s perfect to capture and record while making a live gaming match, marketing promotion, guiding a tour, and more. Plus, you can edit the recording video files in Filmora directly! Worth to have a try!
Start Webcam & Screen Recording Start Webcam & Screen Recording Start Webcam & Screen Recording Learn More >
7. YAWCAM
This webcam software can be referred to as the simplest for all beginners with the will to start streaming and recording videos for personal or home use.
Supported file formats: PNG, JPG, MJPEG, GIF, JavaScript
Price: Free
Supported operating systems: Windows 2000/10/8/7/ Vista and XP
YAWCAM is an absolutely free webcam software windows 10. Why is it the simplest software to use? Just download and you will find all features on one page. Simple language commands aligned in a drop-down menu ready to be used with only one click.
Some of the best features include overlay texts and images, scheduler, motion detection, and an inbuilt webserver. For you to use this webcam software, use these supported devices; DirectX compatible webcams, DV-camera, or video capture devices.
Pros
- No watermark
- Easy to use
- Friendly user interface
Cons
- Few transitions and effects
8. Windows Camera
We all trust any app or software by Microsoft over others! If you also do, then you can download Windows Camera and use it to record videos, take snapshots and shoot videos.
Operating system: Windows 10
Price: Free
Supported devices: Xbox One, Windows, mobile
Windows Camera is among the best free webcam software for Windows 10. This is because of the software’s few but easy-to-use and effective features that are expertly designed for PCs and tablets installed with Windows 10.
The automatic photo back combined with the photo-shoot timer makes it perfect for taking selfies and passports. Using the panorama feature, you can take photos of the best scenes and share them on media platforms.
Pros
- Simplicity is its main strength
- Supports resolutions above 1080p
- Good for photographers
Cons
- Has no built-in virtual webcam
- Requires a camera to support 4K videos
9. Fake Webcam

Supported file formats: AVI, MPEG, DVD, VCD, WMV, 3GP, MP4, SVCD, MOV, ASF,
Price: Free /paid
Operating systems: Windows 7/8/10 (32/64 bit)
Fake Webcam is a free webcam software Windows 10 whose name is creatively used to suggest it almost functions like a webcam. This doesn’t fall far from the truth! You can truly use this software to broadcast, add effects and filters, record on full screen, and fake your voice.
To share or stream your photos and videos on Skype, YIM, or Gtalk, using the screen recorder would give the best results. What makes Fake Webcam stand out is the free video converter and the free video toolkit.
Pros
- Free support tools
- Supports all video and audio formats
- Can convert file formats and stream to any channel
- Availability of the screen recorder
- Integratable with almost all instant messengers
Cons
- Major tools not free(Fake Webcam and Screen recorder)
10. IP Camera Viewer
Do you run a supermarket store, mall or you’ve installed security surveillance cameras in your compound? IP Camera Viewer is the most effective webcam software for video monitoring systems.
Supported file formats: JPEG, MPEG-4, MJPEG, and
Price: Free
Operating systems: Windows 10 / 8 / 7 /2012 /Vista and XP
IP Camera Viewer is the most used free webcam recording software for windows 10 as its compatible with almost all IP camera models like Panasonic, Toshiba, Canon, D-Link, Sony, and more the 2000 others. With the capability of viewing and controlling 4 camera feeds at once, you can use this software to monitor your entire compound.
Some of the important advanced IP Camera Viewer functions include listening to webcam audios, adjust image settings, zoom or tilt images, schedule monitoring times, and detect motions.
Pros
- Automatically uploads recorded videos and photos to a server
- Compatible with almost all IP camera models
- Simple and easy to use
Cons
- No inbuilt media player
- Cannot adjust the image or video quality
You may also want to read >>> 10 Best Webcams | A Buyer’s Guide
![]()
A cross-platform for making videos anywhere for all creators

Why your video editing isn’t good enough? How about some creative inspo?
- 100 Million+ Users
- 150+ Countries and Regions
- 4 Million+ Social Media Followers
- 5 Million+ Stock Media for Use
* Secure Download

FAQs about Webcam Software for Windows
1. What is Webcam Software?
A webcam is a video camera that feeds or streams images or video in real-time to or over a computer network. And webcam software enables users to record video or stream video over the Internet.
Webcam software is an application that allows you to capture video from your laptop/desktop webcam and record or stream video over the Internet. You can use them to deliver professional videos, streaming, and online courses easily.
2. Does Windows have built-in webcam software?
Windows 10 has an in-built webcam app called Camera that lets you record videos and take pictures with your webcam. This is definitely better than downloading 3rd party webcam recording software where spyware/malware is rampant.
3. Does a webcam need software?
Yes, if the camera hardware offers depth, low-light support, night vision, etc. If you use any software on the camera, these functions are only available if the driver is installed.
Conclusion
After a keen of all the webcam software above, it’s evident that every developer had an intended purpose. You cannot therefore just randomly wake up and download any without considering its functions, supported devices, file formats, and the auxiliary apps available. All this information is contained herein.
According to some users, there are free webcam software Windows 10 that more often would not show any video images but the audio is absolutely clear. To help your fellow user, what bad experience have you ever had after recording a game using webcam software ? Kindly share your comment or suggestion on our social media platforms.

Richard Bennett
Richard Bennett is a writer and a lover of all things video.
Follow @Richard Bennett
Richard Bennett
Mar 27, 2024• Proven solutions
Which webcam softwarehave you installed on your laptop or desktop? Using the right webcam software to live stream videos, screen record videos, or chat on Skype results in high-quality images, smooth streaming, and high-quality images and videos.
There is a huge number of free webcam software with advanced features yet free for you to download, and use on your PC.
But how would you determine the best webcam software to use?
Before you mounted that webcam on your desktop or laptop, you had a reason. It’s your webcam features and purpose that should guide you to select the right software for the webcam camera.
In this article, we will show you 10 webcam software for Windows in this guide. Included are the most useful factors to consider as you make your choice – complexity of use, free/paid, integrations, editing tools, and more. You will learn:
- Part 1: The Best Webcam & Screen Recorder for Windows and Mac [Video Tutorial]
- Part 2: Top 10 Best Free Webcam Software for Windows
First take a quick look of the 10 best webcam software that is available on your Windows from a video:
For Win 7 or later (64-bit)
Secure Download
For macOS 10.14 or later
Secure Download
Part 1: The Best Webcam & Screen Recorder for Computer
You need a sound and webcam recorder to record your video tutorials, streaming videos, presentations, or any other type of video. Wondershare Filmora is the software to use. Other than its most admired friendly intuitive interface, it’s simple and easy to use-suitable for both beginners and professionals.
For Win 7 or later (64-bit)
Secure Download
For macOS 10.14 or later
Secure Download
Among the outstanding features, you’ll find in Filmora include,
- Fast-paced recording speed of up to 120 fps
- Adverse professional editing tools that are easy to use
- Simultaneous recording from both webcam and computer screen
- Compatible with 50+ different file formats
- Rich title text and tutorial features
It’s free to download. Have a try now! Join in the Wondershare Video Community and get some inspiration from other Filomora users.
Part 2: Top 10 Best Free Webcam Software for Windows
To help you evaluate which webcam software best suits your needs, I’ve featured the strengths, shortcomings, and support services in each software review.
This is the list of the best free webcam software for Windows 10.
| 1 - Logitech Capture | 2 - CyberLink Youcam |
|---|---|
| 3 - ManyCam | 4 - SplitCam |
| 5 - Bandicam | 6 - NCH - Video Capture Software |
| 7 - YAWCAM | 8 - Windows Camera |
| 9 - Fake Webcam | 10 - IP Camera Viewer |
1. Logitech Capture
The multiple source recording feature and direct streaming app are the key strengths of this software. According to its mission statement- All-In-One Content Creation- you can use this software to record, edit, customize, and stream to your favorite channel.
Operating systems: Windows 10/8/7
Price: Free
Supported webcams: 1080P PRO STREAM, BRIO STREAM, C920s HD PRO, C922 PRO STREAM
Logitech Capture is among the few free webcam recording software for Windows 10 with studio controls applicable during recording. You can use this feature to adjust your image, create frames, adjust focus and transitions, and enable ChromaKey as you record.
In case you want to create a picture-in-picture presentation, this software allows you to use two webcams simultaneously. With the source switching and the auto-focus features, you can record the best tutorials or guides that show all dimensions and your image.
Pros
- Rich in transitions and effects
- Portrait optimization for mobile devices
- Its Capture app offers direct streaming to YouTube
- You can take passports or still images
Cons
- Limited to YouTube channel
- Account registration is mandatory
2. CyberLink Youcam
If you are used to video chatting and video recording, then, you’ll have 200+ fun effects to make your real-time videos as interesting as possible. In fact, the seamless app integration feature will keep your live streaming chats without buffering for long.
Operating systems: Windows 10/8/1.8/7
Price: Free/ Paid
Supported file formats: WMV, MP4, AVI
YouCam is the best free webcam software Windows 10 for YouTubers, business professionals, Streamers, home users, and Vloggers. It seamlessly integrates with live streaming media channels like Twitch, Wirecast, OBS Studio, Facebook Live, Xsplit, and YouTube Live.
The YouCam’s AR technology is one of its hidden treasures that will lighten up your skin by applying a natural-looking makeup. If your room is badly light, use the Live Skin Smoothing feature. Just below it is the TrueTheater Enhancement option to help you automatically adjust your facial sharpness and lighting.
Pros
- Hundreds of animated emojis
- Suitable for video conferencing services
- Plenty of interactive colorful particles and distortions
- Availability of face beautification tool
Cons
- Only limited to the Windows operating system
- Very few features for the free plan
3. ManyCam
Downloading this webcam software guarantees you smooth streaming and effortless recording of videos. Also, this software will help you during game steaming, online education, mobile live streaming, and live telehealth communication.
Operating systems: Windows 10/8/7 and macOS X
Price: Free /Paid
Supported file formats: MJPEG, IP, MP4, AVI, MPEG, MOV
ManyCam is a free webcam recording software for windows 10 . It’s among the most widely used software internationally-not for many reasons, but because of its friendly intuitive user interface and live streaming tools for lessons and lecturers.
So, if you are a lecturer/teacher, you can use the Software Development Kit (SDK) to integrate the webcam with any online teaching platform. Among the features designed to facilitate better online teaching include the picture in picture, Chroma Key, multiple video sources, and screen sharing.
Pro
- Ability to stream 4K videos
- Real-time camera control settings
- No watermark even on the free plan
- Screencasting and screen recording feature
- Real-time drop and drag effects
Cons
- Expensive business subscription plans
- No Light enhancement features
- Most features are manual as opposed to being automatic
Filmora WebCame & Screen Recorder
Filmora - WebCame & Screen Recorder
• No-time delay to record webcam and screen while live streaming or gaming
• Edit recording video for marketing replay or adding game commentary
• Cross-platform supported - (Windows, Mac, iOS, Android)
Start Webcam & Screen Record Start Webcam & Screen Record Start Webcam & Screen Record Learn More >
4. SplitCam
To stream your desktop/laptop screen SplitCam is the most appropriate software. With only the inbuilt virtual webcam, you can share your screen videos to media channels and IMS. Other uses of this software are recording webcam chatting , streaming live videos, and messaging.
Operating systems: Windows 10/8/7
Price: Free
SplitCam is not as popular as the other free webcam software windows 10 like ManyCam and YouCam. This is because it doesn’t integrate with some of the world’s renowned social media platforms- Facebook and Instagram. However, you can use this software to stream, take snapshots, and record videos for YouTube, Skype, Justin.tv, Gtalk, and Windows Live Messenger.
SplitCam is rich in fantastic webcam effects. Haven’t you been surprised to see someone appear to be streaming from the ocean or the Amazon Mountain? This is what you can do with SplitCam. Other cool effects are frames, texts on videos, filters, and facial items like masks and fake face glasses.
Pros
- Open and simple interface
- Integratable with the messaging apps
- Supports a wide range of resolutions ( between 320x180 and 2048x1536)
Cons
- Applicable to a small number of channels
- Supported file formats not defined
5. Bandicam
Do you want a recorder for screen recording, recording your gameplay, or capturing videos from devices like smartphones and PlayStation? Look for no other software but BandiCam. You can also merge two or more video files, remove unwanted parts, and select the only part to screen record.
Operating systems: Windows Vista, 10/8/7
Price: Free/paid
Supported file format: AVI, MP4, JPEG, TIF, GIF, PNG
Supported graphics cards: Nvidia NVENC, Nvidia NVENC (),
BandiCam is another HD webcam software Windows 10 with the capability of capturing high compression videos and games on your PC screen videos without compromising the video quality. Don’t forget to record all webinars aired in your niche.
Netflix is becoming more popular each day due to the thrilling videos. With the BandiCam screen recorder, you can record live-streamed videos on Netflix for over 24hrs. These are the tools to edit your recorded video: real-time drawing tool, webcam overlay, sound mixer, and Chroma Key.
Pros
- No hidden features
- Widescreen capture
- Can record 2D/3D videos in HD mode
- Can capture fast-paced videos of up to 144 FPS
Cons
- Not suitable for beginners
- Cannot be used to live stream videos
6. NCH - Video Capture Software
Of all the listed webcam software in this review, this software has the most diverse functions. You can record streaming videos, record your computer screen, record from external devices, and record from a webcam. It’s also perfect for recording audios and simultaneous recording from screen and webcam.
Operating systems: Windows 10, 8, 8.1, 7, XP, Vista 64 bit and Mac OS X 10.5 and above
Price: Free/paid
Supported file formats: MP4, WMV, AVI, MPG, FLV, MOV
Debut Video Capture is the only free webcam recording software for Windows 10 believed to capture or record videos from any external source. It has also preset settings for HD and TV with pre-production enhancement features like color adjustment settings, overlay buttons and frame rate, aspect ratio, and resolution settings.
If you always think of becoming rich, the Express Burn Disc Burner is the tool that will help you make money. Record the most trending videos and use this tool to burn DVDs and CDs.
Pros
- Can record videos for any social media platform
- Supports a wide range of audio and video file formats
- All features are open and easy to use
- Availability of video editing software
Cons
- Only monthly subscriptions for paid plans
- Watermark for the free download
- Difficult to record a full-screen movie
Try Filmora to Smoothly Record WebCame and Screen!
Filmora Web Camera & Screen Recorder can capture any area of the PC screen and webcam. It’s perfect to capture and record while making a live gaming match, marketing promotion, guiding a tour, and more. Plus, you can edit the recording video files in Filmora directly! Worth to have a try!
Start Webcam & Screen Recording Start Webcam & Screen Recording Start Webcam & Screen Recording Learn More >
7. YAWCAM
This webcam software can be referred to as the simplest for all beginners with the will to start streaming and recording videos for personal or home use.
Supported file formats: PNG, JPG, MJPEG, GIF, JavaScript
Price: Free
Supported operating systems: Windows 2000/10/8/7/ Vista and XP
YAWCAM is an absolutely free webcam software windows 10. Why is it the simplest software to use? Just download and you will find all features on one page. Simple language commands aligned in a drop-down menu ready to be used with only one click.
Some of the best features include overlay texts and images, scheduler, motion detection, and an inbuilt webserver. For you to use this webcam software, use these supported devices; DirectX compatible webcams, DV-camera, or video capture devices.
Pros
- No watermark
- Easy to use
- Friendly user interface
Cons
- Few transitions and effects
8. Windows Camera
We all trust any app or software by Microsoft over others! If you also do, then you can download Windows Camera and use it to record videos, take snapshots and shoot videos.
Operating system: Windows 10
Price: Free
Supported devices: Xbox One, Windows, mobile
Windows Camera is among the best free webcam software for Windows 10. This is because of the software’s few but easy-to-use and effective features that are expertly designed for PCs and tablets installed with Windows 10.
The automatic photo back combined with the photo-shoot timer makes it perfect for taking selfies and passports. Using the panorama feature, you can take photos of the best scenes and share them on media platforms.
Pros
- Simplicity is its main strength
- Supports resolutions above 1080p
- Good for photographers
Cons
- Has no built-in virtual webcam
- Requires a camera to support 4K videos
9. Fake Webcam
Supported file formats: AVI, MPEG, DVD, VCD, WMV, 3GP, MP4, SVCD, MOV, ASF,
Price: Free /paid
Operating systems: Windows 7/8/10 (32/64 bit)
Fake Webcam is a free webcam software Windows 10 whose name is creatively used to suggest it almost functions like a webcam. This doesn’t fall far from the truth! You can truly use this software to broadcast, add effects and filters, record on full screen, and fake your voice.
To share or stream your photos and videos on Skype, YIM, or Gtalk, using the screen recorder would give the best results. What makes Fake Webcam stand out is the free video converter and the free video toolkit.
Pros
- Free support tools
- Supports all video and audio formats
- Can convert file formats and stream to any channel
- Availability of the screen recorder
- Integratable with almost all instant messengers
Cons
- Major tools not free(Fake Webcam and Screen recorder)
10. IP Camera Viewer
Do you run a supermarket store, mall or you’ve installed security surveillance cameras in your compound? IP Camera Viewer is the most effective webcam software for video monitoring systems.
Supported file formats: JPEG, MPEG-4, MJPEG, and
Price: Free
Operating systems: Windows 10 / 8 / 7 /2012 /Vista and XP
IP Camera Viewer is the most used free webcam recording software for windows 10 as its compatible with almost all IP camera models like Panasonic, Toshiba, Canon, D-Link, Sony, and more the 2000 others. With the capability of viewing and controlling 4 camera feeds at once, you can use this software to monitor your entire compound.
Some of the important advanced IP Camera Viewer functions include listening to webcam audios, adjust image settings, zoom or tilt images, schedule monitoring times, and detect motions.
Pros
- Automatically uploads recorded videos and photos to a server
- Compatible with almost all IP camera models
- Simple and easy to use
Cons
- No inbuilt media player
- Cannot adjust the image or video quality
You may also want to read >>> 10 Best Webcams | A Buyer’s Guide
![]()
A cross-platform for making videos anywhere for all creators
Why your video editing isn’t good enough? How about some creative inspo?
- 100 Million+ Users
- 150+ Countries and Regions
- 4 Million+ Social Media Followers
- 5 Million+ Stock Media for Use
* Secure Download
FAQs about Webcam Software for Windows
1. What is Webcam Software?
A webcam is a video camera that feeds or streams images or video in real-time to or over a computer network. And webcam software enables users to record video or stream video over the Internet.
Webcam software is an application that allows you to capture video from your laptop/desktop webcam and record or stream video over the Internet. You can use them to deliver professional videos, streaming, and online courses easily.
2. Does Windows have built-in webcam software?
Windows 10 has an in-built webcam app called Camera that lets you record videos and take pictures with your webcam. This is definitely better than downloading 3rd party webcam recording software where spyware/malware is rampant.
3. Does a webcam need software?
Yes, if the camera hardware offers depth, low-light support, night vision, etc. If you use any software on the camera, these functions are only available if the driver is installed.
Conclusion
After a keen of all the webcam software above, it’s evident that every developer had an intended purpose. You cannot therefore just randomly wake up and download any without considering its functions, supported devices, file formats, and the auxiliary apps available. All this information is contained herein.
According to some users, there are free webcam software Windows 10 that more often would not show any video images but the audio is absolutely clear. To help your fellow user, what bad experience have you ever had after recording a game using webcam software ? Kindly share your comment or suggestion on our social media platforms.
Richard Bennett
Richard Bennett is a writer and a lover of all things video.
Follow @Richard Bennett
Also read:
- Updated 2024 Approved Get Lumafusion for Mac OS Explore Alternative Video Editors
- Updated 2024 Approved From Idea to Reality WeVideos Simplified Video Creation Process
- New In 2024, Instant Cartoon Effects for Your Photos
- In 2024, No Budget? No Problem! Top Free 4K Video Editors
- Updated Best Vegas Pro Replacements for Mac Users Free and Premium Options for 2024
- Updated Rotating Your Video Is a Snap if You Choose One of the Top 5 Free MOV Video Rotators Below for 2024
- Updated MOD Video Editor Showdown The Best Free Options
- Updated In 2024, Online Collage Creators Make Stunning Photo and Video Montages
- Updated 2024 Approved Capture Lifes Moments Best Time-Lapse Apps for iOS and Android
- Top Free Video Trimming Tools 2023 Edition for 2024
- Unboxing Splice A Detailed Examination of the Video Editing App for 2024
- New 2024 Approved Top Video Trailer Creators for Mac and PC (2023 Update)
- Online Image Editor Change Ratio and Dimensions for 2024
- New In 2024, The Best Tools for Crafting Unforgettable Highlight Reels
- 2024 Approved Trim and Cut MKV Videos with These 10 Free Tools
- Updated Premiere Pro Essentials How to Stabilize and Smooth Out Your Footage for 2024
- New 2024 Approved Transform WebM Into MP3 Best Conversion Methods Revealed
- New 2024 Approved Find the Best Sony Vegas Alternative for Windows
- Updated In 2024, Animated Video Magic 12 Best Online Makers to Try Now
- New Unleash Your Creativity Top 5 Reaction Video Makers
- Updated In 2024, Top-Rated Free VOB Video Editing Tools
- New New Milestone Achieved Filmora X Expands to ARM Platform for 2024
- Updated 2024 Approved Discover the Top Mac Speech-to-Text Apps That Dont Need Downloads
- Updated 2024 Approved Lego Movies Are Painstaking, but You Will Get Quicker and Better with Practice. Here Are 5 Best Stop Motion Apps for Lego Movie on iPhone, iPad and Android Devices
- In 2024, Rotate a Video in Final Cut Pro A 4-Step Guide
- Updated 2024 Approved The Best of the Best Top Video Editors for Windows, Mac, iOS, Android, and Linux Users
- Updated Mac Video Editing Essentials A Yosemite Users Handbook for 2024
- Updated In 2024, Unleash High-Quality Audio Expert Guide to FLAC Converters
- New In 2024, Unleash Your Creativity Top Video Animation Apps for Android, iOS, and iPadOS
- Updated In 2024, S Top Intro Design Tools for PC A Comprehensive Review
- 2024 Approved Slow Down and Freeze Advanced FCPX Editing Techniques
- Updated Say Goodbye to Watermarks Top 10 Free Online Video Editing Software for 2024
- Updated 2024 Approved Free and Flexible The Top 10 Online Video Editors without Watermark
- New S Top Open-Source Video Editing Solutions Zero Cost, High Quality
- Updated 2024 Approved Do You Love Making and Uploading Status on WhatsApp for Your Friends and Family? It Has Certainly Become a Trend Nowadays. Continue Reading to Learn About the Best WhatsApp Status Maker Apps
- New 2024 Approved Bring Your Memories to Life How to Make a DVD with Movie Making Software
- New Top 10 Best Free MP4 Video Editors 2023 for 2024
- Updated In 2024, Video Brightness Boosters Top Apps for Android and iOS
- Updated Vegas Pro Too Expensive? Here Are 10 Affordable Mac Alternatives
- New Audio Editing Essentials 2 Ways to Fade In and Out in FCP for 2024
- New 2024 Approved Aspect Ratio Mastery Enhance Your Amazon Prime Video Experience
- Updated Noise Reduction Mastery Tips and Tricks for Final Cut Pro X Users
- New Unlock Perfect Lighting Best Video Brightening Apps for Mobile for 2024
- Updated 2024 Approved Stop Motion in the Cloud Era A Comprehensive Software Roundup
- New In 2024, Slow and Steady Wins the Race How to Use VLCs Slow Motion Feature
- New Top 6 Free MOV Video Cutters for 2024
- New Create Stunning Invitations 10 Free Video Maker Options for 2024
- Full Guide How To Fix Connection Is Not Private on Poco X5 | Dr.fone
- Best Ways on How to Unlock/Bypass/Swipe/Remove Oppo A1x 5G Fingerprint Lock
- New Step by Step to Rotate Video Using KMPlayer
- How to Mirror Your Vivo T2 Pro 5G Screen to PC with Chromecast | Dr.fone
- In 2024, Ultimate Guide from Samsung Galaxy S24+ FRP Bypass
- Hacks to do pokemon go trainer battles For Asus ROG Phone 7 Ultimate | Dr.fone
- 3 Things You Must Know about Fake Snapchat Location On Apple iPhone 15 Pro | Dr.fone
- In 2024, What Is AI Text to Video?
- Spotify Keeps Crashing A Complete List of Fixes You Can Use on Lava Blaze 2 5G | Dr.fone
- In 2024, How to Transfer Contacts from Lava Yuva 3 Pro to iPhone XS/11 | Dr.fone
- Hacks to do pokemon go trainer battles For Oppo A78 | Dr.fone
- In 2024, The 6 Best SIM Unlock Services That Actually Work On Your Oppo A58 4G Device
- In 2024, Android to Apple How To Transfer Photos From Xiaomi 13T Pro to iPad Easily | Dr.fone
- Will Pokémon Go Ban the Account if You Use PGSharp On Vivo V30 | Dr.fone
- How to Reset Vivo Y56 5G without Losing Data | Dr.fone
- In 2024, 3 Ways to Unlock Your iPhone 15 Plus for Free
- Apply These Techniques to Improve How to Detect Fake GPS Location On Nokia 130 Music | Dr.fone
- In 2024, Pattern Locks Are Unsafe Secure Your Vivo V30 Phone Now with These Tips
- Full Guide to Hard Reset Your Honor 90 Pro | Dr.fone
- In 2024, How to Mirror Apple iPhone SE (2022) to iPad? | Dr.fone
- How to Bypass FRP from Samsung Galaxy A54 5G?
- In 2024, Full Guide on Mirroring Your Infinix Note 30 Pro to Your PC/Mac | Dr.fone
- How to Fix Vivo Y27 4G Find My Friends No Location Found? | Dr.fone
- How To Unlock iPhone 14 Pro Max 3 Ways To Unlock
- Home Button Not Working on Vivo Y27s? Here Are Real Fixes | Dr.fone
- In 2024, How to Unlock Apple iPhone 15 Pro Online? Here are 6 Easy Ways
- In 2024, Why Your WhatsApp Location is Not Updating and How to Fix On Realme GT Neo 5 | Dr.fone
- Xiaomi Redmi A2 Video Recovery - Recover Deleted Videos from Xiaomi Redmi A2
- Fix Cant Take Screenshot Due to Security Policy on Oppo K11x | Dr.fone
- Best 10 Anime Series of All Time | Watch Anime Online for 2024
- Complete guide for recovering call logs on Samsung Galaxy A23 5G
- Step-by-Step Tutorial How To Bypass Tecno Spark 20C FRP
- Rootjunky APK To Bypass Google FRP Lock For Samsung Galaxy M34
- Title: Updated 2024 Approved Unleash Your Creativity A Beginners Guide to Stop Motion Animation on Instagram
- Author: Isabella
- Created at : 2024-04-29 12:49:40
- Updated at : 2024-04-30 12:49:40
- Link: https://video-creation-software.techidaily.com/updated-2024-approved-unleash-your-creativity-a-beginners-guide-to-stop-motion-animation-on-instagram/
- License: This work is licensed under CC BY-NC-SA 4.0.
