
:max_bytes(150000):strip_icc():format(webp)/reddit-app-for-andoird-652f6fcd646245e9807afbac25a072ee.jpg)
Updated 2024 Approved Unleash Your Creativity How to Edit Videos in Windows Movie Maker
Unleash Your Creativity: How to Edit Videos in Windows Movie Maker
How to Edit Videos in Windows Live Movie Maker

Ollie Mattison
Mar 27, 2024• Proven solutions
Microsoft has released Windows Live Movie Maker on August 19, 2009 as part of a refresh to their Windows Live Essentials download. Windows Live Movie Maker is the first application designed for Windows 7 and is built to make beautiful movies from your photos and videos. And the latest version is Windows Live Movie Maker 2011.
Update in 2017: Microsoft has stopped the Windows Essentials Suite support on January 10, 2017. It is claimed that it is no longer available for download. If you are looking for an alternative to windows essentials movie maker, or windows movie maker, try Filmora video editor, which is available on both Windows7, Windows8 and Windows 10.
Part 1: Best Alternative to Windows Movie Maker: Filmora [Windows7/8/10 & Mac]


Windows Live Movie Maker is a little bit limiting for video editing. In most cases, you need to run Windows 7. Fortunately, you do have other options. There is plenty of software which will do the same thing but better than Windows Live Movie Maker for you to edit your videos and burn videos to DVD. Among many of them, we recommend one Wondershare Filmora. You may wonder what’s so special with this Video Editor. First of all, it supports almost all kinds of video formats, such as AVI, MP4, MPG, MPEG, 3GP, WMV, ASF, RM, RMVB, DAT, MOV, MKV and HD video formats: MTS, M2TS(AVCHD ), TS(MPEG-2), HD MKV(, MPEG-2 HD), HD WMV(VC-1), and HD MOV(, MPEG-4). Secondly, it provides powerful video editing function, such as crop, trim, adjust video effect, add watermark, etc. Also, there are various title and text templates, filter/transition and effects presets for you to choose from. Thirdly, Windows Live Movie Maker can only generate WMV files directly, but this video editor supports burn video to DVD disc, DVD Folder and ISO file or save the video to most of the popular formats.
Part 2: How to Edit Videos in Windows Live Movie Maker [Step by Step]
1.Add Videos and Photos

While you are adding videos to Windows Live Movie Maker, you may encounter a problem like 3GP files can’t be added to Windows Live Movie Maker. Or it can’t be played in Window Live Movie Maker. And many other video files as well, such as RM, RMVB, DAT and HD video formats: MTS, TS, HD MKV, HD WMV, and HD MOV, etc. It’s quite necessary to get familiar with what all those files that could be imported to Windows Live Movie Maker.

Notes
- Video and music files that are protected with digital rights management (DRM) can’t be used in Windows Live Movie Maker.
- Support for using MPEG-2 and Microsoft Recorded TV Show video files in your movie is available only if your computer is running one of the following editions of Windows Vista or Windows 7: Windows Vista Home Premium, Windows Vista Ultimate, Windows 7 Home Premium, Windows 7 Professional, Windows 7 Enterprise, or Windows 7 Ultimate.
- AVCHD video files that contain Dolby Digital audio can be used in Windows Live Movie Maker if your computer is running one of the following editions of Windows 7: Windows 7 Home Premium, Windows 7 Professional, Windows 7 Enterprise, or Windows 7 Ultimate.
- MPEG-4 video files that contain audio can be used if you’re using Movie Maker on a computer running Windows 7.
- Some MPEG-4 video files can be used when you’re using Movie Maker on a computer running Windows Vista if the necessary audio and video codecs are installed.
After adding your photos or videos, you can also add audio or background music to your video clips by clicking the Add music option.
Learn details about How to Add and Edit Music in Windows Movie Maker
2. Video Editing
As we said before, Windows Live Movie Maker (later named Windows Movie Maker) is a simple and easy video editing software for Windows, it can complete some basic video editing and become a good choice for novices. Here, I will share with you about the basic video editing tutorial in the Movie Maker.

Cut & Trim & Split video in Windows Movie Maker
After adding videos and photos to the storyboard, you can now keep the useful sections and remove unwanted parts. To trim video, just place the playhead to the target position and right click the clip to select the Trim Set Start Point and move the playhead again to then end point and right click to select Set End Point. You can also go to the Edit tab and click the Split menu to split the video into parts. You can then delete and cut out unwanted sections or move it to the proper position.
Add Audio to Video: Record and add voiceover or Music
Windows Movie Maker also allows you to add narrations and background music to video footage. Just click the Add Music option and you can add music from online music libraries such as AudioMicro, Free Music Archive, and Vimeo or add music from the computer.

Add auto movie themes to Video
There is a built-in AutoMovie themes library in Movie Maker. You can use some popular themes such as Contemporary, Cinematic, Fade, Pan and Zoom, Black and White and Sepia.
Add texts &titles to Video
You can add titles, captions, and credits to video with windows movie maker, but it seems hard to add subtitles and customize its position. For more details about the text and title editing, check
Learn more details about How to Add Text to Video with Windows Movie Maker
Apply transitions & animations to video
The Movie Maker features lots of transitions under Animations tab. You can choose from wipes, cinematics, shatters, sweeps and curls, patterns and shapes, reveals, diagonals and dissolves.
Note: if you use the default themes, you won’t see all these transitions. Check the detailed steps about How to Add Transitions in Windows Movie Maker
Apply visual effects to video
We’ve introduced some of the best visual effects software before, but in Windows Movie Maker, you can also add effects such as 3D Ripple, Black and White, Blur, pixelate, mirrors, motions and fade effects.
Change video speed of video
The Movie Maker Edit tab allows you to adjust video volume, add fade in and fade out effects to video, or change video speed.
Learn more details about How to Speed Up Video in Windows Movie Maker
3. Save Video
After finish editing, you can upload your video clips to Facebook, YouTube, and other social media, or burn your videos to DVD with Windows DVD maker. You can also save your video clips on your computer.

You may also like: Windows Movie Maker VS Windows Live Movie Maker: What’s the Difference
While, if you find the windows movie maker editing features are limited based on your editing skills, you can try Wondershare Filmora. Below is a video tutorial about how to edit videos with Filmora.
Ollie Mattison
Ollie Mattison is a writer and a lover of all things video.
Follow @Ollie Mattison
Ollie Mattison
Mar 27, 2024• Proven solutions
Microsoft has released Windows Live Movie Maker on August 19, 2009 as part of a refresh to their Windows Live Essentials download. Windows Live Movie Maker is the first application designed for Windows 7 and is built to make beautiful movies from your photos and videos. And the latest version is Windows Live Movie Maker 2011.
Update in 2017: Microsoft has stopped the Windows Essentials Suite support on January 10, 2017. It is claimed that it is no longer available for download. If you are looking for an alternative to windows essentials movie maker, or windows movie maker, try Filmora video editor, which is available on both Windows7, Windows8 and Windows 10.
Part 1: Best Alternative to Windows Movie Maker: Filmora [Windows7/8/10 & Mac]
Windows Live Movie Maker is a little bit limiting for video editing. In most cases, you need to run Windows 7. Fortunately, you do have other options. There is plenty of software which will do the same thing but better than Windows Live Movie Maker for you to edit your videos and burn videos to DVD. Among many of them, we recommend one Wondershare Filmora. You may wonder what’s so special with this Video Editor. First of all, it supports almost all kinds of video formats, such as AVI, MP4, MPG, MPEG, 3GP, WMV, ASF, RM, RMVB, DAT, MOV, MKV and HD video formats: MTS, M2TS(AVCHD ), TS(MPEG-2), HD MKV(, MPEG-2 HD), HD WMV(VC-1), and HD MOV(, MPEG-4). Secondly, it provides powerful video editing function, such as crop, trim, adjust video effect, add watermark, etc. Also, there are various title and text templates, filter/transition and effects presets for you to choose from. Thirdly, Windows Live Movie Maker can only generate WMV files directly, but this video editor supports burn video to DVD disc, DVD Folder and ISO file or save the video to most of the popular formats.
Part 2: How to Edit Videos in Windows Live Movie Maker [Step by Step]
1.Add Videos and Photos
While you are adding videos to Windows Live Movie Maker, you may encounter a problem like 3GP files can’t be added to Windows Live Movie Maker. Or it can’t be played in Window Live Movie Maker. And many other video files as well, such as RM, RMVB, DAT and HD video formats: MTS, TS, HD MKV, HD WMV, and HD MOV, etc. It’s quite necessary to get familiar with what all those files that could be imported to Windows Live Movie Maker.
Notes
- Video and music files that are protected with digital rights management (DRM) can’t be used in Windows Live Movie Maker.
- Support for using MPEG-2 and Microsoft Recorded TV Show video files in your movie is available only if your computer is running one of the following editions of Windows Vista or Windows 7: Windows Vista Home Premium, Windows Vista Ultimate, Windows 7 Home Premium, Windows 7 Professional, Windows 7 Enterprise, or Windows 7 Ultimate.
- AVCHD video files that contain Dolby Digital audio can be used in Windows Live Movie Maker if your computer is running one of the following editions of Windows 7: Windows 7 Home Premium, Windows 7 Professional, Windows 7 Enterprise, or Windows 7 Ultimate.
- MPEG-4 video files that contain audio can be used if you’re using Movie Maker on a computer running Windows 7.
- Some MPEG-4 video files can be used when you’re using Movie Maker on a computer running Windows Vista if the necessary audio and video codecs are installed.
After adding your photos or videos, you can also add audio or background music to your video clips by clicking the Add music option.
Learn details about How to Add and Edit Music in Windows Movie Maker
2. Video Editing
As we said before, Windows Live Movie Maker (later named Windows Movie Maker) is a simple and easy video editing software for Windows, it can complete some basic video editing and become a good choice for novices. Here, I will share with you about the basic video editing tutorial in the Movie Maker.
Cut & Trim & Split video in Windows Movie Maker
After adding videos and photos to the storyboard, you can now keep the useful sections and remove unwanted parts. To trim video, just place the playhead to the target position and right click the clip to select the Trim Set Start Point and move the playhead again to then end point and right click to select Set End Point. You can also go to the Edit tab and click the Split menu to split the video into parts. You can then delete and cut out unwanted sections or move it to the proper position.
Add Audio to Video: Record and add voiceover or Music
Windows Movie Maker also allows you to add narrations and background music to video footage. Just click the Add Music option and you can add music from online music libraries such as AudioMicro, Free Music Archive, and Vimeo or add music from the computer.
Add auto movie themes to Video
There is a built-in AutoMovie themes library in Movie Maker. You can use some popular themes such as Contemporary, Cinematic, Fade, Pan and Zoom, Black and White and Sepia.
Add texts &titles to Video
You can add titles, captions, and credits to video with windows movie maker, but it seems hard to add subtitles and customize its position. For more details about the text and title editing, check
Learn more details about How to Add Text to Video with Windows Movie Maker
Apply transitions & animations to video
The Movie Maker features lots of transitions under Animations tab. You can choose from wipes, cinematics, shatters, sweeps and curls, patterns and shapes, reveals, diagonals and dissolves.
Note: if you use the default themes, you won’t see all these transitions. Check the detailed steps about How to Add Transitions in Windows Movie Maker
Apply visual effects to video
We’ve introduced some of the best visual effects software before, but in Windows Movie Maker, you can also add effects such as 3D Ripple, Black and White, Blur, pixelate, mirrors, motions and fade effects.
Change video speed of video
The Movie Maker Edit tab allows you to adjust video volume, add fade in and fade out effects to video, or change video speed.
Learn more details about How to Speed Up Video in Windows Movie Maker
3. Save Video
After finish editing, you can upload your video clips to Facebook, YouTube, and other social media, or burn your videos to DVD with Windows DVD maker. You can also save your video clips on your computer.
You may also like: Windows Movie Maker VS Windows Live Movie Maker: What’s the Difference
While, if you find the windows movie maker editing features are limited based on your editing skills, you can try Wondershare Filmora. Below is a video tutorial about how to edit videos with Filmora.
Ollie Mattison
Ollie Mattison is a writer and a lover of all things video.
Follow @Ollie Mattison
Free Animation Software Roundup: Windows and Mac Compatible
Best 12 Free Download Animation Software for Windows and Mac

Shanoon Cox
Mar 27, 2024• Proven solutions
In your search for quality animation software, you may have found that many of the programs cost a lot of money no matter it is 2D animation software or 3D animation editor. The good news is that you can choose free animation tools to make different animation types easily.
That is why we created a list of the best animation software on both Mac and Windows. Whether you are a professional editor or just a beginner to start making animation, you will find the tools listed below are easy to use without watermark and won’t cost money to improve your skills.
The best part is you will find these free animation programs are also very useful for content creation on Mac and Windows. Besides, we have listed the pros and cons of each software. Keep reading!
- Part 1: Best Free Animation Software for Mac
- Part 2: Best Free Animation Software for Windows
- Part 3: FAQ about Animation Software for Windows and Mac
Here we have made a table of 12 free animation software without watermark on Windows and macOS. Take a look.
6 Free Animation Software for macOS
5K-3DMiddleIt is a great tool for 3D artists6KritaDifficultPerfect software for 2D animation
| Number | Software | Difficulty Level | Highlight |
|---|---|---|---|
| 1 | Synfig Studio | Easy | Calculate vector shape to animation automatically |
| 2 | Pencil2D Animation | Easiest | Straightforward interface for beginners |
| 3 | Tupi | Middle | Its community is active to offer solutions |
| 4 | Blender | Difficult | It is a powerful animation tool to render and make modeling |
6 Free Animation Software for Windows
| Number | Software | Difficulty Level | Highlight |
|---|---|---|---|
| 1 | DAZ Studio | Difficult | For professional users with the fast animation process |
| 2 | Terragen | Middle | It can make realistic CG environments |
| 3 | Anim8or | Difficult | 3D animation is Anim8or’s main function |
| 4 | Seamless3d | Easy | It has many features for 3d modeling |
| 5 | OpenToonz | Middle | Make cartoon animation with plugins |
| 6 | Stykz | Easy | Quickly make animation if you have used Pivot StickFigure Animator |
Best Animation Software on Windows and Mac - Filmora
Looking for a simple while powerful Mac video editing tool ? We recommend using Wondershare Filmora. You can use it to create 2D/3D animated texts, shapes, or anything you like for YouTube videos.
The keyframing features will help you make animation effects smooth and precise. When exporting, you can also make it transparent.
Besides, various title templates and transitions are also available for you. Download it now to have a try! Or learn more from Wondershare Video Community .
Key features
- Create various shapes that you like
- Add keyframing to make it move
- Fine-tuning to make it smooth
- Add visual effects/text/color before export it

You can even create photo cut animation which has been very trendy on Tiktok and Instagram. Here is a video to present you how you can do it in Filmora.
Part 1 Best Free Animation Software for Mac
Listed below is free animation software on Mac. Take a look.
01 Synfig Studio - Mac Software to Animate Video
Difficulty Level: Easy
Pro: You can create many layers once a time and sync audio for your animation.
Con: This one needs much time to learn, especially for beginners.
An open-source 2D animation software that works on Macs, Synfig Studio delivers multiple players while you are creating content. Whether you want to add geometric, filters, distortions, or transformations, it is all possible! And thanks to the high-end bone system, you can create cut-out videos using bitmap images!
The thoughtful part is there are two download versions on the homepage: the stable version and the development version. If you want to enjoy a stable and smooth animation editing experience, choose the stable one. However, the development package gives you access to the use of the latest features.
For a novice, you can learn Synfig from step by step guide in Wikipedia and video tutorials. Four languages are available including English, Russian, Dutch, and French for a video course.
You can free download its latest version 1.3.11. The upcoming version is 1.4.
Features:
- It offers support for many layers within the animation.
- The program’s bone system means that you can easily create animations with bitmap images or vector artwork.
- It allows you to sync your creative work with any sound that you want. Has a full-featured audio editor.
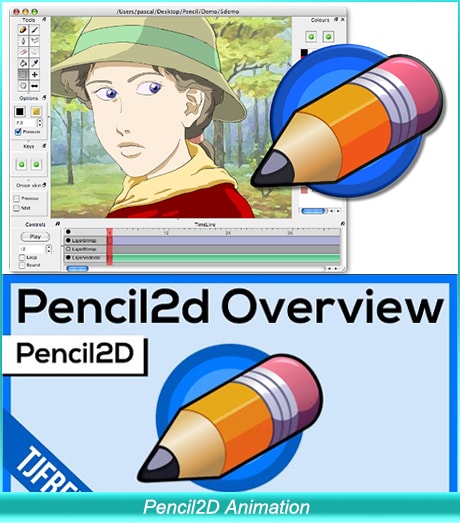
02 Pencil2D Animation - Animation Program for 2D Pencil Lover
Difficulty Level: Easiest
Pro: Easy to start and make animation as the interface is user-friendly for many people.
Con: You need to set your preference every time to open it up, so it takes up some time
Pencil2D Animation is one of the simplest 2D hand-drawn tools available. It will work flawlessly on Mac computers. It is ideal for beginners, as the commands and interface are very easy to understand.
Whether you want to create a simple one, or you want something with many layers for videos on YouTube, you can use Pencil2D animation to get it done. Its timeline is easy to use at first glance. You can add and duplicate different frames on a different track.
The frequency of releasing the new version is very fast as Pencil2D is committed to bringing the lasted features to each user. The newest version is v0.6.4 (as of August 2019). Its user guide is informative with video tutorials, FAQs, and manual material.
Features:
- Lightweight and minimalistic design that makes it very easy for beginners.
- Features raster and vector workflows, with easy switching between them. You can paint and sketch as you want!
- Will run on all platforms - Mac, Windows, and Linux.
- Completely free and open source.
03 TupiTube - Free Animation Application for Mac Users
Difficulty Level: Middle
Pro: It supports vector illustrations. Besides, various formats are available.
Con: If you want to make 3D animation, it will fail. You can only make 2D effects.
A free software application for YouTube, Tupi will allow you to create 2D animations to your heart’s content. The tool was started by animators who wanted to create something that others could use.
It is an open-source tool, which means that users can make tweaks to the program if they have some interesting ideas. The program works on both Windows and Mac. You need to use Tupi and Papagayo to make lip-sync animation with different mouth shapes.
It also offers a solution for schools with related features including academic license, technical support, and ads-free, so many schools choose to use this one to teach kids how to make an animation video.
Features:
- Support for vector illustrations. You can add rectangles, lines, polygons, and other shapes as you please. To fill areas, just use the paint bucket.
- You can import raster images using this program.
- You can export all your finished images into different file formats.
- Support for tweeting positions, scale, shear, and rotations.

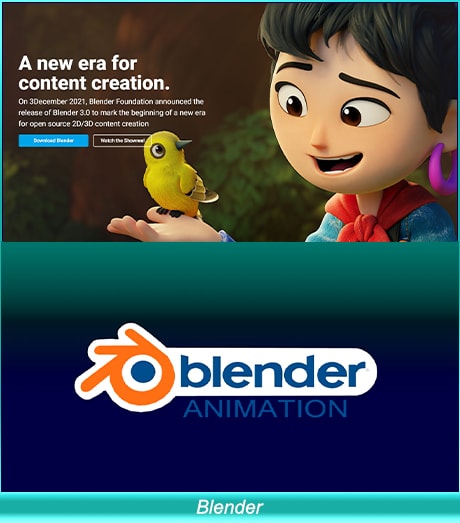
04 Blender - Need Some Time to Learn This Animation Tool
Difficulty Level: Difficult
Pro: Really powerful software that you can make for professional users.
Con: It is not easy to make image animation as it focuses on 3D.
Blender is an open-source 3D animation creation suite without a watermark. If you find that 2D is a little bit limiting, we think that you will be very happy with what this free program offers. You can take your projects to a whole new level when you can use this program on your Mac.
You can use Blender to make a video game, modeling, and high-quality animation. However, it involves a steep learning curve. Luckily, there are many tutorials to guide you through the journey. You can also ask for help in the Blender community that millions of talented people like you are there.
Features:
- Creating renders is no problem with this program.
- Modeling, such as sculpting, retopology, and creating curves is not an issue either.
- VFX and animation features are better than any option on the market.
- It offers powerful simulation tools.
- Integration with pipeline tools is easy.
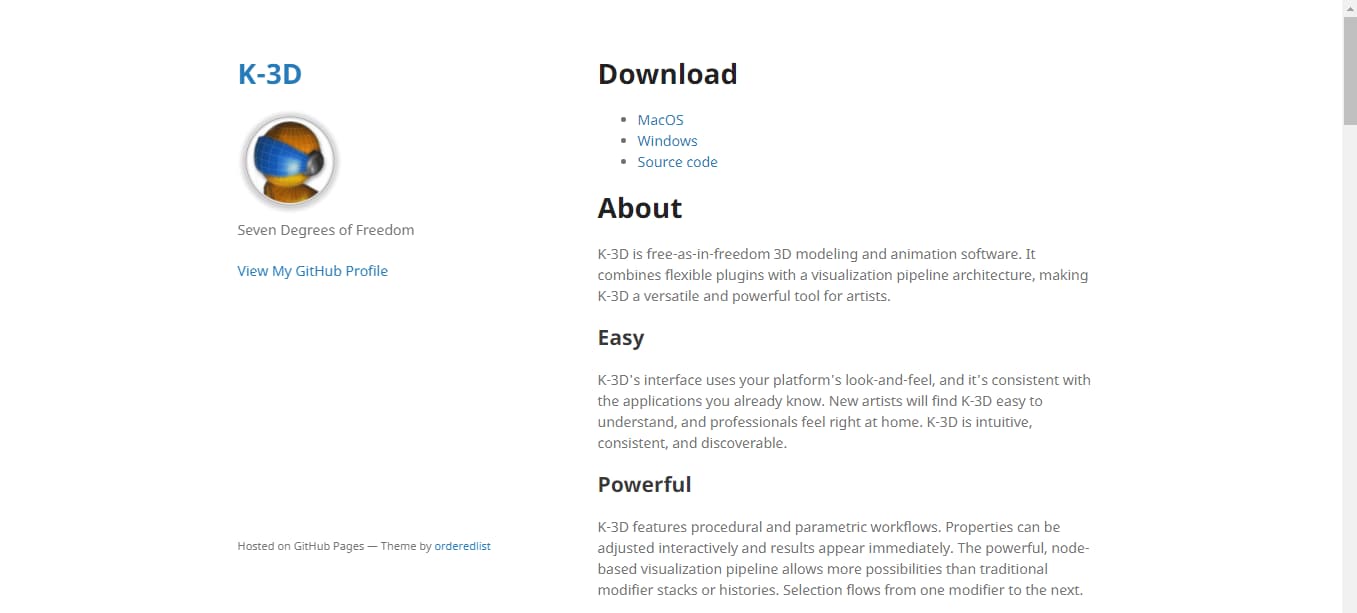
05 K-3D - Best for Animation and Modeling in 3D
Difficulty Level: Middle
Pro: Ideal for designing simple 3D animations and models.
Con: It has an old-fashioned interface. Also, the built-render (RenderMan) feature is difficult to use by beginners.
K-3D is an animation and 3D modeling software. You can download this tool for free on your Mac. Besides, you can also install and run it on your Windows and Linux systems. If you look at the design, you will find that the software is quite old. But don’t judge a book by its cover. Why so? It is because K-3D is one of the strongest and most versatile tools for 3D artists with many options.
For example, K-3D offers extremely systematic and methodological workflows. You can easily adjust the properties of the features in real-time and get instant results. It has a node-oriented visualization pipeline to enjoy more freedom. That means you can create animation using a variety of combinations.
One of the best things about K-3D is that it has three subdivisions of animation. You can work on your model on one side while showing the other side in a mirrored form. Then, experience the final result combined together. And in case you need to make the changes to the end results, you can simply work on the first subdivision and savor automatic changes to the results.
K-3D has an advanced redo and undo mechanism to ensure you can go back or move forward to make corrections or amendments without limits. Additionally, the tool is developed keeping in mind all the industrial standards. For instance, it has complete support and integration of native RenderMan™ to its user interface. This is an excellent feature because most free animation software for Mac requires third-party render plugins.
Features:
- Parametric workflow.
- 2D and 3D animation tools.
- Allows Python and K3DScript scripting.
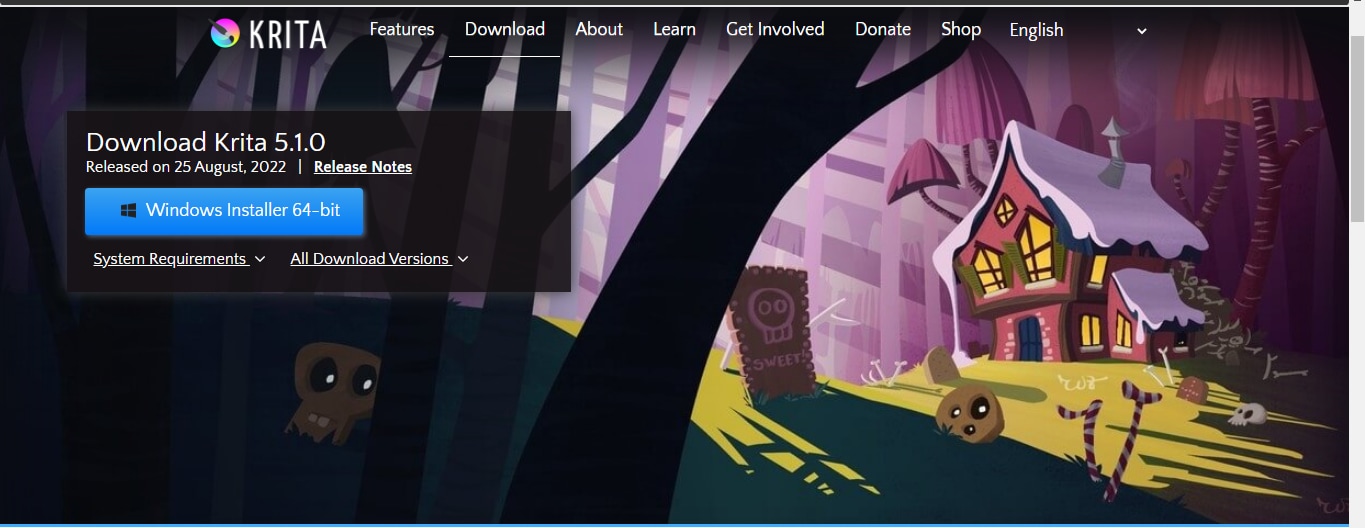
06 Krita - For Professional 2D Animators
Difficulty Level: Difficult
Pro: Advanced tools with numerous animation options and online training material.
Con: Not suitable for beginners.
If you love 2D animation, then you’ll surely love Krita. It is entirely free software available on Mac, Windows, and Linux. Also, it offers a full platform for drawing and frame-by-frame animation.
The number one reason for adoring Krita is its brush library. There are more than 100 professional brushes to give you a wide range of effects. Moreover, the strokes are pretty amazing and similar to Adobe Photoshop or Adobe Illustrator.
Another great thing about Krita is the brush stabilization feature designed for shaky hands. You can add a stabilizer to your chosen brush to smoothen its flow. Besides, there’s a special Dynamic Brush tool to make animation more fun. At the same time, you can also customize your brushes through different brush engines, including filter engines, color smudge engines, and many more.
Apart from the basic brush options, the preloaded vector tools are next to admire. These tools help you make great comic panels. All you need to do is choose and drag the word bubble template on your canvas. Then, make changes with the anchor point to make new shapes. At the same time, you can also add text to your animation by using the text tool.
Last but not least, there’s a wrap-around mode to create seamless patterns and textures. That means the image or drawing makes its own references along the x-axis and y-axis. This gives you the freedom to continue painting and enjoy updates to your animation instantly.
Features:
- HDR painting.
- PSD support.
- Python scripting.
- Selection and transformation tools.
- Proper group, filter, vector, and file layer management.
- Complete color management for extraordinary results.
- Drawing assistant to help you with straight lines and vanishing points.
Part 2 Best Free Animation Software for Windows
Below is free animation software on Windows. Keep reading.
01 Anireel - Easy to Use Animation Software
Difficulty Level: Easy
Anireel is a simple yet powerful Video Creativity tool used to make 2D animated explainer videos. Developed by Wondershare, one of the most popular Windows software and tool developers, Anireel uses rich, ready-to-use, and diverse assets to help one effortlessly make animated videos.
Features:
- There are tons of drag and drop characters, actions, props, text, and audio assets.
- Easy Text-to-Speech conversion via deep studying technology.
- Animate integrated and imported assets.
- Tons of templates that match many script types.

02 DAZ Studio - Free Software for 3D Lovers
Difficulty Level: Difficult
Pro: You can make game animation for fun. It also supports GPU accelerated real-time rendering.
Con: It has a high demand for the device, but owns a steep learning curve.
Daz 3d is a powerful and completely free 3D creation tool that will let you create the short videos that you want. Whether you are using this for business or pleasure, you will find the program is very easy to understand. Within a day, you will be completely used to its interface.
3D effects are the core focus of DAZ Studio. You can build a model, render, and pose animation within the skin texture level. It has a high requirement for the device. For Windows 64 bits, its recommended RAM is 3G.
Features:
- Options for 3D morphing, animation, and rendering.
- GPU accelerated real-time rendering, which delivers the best results.
- Interactive tutorials to help you become a better 3D artist.
- Everything you make is yours, royalty-free!
03 Terragen - Use It to Make CG Animation
Difficulty Level: Middle
Pro: The recently updated version is the best one. Ray-traced preview is a great function to help us make animation.
Con: The interface looks complicated, but it gets easy to know after you are familiar with it.
A completely free program that you can download and install on all Windows computers and tablets, Terragen is the ideal program for you to create the 3D animations and environments that you want. If you want a photo-realistic CG environment, using Terragen is the best way to do it!
Releasing imagination instantly, Terragen Creative is the one tool you’d like to consider. You can use it to make beautiful scenery.
For advanced tools, you can choose FBX to make animation quickly. The featured image gallery on its homepage will give you a deep understanding of the final outcome you can achieve with Terragen.
Features:
- Ray-traced preview. Without watermark after exporting
- Photo-realistic clouds and ozone simulation
- Rendering is twice as fast as the previous version of the program.
- Adding terrain, objects, and shader to your final product is very easy with the intuitive interface.
04 Anim8or - Free Tool to Make 3D Modeling
Difficulty Level: Difficult
Pro: Anim8or supports 3D modeler and TrueType fonts to meet advanced needs.
Con: Beginners will find it difficult to learn.
Anim8or is a free 3D modeling program that will let you create the unique work that you want. It is a personal project from an animator, but the program does get regular updates and troubleshooting.
It is not going to give you the same features as something like Studio Max or Maya, but you will get the basics. Beginners who are getting into animations will love this program.
Anim8or is a great tool to step into 3D animation ff you think other software is too different to start. In some way, it means you need to give up some advanced features. But all in all, it’s still recommended for you.
Features:
- A full 3D modeler that allows you to create spheres, cylinders, platonic solids, and any other objects that you want.
- Features support for TrueType fonts.
- Easy to create 3D scenes and output them as video files or images.
05 Seamless3d - Open-source Free Software
Difficulty Level: Easy
Pro: It is an open-source 3D modeling package. The good thing is the handy infinite Undo/Redo operation.
Con: Some advanced features are missing like drawing.
Seamless3d, an open-source 3D modeling software that you can download, is among the best animation worktables if you want to create specialized images, animated videos, or 3D characters.
It supports FFmpeg video format, so you can use AVI, MP4, and more. Besides, the forum is not active compared with before, but you still can find answers from many tutorials .
Features:
- It comes with infinite undo and redo options for complete flexibility to correct mistakes.
- It allows for partitioned and seamless texture mapping for YouTube videos.
- Has a specialized tree view interface.

06 OpenToonz - Support Plug in to Make Animation Freely
Difficulty Level: Middle
Pro: It is open-source software, so you can change the code freely.
Con: The plug-in effects are limited.
This animation program is made for beginners on Windows. It is among the best 2D animation software in the market. You can use plug-in effects to change image style, add lights, and distort details. It supports Windows 7/8/10 only for 64 bit.
Features:
- You can add provisional colors to make your animation more colorful.
- Smooth correction without frame losing.
- Compatible with black-and-white, colored, or without binarization scanning.
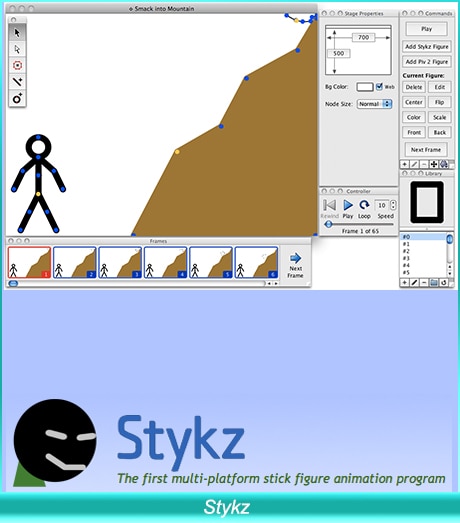
7 Stykz - Simple to Use Animation Program for Beginners
Difficulty Level: Easy
Pro: It is the best stick figure animation if you want to make this kind of video.
Con: The UI is not modern to use and needs time to adapt to using it.
Stykz is completely free to use and without a watermark. If you have used Pivot StickFigure Animator, then you will find Stykz is similar to it, but you can import the previous .stk files to animate it again. You can use it to make animation smooth frame by frame.
With its frame-based feature, Stykz is easy to customize each frame. You can change previous and current frames to get what you want. You can download it to have a try considering its easy-to-use features.
Features:
- There is some animes file on this website, so you can have a reference.
- Edit animation in the software without using another editing window.
- You can share the final work with others including information.
Part 3 FAQ about Animation Software for Windows and Mac
01 Are Macs good for animation?
To be frank, Mac is a better choice to make animation if you want to have a smooth animation experience. For example, screen resolution is a crucial factor to make excellent animation. The good is Mac’s screen will never let you disappointed.
02 What is the best animation software for Mac?
The best animation software on mac includes Synfig Studio, Pencil2D Animation, Tupi, Blender, and more. Mentioned are free-to-use. Maya is also worth considering animation software if you are a professional user. Maya offers a 1-month free trial. After it is ended, the paid plans are month, 1-year, and 3-year.
03 Can you animate in Photoshop?
Yes, you can make basic animation in Photoshop. However, it only supports frame-based animation making. In this case, you need to use other professional software to make animation. But, you still can use Photoshop to meet your needs if you are a beginner.
Conclusion
With any of these free animation maker programs on Mac and Windows, you will have an easy time creating your next 2D or 3D video. Ensure you choose the program that has the features and compatibility that you desire. Then it is up to your creative mind to come up with stunning animations! If you want to make animation easily, you can also find inspiration through classical animated cartoon types with examples .
Shanoon Cox
Shanoon Cox is a writer and a lover of all things video.
Follow @Shanoon Cox
Shanoon Cox
Mar 27, 2024• Proven solutions
In your search for quality animation software, you may have found that many of the programs cost a lot of money no matter it is 2D animation software or 3D animation editor. The good news is that you can choose free animation tools to make different animation types easily.
That is why we created a list of the best animation software on both Mac and Windows. Whether you are a professional editor or just a beginner to start making animation, you will find the tools listed below are easy to use without watermark and won’t cost money to improve your skills.
The best part is you will find these free animation programs are also very useful for content creation on Mac and Windows. Besides, we have listed the pros and cons of each software. Keep reading!
- Part 1: Best Free Animation Software for Mac
- Part 2: Best Free Animation Software for Windows
- Part 3: FAQ about Animation Software for Windows and Mac
Here we have made a table of 12 free animation software without watermark on Windows and macOS. Take a look.
6 Free Animation Software for macOS
5K-3DMiddleIt is a great tool for 3D artists6KritaDifficultPerfect software for 2D animation
| Number | Software | Difficulty Level | Highlight |
|---|---|---|---|
| 1 | Synfig Studio | Easy | Calculate vector shape to animation automatically |
| 2 | Pencil2D Animation | Easiest | Straightforward interface for beginners |
| 3 | Tupi | Middle | Its community is active to offer solutions |
| 4 | Blender | Difficult | It is a powerful animation tool to render and make modeling |
6 Free Animation Software for Windows
| Number | Software | Difficulty Level | Highlight |
|---|---|---|---|
| 1 | DAZ Studio | Difficult | For professional users with the fast animation process |
| 2 | Terragen | Middle | It can make realistic CG environments |
| 3 | Anim8or | Difficult | 3D animation is Anim8or’s main function |
| 4 | Seamless3d | Easy | It has many features for 3d modeling |
| 5 | OpenToonz | Middle | Make cartoon animation with plugins |
| 6 | Stykz | Easy | Quickly make animation if you have used Pivot StickFigure Animator |
Best Animation Software on Windows and Mac - Filmora
Looking for a simple while powerful Mac video editing tool ? We recommend using Wondershare Filmora. You can use it to create 2D/3D animated texts, shapes, or anything you like for YouTube videos.
The keyframing features will help you make animation effects smooth and precise. When exporting, you can also make it transparent.
Besides, various title templates and transitions are also available for you. Download it now to have a try! Or learn more from Wondershare Video Community .
Key features
- Create various shapes that you like
- Add keyframing to make it move
- Fine-tuning to make it smooth
- Add visual effects/text/color before export it
You can even create photo cut animation which has been very trendy on Tiktok and Instagram. Here is a video to present you how you can do it in Filmora.
Part 1 Best Free Animation Software for Mac
Listed below is free animation software on Mac. Take a look.
01 Synfig Studio - Mac Software to Animate Video
Difficulty Level: Easy
Pro: You can create many layers once a time and sync audio for your animation.
Con: This one needs much time to learn, especially for beginners.
An open-source 2D animation software that works on Macs, Synfig Studio delivers multiple players while you are creating content. Whether you want to add geometric, filters, distortions, or transformations, it is all possible! And thanks to the high-end bone system, you can create cut-out videos using bitmap images!
The thoughtful part is there are two download versions on the homepage: the stable version and the development version. If you want to enjoy a stable and smooth animation editing experience, choose the stable one. However, the development package gives you access to the use of the latest features.
For a novice, you can learn Synfig from step by step guide in Wikipedia and video tutorials. Four languages are available including English, Russian, Dutch, and French for a video course.
You can free download its latest version 1.3.11. The upcoming version is 1.4.
Features:
- It offers support for many layers within the animation.
- The program’s bone system means that you can easily create animations with bitmap images or vector artwork.
- It allows you to sync your creative work with any sound that you want. Has a full-featured audio editor.
02 Pencil2D Animation - Animation Program for 2D Pencil Lover
Difficulty Level: Easiest
Pro: Easy to start and make animation as the interface is user-friendly for many people.
Con: You need to set your preference every time to open it up, so it takes up some time
Pencil2D Animation is one of the simplest 2D hand-drawn tools available. It will work flawlessly on Mac computers. It is ideal for beginners, as the commands and interface are very easy to understand.
Whether you want to create a simple one, or you want something with many layers for videos on YouTube, you can use Pencil2D animation to get it done. Its timeline is easy to use at first glance. You can add and duplicate different frames on a different track.
The frequency of releasing the new version is very fast as Pencil2D is committed to bringing the lasted features to each user. The newest version is v0.6.4 (as of August 2019). Its user guide is informative with video tutorials, FAQs, and manual material.
Features:
- Lightweight and minimalistic design that makes it very easy for beginners.
- Features raster and vector workflows, with easy switching between them. You can paint and sketch as you want!
- Will run on all platforms - Mac, Windows, and Linux.
- Completely free and open source.
03 TupiTube - Free Animation Application for Mac Users
Difficulty Level: Middle
Pro: It supports vector illustrations. Besides, various formats are available.
Con: If you want to make 3D animation, it will fail. You can only make 2D effects.
A free software application for YouTube, Tupi will allow you to create 2D animations to your heart’s content. The tool was started by animators who wanted to create something that others could use.
It is an open-source tool, which means that users can make tweaks to the program if they have some interesting ideas. The program works on both Windows and Mac. You need to use Tupi and Papagayo to make lip-sync animation with different mouth shapes.
It also offers a solution for schools with related features including academic license, technical support, and ads-free, so many schools choose to use this one to teach kids how to make an animation video.
Features:
- Support for vector illustrations. You can add rectangles, lines, polygons, and other shapes as you please. To fill areas, just use the paint bucket.
- You can import raster images using this program.
- You can export all your finished images into different file formats.
- Support for tweeting positions, scale, shear, and rotations.
04 Blender - Need Some Time to Learn This Animation Tool
Difficulty Level: Difficult
Pro: Really powerful software that you can make for professional users.
Con: It is not easy to make image animation as it focuses on 3D.
Blender is an open-source 3D animation creation suite without a watermark. If you find that 2D is a little bit limiting, we think that you will be very happy with what this free program offers. You can take your projects to a whole new level when you can use this program on your Mac.
You can use Blender to make a video game, modeling, and high-quality animation. However, it involves a steep learning curve. Luckily, there are many tutorials to guide you through the journey. You can also ask for help in the Blender community that millions of talented people like you are there.
Features:
- Creating renders is no problem with this program.
- Modeling, such as sculpting, retopology, and creating curves is not an issue either.
- VFX and animation features are better than any option on the market.
- It offers powerful simulation tools.
- Integration with pipeline tools is easy.
05 K-3D - Best for Animation and Modeling in 3D
Difficulty Level: Middle
Pro: Ideal for designing simple 3D animations and models.
Con: It has an old-fashioned interface. Also, the built-render (RenderMan) feature is difficult to use by beginners.
K-3D is an animation and 3D modeling software. You can download this tool for free on your Mac. Besides, you can also install and run it on your Windows and Linux systems. If you look at the design, you will find that the software is quite old. But don’t judge a book by its cover. Why so? It is because K-3D is one of the strongest and most versatile tools for 3D artists with many options.
For example, K-3D offers extremely systematic and methodological workflows. You can easily adjust the properties of the features in real-time and get instant results. It has a node-oriented visualization pipeline to enjoy more freedom. That means you can create animation using a variety of combinations.
One of the best things about K-3D is that it has three subdivisions of animation. You can work on your model on one side while showing the other side in a mirrored form. Then, experience the final result combined together. And in case you need to make the changes to the end results, you can simply work on the first subdivision and savor automatic changes to the results.
K-3D has an advanced redo and undo mechanism to ensure you can go back or move forward to make corrections or amendments without limits. Additionally, the tool is developed keeping in mind all the industrial standards. For instance, it has complete support and integration of native RenderMan™ to its user interface. This is an excellent feature because most free animation software for Mac requires third-party render plugins.
Features:
- Parametric workflow.
- 2D and 3D animation tools.
- Allows Python and K3DScript scripting.
06 Krita - For Professional 2D Animators
Difficulty Level: Difficult
Pro: Advanced tools with numerous animation options and online training material.
Con: Not suitable for beginners.
If you love 2D animation, then you’ll surely love Krita. It is entirely free software available on Mac, Windows, and Linux. Also, it offers a full platform for drawing and frame-by-frame animation.
The number one reason for adoring Krita is its brush library. There are more than 100 professional brushes to give you a wide range of effects. Moreover, the strokes are pretty amazing and similar to Adobe Photoshop or Adobe Illustrator.
Another great thing about Krita is the brush stabilization feature designed for shaky hands. You can add a stabilizer to your chosen brush to smoothen its flow. Besides, there’s a special Dynamic Brush tool to make animation more fun. At the same time, you can also customize your brushes through different brush engines, including filter engines, color smudge engines, and many more.
Apart from the basic brush options, the preloaded vector tools are next to admire. These tools help you make great comic panels. All you need to do is choose and drag the word bubble template on your canvas. Then, make changes with the anchor point to make new shapes. At the same time, you can also add text to your animation by using the text tool.
Last but not least, there’s a wrap-around mode to create seamless patterns and textures. That means the image or drawing makes its own references along the x-axis and y-axis. This gives you the freedom to continue painting and enjoy updates to your animation instantly.
Features:
- HDR painting.
- PSD support.
- Python scripting.
- Selection and transformation tools.
- Proper group, filter, vector, and file layer management.
- Complete color management for extraordinary results.
- Drawing assistant to help you with straight lines and vanishing points.
Part 2 Best Free Animation Software for Windows
Below is free animation software on Windows. Keep reading.
01 Anireel - Easy to Use Animation Software
Difficulty Level: Easy
Anireel is a simple yet powerful Video Creativity tool used to make 2D animated explainer videos. Developed by Wondershare, one of the most popular Windows software and tool developers, Anireel uses rich, ready-to-use, and diverse assets to help one effortlessly make animated videos.
Features:
- There are tons of drag and drop characters, actions, props, text, and audio assets.
- Easy Text-to-Speech conversion via deep studying technology.
- Animate integrated and imported assets.
- Tons of templates that match many script types.
02 DAZ Studio - Free Software for 3D Lovers
Difficulty Level: Difficult
Pro: You can make game animation for fun. It also supports GPU accelerated real-time rendering.
Con: It has a high demand for the device, but owns a steep learning curve.
Daz 3d is a powerful and completely free 3D creation tool that will let you create the short videos that you want. Whether you are using this for business or pleasure, you will find the program is very easy to understand. Within a day, you will be completely used to its interface.
3D effects are the core focus of DAZ Studio. You can build a model, render, and pose animation within the skin texture level. It has a high requirement for the device. For Windows 64 bits, its recommended RAM is 3G.
Features:
- Options for 3D morphing, animation, and rendering.
- GPU accelerated real-time rendering, which delivers the best results.
- Interactive tutorials to help you become a better 3D artist.
- Everything you make is yours, royalty-free!
03 Terragen - Use It to Make CG Animation
Difficulty Level: Middle
Pro: The recently updated version is the best one. Ray-traced preview is a great function to help us make animation.
Con: The interface looks complicated, but it gets easy to know after you are familiar with it.
A completely free program that you can download and install on all Windows computers and tablets, Terragen is the ideal program for you to create the 3D animations and environments that you want. If you want a photo-realistic CG environment, using Terragen is the best way to do it!
Releasing imagination instantly, Terragen Creative is the one tool you’d like to consider. You can use it to make beautiful scenery.
For advanced tools, you can choose FBX to make animation quickly. The featured image gallery on its homepage will give you a deep understanding of the final outcome you can achieve with Terragen.
Features:
- Ray-traced preview. Without watermark after exporting
- Photo-realistic clouds and ozone simulation
- Rendering is twice as fast as the previous version of the program.
- Adding terrain, objects, and shader to your final product is very easy with the intuitive interface.
04 Anim8or - Free Tool to Make 3D Modeling
Difficulty Level: Difficult
Pro: Anim8or supports 3D modeler and TrueType fonts to meet advanced needs.
Con: Beginners will find it difficult to learn.
Anim8or is a free 3D modeling program that will let you create the unique work that you want. It is a personal project from an animator, but the program does get regular updates and troubleshooting.
It is not going to give you the same features as something like Studio Max or Maya, but you will get the basics. Beginners who are getting into animations will love this program.
Anim8or is a great tool to step into 3D animation ff you think other software is too different to start. In some way, it means you need to give up some advanced features. But all in all, it’s still recommended for you.
Features:
- A full 3D modeler that allows you to create spheres, cylinders, platonic solids, and any other objects that you want.
- Features support for TrueType fonts.
- Easy to create 3D scenes and output them as video files or images.
05 Seamless3d - Open-source Free Software
Difficulty Level: Easy
Pro: It is an open-source 3D modeling package. The good thing is the handy infinite Undo/Redo operation.
Con: Some advanced features are missing like drawing.
Seamless3d, an open-source 3D modeling software that you can download, is among the best animation worktables if you want to create specialized images, animated videos, or 3D characters.
It supports FFmpeg video format, so you can use AVI, MP4, and more. Besides, the forum is not active compared with before, but you still can find answers from many tutorials .
Features:
- It comes with infinite undo and redo options for complete flexibility to correct mistakes.
- It allows for partitioned and seamless texture mapping for YouTube videos.
- Has a specialized tree view interface.
06 OpenToonz - Support Plug in to Make Animation Freely
Difficulty Level: Middle
Pro: It is open-source software, so you can change the code freely.
Con: The plug-in effects are limited.
This animation program is made for beginners on Windows. It is among the best 2D animation software in the market. You can use plug-in effects to change image style, add lights, and distort details. It supports Windows 7/8/10 only for 64 bit.
Features:
- You can add provisional colors to make your animation more colorful.
- Smooth correction without frame losing.
- Compatible with black-and-white, colored, or without binarization scanning.
7 Stykz - Simple to Use Animation Program for Beginners
Difficulty Level: Easy
Pro: It is the best stick figure animation if you want to make this kind of video.
Con: The UI is not modern to use and needs time to adapt to using it.
Stykz is completely free to use and without a watermark. If you have used Pivot StickFigure Animator, then you will find Stykz is similar to it, but you can import the previous .stk files to animate it again. You can use it to make animation smooth frame by frame.
With its frame-based feature, Stykz is easy to customize each frame. You can change previous and current frames to get what you want. You can download it to have a try considering its easy-to-use features.
Features:
- There is some animes file on this website, so you can have a reference.
- Edit animation in the software without using another editing window.
- You can share the final work with others including information.
Part 3 FAQ about Animation Software for Windows and Mac
01 Are Macs good for animation?
To be frank, Mac is a better choice to make animation if you want to have a smooth animation experience. For example, screen resolution is a crucial factor to make excellent animation. The good is Mac’s screen will never let you disappointed.
02 What is the best animation software for Mac?
The best animation software on mac includes Synfig Studio, Pencil2D Animation, Tupi, Blender, and more. Mentioned are free-to-use. Maya is also worth considering animation software if you are a professional user. Maya offers a 1-month free trial. After it is ended, the paid plans are month, 1-year, and 3-year.
03 Can you animate in Photoshop?
Yes, you can make basic animation in Photoshop. However, it only supports frame-based animation making. In this case, you need to use other professional software to make animation. But, you still can use Photoshop to meet your needs if you are a beginner.
Conclusion
With any of these free animation maker programs on Mac and Windows, you will have an easy time creating your next 2D or 3D video. Ensure you choose the program that has the features and compatibility that you desire. Then it is up to your creative mind to come up with stunning animations! If you want to make animation easily, you can also find inspiration through classical animated cartoon types with examples .
Shanoon Cox
Shanoon Cox is a writer and a lover of all things video.
Follow @Shanoon Cox
MP3 to MP4: The Dos and Don’ts of Audio-Video Conversion
What Should Consider when You Convert MP3 into MP4
An easy yet powerful editor
Numerous effects to choose from
Detailed tutorials provided by the official channel
Keeping in mind that there will of course be no actual imagery to go with the finished product (unless you choose to add as such), converting an MP3 into MP4 is very easy!
There are even online MP3 to MP4 converters that will allow you to do this without having to download or install anything! But, we’re getting ahead of ourselves here. Continue reading below to learn more:
In this article
01 [Easy Steps on Convert MP3 into MP 4](#Part 1)
02 [Six Online and Free Mp3 to Mp4 Converter](#Part 2)
Part 1 Easy Steps on Convert MP3 into MP4
For the first part of this article, we’ll be covering how to use a free MP3 to MP4 converter in order to successfully change the format of your audio into a video file! There will be two examples given for this, one for the straightforward MP3 into MP4 conversion the other for the more specified MP3 to MOV conversion!
01How to Convert MP3 to MP4?
Step 1: Launch MP3 to MP4 Convert (for Windows)
For our example, we’ll be using the free MP3 to MP4 converter, EaseUS Video Converter! This is open-source software, so you can use it for free!
To start using your chosen free MP3 to MP4 converter, upload the file that you want to convert! For our example converter, it’s as simple as dragging and dropping your chosen MP3 into the interface (as pointed out in the image below.)

Step 2: Choose Output Format!
Once the MP3 file has been uploaded, choose your desired output format.
(For our example MP3 to MP4 converter, this means selecting the settings icon for the file in question and then choosing a format from the pop-up window that appears (shown in the image below).

Step 3: Start Converting!
Once you’ve chosen your desired output format (which in this case is MP3 into MP4), select the “CONVERT” button to finish up!

Step 4: Save MP3 Into MP4
Depending on your chosen free MP3 to MP4 converter, your new MP4 file may have to be downloaded manually or not.
In the case of EaseUS Video Converter, it is downloaded automatically, all you have to do is select the “Finished” tab and select “OPEN” to go directly to the file location.

02How to Convert MP3 to MOV?
We’ve also included how you can convert MP3 to MOV with the same tool! As you will surely see, much of the process is the same. Only one step is really changed!
Step 1: Uploaded MP3 File!
First, just like in the previous section, upload your MP3 file (by dragging and dropping the file onto the MP3 to MOV converter.)

Step 2: Select ‘MOV’ Format!
This is the step where things change, of course! Now, rather than choosing MP4, you should select the “MOV” format for your output type! This will ensure that your MP3 file is converted specifically to a MOV file.

Step 3: Convert!
Again, just like before, select “CONVERT” to start the conversion process from MP3 to MOV!

Step 4: Open Folder to Find File!
Then, finally, go to the “Finished” tab to find your new MOV file.

Part 2 Six Online and Free Mp3 to Mp4 Converter
For this next section, we’re going to introduce a couple of online MP3 to MP4 converters as well other general, paid, and free MP3 to MP4 converters that you can check out. A link to a video showing how the converter works, as well as brief descriptions for each converter, have also been provided to ensure that you have a good idea of how each one works!
01**Wondershare Filmora **
The first of the tools on this list is Filmora! Filmora, first and foremost, is an advanced video editor. Some might say that using it as a tool to simply convert MP3 into MP4 is a little bit of an overkill.
But, chances are, you’re not likely going to want to stop at converting your MP3 into an MP4 file anyway, right? Well, if that’s the case, then having an all-in-one tool on your side that can offer you endless options for all sorts of purposes is one way to ensure that you are starting off on the right foot from the very beginning!
02Zamzar
Zamzar is a Windows 10 app that works as a general conversion tool. It doesn’t just convert MP3 into MP4 or MP3 into MOV — it also does the job if you’re looking for a converter that will work on JPG to PNG or PDF to JPG, etc. That makes it a helpful tool to have on hand just for general conversion purposes.
03Online File Converter
Online File Converter, as you can probably guess from the name, is an online conversion tool! This tool, much like Zamzar, is a heavy-hitter when it comes to conversion inputs and outputs compatibility. So, not only are you able to do the general MP3 into MP4 conversion promised today, but you can do other things as well! Plus, no download or installation is required! All you need is an internet connection to access the website the converter is on and a little patience while you wait to upload, convert, and download the file in question.
04Any Conv
AnyConv is an alternate to the Online File Converter if you’re looking for an online solution, but you don’t like the interface of one or the other. The two are pretty much identical in terms of features. All you need to do in order to use it is to upload the file that you want to convert, choose a format, and then download the output file when you’re done!
05Uniconverter
Uniconverter is an online MP3 to MP4 tool from Wondershare (the same creators of Filmora Pro). It’s a very solid tool. And it’s quite a convenient one too. Since, just like any online converter, all you need to start using it is an internet connection.
06MConverter - Chrome Extension
Our last pick brings us back to unique solutions! Specifically, we’re delving into the realm of Chrome extensions! This tool, the MConverter, works similarly to the other converters on this list. But, of course, in this case, if you want to use it in order to convert your files, you must first download the plug-in to your Chrome browser!
Key Takeaways from This Episode
● Despite the variety of options out there for MP3 into MP4 converters, they all pretty much work the same. First, you upload the file that you want to convert. Second, you select the output format for the conversion. And finally, third, you finish the conversion!
● Most MP3 to MP4 converters work for other formats as well. For example, if you want to convert your MP3 to MOV instead — that’s possible! OR, if you want to do the opposite, and convert MP4 to MP3, that works too!
● The difference between the different audio-to-video converters is usually the type of extra features it comes with as well as from what platform you can use it. For the latter, there are software types that you download and install to your computer, online types that you access through the internet, and extensions that you plug into your browser! Pick the one that works best with your workflow.
Keeping in mind that there will of course be no actual imagery to go with the finished product (unless you choose to add as such), converting an MP3 into MP4 is very easy!
There are even online MP3 to MP4 converters that will allow you to do this without having to download or install anything! But, we’re getting ahead of ourselves here. Continue reading below to learn more:
In this article
01 [Easy Steps on Convert MP3 into MP 4](#Part 1)
02 [Six Online and Free Mp3 to Mp4 Converter](#Part 2)
Part 1 Easy Steps on Convert MP3 into MP4
For the first part of this article, we’ll be covering how to use a free MP3 to MP4 converter in order to successfully change the format of your audio into a video file! There will be two examples given for this, one for the straightforward MP3 into MP4 conversion the other for the more specified MP3 to MOV conversion!
01How to Convert MP3 to MP4?
Step 1: Launch MP3 to MP4 Convert (for Windows)
For our example, we’ll be using the free MP3 to MP4 converter, EaseUS Video Converter! This is open-source software, so you can use it for free!
To start using your chosen free MP3 to MP4 converter, upload the file that you want to convert! For our example converter, it’s as simple as dragging and dropping your chosen MP3 into the interface (as pointed out in the image below.)
Step 2: Choose Output Format!
Once the MP3 file has been uploaded, choose your desired output format.
(For our example MP3 to MP4 converter, this means selecting the settings icon for the file in question and then choosing a format from the pop-up window that appears (shown in the image below).
Step 3: Start Converting!
Once you’ve chosen your desired output format (which in this case is MP3 into MP4), select the “CONVERT” button to finish up!
Step 4: Save MP3 Into MP4
Depending on your chosen free MP3 to MP4 converter, your new MP4 file may have to be downloaded manually or not.
In the case of EaseUS Video Converter, it is downloaded automatically, all you have to do is select the “Finished” tab and select “OPEN” to go directly to the file location.
02How to Convert MP3 to MOV?
We’ve also included how you can convert MP3 to MOV with the same tool! As you will surely see, much of the process is the same. Only one step is really changed!
Step 1: Uploaded MP3 File!
First, just like in the previous section, upload your MP3 file (by dragging and dropping the file onto the MP3 to MOV converter.)
Step 2: Select ‘MOV’ Format!
This is the step where things change, of course! Now, rather than choosing MP4, you should select the “MOV” format for your output type! This will ensure that your MP3 file is converted specifically to a MOV file.
Step 3: Convert!
Again, just like before, select “CONVERT” to start the conversion process from MP3 to MOV!
Step 4: Open Folder to Find File!
Then, finally, go to the “Finished” tab to find your new MOV file.
Part 2 Six Online and Free Mp3 to Mp4 Converter
For this next section, we’re going to introduce a couple of online MP3 to MP4 converters as well other general, paid, and free MP3 to MP4 converters that you can check out. A link to a video showing how the converter works, as well as brief descriptions for each converter, have also been provided to ensure that you have a good idea of how each one works!
01**Wondershare Filmora **
The first of the tools on this list is Filmora! Filmora, first and foremost, is an advanced video editor. Some might say that using it as a tool to simply convert MP3 into MP4 is a little bit of an overkill.
But, chances are, you’re not likely going to want to stop at converting your MP3 into an MP4 file anyway, right? Well, if that’s the case, then having an all-in-one tool on your side that can offer you endless options for all sorts of purposes is one way to ensure that you are starting off on the right foot from the very beginning!
02Zamzar
Zamzar is a Windows 10 app that works as a general conversion tool. It doesn’t just convert MP3 into MP4 or MP3 into MOV — it also does the job if you’re looking for a converter that will work on JPG to PNG or PDF to JPG, etc. That makes it a helpful tool to have on hand just for general conversion purposes.
03Online File Converter
Online File Converter, as you can probably guess from the name, is an online conversion tool! This tool, much like Zamzar, is a heavy-hitter when it comes to conversion inputs and outputs compatibility. So, not only are you able to do the general MP3 into MP4 conversion promised today, but you can do other things as well! Plus, no download or installation is required! All you need is an internet connection to access the website the converter is on and a little patience while you wait to upload, convert, and download the file in question.
04Any Conv
AnyConv is an alternate to the Online File Converter if you’re looking for an online solution, but you don’t like the interface of one or the other. The two are pretty much identical in terms of features. All you need to do in order to use it is to upload the file that you want to convert, choose a format, and then download the output file when you’re done!
05Uniconverter
Uniconverter is an online MP3 to MP4 tool from Wondershare (the same creators of Filmora Pro). It’s a very solid tool. And it’s quite a convenient one too. Since, just like any online converter, all you need to start using it is an internet connection.
06MConverter - Chrome Extension
Our last pick brings us back to unique solutions! Specifically, we’re delving into the realm of Chrome extensions! This tool, the MConverter, works similarly to the other converters on this list. But, of course, in this case, if you want to use it in order to convert your files, you must first download the plug-in to your Chrome browser!
Key Takeaways from This Episode
● Despite the variety of options out there for MP3 into MP4 converters, they all pretty much work the same. First, you upload the file that you want to convert. Second, you select the output format for the conversion. And finally, third, you finish the conversion!
● Most MP3 to MP4 converters work for other formats as well. For example, if you want to convert your MP3 to MOV instead — that’s possible! OR, if you want to do the opposite, and convert MP4 to MP3, that works too!
● The difference between the different audio-to-video converters is usually the type of extra features it comes with as well as from what platform you can use it. For the latter, there are software types that you download and install to your computer, online types that you access through the internet, and extensions that you plug into your browser! Pick the one that works best with your workflow.
Stop Motion in the Cloud: A Comprehensive Guide to Tools and Best Practices
Creating a stop motion video is a fascinating process. If you use the right software and know the basics of making videos, you can create fantastic animations. While creating a stop motion video, there are things to keep in mind, like keeping the cameras steady and using the proper audio effects. Cloud Stop motion is well-known software with the tools to create unique video projects on your smartphone, laptop, desktop, Chromebook, or even tablet.
Part 1. Introduction- Cloud Stop Motion
It is easy to create stop motion animation with this web-based app. To use cloud stop motion you must first create an account and grant the app permission to your computer’s webcam. Then you can start a new project and start taking pictures.
Each image is displayed on the timeline to know all photos that are going to be included in the stop motion video. On Cloud Stop Motion, you have the option to either record or import audio files from the sound library or your device. You can add additional things, like opening titles, end credits, speech bubbles, and text overlays. It functions directly in the browser on any modern device.
You do not have to install anything. It is all saved to the cloud. You can work with your animation on a zoomable, scrollable timeline.
Features -
- Easy to use, powerful, and intuitive software to create animations.
- The Interface has a modern design.
- It is equipped with a rich audio library, backgrounds and styles included.
- You can switch devices seamlessly at any point.
Part 2. How to Use Cloud Stop Motion to Create Animation Videos?
Cloud Stop Motion is a great browser-based app that one can use to create fun animation videos. You can use Cloud Stop Motion even when you have not created your account. But consider creating an account to enjoy additional features.

Before you open Cloud Stop Motion and start clicking pictures of your subject for your video, it is important to have a story in mind. So, create a storyboard to break down your stop motion video. You can sketch your plan frame by frame or write bulleted list of your frames. It will help you create your project efficiently, ensuring that you have taken pictures of all the frames that you need to tell your story.

Step 1: Once you have created your storyboard, open the app to go to the Cloud Stop Motion dashboard. Click on the new project button. Cloud Stop Motion needs access to your camera for capturing images. So, allow camera access.

On the dashboard, go to the taking picture menu. Now place the subject at the center of your frame. Capture a few test shots to find the composition that you like. You can see the picture at the bottom of the timeline. If needed, adjust the position of your subject. Make sure that the location you choose has plenty of light. If not, you also use a lamp for good light.
Tip: Keeping your phone or camera steady while making your stop-motion project is the key. You can use a tripod, a selfie stick, or a gimbal to keep your device as still as possible. If you don’t own any of these, keep your device on something sturdy and make sure that you do not change its place until you capture all the images needed for your project. This way all your shots will be consistent.
Step 2: Move your subject or change its position and take a picture. Repeat the process until you complete your story. To make your stop-motion smooth, make small changes to the position of your subject between shots.

You can also add more frames per second. Generally, you should add 10 frames per second. But you can go for 25 frames per second to make a smoother video. All the pictures you snap are automatically added to the editor in chronological order.
Step 3: Once you have captured images for your project, add sound by going to the sound menu in the top left of the dashboard. You can record sounds, upload sounds, or select sounds from Cloud Stop Motion’s gallery. You can also add text to your Cloud Stop Motion project if you want.
Step 4: Click on play button to preview your project and see if your motion picture turned out as per your liking or not. If you do not like something, go back and make changes. Once done, download your video from cloudstop motion.
Part 3. 3 Alternatives for Cloud Stop Motion
Are you ready to turn your video clips and images into a stop motion movie? Have a look at all these software that can create animations wonderfully well. You can share the animations with your friends on social media platforms. The stop motion effect is ideal for action videos.
1. Stop Motion Animator
It is a simple tool for creating stop motion animation sequences using a webcam. You can save the animation as a video file in the widely-supported webm format. The videos previously saved can be loaded into the app and extended. Stop Motion Animator is free software that lets you create fantastic stop motion videos. It is an open-source, non-commercial app.
It does not collect any data, and it does not connect to the internet at all.

2. Kapwig
Whether you’re a beginner video creator or advanced, Kapwing is the right tool to create stop motion animation. It is an all-in-one online video studio as it has an intuitive timeline, advanced editor, and plugin ecosystem that will help you make next-level videos.
Kapwing Studio supports many different file types like MP4, MOV, AVI, 3GP. Record video clips, add voiceovers and add images and texts to create a fresh stop motion video. Then you can edit them in the browser from any device. If you like how the final video looks, click “Export.” Download the MP4 file directly, publish the video on social media, or share the link with your friends.
You can customize the output video size in 1:1, 9:16, 16:9, 4:5, or 5:4. Sign in to the Kapwing account to remove the watermark.

3. Clideo
Clideo is a high-speed stop motion maker with an easy-to-use dashboard and instant download. It is compatible with almost all the video formats such as AVI, MPG, VOB, WMV, MOV, and more. When creating a stop motion, you can choose from various frame and clip rates available. They slow down, speed up or maintain the same speed for your video. The interface is intuitive, so you don’t have to have experience using the stop motion editor.
Just upload a video file from your device- whether it’s a computer, iPhone, or android phone. Apply the effects that go with your movie. You can watch the final result and click the “Download” button.

Closing Word
Recording and editing stop motion animation has never been easier. You can thousands of images and create video projects quickly on Cloud stop motion.
Each software we include in this article grants you access to all the necessary tools you’ll need while creating a stop motion animation. Are you impressed with cloud stop motion or one of the alternatives? Leave a comment and let us know.
Part 2. How to Use Cloud Stop Motion to Create Animation Videos?
Cloud Stop Motion is a great browser-based app that one can use to create fun animation videos. You can use Cloud Stop Motion even when you have not created your account. But consider creating an account to enjoy additional features.
Before you open Cloud Stop Motion and start clicking pictures of your subject for your video, it is important to have a story in mind. So, create a storyboard to break down your stop motion video. You can sketch your plan frame by frame or write bulleted list of your frames. It will help you create your project efficiently, ensuring that you have taken pictures of all the frames that you need to tell your story.
Step 1: Once you have created your storyboard, open the app to go to the Cloud Stop Motion dashboard. Click on the new project button. Cloud Stop Motion needs access to your camera for capturing images. So, allow camera access.
On the dashboard, go to the taking picture menu. Now place the subject at the center of your frame. Capture a few test shots to find the composition that you like. You can see the picture at the bottom of the timeline. If needed, adjust the position of your subject. Make sure that the location you choose has plenty of light. If not, you also use a lamp for good light.
Tip: Keeping your phone or camera steady while making your stop-motion project is the key. You can use a tripod, a selfie stick, or a gimbal to keep your device as still as possible. If you don’t own any of these, keep your device on something sturdy and make sure that you do not change its place until you capture all the images needed for your project. This way all your shots will be consistent.
Step 2: Move your subject or change its position and take a picture. Repeat the process until you complete your story. To make your stop-motion smooth, make small changes to the position of your subject between shots.
You can also add more frames per second. Generally, you should add 10 frames per second. But you can go for 25 frames per second to make a smoother video. All the pictures you snap are automatically added to the editor in chronological order.
Step 3: Once you have captured images for your project, add sound by going to the sound menu in the top left of the dashboard. You can record sounds, upload sounds, or select sounds from Cloud Stop Motion’s gallery. You can also add text to your Cloud Stop Motion project if you want.
Step 4: Click on play button to preview your project and see if your motion picture turned out as per your liking or not. If you do not like something, go back and make changes. Once done, download your video from cloudstop motion.
Part 3. 3 Alternatives for Cloud Stop Motion
Are you ready to turn your video clips and images into a stop motion movie? Have a look at all these software that can create animations wonderfully well. You can share the animations with your friends on social media platforms. The stop motion effect is ideal for action videos.
1. Stop Motion Animator
It is a simple tool for creating stop motion animation sequences using a webcam. You can save the animation as a video file in the widely-supported webm format. The videos previously saved can be loaded into the app and extended. Stop Motion Animator is free software that lets you create fantastic stop motion videos. It is an open-source, non-commercial app.
It does not collect any data, and it does not connect to the internet at all.
2. Kapwig
Whether you’re a beginner video creator or advanced, Kapwing is the right tool to create stop motion animation. It is an all-in-one online video studio as it has an intuitive timeline, advanced editor, and plugin ecosystem that will help you make next-level videos.
Kapwing Studio supports many different file types like MP4, MOV, AVI, 3GP. Record video clips, add voiceovers and add images and texts to create a fresh stop motion video. Then you can edit them in the browser from any device. If you like how the final video looks, click “Export.” Download the MP4 file directly, publish the video on social media, or share the link with your friends.
You can customize the output video size in 1:1, 9:16, 16:9, 4:5, or 5:4. Sign in to the Kapwing account to remove the watermark.
3. Clideo
Clideo is a high-speed stop motion maker with an easy-to-use dashboard and instant download. It is compatible with almost all the video formats such as AVI, MPG, VOB, WMV, MOV, and more. When creating a stop motion, you can choose from various frame and clip rates available. They slow down, speed up or maintain the same speed for your video. The interface is intuitive, so you don’t have to have experience using the stop motion editor.
Just upload a video file from your device- whether it’s a computer, iPhone, or android phone. Apply the effects that go with your movie. You can watch the final result and click the “Download” button.
Closing Word
Recording and editing stop motion animation has never been easier. You can thousands of images and create video projects quickly on Cloud stop motion.
Each software we include in this article grants you access to all the necessary tools you’ll need while creating a stop motion animation. Are you impressed with cloud stop motion or one of the alternatives? Leave a comment and let us know.
Also read:
- 2024 Approved The Ultimate List 10 Online Video Rotators for Perfect Orientation
- New FCP 2023 The Ultimate Guide to Editing and Mixing Audio for Video for 2024
- Updated The Ultimate List 10 Best Intro Generator Sites for 2024
- Updated 2024 Approved Transform Your Text Expert Guide to MP3 Conversion
- New In 2024, Motion Mastery Best Apps for Android and iOS Devices
- Updated Retro Video on Demand Top VHS Streaming Apps for Mobile
- New Why Apple Discontinued Final Cut Express for 2024 What Are the Major Differences Between Final Cut Express and Final Cut Pro?
- New Top Picks Lightweight Video Editors for Seamless Editing for 2024
- 2024 Approved Unleash the Power of Reversal Advanced TikTok Video Editing Techniques
- Updated Social Media Image Sizes A Step-by-Step Handbook for 2024
- Updated 2024 Approved FCPX Title Effects Take Your Videos to the Next Level
- 2024 Approved The Ultimate Guide to Finding a Windows Movie Maker Alternative for Mac
- 2024 Approved The Ultimate FCPX Shortcut Guide 40 Time-Saving Keys
- Updated 2024 Approved Get Animated Discover the 7 Best Drawing Software
- New The Ultimate Guide to Choosing the Right Animation Drawing Software for Your Needs
- Updated 2024 Approved MP4 Editor for Windows 8 Easily Edit MP4 Files on PC
- New In 2024, Stop Motion Animation 101 A Beginners Guide to Software and Techniques
- Updated Perfect Exposure Top Video Brightness Editors and Adjusters
- New How to Custom LinkedIn Video Thumbnail Size for 2024
- Updated Revolutionize Your Animation Workflow 7 Must-Try Drawing Software for 2024
- New 2024 Approved Stabilize Your Videos for Free 8 Best Online Tools and a Step-by-Step Guide
- New Introductory Video Editing Programs for 2024
- New 2024 Approved WhatsApp Status Designers Top Rated Apps
- Updated The Ultimate Guide to Video Editing on Windows 11 Best Tools
- Updated 2024 Approved Neon Text Maker 9 Easy-to-Use Online Tools for Custom Designs
- New In 2024, The Basics of High-Definition Video Pixel Size Explained
- New In 2024, 10 Online Rotators for Rotating Videos
- New Top Free Video Repeat Tools
- Updated 2024 Approved Battle of the Editors Final Cut Pro vs LumaFusion - Features, Pricing, and More
- In 2024, Premiere Elements Alternatives Top 10 Video Editors to Consider
- New Effortless Reaction Videos Unleashing the Power of Filmora for 2024
- New Top 10 Budget-Friendly Filmmaking Tools for Indie Creators
- Updated 2024 Approved Unlock Canon Footage A Step-by-Step Video Editing Guide
- New In 2024, Unlock Live Photos From Videos Top Converter Apps and Tips
- New In 2024, FCPX Mastery The Ultimate Guide to Online Tutorials
- Updated Premiere Pro 2023 Mastering Video Stabilization for Pro Results
- Updated 2024 Approved From Studio to Screen The Definitive Stop Motion Animation Guide
- In 2024, Does Airplane Mode Turn off GPS Location On HTC U23 Pro? | Dr.fone
- Updated FCPX Like a Pro Top-Rated Tutorials, Channels, and Websites
- In 2024, How to Share/Fake Location on WhatsApp for Realme C67 4G | Dr.fone
- How to Change Your Apple iPhone 12 Pro Location on life360 Without Anyone Knowing? | Dr.fone
- In 2024, 2 Solutions to Cut Video in VLC on Windows
- In 2024, 3 Effective Methods to Fake GPS location on Android For your Poco C65 | Dr.fone
- Everything You Need to Know about Lock Screen Settings on your Samsung Galaxy S23 Tactical Edition
- How To Fake GPS On Vivo T2 5G For Mobile Legends? | Dr.fone
- How to Transfer Data from Vivo Y100i Power 5G to Samsung Phone | Dr.fone
- In 2024, Easy Tutorial for Activating iCloud on Apple iPhone 12 Safe and Legal
- 4 Ways to Transfer Music from Poco C50 to iPhone | Dr.fone
- Title: Updated 2024 Approved Unleash Your Creativity How to Edit Videos in Windows Movie Maker
- Author: Isabella
- Created at : 2024-04-29 12:49:40
- Updated at : 2024-04-30 12:49:40
- Link: https://video-creation-software.techidaily.com/updated-2024-approved-unleash-your-creativity-how-to-edit-videos-in-windows-movie-maker/
- License: This work is licensed under CC BY-NC-SA 4.0.
