
:max_bytes(150000):strip_icc():format(webp)/GettyImages-1139785112-76d1d0f975934233883a19f33b8cd813.jpg)
Updated In 2024, Top 9 Best Online Video Quality Enhancer for FREE
Sharpen & Shine: The Best Free Online Video Quality Enhancers
Top 9 Best Online Video Quality Enhancer for FREE

Ollie Mattison
Apr 24, 2024• Proven solutions
In 2024, the average person will watch 17 hours of video content every week. Improving the quality of your videos can make your content more noticeable.
Fortunately, there are many excellent video quality enhancer tools to choose from. These tools can enhance both the visual and audio clarity of your content. Ultimately, this will enhance your professionalism and reputation as a trustworthy creator.
Are you wondering where to start when selecting an effective, user-friendly video enhancer? Here are some of our top recommendations to help you begin.
- Part 2: 5 Free AI Video Enhancers [Software Options]
- Part 3: Top 2 4K Video Enhancer Online Free Options
- Part 4: How to Choose the Best Video Enhancer
- In this article
Why Do You Need an AI Video Enhancer?
AI video enhancers utilize generative AI to remove noise, stabilize shaky videos, upscale, or enhance their overall appearance. These tools employ machine learning and neural network techniques to analyze videos and apply different effects for enhancement. Trained on extensive datasets, most AI video enhancers can understand video content like faces, scenes, and objects, automatically adjusting imperfections.
Using an AI video enhancer is an excellent way to boost video quality quickly. Unlike traditional methods, AI speeds up the enhancement process significantly. There are additional benefits, such as:
- **Enhanced Media Quality:**AI video enhancers enhance videos automatically with advanced algorithms, maintaining quality, clarity, and detail.
- Noise Reduction: Many AI video enhancer tools effectively reduce visual noise in videos, resulting in cleaner and clearer footage.
- **Reviving Old Clip:**AI video enhancers are adept at restoring old video footage to make it appear more vibrant.
5 Free AI Video Enhancers [Software Options]
Are blurry videos on your large screen getting on your nerves? Thanks to advancements in artificial intelligence (AI), you can now enhance your low-resolution videos for a crystal-clear viewing experience.
Whether you’re a video editor, content creator, or streamer, incorporating an AI video upscaler into your toolkit is a wise choice. Here are the top 5 picks for the best free AI video enhancer software to improve your video editing.
1.Wondershare Filmora - AI Video Enhancer

Pricing:Filmora offers a free trial without exporting.
Wondershare Filmora stands out in video editing by combining comprehensive editing features with AI-powered enhancement tools. With 4K editing, Filmora ensures videos are improved and future-proofed.
In addition to enhancement, Filmora offers over 300 unique transitions and effects catering to creative minds. Audio enthusiasts will enjoy advanced audio tools like audio ducking and equalizers.
Filmora’s standout feature is its motion tracking capability, enabling dynamic video compositions. While beginners may find the abundance of features overwhelming, regular updates and an active online community provide ample support.
Features
- Filmora’s advanced AI video-enhancing algorithms let you convert black-and-white footage to colored ones.
- It boosts frame rates up to 240 FPS using AI-enhanced frame interpolation technology and 4x super-resolution algorithms.
- Filmora enhances videos’ clarity and quality through audio ducking, equalizers, and more.
- This AI Video Enhancer tracks and attaches objects in videos.
- The tool preserves details and enhances quality in slow-motion scenes.
- Offers over 300 unique transitions and effects.
Pros
- Versatile editing and enhancement options.
- This AI video enhancer is designed to assist both beginners and professionals.
- It supports batch processing, enhancing 10+ videos simultaneously.
Cons
- The free version adds a watermark.
2.AVCLabs Video Enhancer AI
Pricing:AVCLabs offers new users a 7-day free trial.
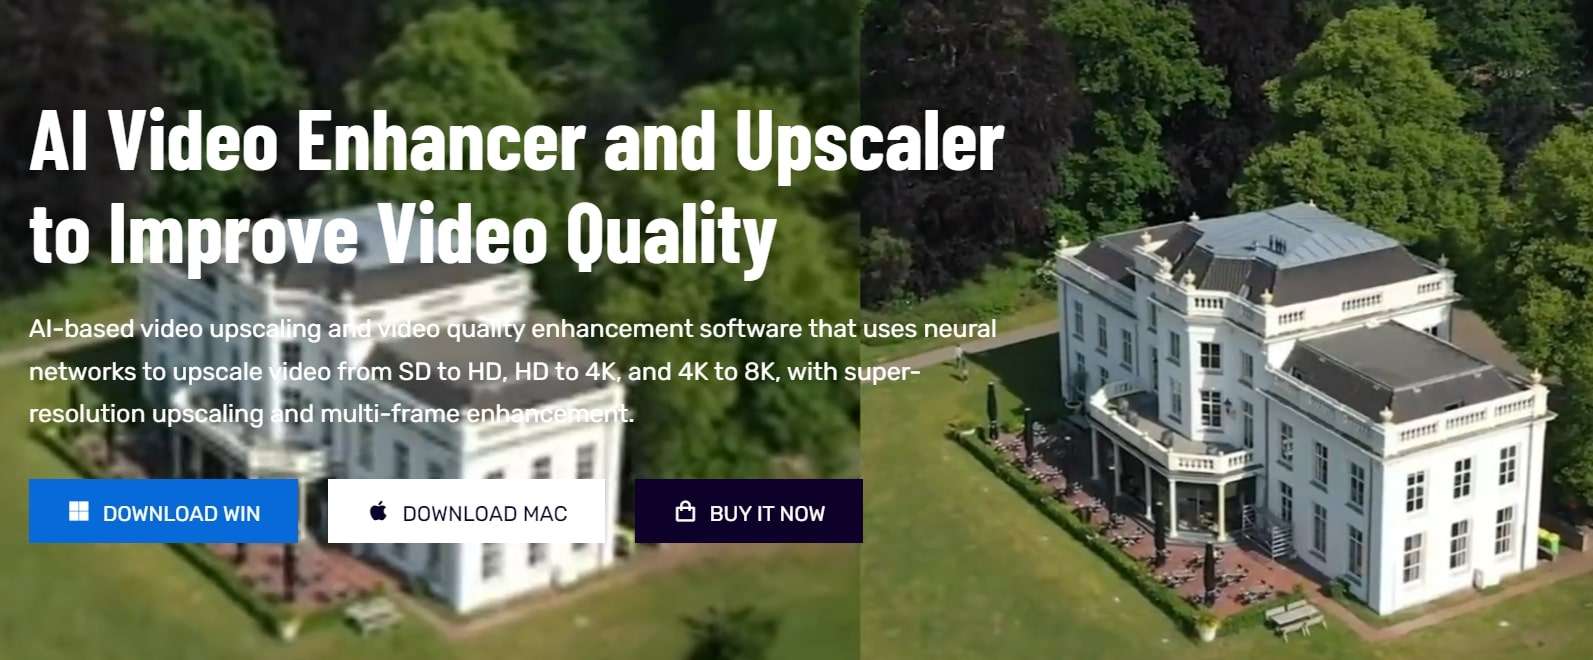
AVCLabs Video Enhancer AI utilizes a neural network to improve video clip quality. With super-resolution AI video upscaling and multi-frame enhancement, it can easily upscale video from SD to HD (720p or 1080p) to 4K and up to 8K in just one click.
With support for various video and audio formats, users can work seamlessly without compatibility issues. A notable feature is its batch processing capability, enabling users to upscale and enhance multiple videos simultaneously, saving time. The real-time preview feature is invaluable for those who wish to see the software’s results before finalizing their project.
Features
- AVCLabs seamlessly enhances any video footage without quality loss. Whether single or multi-frame, you’ll experience smooth transitions and improved frames.
- With AVCLabs’ color correction feature, you can easily adjust each video frame’s brightness, saturation, and contrast. This tool employs AI video upscaling to create larger, more detailed images without sacrificing quality.
- This video enhancement tool offers automatic face refinement to enhance facial details, which is ideal for improving low-quality videos with excessive noise and blurriness.
- The Super Resolution feature recovers high-resolution videos from low-resolution materials by generating additional pixel data to fill gaps, resulting in enhanced output.
- AVCLabs Video Enhancer AI uses a multi-frame convolutional neural network to stabilize video shakes and remove motion artifacts, overlay noise, and grain, producing natural and enhanced results.
Pros
- AVCLabs features a color calibration algorithm that accurately portrays natural colors.
- It allows you to add color to old black-and-white videos.
- The video processing is fully automatic, requiring no manual fine-tuning.
Cons
- The app demands a significant amount of free space, up to 15 GB.
- It is only compatible with Windows and Mac operating systems.
- The free trial adds a watermark from AVC Labs to the videos.
3.UniFab Video Enhancer
Pricing: UniFab provides a 30-day free trial for new AI users and a 30-day money-back guarantee for paid.
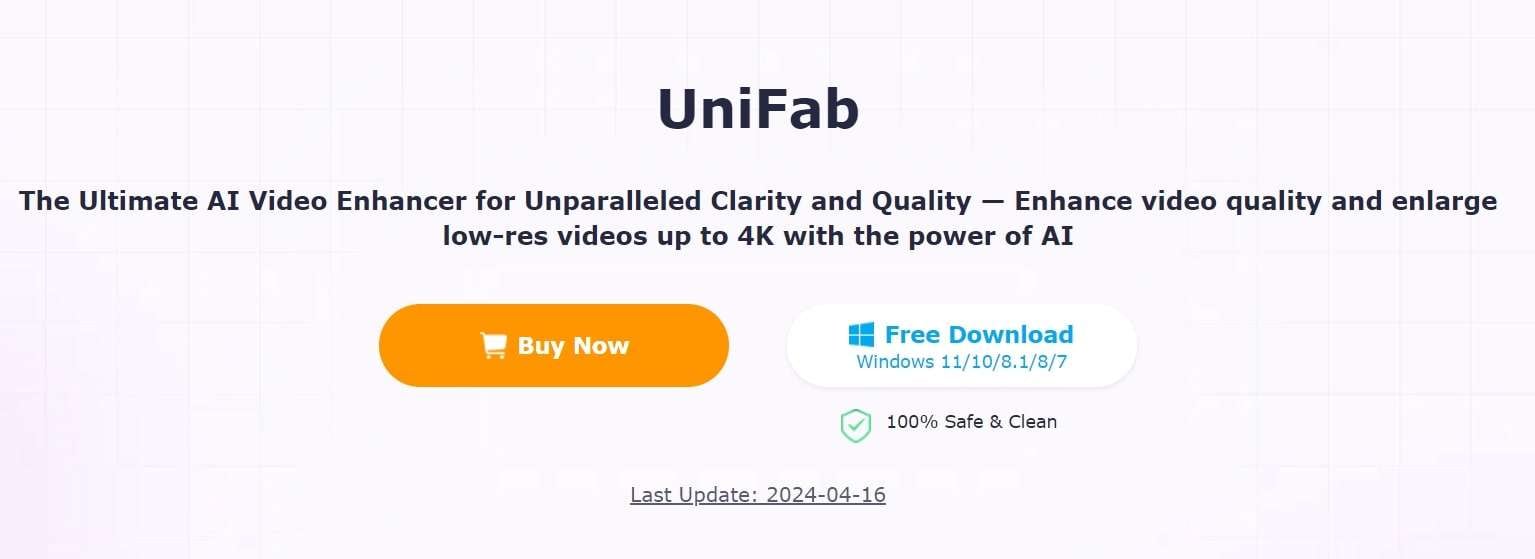
UniFab is a comprehensive AI-powered video enhancer to enhance video quality for all types of videos. Standout features like upscaling video to HDR10/Dolby Vision, denoising, and deinterlacing set this tool apart.
The models are regularly updated with the latest advancements in Deep Learning. Whether you’re a novice or an expert, UniFab offers both automatic and manual modes for video enhancement, making it easy to use without requiring complex settings.
Features
- Upgrade any video to 720p, 1080p, or even 4k resolution with remarkable clarity.
- Convert SDR videos to stunning HDR formats like HDR10+ and Dolby Vision. This feature revitalizes your videos, making them significantly more vibrant and immersive.
- Utilize AI technology to deinterlace your videos, ensuring smooth playback and a pristine viewing experience on modern displays.
- Specifically designed for videos captured in low-light conditions or with high ISO settings, this tool intuitively reduces grain and noise, restoring your footage’s true essence without sacrificing detail.
- Experience unprecedented fluidity as the software boosts your videos to an impressive 120FPS using AI. This transforms your content into a smooth motion stream, ideal for high-definition screens and attentive audiences.
Pros
- It allows audio up-mixing to EAC3 5.1/DTS 7.1 through AI.
- Utilizes GPU-accelerated technology.
- Supports video conversion, compression, and editing.
Cons
- The free trial is limited to 3 videos.
- Does not support Mac systems.
4.Topaz Video Enhance AI

Pricing:Topaz video enhancement tool offers a 30-day no-questions-asked refund policy.
Topaz Video Enhance AI enhances video quality by increasing its resolution. It supports batch upscaling of videos and is compatible with DVD, DSLR, Game, and HD stock footage.
Many notable film studios consider Topaz Video Enhance AI one of the best video editing software tools. It is suitable for various uses, such as commercials, movie content, and YouTube videos.
Features
- This free video upscaling software swiftly analyzes video footage quality using AI tools and recreates it into high-resolution videos.
- Topaz offers Gaia CGI and Theia for enhancing CG and animated videos, along with Proteus and Artemis for noise removal and sharpening.
- Easily recover details from any video footage by injecting original details using adjacent frames’ additional information. It detects and corrects visual artifacts formed during compression.
- Topaz provides an automatic mode for quick video quality enhancement and manual fine-tuning options using available controls.
- With this free video enhancer software, preserve video audio tracks and select from different conversion options for optimal output in the final project.
Pros
- Reduces motion artifacts.
- Adds extra frames for smooth, slow-motion videos.
- Enhances video quality up to 8K.
Cons
- AI processing can be time-consuming, sometimes taking hours.
- Requires a high-quality graphics card.
5.HitPaw Video Enhancer

Pricing:HitPaw AI video enhancer offers a 30-day refund guarantee on paid plans.
HitPaw is a user-friendly video enhancer suitable for both beginners and professionals. It features an easy-to-navigate interface, ensuring even those with minimal experience can improve their videos. Despite its simplicity, HitPaw offers robust enhancement tools, including color correction and stabilization. Its extensive support for various video formats eliminates compatibility concerns.
The software prioritizes efficient video enhancement without compromising quality or speed. Comprehensive tutorials help users explore different editing tasks and unlock their content’s full potential.
Features
- Utilize advanced AI algorithms to upscale low-resolution videos for a more appealing look. The AI feature optimizes content for sharper and more vibrant visuals.
- The HitPaw video quality enhancer app uses AI tools to improve detailing on human faces. Apply filters and adjust settings to enhance facial output in videos.
- The app includes a video stabilization feature that eliminates shaky camera movements, producing smoother and clearer videos with a professional touch.
- HitPaw offers an AI video repair option to restore damaged, corrupted, and old videos. It can also use deep learning AI to colorize black-and-white videos.
- Remove noise from videos with the General Denoise feature, making them look sharper, clearer, and newer.
Pros
- Supports various video formats.
- Has a user-friendly and intuitive interface.
- Can repair and enhance animation videos.
Cons
- The free plan has limited editing features.
Top 2 4K Video Enhancer Online Free Options
The AI-enhanced video tools mentioned above excel in their field. However, there are times when you might run out of storage or need a quick fix through your browser. So, here are some online AI tools that can enhance your videos. Unlike offline video enhancer AIs, online tools are easily accessible. While they may offer fewer features than desktop solutions, they are still useful for some editors.
1.Cutout.Pro
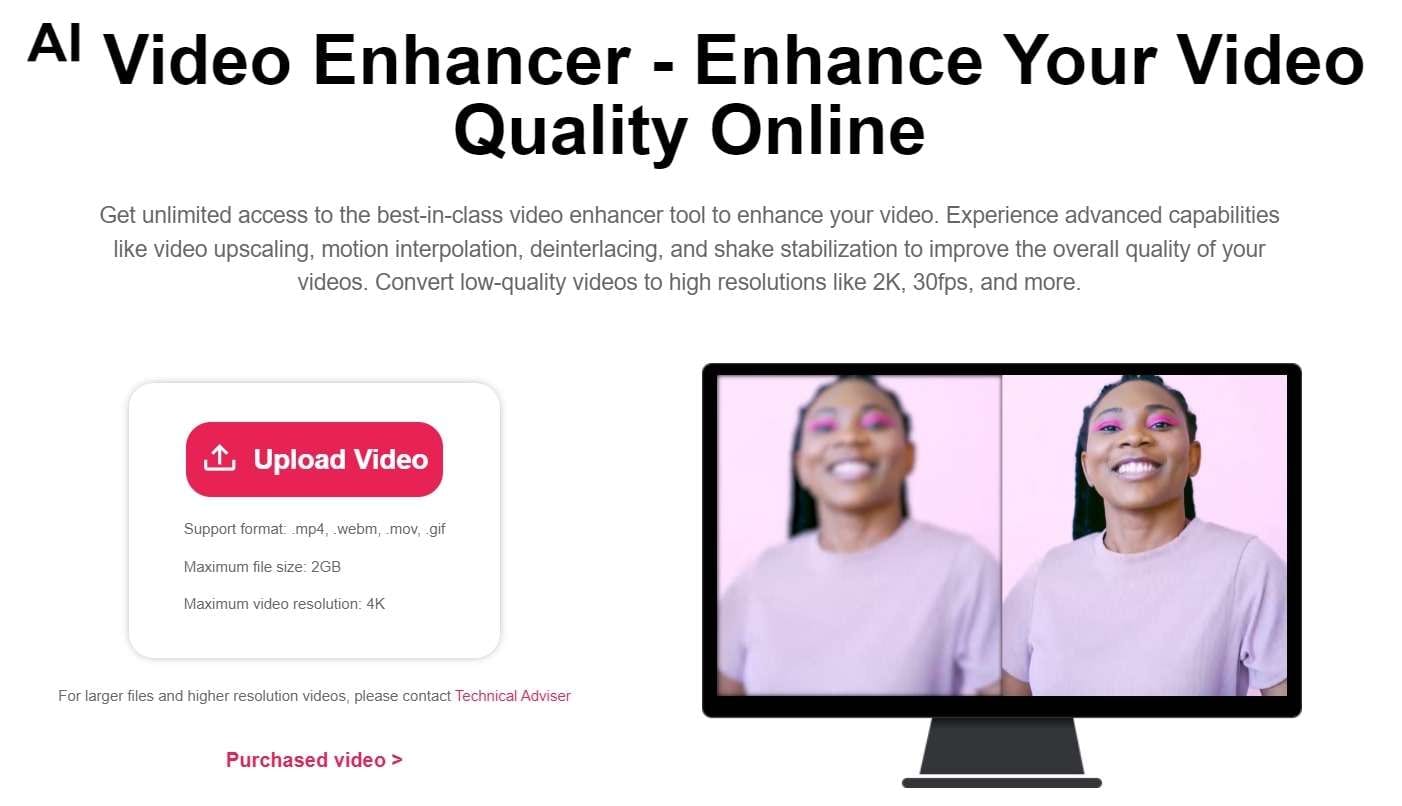
Many editing professionals rely on this free AI video enhancer for unlimited video improvements. Cutout.Pro utilizes advanced features such as video upscaling, motion interpolation, deinterlacing, and shake stabilization to enhance overall quality. This tool converts low-quality videos to higher resolutions like 2K, 30fps, and beyond. Moreover, this online tool swiftly reduces visual noise and other motion artifacts from clips using AI.
Features
- Reduce noise, motion artifacts, and improve video resolution significantly with this powerful online video quality enhancer and upscaler. Perfect for enhancing low-resolution videos like 240p, 360p, 480p, and more.
- Pro increases video frame rates without sacrificing quality. Smooth out shaky footage for better slow-motion effects.
- This tool enhances video resolution up to 2K at a maximum of 30fps effortlessly. It sharpens and defines your videos, bringing your story to life like a professional.
- This is perfect for filmmakers seeking to enhance footage quality and create professional-looking films. Improve video resolution and quality to unblur, upscale, and smooth videos for cinematic results.
- Enhance the quality of personal videos as this tool features shake stabilization for professional results.
- This video enhancer is ideal for professionals creating cinematic frames and restoring old footage. It’s also great for individuals looking to improve the quality of compressed videos downloaded from social media platforms like YouTube, Netflix, and TikTok.
Pros
- It boosts video frame rates and enables HD clip exports.
- Users can upload videos in MP4, MOV, WebM, and GIF formats for processing.
Cons
- It only offers a 5-second preview of the results after enhancement.
2.Clideo Video Enhancer
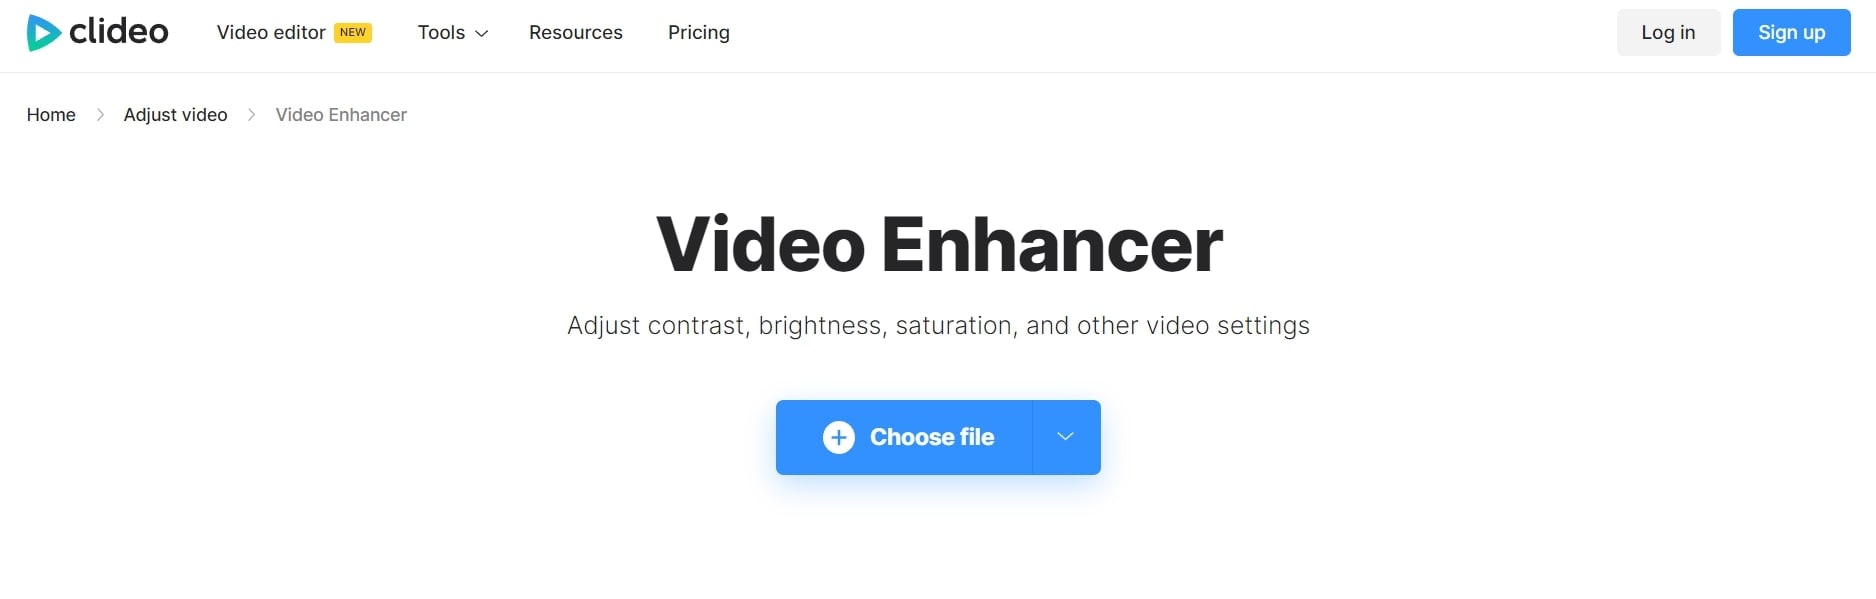
Clideo is an online video-enhancing tool that can completely transform any random video. It lets you add special AI effects and filters to adjust the video’s brightness, saturation, and contrast, making it stunning, vibrant, and attractive. You can enhance any video professionally for social media attention or business branding.
When it comes to video-enhancing tools, users seek maximum customization options. Clideo offers various features, functions, and facilities to transform average-looking videos into 4k video resolutions.
Features
- The interface is intuitive, so you don’t need any video editing experience to use it.
- You can enhance your video regardless of format because Clideo works with MP4, WMV, MOV, VOB, AVI, and other popular formats.
- You don’t need to download and install the video enhancer to your device. It’s not only faster but also more secure.
- Enhance multiple videos or images simultaneously.
- Add subtitles with customizable text fonts.
- Text Overlay feature with support for HD resolution.
- Access a media library with social sharing options.
Pros
- User-friendly tool is ideal for beginners.
- Supports multiple formats.
- As an online tool, it saves device storage space.
- Reasonable pricing.
- Provides uninterrupted video editing with customizable features.
Cons
- A premium subscription is required to remove watermarking.
- No offline app available; internet connection always necessary.
- No dedicated mobile app.
How to Choose the Best Video Enhancer
Consider the following to ensure you select the right video enhancer for your needs and creative vision.
1.Type of Content
Think about the type of content you’re working with. Are you creating short-form clips for social media or longer, more complex videos? Different enhancers may better suit different content types, so consider your file type and potential quality issues.
2.Consider The Features You Need
Consider the tools and features you need from your video quality enhancer software. Each system offers different capabilities, so planning can help you find the option that best fits your requirements.
3.Sharing Formats and Requirements
Determine the purpose of your video project and any specific sharing requirements. Understanding your goals will help you plan accordingly, whether for online sharing or commercial use.
4.Your Budget
Keep your budget in mind. Some enhancers offer free features, while others may require a purchase or subscription fee for full access. Budgeting effectively ensures you get the best value for your money while achieving great video results.
Conclusion
The video enhancement landscape has been transformed by artificial intelligence, providing numerous options to enhance your videos’ quality. Whether a professional filmmaker or a casual content creator, free AI video enhancers offer a chance to take your productions to the next level.
Each software has unique strengths, from Wondershare Filmora’s comprehensive editing features to AVCLabs’ neural network-powered upscaling and UniFab’s HDR conversion capabilities. User-friendly options like HitPaw cater to beginners while providing robust enhancement tools.
Moreover, for quick fixes or limited storage, online options like Cutout.Pro and Clideo offer accessible solutions with impressive results. With these advancements, achieving professional-quality videos is now achievable for everyone.
Ollie Mattison
Ollie Mattison is a writer and a lover of all things video.
Follow @Ollie Mattison
Ollie Mattison
Apr 24, 2024• Proven solutions
In 2024, the average person will watch 17 hours of video content every week. Improving the quality of your videos can make your content more noticeable.
Fortunately, there are many excellent video quality enhancer tools to choose from. These tools can enhance both the visual and audio clarity of your content. Ultimately, this will enhance your professionalism and reputation as a trustworthy creator.
Are you wondering where to start when selecting an effective, user-friendly video enhancer? Here are some of our top recommendations to help you begin.
- Part 2: 5 Free AI Video Enhancers [Software Options]
- Part 3: Top 2 4K Video Enhancer Online Free Options
- Part 4: How to Choose the Best Video Enhancer
- In this article
Why Do You Need an AI Video Enhancer?
AI video enhancers utilize generative AI to remove noise, stabilize shaky videos, upscale, or enhance their overall appearance. These tools employ machine learning and neural network techniques to analyze videos and apply different effects for enhancement. Trained on extensive datasets, most AI video enhancers can understand video content like faces, scenes, and objects, automatically adjusting imperfections.
Using an AI video enhancer is an excellent way to boost video quality quickly. Unlike traditional methods, AI speeds up the enhancement process significantly. There are additional benefits, such as:
- **Enhanced Media Quality:**AI video enhancers enhance videos automatically with advanced algorithms, maintaining quality, clarity, and detail.
- Noise Reduction: Many AI video enhancer tools effectively reduce visual noise in videos, resulting in cleaner and clearer footage.
- **Reviving Old Clip:**AI video enhancers are adept at restoring old video footage to make it appear more vibrant.
5 Free AI Video Enhancers [Software Options]
Are blurry videos on your large screen getting on your nerves? Thanks to advancements in artificial intelligence (AI), you can now enhance your low-resolution videos for a crystal-clear viewing experience.
Whether you’re a video editor, content creator, or streamer, incorporating an AI video upscaler into your toolkit is a wise choice. Here are the top 5 picks for the best free AI video enhancer software to improve your video editing.
1.Wondershare Filmora - AI Video Enhancer
Pricing:Filmora offers a free trial without exporting.
Wondershare Filmora stands out in video editing by combining comprehensive editing features with AI-powered enhancement tools. With 4K editing, Filmora ensures videos are improved and future-proofed.
In addition to enhancement, Filmora offers over 300 unique transitions and effects catering to creative minds. Audio enthusiasts will enjoy advanced audio tools like audio ducking and equalizers.
Filmora’s standout feature is its motion tracking capability, enabling dynamic video compositions. While beginners may find the abundance of features overwhelming, regular updates and an active online community provide ample support.
Features
- Filmora’s advanced AI video-enhancing algorithms let you convert black-and-white footage to colored ones.
- It boosts frame rates up to 240 FPS using AI-enhanced frame interpolation technology and 4x super-resolution algorithms.
- Filmora enhances videos’ clarity and quality through audio ducking, equalizers, and more.
- This AI Video Enhancer tracks and attaches objects in videos.
- The tool preserves details and enhances quality in slow-motion scenes.
- Offers over 300 unique transitions and effects.
Pros
- Versatile editing and enhancement options.
- This AI video enhancer is designed to assist both beginners and professionals.
- It supports batch processing, enhancing 10+ videos simultaneously.
Cons
- The free version adds a watermark.
2.AVCLabs Video Enhancer AI
Pricing:AVCLabs offers new users a 7-day free trial.
AVCLabs Video Enhancer AI utilizes a neural network to improve video clip quality. With super-resolution AI video upscaling and multi-frame enhancement, it can easily upscale video from SD to HD (720p or 1080p) to 4K and up to 8K in just one click.
With support for various video and audio formats, users can work seamlessly without compatibility issues. A notable feature is its batch processing capability, enabling users to upscale and enhance multiple videos simultaneously, saving time. The real-time preview feature is invaluable for those who wish to see the software’s results before finalizing their project.
Features
- AVCLabs seamlessly enhances any video footage without quality loss. Whether single or multi-frame, you’ll experience smooth transitions and improved frames.
- With AVCLabs’ color correction feature, you can easily adjust each video frame’s brightness, saturation, and contrast. This tool employs AI video upscaling to create larger, more detailed images without sacrificing quality.
- This video enhancement tool offers automatic face refinement to enhance facial details, which is ideal for improving low-quality videos with excessive noise and blurriness.
- The Super Resolution feature recovers high-resolution videos from low-resolution materials by generating additional pixel data to fill gaps, resulting in enhanced output.
- AVCLabs Video Enhancer AI uses a multi-frame convolutional neural network to stabilize video shakes and remove motion artifacts, overlay noise, and grain, producing natural and enhanced results.
Pros
- AVCLabs features a color calibration algorithm that accurately portrays natural colors.
- It allows you to add color to old black-and-white videos.
- The video processing is fully automatic, requiring no manual fine-tuning.
Cons
- The app demands a significant amount of free space, up to 15 GB.
- It is only compatible with Windows and Mac operating systems.
- The free trial adds a watermark from AVC Labs to the videos.
3.UniFab Video Enhancer
Pricing: UniFab provides a 30-day free trial for new AI users and a 30-day money-back guarantee for paid.
UniFab is a comprehensive AI-powered video enhancer to enhance video quality for all types of videos. Standout features like upscaling video to HDR10/Dolby Vision, denoising, and deinterlacing set this tool apart.
The models are regularly updated with the latest advancements in Deep Learning. Whether you’re a novice or an expert, UniFab offers both automatic and manual modes for video enhancement, making it easy to use without requiring complex settings.
Features
- Upgrade any video to 720p, 1080p, or even 4k resolution with remarkable clarity.
- Convert SDR videos to stunning HDR formats like HDR10+ and Dolby Vision. This feature revitalizes your videos, making them significantly more vibrant and immersive.
- Utilize AI technology to deinterlace your videos, ensuring smooth playback and a pristine viewing experience on modern displays.
- Specifically designed for videos captured in low-light conditions or with high ISO settings, this tool intuitively reduces grain and noise, restoring your footage’s true essence without sacrificing detail.
- Experience unprecedented fluidity as the software boosts your videos to an impressive 120FPS using AI. This transforms your content into a smooth motion stream, ideal for high-definition screens and attentive audiences.
Pros
- It allows audio up-mixing to EAC3 5.1/DTS 7.1 through AI.
- Utilizes GPU-accelerated technology.
- Supports video conversion, compression, and editing.
Cons
- The free trial is limited to 3 videos.
- Does not support Mac systems.
4.Topaz Video Enhance AI
Pricing:Topaz video enhancement tool offers a 30-day no-questions-asked refund policy.
Topaz Video Enhance AI enhances video quality by increasing its resolution. It supports batch upscaling of videos and is compatible with DVD, DSLR, Game, and HD stock footage.
Many notable film studios consider Topaz Video Enhance AI one of the best video editing software tools. It is suitable for various uses, such as commercials, movie content, and YouTube videos.
Features
- This free video upscaling software swiftly analyzes video footage quality using AI tools and recreates it into high-resolution videos.
- Topaz offers Gaia CGI and Theia for enhancing CG and animated videos, along with Proteus and Artemis for noise removal and sharpening.
- Easily recover details from any video footage by injecting original details using adjacent frames’ additional information. It detects and corrects visual artifacts formed during compression.
- Topaz provides an automatic mode for quick video quality enhancement and manual fine-tuning options using available controls.
- With this free video enhancer software, preserve video audio tracks and select from different conversion options for optimal output in the final project.
Pros
- Reduces motion artifacts.
- Adds extra frames for smooth, slow-motion videos.
- Enhances video quality up to 8K.
Cons
- AI processing can be time-consuming, sometimes taking hours.
- Requires a high-quality graphics card.
5.HitPaw Video Enhancer
Pricing:HitPaw AI video enhancer offers a 30-day refund guarantee on paid plans.
HitPaw is a user-friendly video enhancer suitable for both beginners and professionals. It features an easy-to-navigate interface, ensuring even those with minimal experience can improve their videos. Despite its simplicity, HitPaw offers robust enhancement tools, including color correction and stabilization. Its extensive support for various video formats eliminates compatibility concerns.
The software prioritizes efficient video enhancement without compromising quality or speed. Comprehensive tutorials help users explore different editing tasks and unlock their content’s full potential.
Features
- Utilize advanced AI algorithms to upscale low-resolution videos for a more appealing look. The AI feature optimizes content for sharper and more vibrant visuals.
- The HitPaw video quality enhancer app uses AI tools to improve detailing on human faces. Apply filters and adjust settings to enhance facial output in videos.
- The app includes a video stabilization feature that eliminates shaky camera movements, producing smoother and clearer videos with a professional touch.
- HitPaw offers an AI video repair option to restore damaged, corrupted, and old videos. It can also use deep learning AI to colorize black-and-white videos.
- Remove noise from videos with the General Denoise feature, making them look sharper, clearer, and newer.
Pros
- Supports various video formats.
- Has a user-friendly and intuitive interface.
- Can repair and enhance animation videos.
Cons
- The free plan has limited editing features.
Top 2 4K Video Enhancer Online Free Options
The AI-enhanced video tools mentioned above excel in their field. However, there are times when you might run out of storage or need a quick fix through your browser. So, here are some online AI tools that can enhance your videos. Unlike offline video enhancer AIs, online tools are easily accessible. While they may offer fewer features than desktop solutions, they are still useful for some editors.
1.Cutout.Pro
Many editing professionals rely on this free AI video enhancer for unlimited video improvements. Cutout.Pro utilizes advanced features such as video upscaling, motion interpolation, deinterlacing, and shake stabilization to enhance overall quality. This tool converts low-quality videos to higher resolutions like 2K, 30fps, and beyond. Moreover, this online tool swiftly reduces visual noise and other motion artifacts from clips using AI.
Features
- Reduce noise, motion artifacts, and improve video resolution significantly with this powerful online video quality enhancer and upscaler. Perfect for enhancing low-resolution videos like 240p, 360p, 480p, and more.
- Pro increases video frame rates without sacrificing quality. Smooth out shaky footage for better slow-motion effects.
- This tool enhances video resolution up to 2K at a maximum of 30fps effortlessly. It sharpens and defines your videos, bringing your story to life like a professional.
- This is perfect for filmmakers seeking to enhance footage quality and create professional-looking films. Improve video resolution and quality to unblur, upscale, and smooth videos for cinematic results.
- Enhance the quality of personal videos as this tool features shake stabilization for professional results.
- This video enhancer is ideal for professionals creating cinematic frames and restoring old footage. It’s also great for individuals looking to improve the quality of compressed videos downloaded from social media platforms like YouTube, Netflix, and TikTok.
Pros
- It boosts video frame rates and enables HD clip exports.
- Users can upload videos in MP4, MOV, WebM, and GIF formats for processing.
Cons
- It only offers a 5-second preview of the results after enhancement.
2.Clideo Video Enhancer
Clideo is an online video-enhancing tool that can completely transform any random video. It lets you add special AI effects and filters to adjust the video’s brightness, saturation, and contrast, making it stunning, vibrant, and attractive. You can enhance any video professionally for social media attention or business branding.
When it comes to video-enhancing tools, users seek maximum customization options. Clideo offers various features, functions, and facilities to transform average-looking videos into 4k video resolutions.
Features
- The interface is intuitive, so you don’t need any video editing experience to use it.
- You can enhance your video regardless of format because Clideo works with MP4, WMV, MOV, VOB, AVI, and other popular formats.
- You don’t need to download and install the video enhancer to your device. It’s not only faster but also more secure.
- Enhance multiple videos or images simultaneously.
- Add subtitles with customizable text fonts.
- Text Overlay feature with support for HD resolution.
- Access a media library with social sharing options.
Pros
- User-friendly tool is ideal for beginners.
- Supports multiple formats.
- As an online tool, it saves device storage space.
- Reasonable pricing.
- Provides uninterrupted video editing with customizable features.
Cons
- A premium subscription is required to remove watermarking.
- No offline app available; internet connection always necessary.
- No dedicated mobile app.
How to Choose the Best Video Enhancer
Consider the following to ensure you select the right video enhancer for your needs and creative vision.
1.Type of Content
Think about the type of content you’re working with. Are you creating short-form clips for social media or longer, more complex videos? Different enhancers may better suit different content types, so consider your file type and potential quality issues.
2.Consider The Features You Need
Consider the tools and features you need from your video quality enhancer software. Each system offers different capabilities, so planning can help you find the option that best fits your requirements.
3.Sharing Formats and Requirements
Determine the purpose of your video project and any specific sharing requirements. Understanding your goals will help you plan accordingly, whether for online sharing or commercial use.
4.Your Budget
Keep your budget in mind. Some enhancers offer free features, while others may require a purchase or subscription fee for full access. Budgeting effectively ensures you get the best value for your money while achieving great video results.
Conclusion
The video enhancement landscape has been transformed by artificial intelligence, providing numerous options to enhance your videos’ quality. Whether a professional filmmaker or a casual content creator, free AI video enhancers offer a chance to take your productions to the next level.
Each software has unique strengths, from Wondershare Filmora’s comprehensive editing features to AVCLabs’ neural network-powered upscaling and UniFab’s HDR conversion capabilities. User-friendly options like HitPaw cater to beginners while providing robust enhancement tools.
Moreover, for quick fixes or limited storage, online options like Cutout.Pro and Clideo offer accessible solutions with impressive results. With these advancements, achieving professional-quality videos is now achievable for everyone.
Ollie Mattison
Ollie Mattison is a writer and a lover of all things video.
Follow @Ollie Mattison
Simplest Online Tone Generators: Our Top Picks
5 Best Online Tone Generators for You

Liza Brown
Mar 27, 2024• Proven solutions
Conducting science experiments, calibrating the audio equipment, testing your hearing or tuning music instruments are just a few reasons why online tone generators can be useful in a wide range of contexts. Most of the tools that enable you to generate different tones on online platforms are easy to use and they won’t take you too much time to get a hold of them.
Furthermore, some of the online tone generators can even be used to improve health as some scientific studies have proven that a low-frequency tone can help treat the Alzheimer’s disease.
Regardless of the reason why you want to generate tones, these online tone generators will help you accomplish this task with ease.
You may also like: How to Add a Vignette Effect Online >>
Top 5 Online Tone Generators
Each of the online generators listed below will enable you to hear a pure tone, and let you adjust the tone’s frequency. Make sure that the volume on your headphones or the speakers is properly adjusted to avoid damaging the equipment and your hearing.
1. Online Tone Generator
You can find a number of different options on this website that range from the Pitch Shifter that allows you to change the Pitch of the files you upload to the Online Tone Generator platform to Binaural Beats and DTMF Signals. After you land on the website’s homepage, you’ll be able to see a tone generator that lets you select the frequency, volume and the waveform of a tone. The frequency will be set to 44.1 kHz and the wave type will be set to Sine by default.

You can insert any frequency value you want or choose between Sine, Square, Sawtooth and Triangle wave type options. The volume bar lets you control how loud the tone you’re generating is. The Play and Stop buttons enable you to start or pause the playback whenever you want, while the Save button lets you download the tone you created.
2. Audio Test File Generators

Generating Sweep, Dual or Sine tones with this online tool is easy, as you simply have to select the type of tone you want to generate. All sound files you can find on this platform are accurately calibrated, and you can adjust their frequency and amplitude. Clicking on any of the links available in the Tone Gen section of this website will take you to another page where you can adjust the properties of a tone before downloading it.

In the upper left corner of the new webpage, you’ll be able to see the Play button that lets you hear the default tone you selected. Directly below you can find the File Generator option where you can adjust the properties of the tone you’re generating. The displayed options depend on the type of tone you selected. Clicking on the Download button will save the tone you generated to your computer, but you won’t be able to save a tone if you inserted an incorrect value into one of the boxes.
3. Szynalski Online Tone Generator
Making tones on this online platform doesn’t require any effort at all since you can easily control the frequency of the tone using a large slider that is displayed across the entire page. Clicking on the Play button will play the tone under the current settings so you can make the necessary adjustments if you’re not happy with the results you’re getting. Several options that let you fine-tune the settings of the tone you’re generating can be found below the frequency slider.

The volume and balance are located on the right side of the screen and they allow you to determine how loud the tone is going to be or to choose to which channel the majority of the signal is going to be sent. The value in the middle of the screen displays the current frequency of the tone. The arrows also allow you to change the frequency value, while clicking on the wave type selector lets you choose between Sawtooth, Sine, Triangle, and Square options.
The tones you generate on this website can’t be downloaded to your computer, but you can use the Get Link option to send a tone to your email or to a friend.
4. Wavtones Audio Frequency Signal Generator
The free version of this website offers only a limited amount of tones that have a maximum duration of 5 seconds. Purchasing Basic, Pro or Corporate packages will grant you access to all types of tones this online tone generator offers, and the tones you download can last up to 300 seconds depending on the sample rate.

The WavtonesAudio Frequency Signal Generator allows you to alter the properties of each tone it offers, even if you’re using the free version, but you can’t listen to any of the available tones before you download them. This makes it a bit more difficult to generate a tone in accordance with your current demands. Furthermore, the Bit Depth of all tones the free version of this online tone generator provides is limited to 16-bit.
5. Gieson TonGen
If you are looking for an easy way to generate tones from your browser this may be one of the best options available. You can easily change the frequency of a tone by dragging the Hz slider, and the Fine Tune Hz slider enables you to find the perfect frequency of a tone.
There are four wave types you can choose from that generate different types of tones and you can change their tonality by clicking on one of the buttons located near the bottom of the tone generator.

Saving the tones you generate is not possible as Gieson TonGen website doesn’t offer this option. Using a link to send a tone you created is also not possible. This online tone generator is a perfect option if you’re looking for a way to quickly generate a tone directly from your web browser, but it can be hardly considered a great option if you want to generate a tone for professional purposes.
Conclusion
The scope of options different online tone generators provide can vary. That is the reason why your decision which of the tone-generating tools we covered in this article you are going to use depends on the reason why you’re creating a tone.
What is your favorite method of generating tones? Leave a comment below and let us know.
Liza Brown
Liza Brown is a writer and a lover of all things video.
Follow @Liza Brown
Liza Brown
Mar 27, 2024• Proven solutions
Conducting science experiments, calibrating the audio equipment, testing your hearing or tuning music instruments are just a few reasons why online tone generators can be useful in a wide range of contexts. Most of the tools that enable you to generate different tones on online platforms are easy to use and they won’t take you too much time to get a hold of them.
Furthermore, some of the online tone generators can even be used to improve health as some scientific studies have proven that a low-frequency tone can help treat the Alzheimer’s disease.
Regardless of the reason why you want to generate tones, these online tone generators will help you accomplish this task with ease.
You may also like: How to Add a Vignette Effect Online >>
Top 5 Online Tone Generators
Each of the online generators listed below will enable you to hear a pure tone, and let you adjust the tone’s frequency. Make sure that the volume on your headphones or the speakers is properly adjusted to avoid damaging the equipment and your hearing.
1. Online Tone Generator
You can find a number of different options on this website that range from the Pitch Shifter that allows you to change the Pitch of the files you upload to the Online Tone Generator platform to Binaural Beats and DTMF Signals. After you land on the website’s homepage, you’ll be able to see a tone generator that lets you select the frequency, volume and the waveform of a tone. The frequency will be set to 44.1 kHz and the wave type will be set to Sine by default.
You can insert any frequency value you want or choose between Sine, Square, Sawtooth and Triangle wave type options. The volume bar lets you control how loud the tone you’re generating is. The Play and Stop buttons enable you to start or pause the playback whenever you want, while the Save button lets you download the tone you created.
2. Audio Test File Generators
Generating Sweep, Dual or Sine tones with this online tool is easy, as you simply have to select the type of tone you want to generate. All sound files you can find on this platform are accurately calibrated, and you can adjust their frequency and amplitude. Clicking on any of the links available in the Tone Gen section of this website will take you to another page where you can adjust the properties of a tone before downloading it.
In the upper left corner of the new webpage, you’ll be able to see the Play button that lets you hear the default tone you selected. Directly below you can find the File Generator option where you can adjust the properties of the tone you’re generating. The displayed options depend on the type of tone you selected. Clicking on the Download button will save the tone you generated to your computer, but you won’t be able to save a tone if you inserted an incorrect value into one of the boxes.
3. Szynalski Online Tone Generator
Making tones on this online platform doesn’t require any effort at all since you can easily control the frequency of the tone using a large slider that is displayed across the entire page. Clicking on the Play button will play the tone under the current settings so you can make the necessary adjustments if you’re not happy with the results you’re getting. Several options that let you fine-tune the settings of the tone you’re generating can be found below the frequency slider.
The volume and balance are located on the right side of the screen and they allow you to determine how loud the tone is going to be or to choose to which channel the majority of the signal is going to be sent. The value in the middle of the screen displays the current frequency of the tone. The arrows also allow you to change the frequency value, while clicking on the wave type selector lets you choose between Sawtooth, Sine, Triangle, and Square options.
The tones you generate on this website can’t be downloaded to your computer, but you can use the Get Link option to send a tone to your email or to a friend.
4. Wavtones Audio Frequency Signal Generator
The free version of this website offers only a limited amount of tones that have a maximum duration of 5 seconds. Purchasing Basic, Pro or Corporate packages will grant you access to all types of tones this online tone generator offers, and the tones you download can last up to 300 seconds depending on the sample rate.
The WavtonesAudio Frequency Signal Generator allows you to alter the properties of each tone it offers, even if you’re using the free version, but you can’t listen to any of the available tones before you download them. This makes it a bit more difficult to generate a tone in accordance with your current demands. Furthermore, the Bit Depth of all tones the free version of this online tone generator provides is limited to 16-bit.
5. Gieson TonGen
If you are looking for an easy way to generate tones from your browser this may be one of the best options available. You can easily change the frequency of a tone by dragging the Hz slider, and the Fine Tune Hz slider enables you to find the perfect frequency of a tone.
There are four wave types you can choose from that generate different types of tones and you can change their tonality by clicking on one of the buttons located near the bottom of the tone generator.
Saving the tones you generate is not possible as Gieson TonGen website doesn’t offer this option. Using a link to send a tone you created is also not possible. This online tone generator is a perfect option if you’re looking for a way to quickly generate a tone directly from your web browser, but it can be hardly considered a great option if you want to generate a tone for professional purposes.
Conclusion
The scope of options different online tone generators provide can vary. That is the reason why your decision which of the tone-generating tools we covered in this article you are going to use depends on the reason why you’re creating a tone.
What is your favorite method of generating tones? Leave a comment below and let us know.
Liza Brown
Liza Brown is a writer and a lover of all things video.
Follow @Liza Brown
WebM vs MP4: 10 Best Conversion Software Options
10 Best WebM to MP4 Converters
Liza Brown
Mar 27, 2024• Proven solutions
Reaching the widest audience possible is the goal of every video content creator, but achieving this goal might be impossible if the videos you share online are not saved in the right file format. MP4 is probably the most common video file there is, because it is compatible with a broad range of media players , as well as online video hosting and social media platforms.
WebM, on the other hand, is perfectly suited for videos that are viewed from Google Chrome or Mozilla Firefox, but only a handful of desktop-based media players offer support for this video file format. That is why in this article we are going to take a look at the 10 best WebM to MP4 converters on the market.
The 10 Best WebM to MP4 Converters
Changing the format of a video file is never a complicated process, regardless of the software or the web-based application you are using. However, the duration, speed, and quality of the conversion process depend on the converter you’ve selected for this task. Here are the ten best WebM to MP4 converters that make the file conversion process swift and smooth.
1. UniConverter
Price: Subscription plans start at $2.95 for the online version of UniConverter
Compatibility: Windows, Mac, web-based
This is a powerful file converter that is available both online and on desktop computers. You can choose from more than a thousand conversion formats, which enables you to convert your video files into virtually any format you want.
So, in order to convert a WebM video to MP4 you just need to add one or more WebM files to UniConverter and then set MP4 as the output file format. The amount of time you will have to wait for the conversion process to be completed varies on the desktop and online versions of UniConverter, and you can only convert two WebM files to MP4 at the same time with the online version of this file converter.
2. VLC
Price: Free
Compatibility: Windows, Mac, Linux, iOS, Android

Even though VLC is primarily a media player, you can still use it to convert WebM videos to MP4. Head over to the Media menu after you launch VLC and select the Convert/Save option or use the CTRL+R keyboard shortcut to bring up the Open Media window.
Afterward, you should click on the Add button and proceed to import the WebM file into the media player, and then click on the Browse button in order to specify the location on your hard drive where the converted file is going to be saved. When done, you should click on the Convert/Save button to initiate the file conversion process.
3. Any Video Converter
Price: Free, $69.95
Compatibility: Windows

As its name suggests, you can convert any video file with this software regardless of the format in which it is saved. Converting WebM files to MP4 with Any Video Converter is a simple three-step process that can be completed in just a few moments.
To import the WebM video files into Any Video Converter you must click on the Add Video button and then set MP4 as the output format. The software also allows you to adjust the Bit Rate, audio, and video codec settings, so once you are done fine-tuning these settings you should click on the Convert button. After the conversion process is completed, your files will be accessible from the Output Folder.
4. Online Converter
Price: Free
Compatibility: Web-based

This online file conversion platform enables you to convert a broad range of documents for free. It also supports nearly all commonly used video file formats, including the WebM format, which makes it a perfect choice if you want to convert WebM videos to MP4.
In order to convert a WebM file with Online Converter you just need to upload it to the platform either from an online source or from a local hard drive. Optionally you can set the frame size or cut a video clip before clicking on the Convert button. Uploading a WebM video file can be time-consuming, especially if your file is larger than a few hundred MB.
5. Convertio
Price: Free, pricing options start at $9.99 per month
Compatibility: Web-based

Changing the format of an image, audio and files or presentations is an effortless process that can be completed in just a few clicks. Convertio lets you upload WebM videos from a local hard drive, a URL or cloud storage platforms like Dropbox and Google Drive.
After the upload is completed you just have to change the output format to MP4 and click on the Convert button. The size of the files you can convert with the free version of the platform cannot exceed 100MB and you must opt for one of the available subscription models if you want to convert video files that exceed this limit. What’s more the number of concurrent conversions you can make depends on the subscription model you select.
6. Zamzar
Price: Free, pricing options start at $9.00 per month
Compatibility: Web-based

The fact that 480 million files have been converted with Zamzar since 2006, shows you just how popular this file conversion platform really is. Converting a video with this platform requires you to go through a simple three-step process, so you just have to upload a WebM video file, select the output format and click on the Convert Now button.
You cannot convert files larger than 150MB with the free version of Zamzar. Moreover, this file conversion platform doesn’t allow its users to convert videos that exceed 2GB limit even if they purchase the Business subscription plan. In addition, the maximum online storage capacity you will have at your disposal varies from one subscription plan to another.
7. CloudConvert
Price: Free, pricing options start at $9. 52 per month
Compatibility: Web-based

With the support for over 200 file formats, CloudConvert is easily one of the best file conversion platforms on the Internet. That is why it is hardly a surprise that converting a WebM video file to MP4 requires a minimum amount of effort. However, the platform also enables you to fine-tune the conversion settings by choosing video and audio codecs, setting the constant frame rate or selecting the resolution of the output video.
Trimming the WebM videos is yet another option you will have at your disposal if you choose to convert your files with CloudConvert. In case you’re planning on using this file conversion platform on a regular basis, you can choose how many conversion minutes you’re going to have every month.
8. Video2Edit
Price: Free, $15.00 per month
Compatibility: Web-based

Video2Edit offers a quick way to convert a WebM video to MP4, since you just have to upload a file, either from Google Drive, Dropbox or your hard drive and click on the Start button. Optionally, you can adjust the frame rate, choose a video codec or select a new resolution for the video you’re converting. What’s more, the Video2Edit platform lets you disable a video’s audio track or change the audio codec.
Creating a profile on this file conversion platform will enable you to convert WebM video files that are smaller than 400MB. Purchasing the premium version of Video2Edit will enable you to convert WebM files that don’t exceed a 1GB size limit.
9. Onlineconvertforfree
Price: Free, pricing options start at $6.99
Compatibility: Web-based

You don’t need any previous experience with the file conversion process to convert a WebM video to MP4 with the online file conversion platform. Simply upload a file from your computer or from an online source, choose MP4 as the output file format and then download your file after the conversion.
The platform offers batch conversion options, which can be quite useful if you are looking to convert multiple video files quickly. It is worth noting that converting a video larger than 500MB with this platform isn’t possible, regardless of the subscription model you choose. The number of daily conversions, however, is not limited.
10. Aconvert
Price: Free
Compatibility: Web-based

This is a simple online file conversion tool that lets you convert WebM videos that are stored locally on your computer or on the cloud. You just have to select the source from which you want to import the video, select the output format and decide if you want to change the video’s frame rate , aspect ratio or size.
When done, simply click on the Convert Now button and then after the conversion process is completed, proceed to download your video to your computer. The only downside is that you cannot convert WebM video files that are larger than 200MB with Aconvert.
WebM vs MP4: Which Video File Format is Better?
The file format in which a video is saved determines its compatibility with different media players. So, if your videos are only going to be played in web-browsers like Google Chrome or Mozilla Firefox, then it is better to save your video in WebM file format.
However, you should keep in mind that this file format isn’t used often outside of the online context and that finding a media player that is compatible with the WebM format can be a challenge. MP4 video files, on the other hand, can be played in virtually any macOS or Windows-based media player or uploaded to YouTube or any other video hosting service. That’s why MP4 is a more appealing option to video content creators who want to ensure that their videos can be played anywhere regardless of the device or the media player that is being used to open them.
Conclusion
Changing a video’s file format in 2020 no longer requires you to have access to a professional video editing software, because there are countless online file conversion platforms, that enable you to complete this process in just a couple of clicks. Even so, most online solutions limit the maximum size of the video files you can convert with them, which is why it is better to choose one of the desktop-based options if you are working with large video files. Which WebM to MP4 converter do you like to use the most? Share your opinions with us in the comments.
Liza Brown
Liza Brown is a writer and a lover of all things video.
Follow @Liza Brown
Liza Brown
Mar 27, 2024• Proven solutions
Reaching the widest audience possible is the goal of every video content creator, but achieving this goal might be impossible if the videos you share online are not saved in the right file format. MP4 is probably the most common video file there is, because it is compatible with a broad range of media players , as well as online video hosting and social media platforms.
WebM, on the other hand, is perfectly suited for videos that are viewed from Google Chrome or Mozilla Firefox, but only a handful of desktop-based media players offer support for this video file format. That is why in this article we are going to take a look at the 10 best WebM to MP4 converters on the market.
The 10 Best WebM to MP4 Converters
Changing the format of a video file is never a complicated process, regardless of the software or the web-based application you are using. However, the duration, speed, and quality of the conversion process depend on the converter you’ve selected for this task. Here are the ten best WebM to MP4 converters that make the file conversion process swift and smooth.
1. UniConverter
Price: Subscription plans start at $2.95 for the online version of UniConverter
Compatibility: Windows, Mac, web-based
This is a powerful file converter that is available both online and on desktop computers. You can choose from more than a thousand conversion formats, which enables you to convert your video files into virtually any format you want.
So, in order to convert a WebM video to MP4 you just need to add one or more WebM files to UniConverter and then set MP4 as the output file format. The amount of time you will have to wait for the conversion process to be completed varies on the desktop and online versions of UniConverter, and you can only convert two WebM files to MP4 at the same time with the online version of this file converter.
2. VLC
Price: Free
Compatibility: Windows, Mac, Linux, iOS, Android
Even though VLC is primarily a media player, you can still use it to convert WebM videos to MP4. Head over to the Media menu after you launch VLC and select the Convert/Save option or use the CTRL+R keyboard shortcut to bring up the Open Media window.
Afterward, you should click on the Add button and proceed to import the WebM file into the media player, and then click on the Browse button in order to specify the location on your hard drive where the converted file is going to be saved. When done, you should click on the Convert/Save button to initiate the file conversion process.
3. Any Video Converter
Price: Free, $69.95
Compatibility: Windows
As its name suggests, you can convert any video file with this software regardless of the format in which it is saved. Converting WebM files to MP4 with Any Video Converter is a simple three-step process that can be completed in just a few moments.
To import the WebM video files into Any Video Converter you must click on the Add Video button and then set MP4 as the output format. The software also allows you to adjust the Bit Rate, audio, and video codec settings, so once you are done fine-tuning these settings you should click on the Convert button. After the conversion process is completed, your files will be accessible from the Output Folder.
4. Online Converter
Price: Free
Compatibility: Web-based
This online file conversion platform enables you to convert a broad range of documents for free. It also supports nearly all commonly used video file formats, including the WebM format, which makes it a perfect choice if you want to convert WebM videos to MP4.
In order to convert a WebM file with Online Converter you just need to upload it to the platform either from an online source or from a local hard drive. Optionally you can set the frame size or cut a video clip before clicking on the Convert button. Uploading a WebM video file can be time-consuming, especially if your file is larger than a few hundred MB.
5. Convertio
Price: Free, pricing options start at $9.99 per month
Compatibility: Web-based
Changing the format of an image, audio and files or presentations is an effortless process that can be completed in just a few clicks. Convertio lets you upload WebM videos from a local hard drive, a URL or cloud storage platforms like Dropbox and Google Drive.
After the upload is completed you just have to change the output format to MP4 and click on the Convert button. The size of the files you can convert with the free version of the platform cannot exceed 100MB and you must opt for one of the available subscription models if you want to convert video files that exceed this limit. What’s more the number of concurrent conversions you can make depends on the subscription model you select.
6. Zamzar
Price: Free, pricing options start at $9.00 per month
Compatibility: Web-based
The fact that 480 million files have been converted with Zamzar since 2006, shows you just how popular this file conversion platform really is. Converting a video with this platform requires you to go through a simple three-step process, so you just have to upload a WebM video file, select the output format and click on the Convert Now button.
You cannot convert files larger than 150MB with the free version of Zamzar. Moreover, this file conversion platform doesn’t allow its users to convert videos that exceed 2GB limit even if they purchase the Business subscription plan. In addition, the maximum online storage capacity you will have at your disposal varies from one subscription plan to another.
7. CloudConvert
Price: Free, pricing options start at $9. 52 per month
Compatibility: Web-based
With the support for over 200 file formats, CloudConvert is easily one of the best file conversion platforms on the Internet. That is why it is hardly a surprise that converting a WebM video file to MP4 requires a minimum amount of effort. However, the platform also enables you to fine-tune the conversion settings by choosing video and audio codecs, setting the constant frame rate or selecting the resolution of the output video.
Trimming the WebM videos is yet another option you will have at your disposal if you choose to convert your files with CloudConvert. In case you’re planning on using this file conversion platform on a regular basis, you can choose how many conversion minutes you’re going to have every month.
8. Video2Edit
Price: Free, $15.00 per month
Compatibility: Web-based
Video2Edit offers a quick way to convert a WebM video to MP4, since you just have to upload a file, either from Google Drive, Dropbox or your hard drive and click on the Start button. Optionally, you can adjust the frame rate, choose a video codec or select a new resolution for the video you’re converting. What’s more, the Video2Edit platform lets you disable a video’s audio track or change the audio codec.
Creating a profile on this file conversion platform will enable you to convert WebM video files that are smaller than 400MB. Purchasing the premium version of Video2Edit will enable you to convert WebM files that don’t exceed a 1GB size limit.
9. Onlineconvertforfree
Price: Free, pricing options start at $6.99
Compatibility: Web-based
You don’t need any previous experience with the file conversion process to convert a WebM video to MP4 with the online file conversion platform. Simply upload a file from your computer or from an online source, choose MP4 as the output file format and then download your file after the conversion.
The platform offers batch conversion options, which can be quite useful if you are looking to convert multiple video files quickly. It is worth noting that converting a video larger than 500MB with this platform isn’t possible, regardless of the subscription model you choose. The number of daily conversions, however, is not limited.
10. Aconvert
Price: Free
Compatibility: Web-based
This is a simple online file conversion tool that lets you convert WebM videos that are stored locally on your computer or on the cloud. You just have to select the source from which you want to import the video, select the output format and decide if you want to change the video’s frame rate , aspect ratio or size.
When done, simply click on the Convert Now button and then after the conversion process is completed, proceed to download your video to your computer. The only downside is that you cannot convert WebM video files that are larger than 200MB with Aconvert.
WebM vs MP4: Which Video File Format is Better?
The file format in which a video is saved determines its compatibility with different media players. So, if your videos are only going to be played in web-browsers like Google Chrome or Mozilla Firefox, then it is better to save your video in WebM file format.
However, you should keep in mind that this file format isn’t used often outside of the online context and that finding a media player that is compatible with the WebM format can be a challenge. MP4 video files, on the other hand, can be played in virtually any macOS or Windows-based media player or uploaded to YouTube or any other video hosting service. That’s why MP4 is a more appealing option to video content creators who want to ensure that their videos can be played anywhere regardless of the device or the media player that is being used to open them.
Conclusion
Changing a video’s file format in 2020 no longer requires you to have access to a professional video editing software, because there are countless online file conversion platforms, that enable you to complete this process in just a couple of clicks. Even so, most online solutions limit the maximum size of the video files you can convert with them, which is why it is better to choose one of the desktop-based options if you are working with large video files. Which WebM to MP4 converter do you like to use the most? Share your opinions with us in the comments.
Liza Brown
Liza Brown is a writer and a lover of all things video.
Follow @Liza Brown
Diagnosing and Fixing Final Cut Pro X Crash Errors
Solved: Final Cut Pro X Keeps Crashing

Benjamin Arango
Oct 26, 2023• Proven solutions
Apple launched an advanced video editing tool, Final Cut Pro, back in 1999 and it didn’t take very long to get popular and gain recognition among the photographers and videographers. Later in 2003, Final cut pro beats Final Cut Express, click to learn why . One of the best features that help it stand out from the rest of the video editors is that it is supported by all Mac systems and has permitted Apple to make it fully enhanced in terms of efficiency and speed, enabling it to edit even 4K UND footage without any rendering issues.
Along with such exciting advantages, the video editing tool comes with several disadvantages too. It is complex to understand especially for beginners and most importantly it keeps crashing, corrupting the file even if it is saved properly on your Mac system, which can lead to your entire work being lost. Several Final Cut Pro X users complain that their work gets corrupted as the video editing tool keeps crashing after intervals.
If you can relate to this scenario, you will find this blog post helpful as we have listed some methods that can possibly fix the crashing problem and save your hours of video editing efforts. Keep reading to know the steps that can prevent your video editor from crashing.
Why Does Final Cut Pro X Keep Crashing?
According to Final Cut Pro X users, the video editor is a reliable and solid program, but it can be really frustrating for them when it keeps crashing. If your Final Cut Pro X video editor and program tool also keep acting up, it can probably be because of the corrupted preferences file.
A corrupted preferences file occurs when you do not reset your preferences and settings in the first place. Not resetting the preferences can corrupt the file and end up crashing the video editing tool, damaging the whole video. All those who want to troubleshoot and require methods to fix the crashing issue should take a few steps to resolve the problem which leads us to our second section.
What to Do if Final Cut Pro X Keeps Crashing on Your Mac System?
One of the major issues in Final Cut Pro X is the crashing problem on the Mac system. If you encounter this problem and learn to isolate, troubleshoot, and fix this issue following the below methods, you will likely resolve the crashing problem on your own. However, you should always ensure keeping a back-up of your Final Cut Pro X media, libraries, and applications as a whole in order to keep the data before following the below steps.

Method 1: Resetting Final Cut Pro X Preferences and Settings
As mentioned above, resetting the preferences and settings can help in resolving the crashing issue. Resetting preferences will not affect your projects, libraries, or media. With resetting, we mean that you should change the custom preference settings to the default settings. Before you take the plunge to reset your preferences, you should choose Final Cut Pro over Preferences and note all the specific settings that you have to make.
Follow the below steps to reset the preferences in Final Cut Pro X:
Step 1: Quit working on Final Cut Pro.
Step 2: Hold down the option and command keys, then open the Final Cut Pro.
Step 3: Click on the delete preferences option.
Step 4: In the last step, recreate the issue that you were having during video editing. If the problem is resolved, you should open Final Cut Pro preferences and apply the custom settings again.
Step 5: And, it’s done!
This method will reset all your preferences to default settings and this way it will empty the list of the recent libraries and media. Though the entire libraries are not erased, you will be able to find them in the specified location when you first created them. But they will only be there if you have created a back-up of your data. That is why we mentioned in the beginning to create a back-up of your Final Cut Pro data in the first place.
With the help of fixing the Final Cut Pro X preferences, you will be able to fix a lot of your problems especially the crashing one. The preferences are deeply embedded into the program operation even if we cannot directly amend most of them.

Method 2: Restart Your Mac
If you find that there is a major crashing problem, another way to fix the problem is to restart the computer and by resetting the Final Cut Pro-related system resources. Here are the steps that you should follow to restart your Mac system:
Step 1: Choose the Apple menu.
Step 2: Reopen the Final Cut Pro.
Step 3: Reproduce the issue and see if the problem still exists.
If your Final Cut Pro X acts up on your Mac system, you should try restarting the system following the aforementioned steps. In case, restarting doesn’t fix the issue, you should apply the first method.
Always remember to leave some extra space for software like FCPX to run freely. Click to see more tips on free up space in FCPX and Mac.
The Best Easy-to-use Alternative to Final Cut Pro X for Beginners
If you often face crashing issues on your Final Cut Pro X video editing program, you should consider downloading one of the best and easy-to-use alternatives to it, i.e. Wondershare Filmora. It is a professional video editing and very simple professional tool that can assist you in editing the desired video flawlessly.


In addition to basic video editing, users can use this application on the Mac system utilizing its modern editing features including audio compressor, automatic audio sync, ranger markers, audio noise reduction, and color correction with plentiful presents, auto-corrections, and color wheels. It also supports animation and motion tracking. It has a very simple and easy-to-use interface and low system requirements which can be helpful for both beginners and experienced video editors.
Final Thoughts
If you usually experience crashing issues in Final Cut Pro X, you should follow the aforementioned methods which would likely fix the problem. But if that doesn’t help, you can download Wondershare Filmora today. Best for beginners and experienced users, this video editing tool is free of cost and has a user-friendly interface, letting you effortlessly edit your videos incorporating the advanced features and effects in no time.
Benjamin Arango
Benjamin Arango is a writer and a lover of all things video.
Follow @Benjamin Arango
Benjamin Arango
Oct 26, 2023• Proven solutions
Apple launched an advanced video editing tool, Final Cut Pro, back in 1999 and it didn’t take very long to get popular and gain recognition among the photographers and videographers. Later in 2003, Final cut pro beats Final Cut Express, click to learn why . One of the best features that help it stand out from the rest of the video editors is that it is supported by all Mac systems and has permitted Apple to make it fully enhanced in terms of efficiency and speed, enabling it to edit even 4K UND footage without any rendering issues.
Along with such exciting advantages, the video editing tool comes with several disadvantages too. It is complex to understand especially for beginners and most importantly it keeps crashing, corrupting the file even if it is saved properly on your Mac system, which can lead to your entire work being lost. Several Final Cut Pro X users complain that their work gets corrupted as the video editing tool keeps crashing after intervals.
If you can relate to this scenario, you will find this blog post helpful as we have listed some methods that can possibly fix the crashing problem and save your hours of video editing efforts. Keep reading to know the steps that can prevent your video editor from crashing.
Why Does Final Cut Pro X Keep Crashing?
According to Final Cut Pro X users, the video editor is a reliable and solid program, but it can be really frustrating for them when it keeps crashing. If your Final Cut Pro X video editor and program tool also keep acting up, it can probably be because of the corrupted preferences file.
A corrupted preferences file occurs when you do not reset your preferences and settings in the first place. Not resetting the preferences can corrupt the file and end up crashing the video editing tool, damaging the whole video. All those who want to troubleshoot and require methods to fix the crashing issue should take a few steps to resolve the problem which leads us to our second section.
What to Do if Final Cut Pro X Keeps Crashing on Your Mac System?
One of the major issues in Final Cut Pro X is the crashing problem on the Mac system. If you encounter this problem and learn to isolate, troubleshoot, and fix this issue following the below methods, you will likely resolve the crashing problem on your own. However, you should always ensure keeping a back-up of your Final Cut Pro X media, libraries, and applications as a whole in order to keep the data before following the below steps.
Method 1: Resetting Final Cut Pro X Preferences and Settings
As mentioned above, resetting the preferences and settings can help in resolving the crashing issue. Resetting preferences will not affect your projects, libraries, or media. With resetting, we mean that you should change the custom preference settings to the default settings. Before you take the plunge to reset your preferences, you should choose Final Cut Pro over Preferences and note all the specific settings that you have to make.
Follow the below steps to reset the preferences in Final Cut Pro X:
Step 1: Quit working on Final Cut Pro.
Step 2: Hold down the option and command keys, then open the Final Cut Pro.
Step 3: Click on the delete preferences option.
Step 4: In the last step, recreate the issue that you were having during video editing. If the problem is resolved, you should open Final Cut Pro preferences and apply the custom settings again.
Step 5: And, it’s done!
This method will reset all your preferences to default settings and this way it will empty the list of the recent libraries and media. Though the entire libraries are not erased, you will be able to find them in the specified location when you first created them. But they will only be there if you have created a back-up of your data. That is why we mentioned in the beginning to create a back-up of your Final Cut Pro data in the first place.
With the help of fixing the Final Cut Pro X preferences, you will be able to fix a lot of your problems especially the crashing one. The preferences are deeply embedded into the program operation even if we cannot directly amend most of them.
Method 2: Restart Your Mac
If you find that there is a major crashing problem, another way to fix the problem is to restart the computer and by resetting the Final Cut Pro-related system resources. Here are the steps that you should follow to restart your Mac system:
Step 1: Choose the Apple menu.
Step 2: Reopen the Final Cut Pro.
Step 3: Reproduce the issue and see if the problem still exists.
If your Final Cut Pro X acts up on your Mac system, you should try restarting the system following the aforementioned steps. In case, restarting doesn’t fix the issue, you should apply the first method.
Always remember to leave some extra space for software like FCPX to run freely. Click to see more tips on free up space in FCPX and Mac.
The Best Easy-to-use Alternative to Final Cut Pro X for Beginners
If you often face crashing issues on your Final Cut Pro X video editing program, you should consider downloading one of the best and easy-to-use alternatives to it, i.e. Wondershare Filmora. It is a professional video editing and very simple professional tool that can assist you in editing the desired video flawlessly.
In addition to basic video editing, users can use this application on the Mac system utilizing its modern editing features including audio compressor, automatic audio sync, ranger markers, audio noise reduction, and color correction with plentiful presents, auto-corrections, and color wheels. It also supports animation and motion tracking. It has a very simple and easy-to-use interface and low system requirements which can be helpful for both beginners and experienced video editors.
Final Thoughts
If you usually experience crashing issues in Final Cut Pro X, you should follow the aforementioned methods which would likely fix the problem. But if that doesn’t help, you can download Wondershare Filmora today. Best for beginners and experienced users, this video editing tool is free of cost and has a user-friendly interface, letting you effortlessly edit your videos incorporating the advanced features and effects in no time.
Benjamin Arango
Benjamin Arango is a writer and a lover of all things video.
Follow @Benjamin Arango
Also read:
- In 2024, Maximizing Engagement with Optimal Social Media Aspect Ratios
- Updated Venture Beyond Final Cut Pro X 10 Impressive Video Editing Software Alternatives
- New Rotate AVI Videos with Ease 16 Best Free Tools and Apps
- Updated Easily Delete TikTok Logos Best Watermark Removers for 2024
- Updated In 2024, The Science Behind Instagram Video Dimensions What Works Best
- 2024 Approved Vlog Editing Made Easy The Best Free and Paid Software Solutions
- New 2024 Approved Unleash the Power of Time Lapse A Step-by-Step Tutorial for Video Creators
- Updated Speed Up Your Video Workflow with QuickTime Player
- Unleash Your Creativity Top 10 Free and Paid Android Video Editors for 2024
- Updated 2024 Approved Boost Your Videos Visibility Expert YouTube Thumbnail Creation Tips
- New 2024 Approved Rotate Videos with Ease Top 10 Free Tools for Windows, Mac, Android, and iPhone
- Updated MediaMolder for Mac for 2024
- Updated 2024 Approved Easy Facebook MP3 Conversion Top 8 Online Solutions
- Mastering Jump Cuts in Final Cut Pro X A Step-by-Step Guide for 2024
- Updated Bring Back the 80S Best VHS Emulator Apps for iPhone and Android for 2024
- Updated 2024 Approved The Ultimate Guide to Converting Files to M4R A Beginners Primer
- New In 2024, Take Your Videos to the Next Level Top Adobe Premiere Plugins
- Updated In 2024, Free and Fabulous Best Video Stabilizer Apps for Android Users
- Updated Unleash Your Creativity 35 Top Video Editors for Every Operating System for 2024
- New 2024 Approved Online Movie Creation Made Easy Top 9 Free Tools
- Updated Smooth Operator 3 Easy Ways to Steady Your Footage in AE for 2024
- New Mobile Video Editing Essentials Top Apps for Vertical Content for 2024
- New In 2024, Top Android Video Editing Apps for Cinematic Creations
- The 5 Best Free Video Trimmers You Need to Try for 2024
- New 2024 Approved Gaming Intro Design Tools Best Options for Windows and Mac
- 2024 Approved WMV Video Joining Made Easy Top Free Software
- 2024 Approved Ranking the Best Lego Stop Motion Producers
- Updated In 2024, Unlock Premiere Pros Full Potential System Requirements and Setup Tips
- Updated 2024 Approved Cutting-Edge Free 4K Video Editing Solutions
- New 2024 Approved Free Video Stabilization Software for Android Devices
- 2024 Approved Top MP4 Metadata Editors for Video Enthusiasts
- New Windows Movie Maker for Mac Discover the Best Equivalent Software for 2024
- New The Quest for Quality How to Find a Reliable FLAC Converter for 2024
- Updated 2024 Approved Final Cut Pro X Troubleshooting Handbook Quick Fixes and Workarounds
- Updated 2024 Approved Final Cut Pro 2023 Reversing Video Clips Like a Pro
- In 2024, Speed Up or Slow Down Videos in QuickTime Player The Easy Way
- New 2024 Approved Elevate Your Videos The Top 10 Editing Software Options
- In 2024, Select the Best Top YouTube to MP4 Converter Options
- In 2024, WebM to MP3 Conversion Made Simple Top 10 Online Tools
- Top 10 Vivo T2 5G Android SIM Unlock APK
- 3 Solutions to Hard Reset Xiaomi Redmi Note 12 5G Phone Using PC | Dr.fone
- In 2024, Best Solutions for Asus Network Unlock
- The Best Text-to-Speech Online Tools To Use
- 2024 Approved Unlock the Power of Slow Motion A Beginners Guide to Windows Live Movie Maker
- In 2024, Easy Tutorial for Activating iCloud on Apple iPhone 6 Safe and Legal
- Complete Tutorial to Use VPNa to Fake GPS Location On Motorola Moto G73 5G | Dr.fone
- In 2024, Did Your Apple iPhone 15 Passcode Change Itself? Unlock It Now
- The 6 Best SIM Unlock Services That Actually Work On Your OnePlus Open Device
- Full Solutions to Fix Error Code 920 In Google Play on Lava Yuva 2 Pro | Dr.fone
- Title: Updated In 2024, Top 9 Best Online Video Quality Enhancer for FREE
- Author: Isabella
- Created at : 2024-05-19 13:04:02
- Updated at : 2024-05-20 13:04:02
- Link: https://video-creation-software.techidaily.com/updated-in-2024-top-9-best-online-video-quality-enhancer-for-free/
- License: This work is licensed under CC BY-NC-SA 4.0.
